Guest Upload lets people without a platform login (Guest Users) upload files to your platform through a database form, and fill in the form to give context to what they've uploaded. You can then review the submission.
For example, a freelance photographer who covered your event doesn't need a platform account. Share a link with them to upload their photos, then review them and decide which to publish to your Asset Library.
This article covers how to enable and configure Guest Upload, share links, and what guests and your team see along the way.
Table of Contents
Configure Guest Upload Databases
Once Public Access is enabled for your platform, a Public Access profile appears as a User-as-Group in Admin > Groups.

Click its edit icon and open the Permissions tab. Databases shows as a public module. Only Create access applies, and you enable it Database by Database (below).

You can also set this inside each Database: in Manage Permissions, add Public Access to the Group(s) can create rule.

Share Links with Guests
While logged in, start creating a record in the database and copy the page link. It looks something like this:
https://yourplatformname.intelligencebank.com/profiler-11d9233a337f284971e209382b00d8ac/profiler/create
Share the link with your guest outside the platform, for example by email, or add it to a Public Custom Page. Read more about public Custom Pages.
Guest User Email Verification
When a guest opens the link, they see a page only Guest Upload users see, and verify their email before they can upload:
| 1Enter email | The guest enters a valid email address and clicks Next.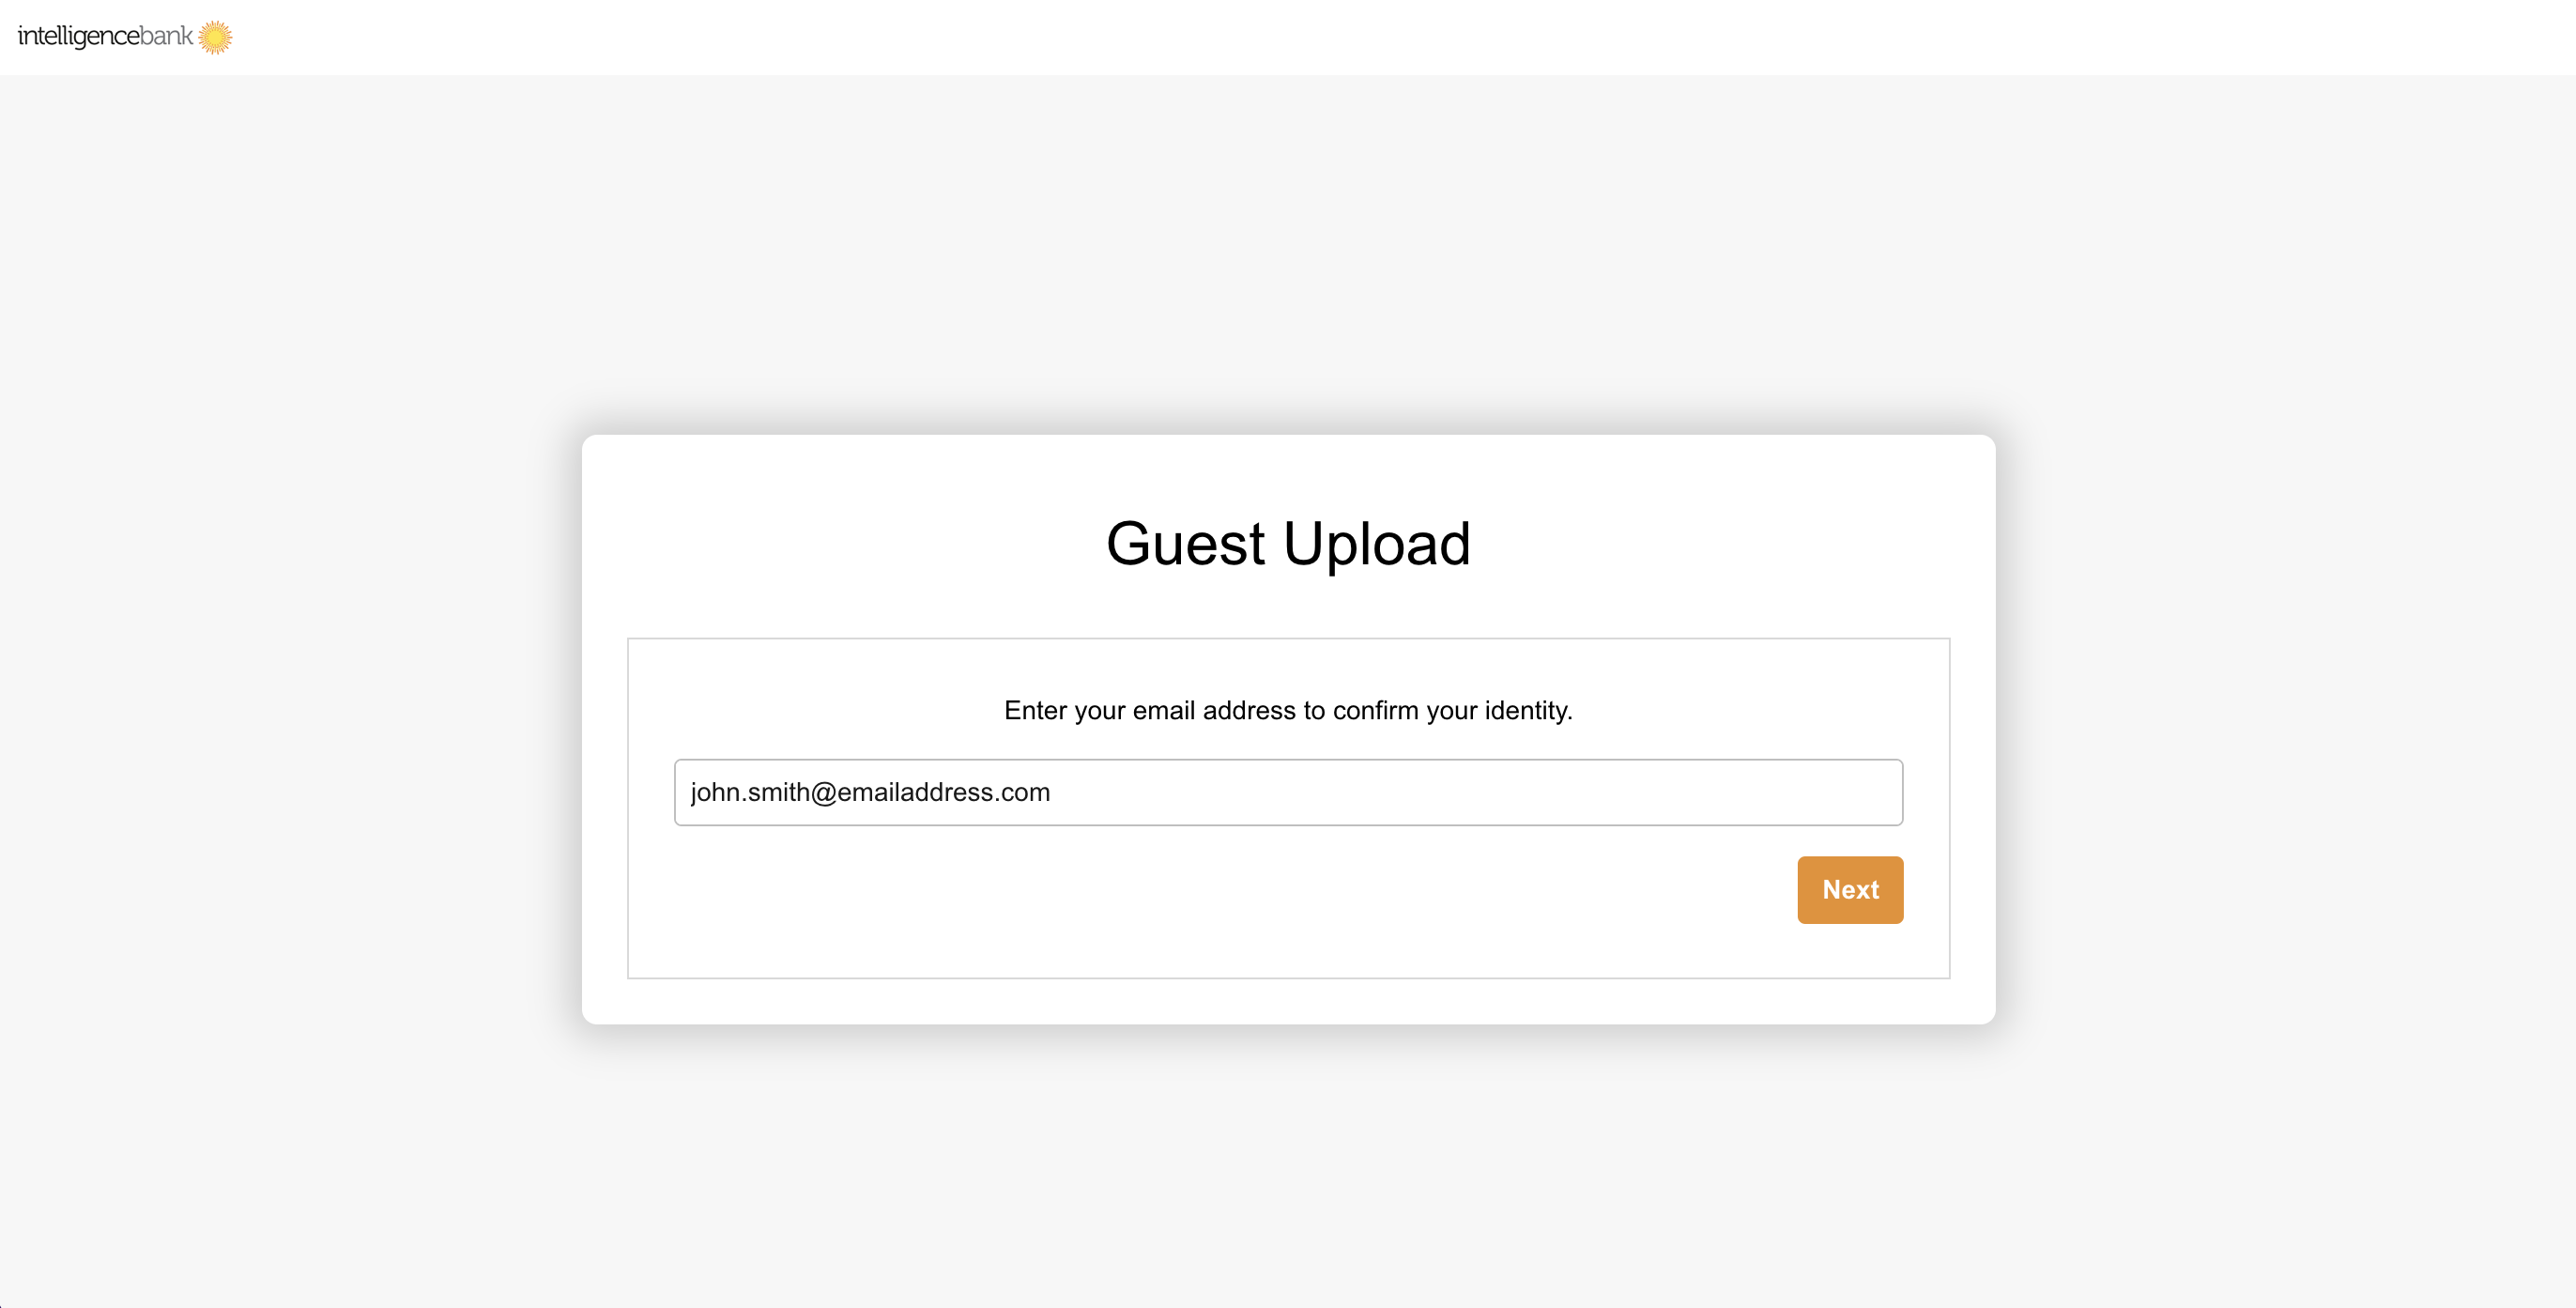 |
| 2Get the code | They receive an email with a verification code, which confirms the address is real and they aren't a bot.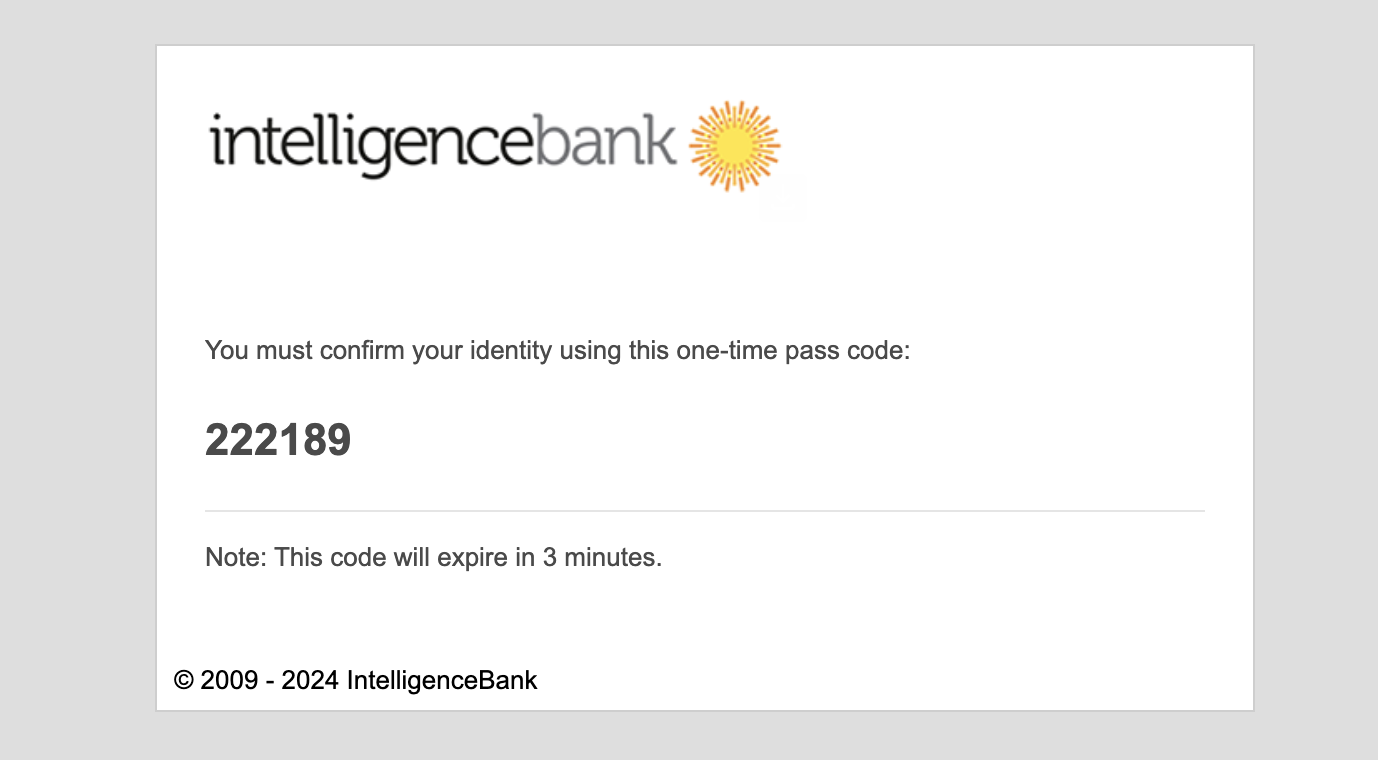 |
| 3Enter the code | They paste the code into the next screen in their browser, then go to the Create Record page.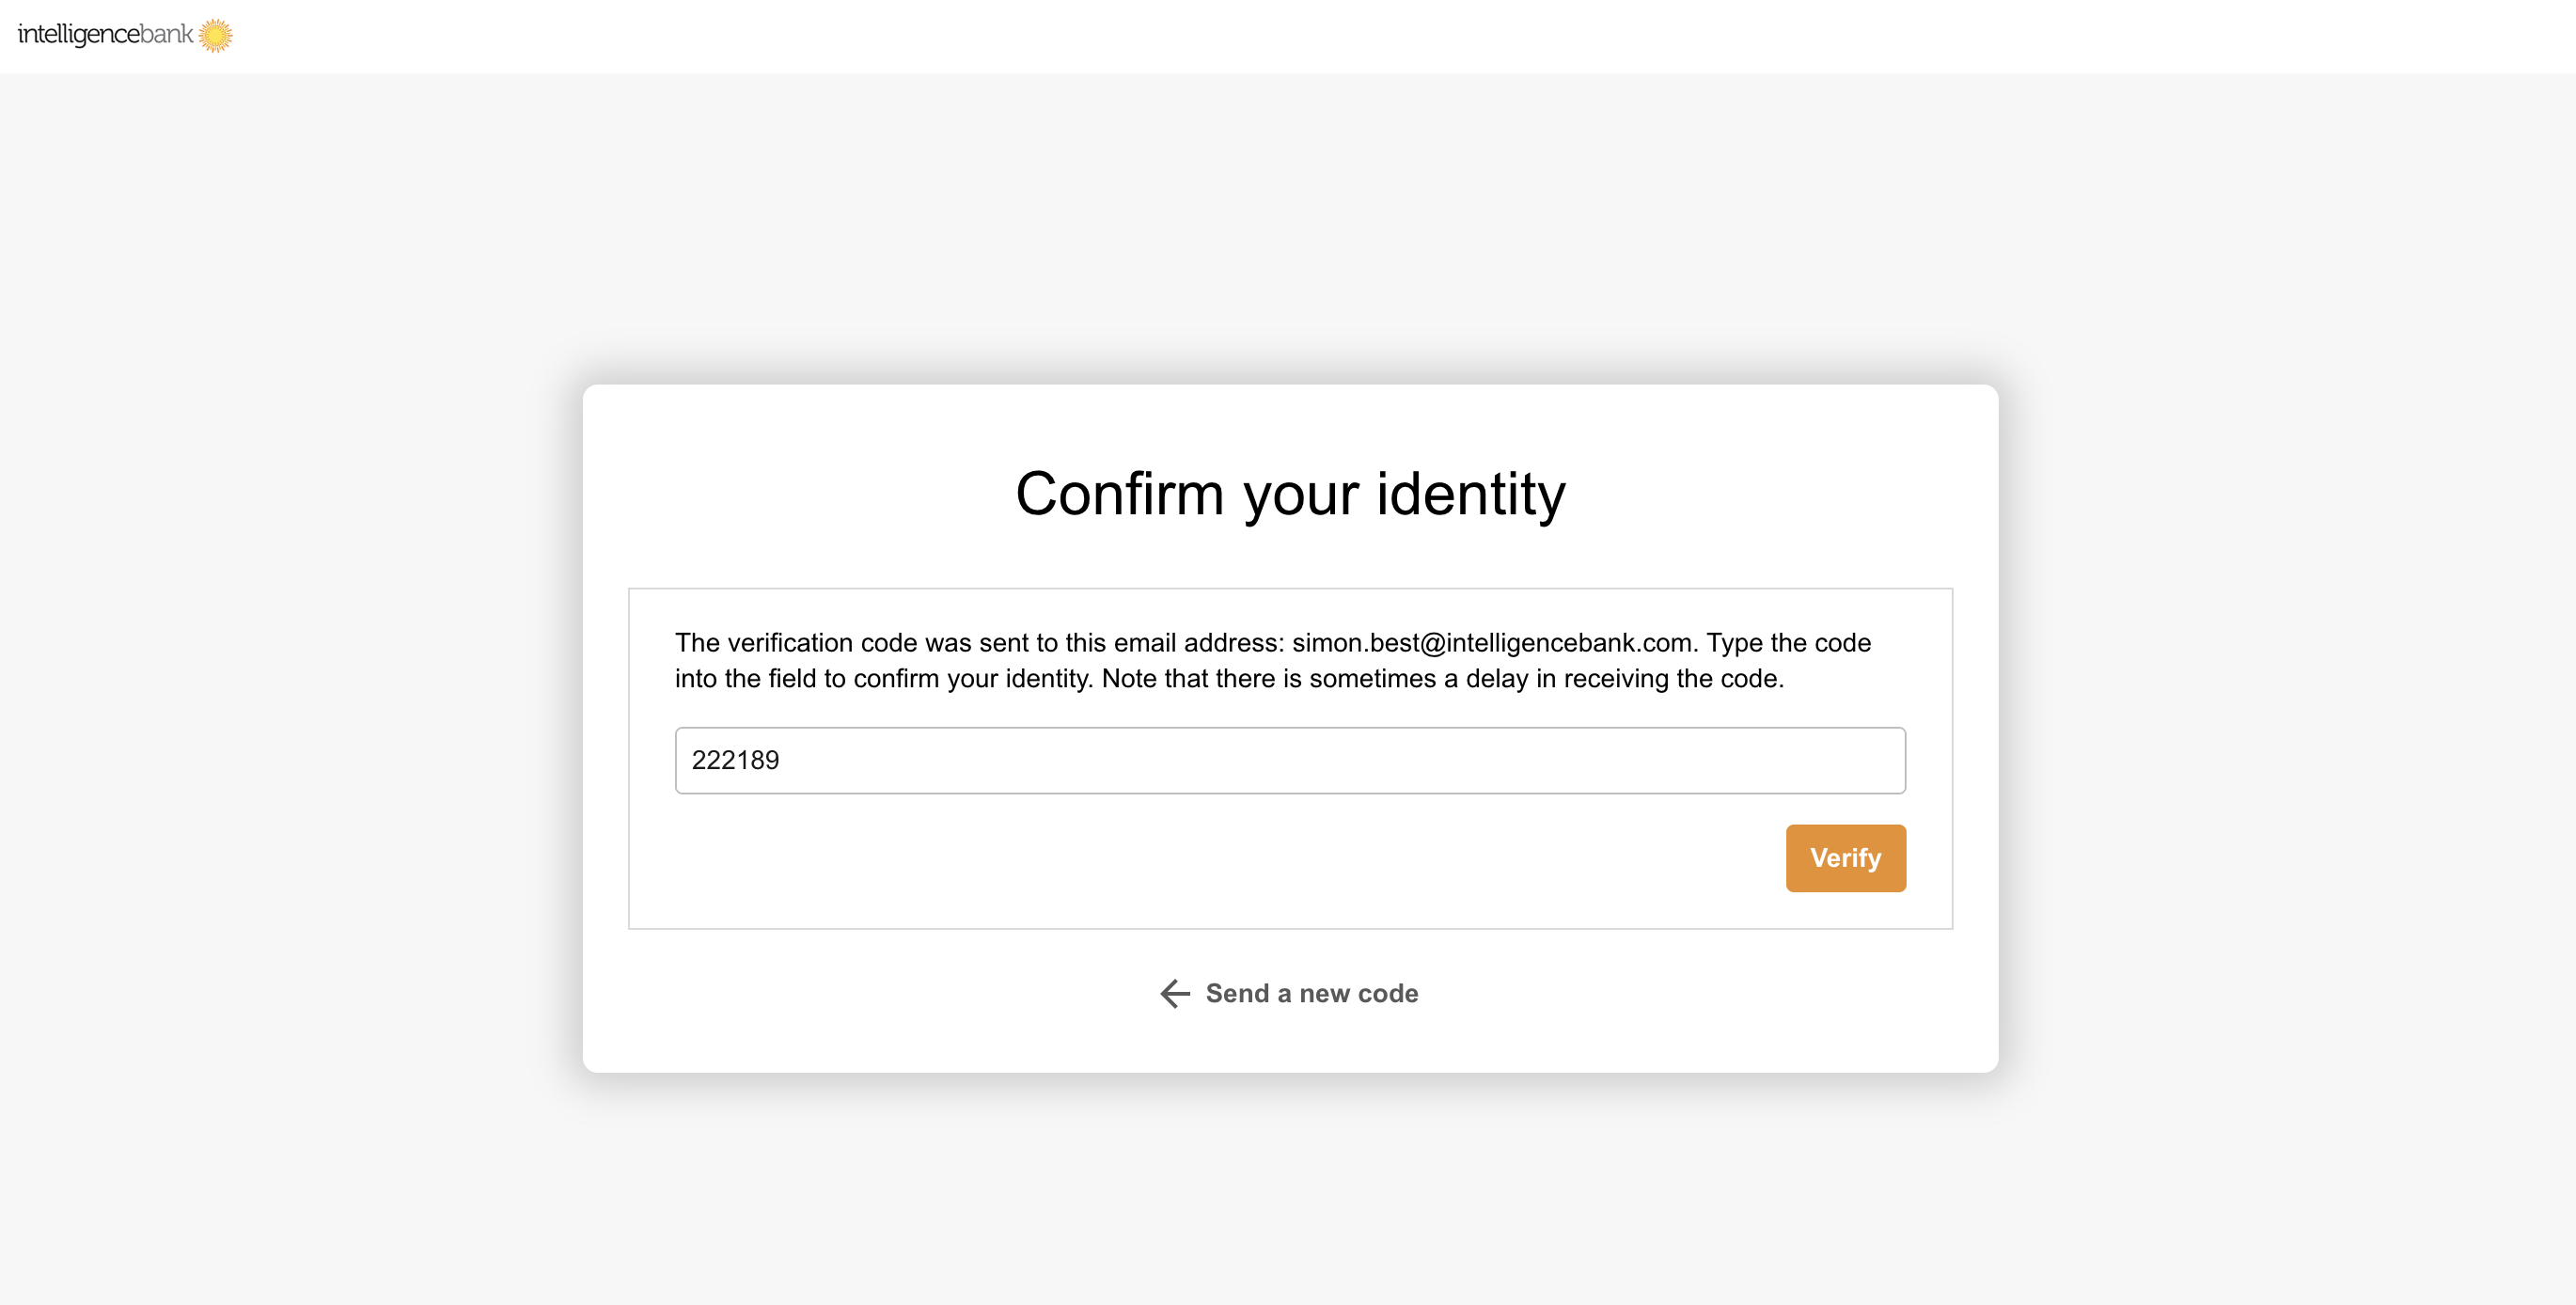 |
Creating a Record as a Guest
What Guests See
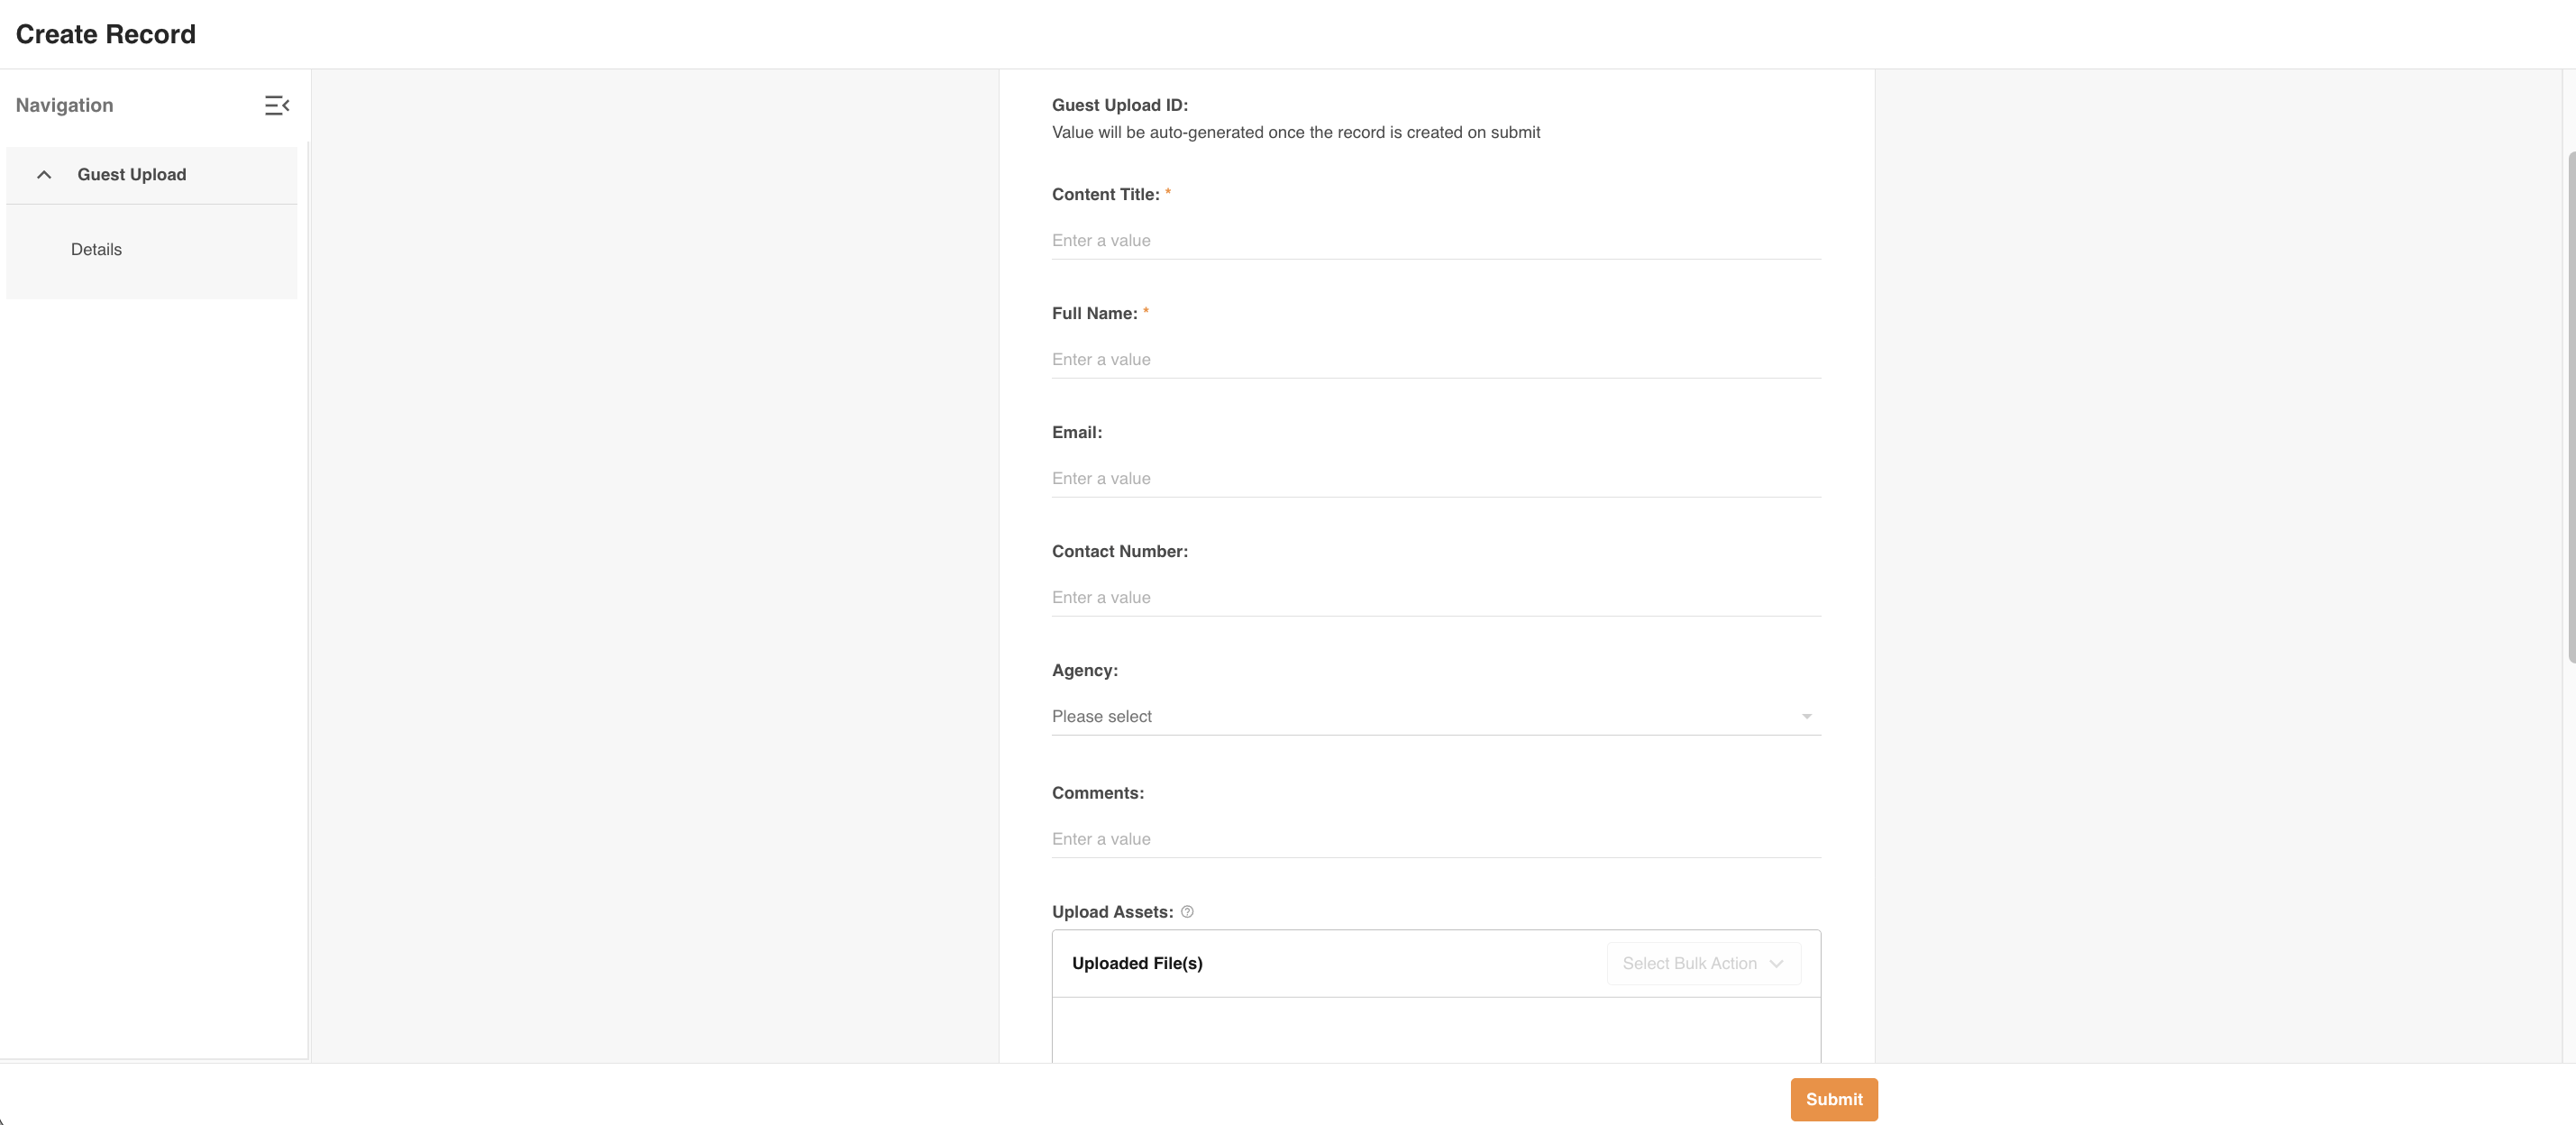
Guests get a simpler Create Record page than logged-in users, even for the same database, without links to areas they can't access.
| For Guests | What Happens |
|---|---|
| Header | A simple header shows the platform's Small Logo. If no Small Logo is set in Admin > Templates, no logo shows. |
| Page title | The database name is hidden. The title just says Create Record, or your custom term, such as Create Brief or Create Task. |
| Close and Cancel | Hidden, so guests aren't sent elsewhere on the platform. |
| Lookup fields | All Lookup fields are hidden, because they can pull in internal data (Resources, Users, Groups, other Databases). Their mandatory rules and display or mandatory conditions are also ignored for guests. |
| Save as Draft | Not shown, even if enabled, because guests can't come back to a draft. The only button is Submit. |
| Record Publish Workflows | Skipped for guests. See Notes and Restrictions. |
| Manage Permissions | Hidden, even if Database Settings show it in records. |
These changes only apply to guests. Logged-in users with permission can create records in the same database as normal. Apart from Lookup fields, you can use any form fields to collect more information about the uploads, such as the shoot location.
Upload Fields for Guests
To protect your platform, Anti-Virus scanning always applies when guests add files to a Single or Multi-Upload field, even if the Anti-Virus add-on isn't otherwise enabled on your platform.
Multi-Upload fields also have a Maximum File Limit setting, between 1 and 1,000, which applies to all users, not just guests. It's useful for asks like "only upload your best 20 photos from the event".
- The limit is set per field, so each Multi Upload field in a form can have its own limit.
- The limit is only checked on upload. If you lower it later (say from 50 to 5), existing records with more files can still be edited without errors.
Guest User Record Submit
After submitting, the guest sees a Submit Confirmation page.

It shows:
- The number of files and URLs added, across all Single and Multi-Upload fields.
- The record's Sequence ID, if enabled, which the guest can use as a reference.
- The date and time the record was submitted.
The guest also gets an email with the same details at their verified address.
Alerts for New Guest Upload Records
Registered users can set up Alerts to notify themselves or other registered users when guests add new records, just as for any other database. The alert shows the guest's verified email address.

Review and Update Guest Upload Records
Registered users with the right permissions can then review the records. Depending on your needs, they can:
- Edit the record to add a reviewer, using a User Lookup field that guests don't see.
- Continue a staged record to stage 2 to fill in internal-only fields.
- Give feedback on the uploads with other registered users through General Markup Comments.
- Remove unwanted files one at a time or in bulk, or send files for Record File Approval.
- Publish selected files to a folder with Publish to Folder.
Usage Tracking for Guest Upload
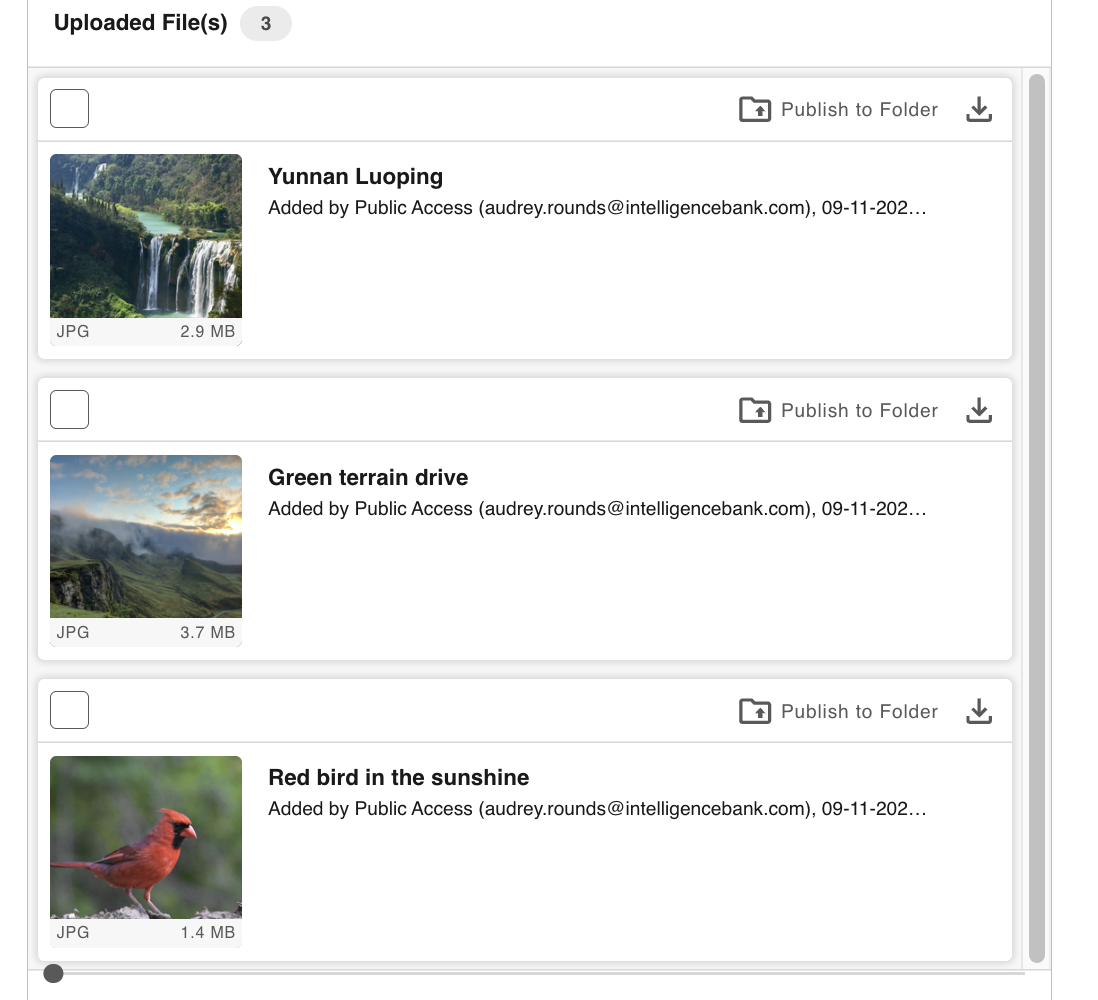
The guest's verified email address is added to the creator details in Usage Reports, in both record usage and Admin > User Usage:

It also shows in other key places, such as the Multi-Upload field:
Notes and Restrictions
| Email verification scope | Verification only applies to guest record pages, not Public Custom Pages or Public Folders. A guest browsing a Public Custom Page only sees the verification page once they open a Create Record link. |
| Session time limit | Guests have 4 hours to submit before the platform's public session ends and logs them out. |
| Refreshing the page | For security, if a guest refreshes during verification or while creating a record, they must start again and enter their email for a new code. |
| Record Publish Workflows | Don't apply to guests, even if mandatory. If approval is needed, internal users edit the record and submit it for approval. A note explaining this shows on the Database and Workflow Settings pages when a database is open to guests (pictured below). |

Was this article helpful?
That’s Great!
Thank you for your feedback
Sorry! We couldn't be helpful
Thank you for your feedback
Feedback sent
We appreciate your effort and will try to fix the article