IntelligenceBank's embedded templates let users create custom jobs from templatized collateral, updating text and images within the boundaries a designer has set, without needing design support for every small change.
Table of Contents
Permissions Required
Users need Access permission or higher on the folder the embedded templates are stored in to create jobs.
If there is a download approval workflow on the folder, then users with Preview permission can still create a job, but they will need to request approval before they can download it.
Creating a Custom Job
Follow these steps to start a custom job from an embedded template.
| 1Navigate to the folder | Go to the folder within your asset library where the embedded templates are stored. |
| 2Select Create Job | Find the embedded template you want to use and select Create Job.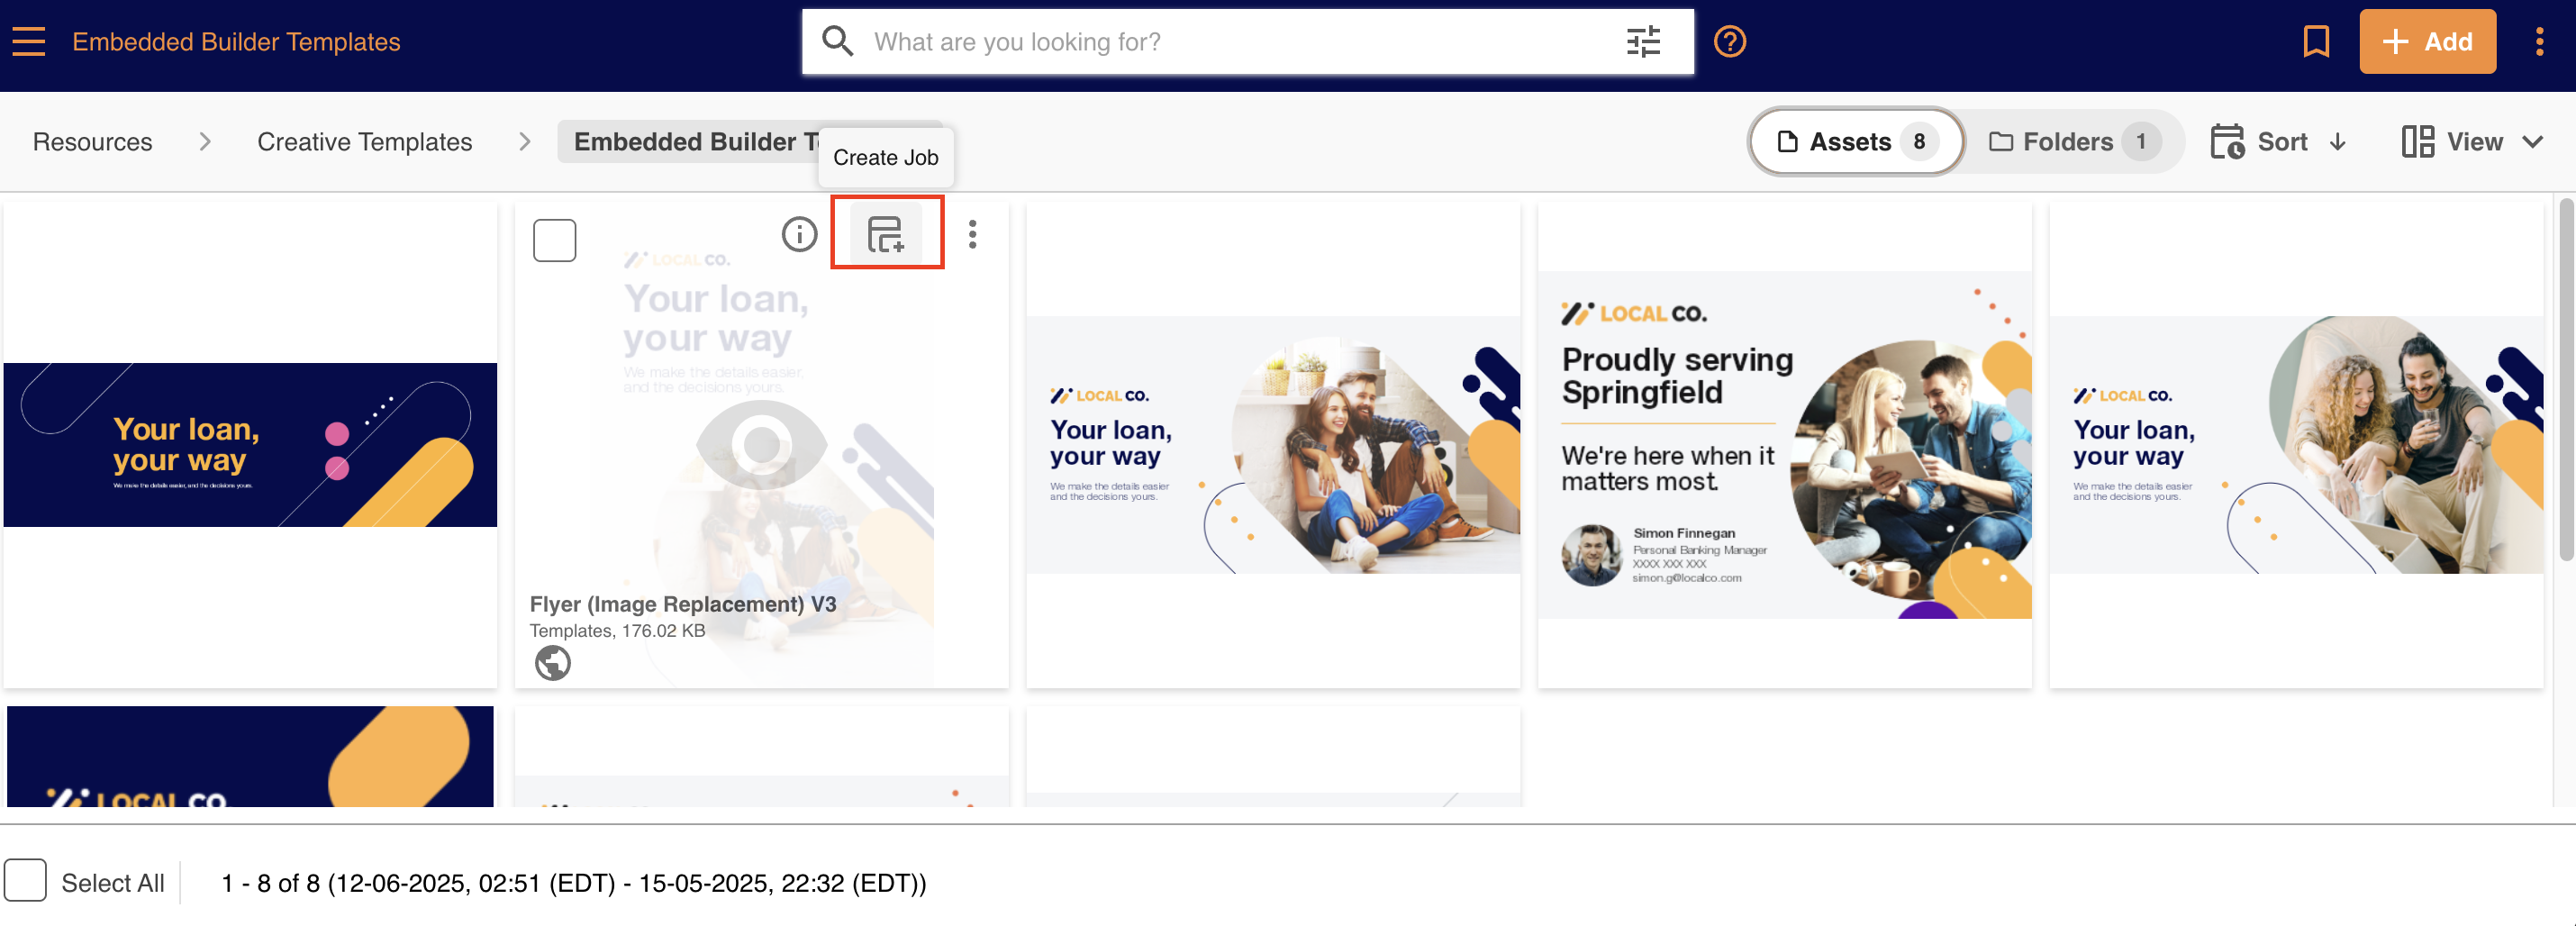 |
| 3Review the overview | You'll land on a page with a three-step outline of how to customise your template job: Customize the core layout (edit content, design elements, and structure), Select sizes (choose which formats to download, for example LinkedIn or Facebook), and Review and fine-tune sizes (check that styling still looks right after switching between sizes). Select Get Started to begin. 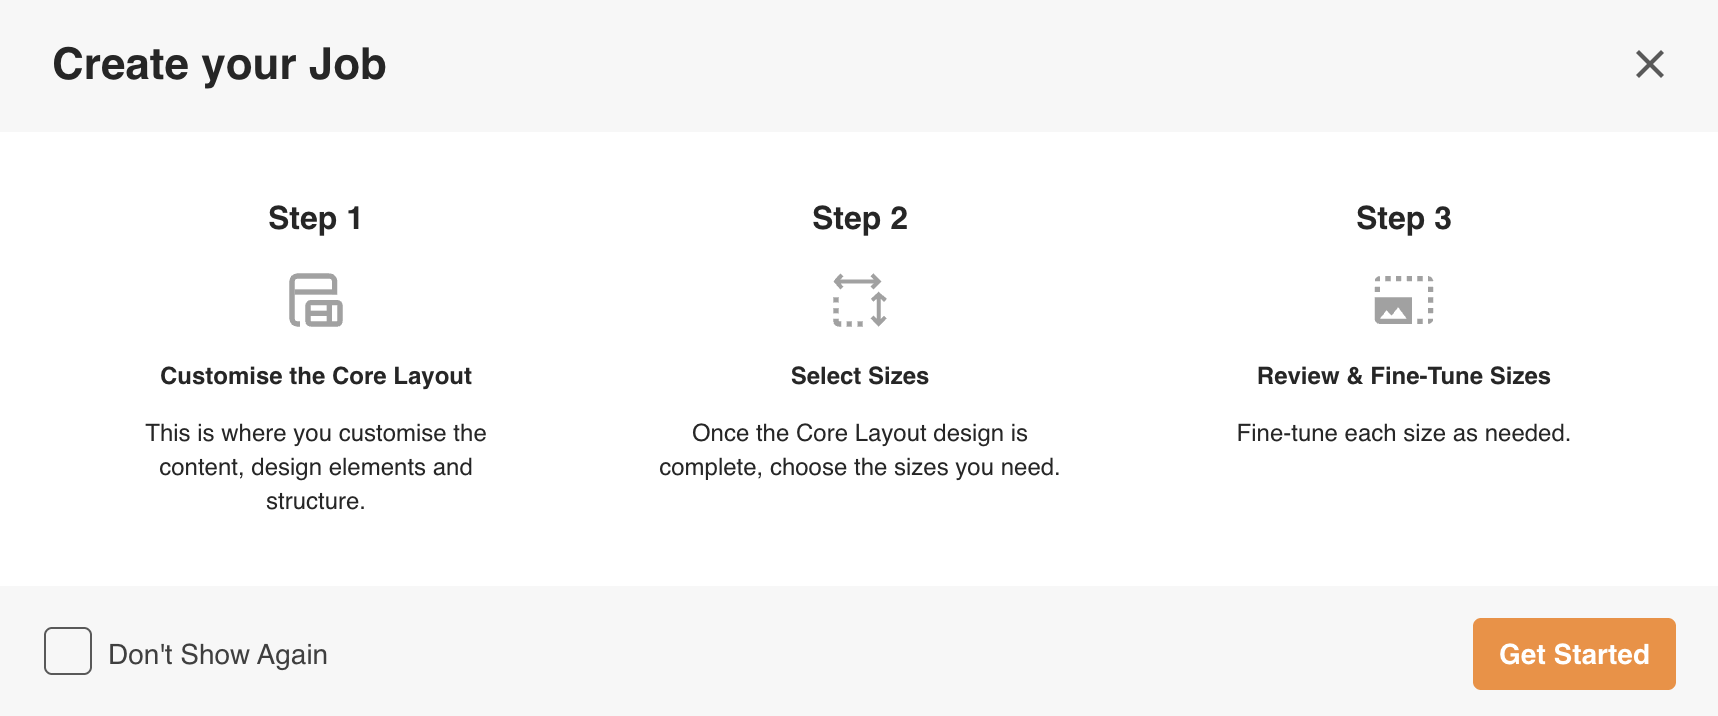 |
| 4Select Get Started | This opens the template in the Creative Editor, where you can zoom in and out using the controls in the upper right corner.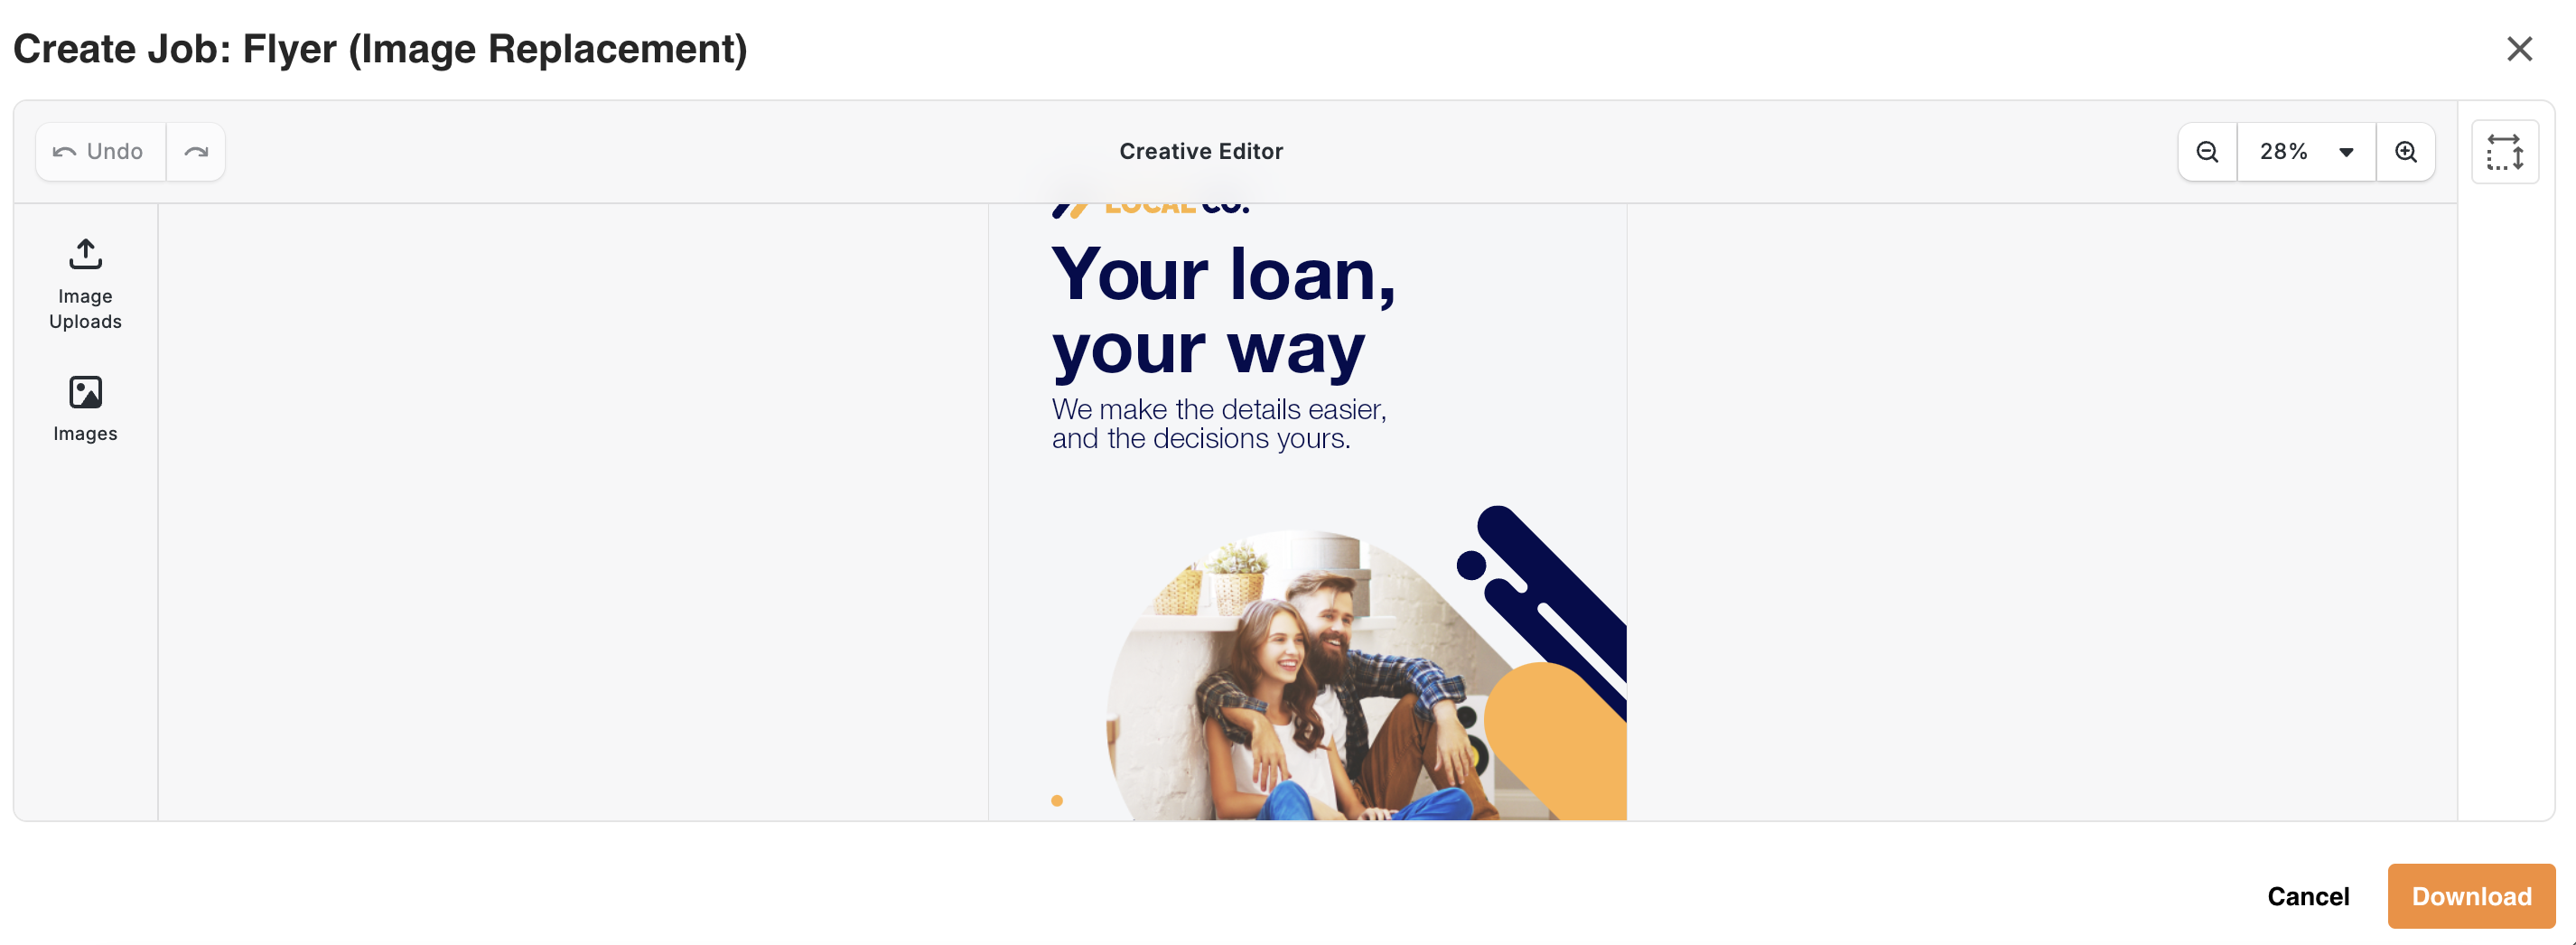 |
Editing the Core Layout
Inside the editor, any element highlighted in blue template can be customized. The exact options available depend on how the template creator locked it down.
Text Elements
If a text field is editable, it appears highlighted in blue. Select the field and adjust the text as needed.
Image Elements
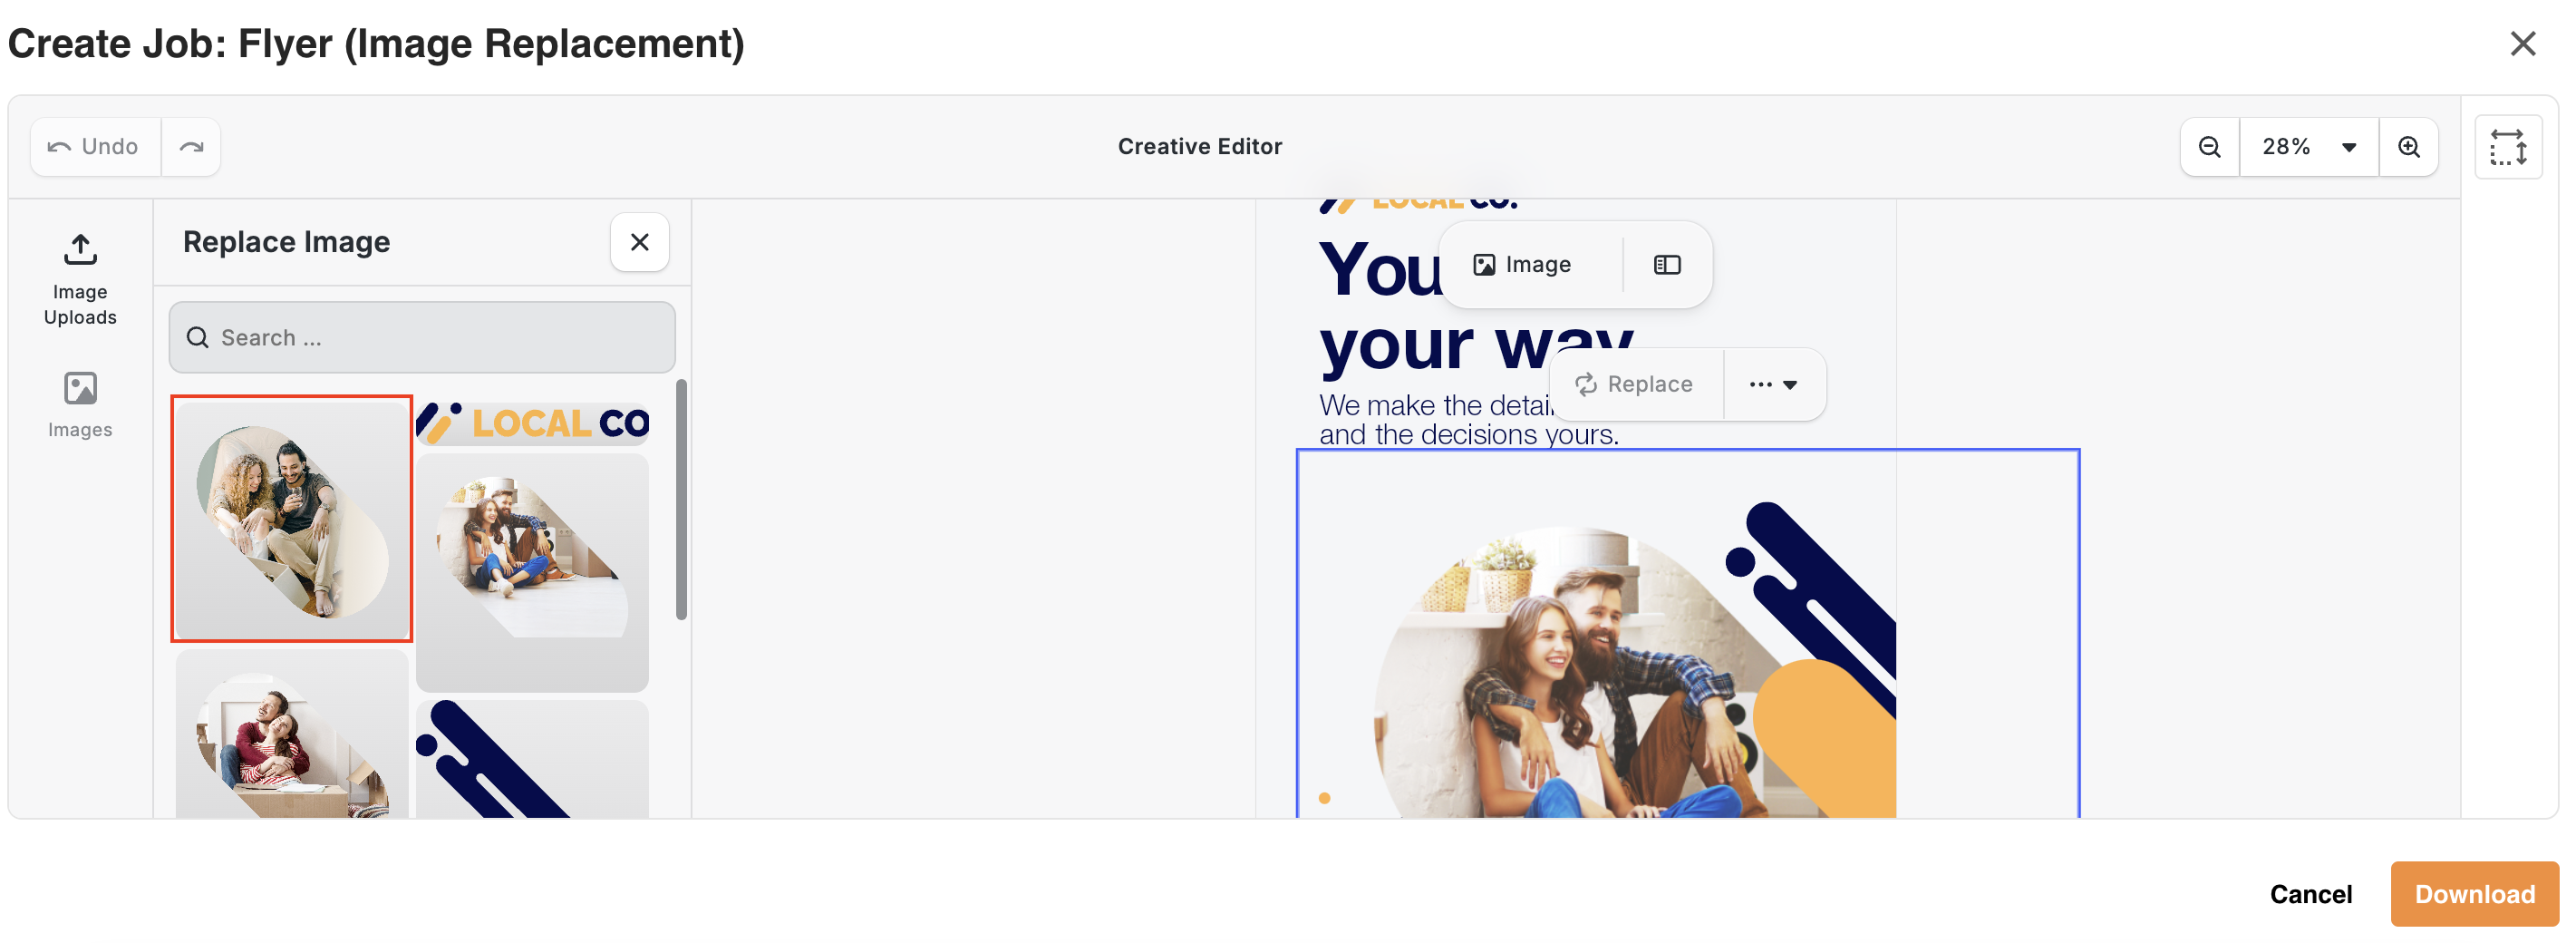
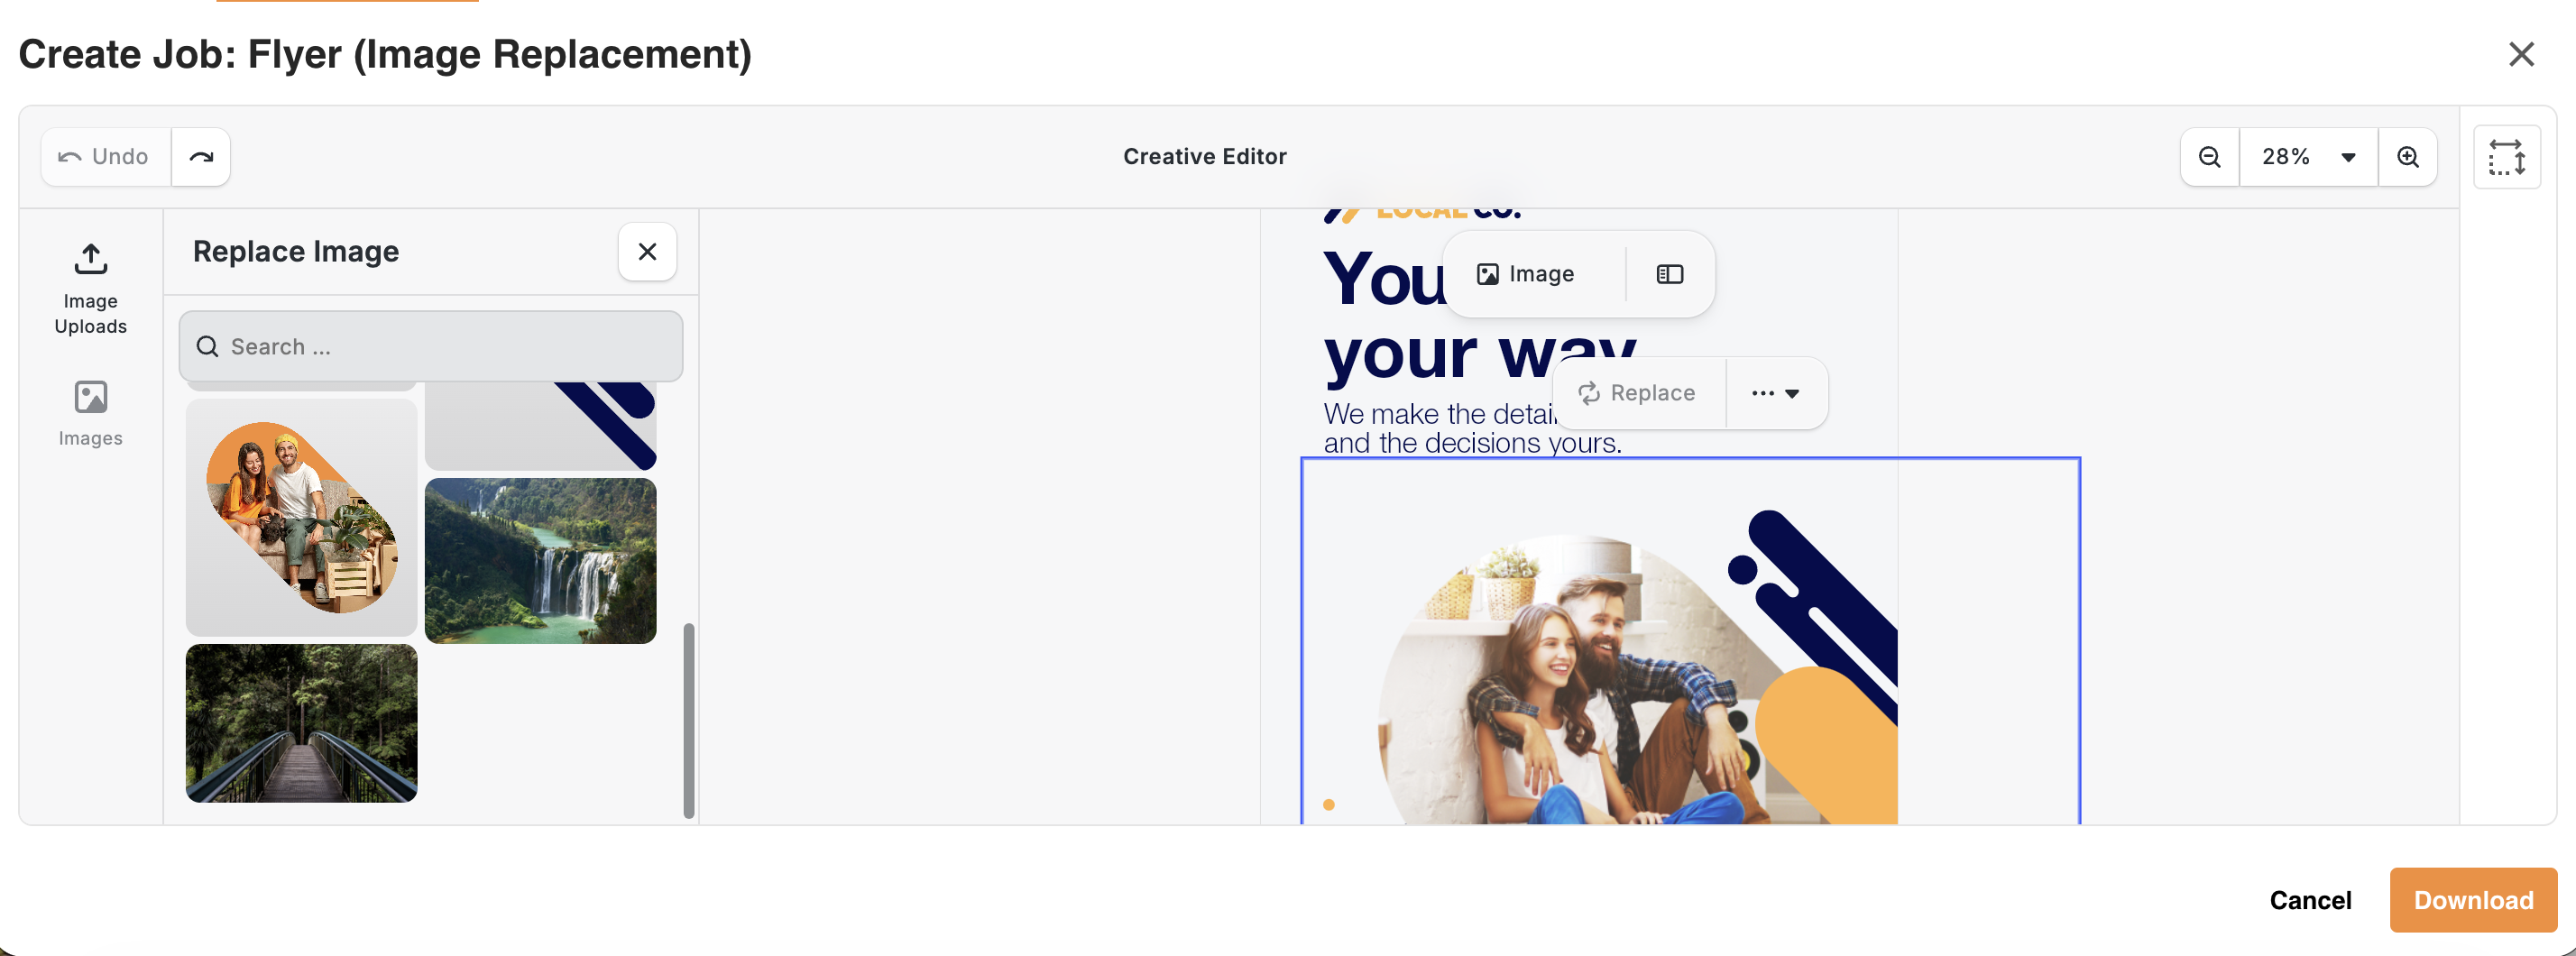
To change an editable image, select the image, then select Replace.
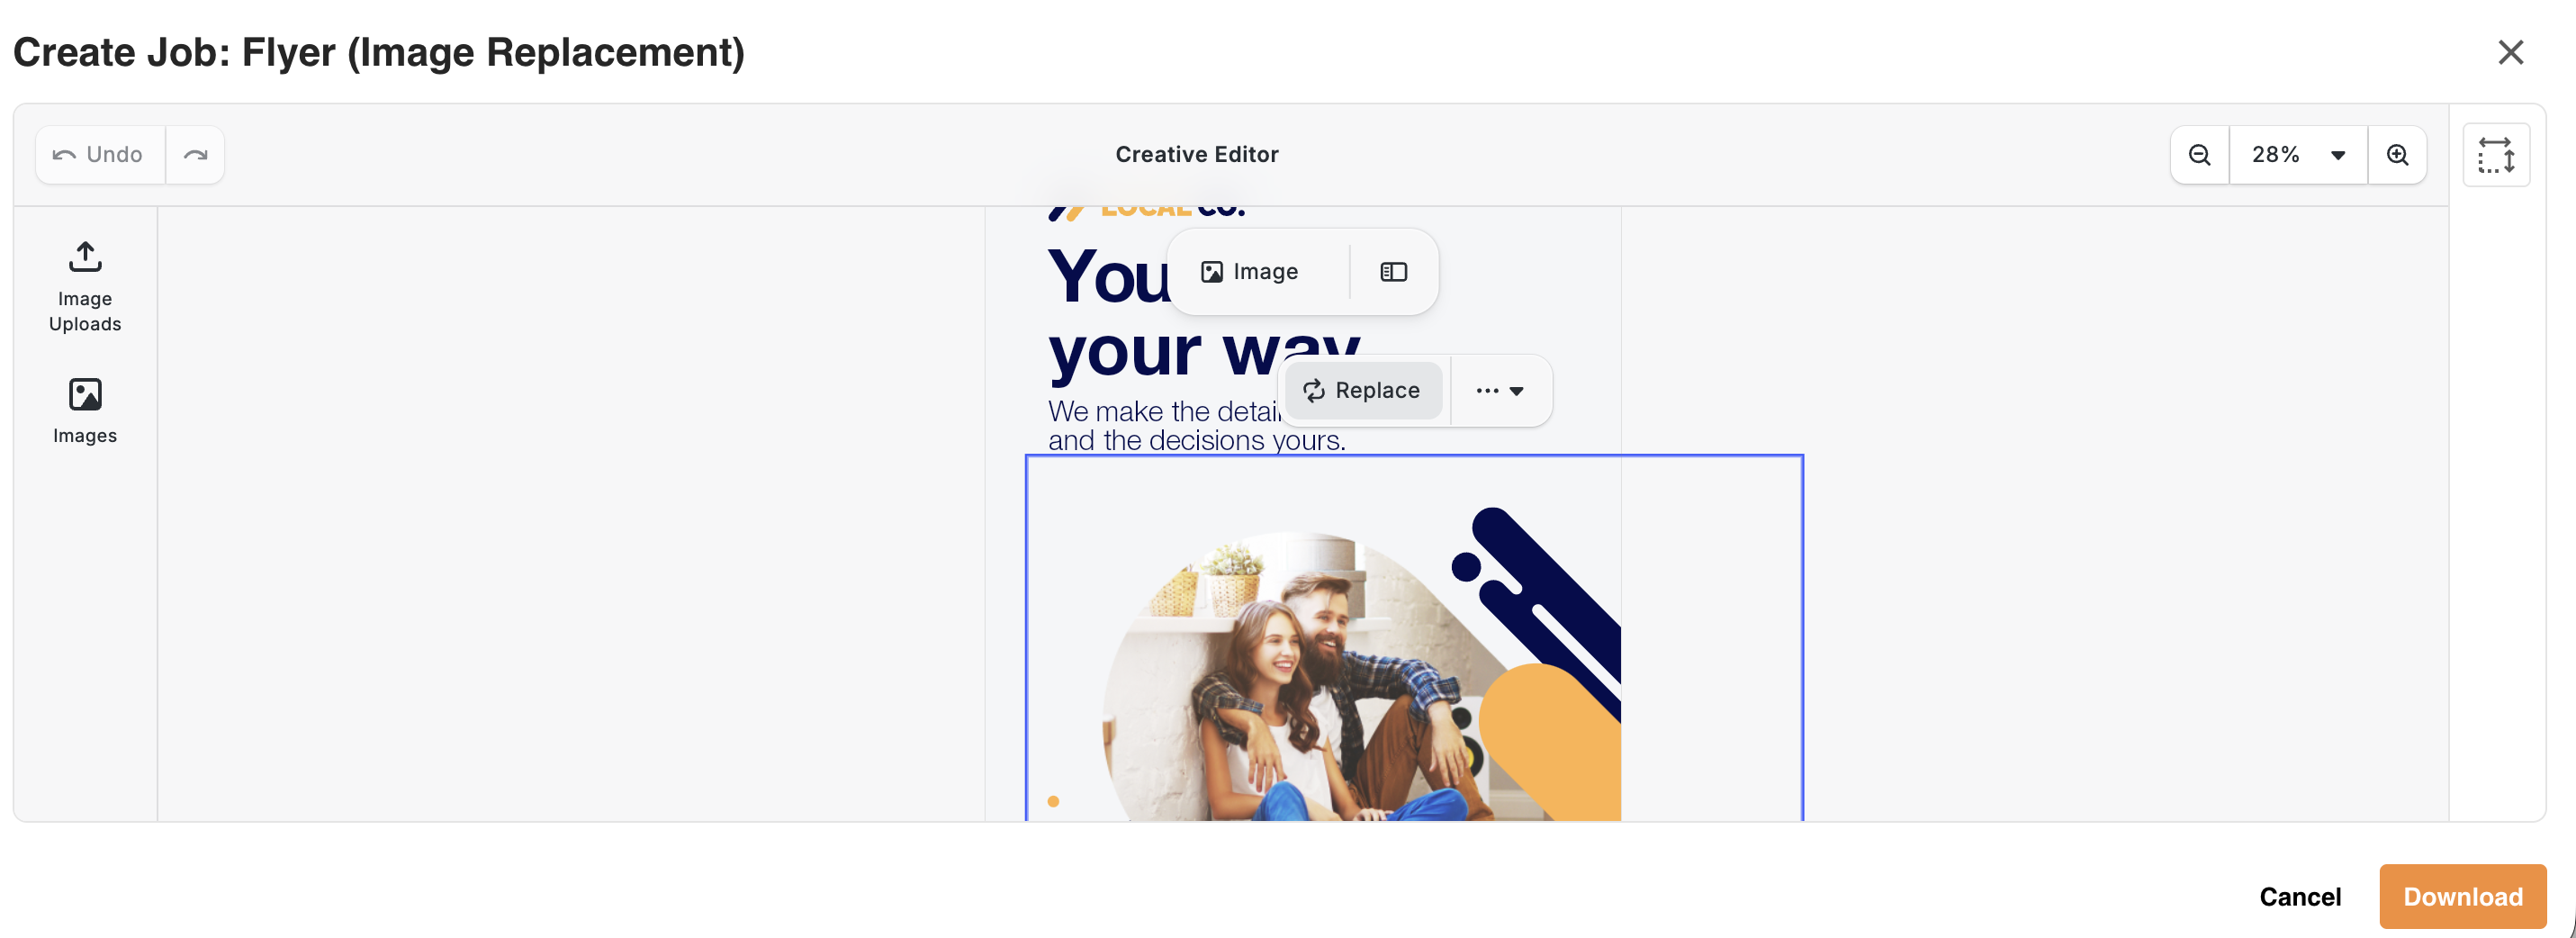
Depending on the template's settings and how it was created, you may see alternative images displayed in a panel that opens up on the lefthand side. These are images that the template creator curated and saved as options to use in the template.
Select one of the images in the panel, which will then replace the image in your template.
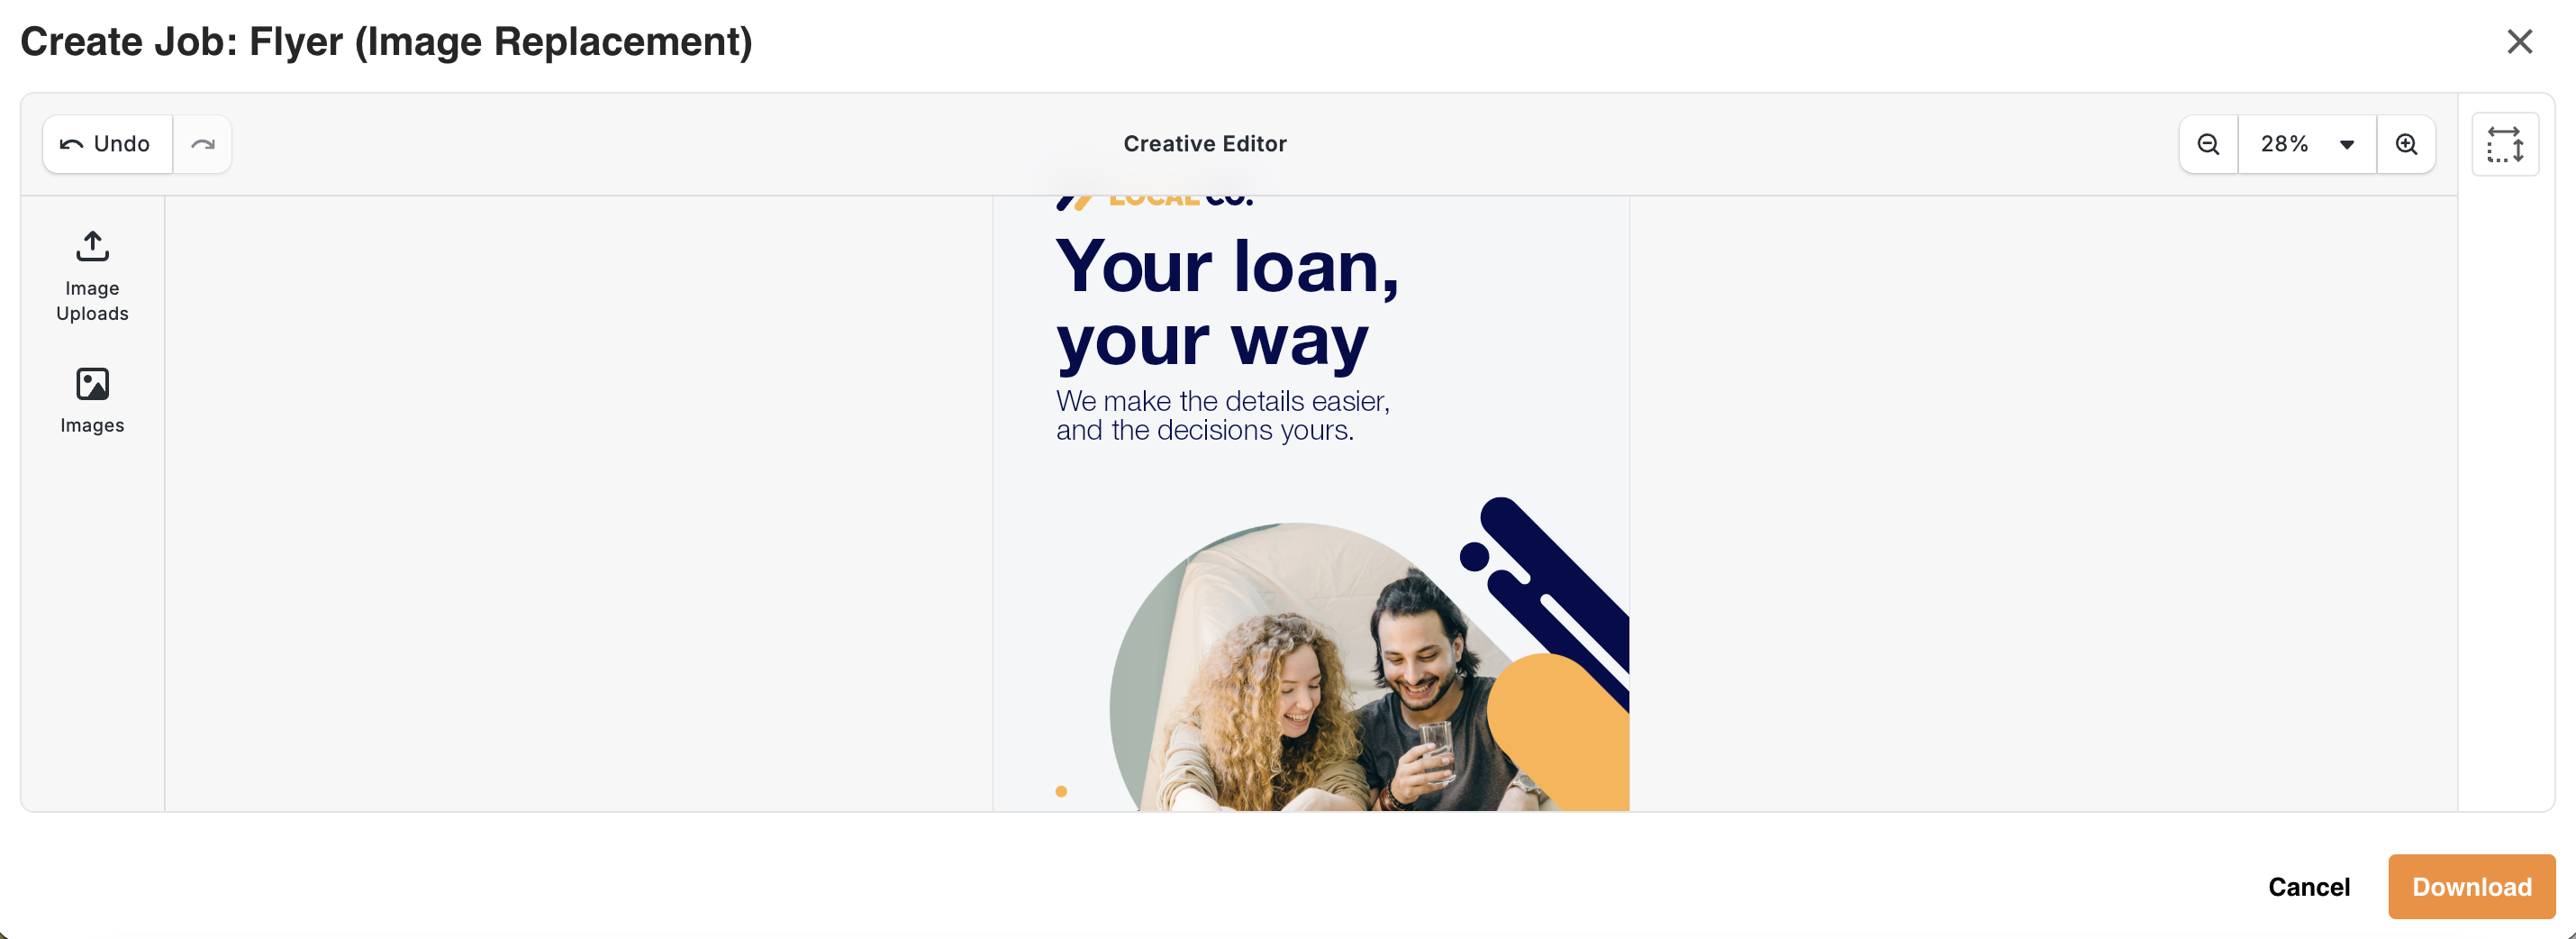
You may also have the ability to add additional images to the images panel, either from your Asset Library, or by uploading images from your computer. This gives you greater flexibility in selecting the images you'd like to use within your template.
If either option is available, select Image Uploads and then choose either add from your computer or add from the DAM.
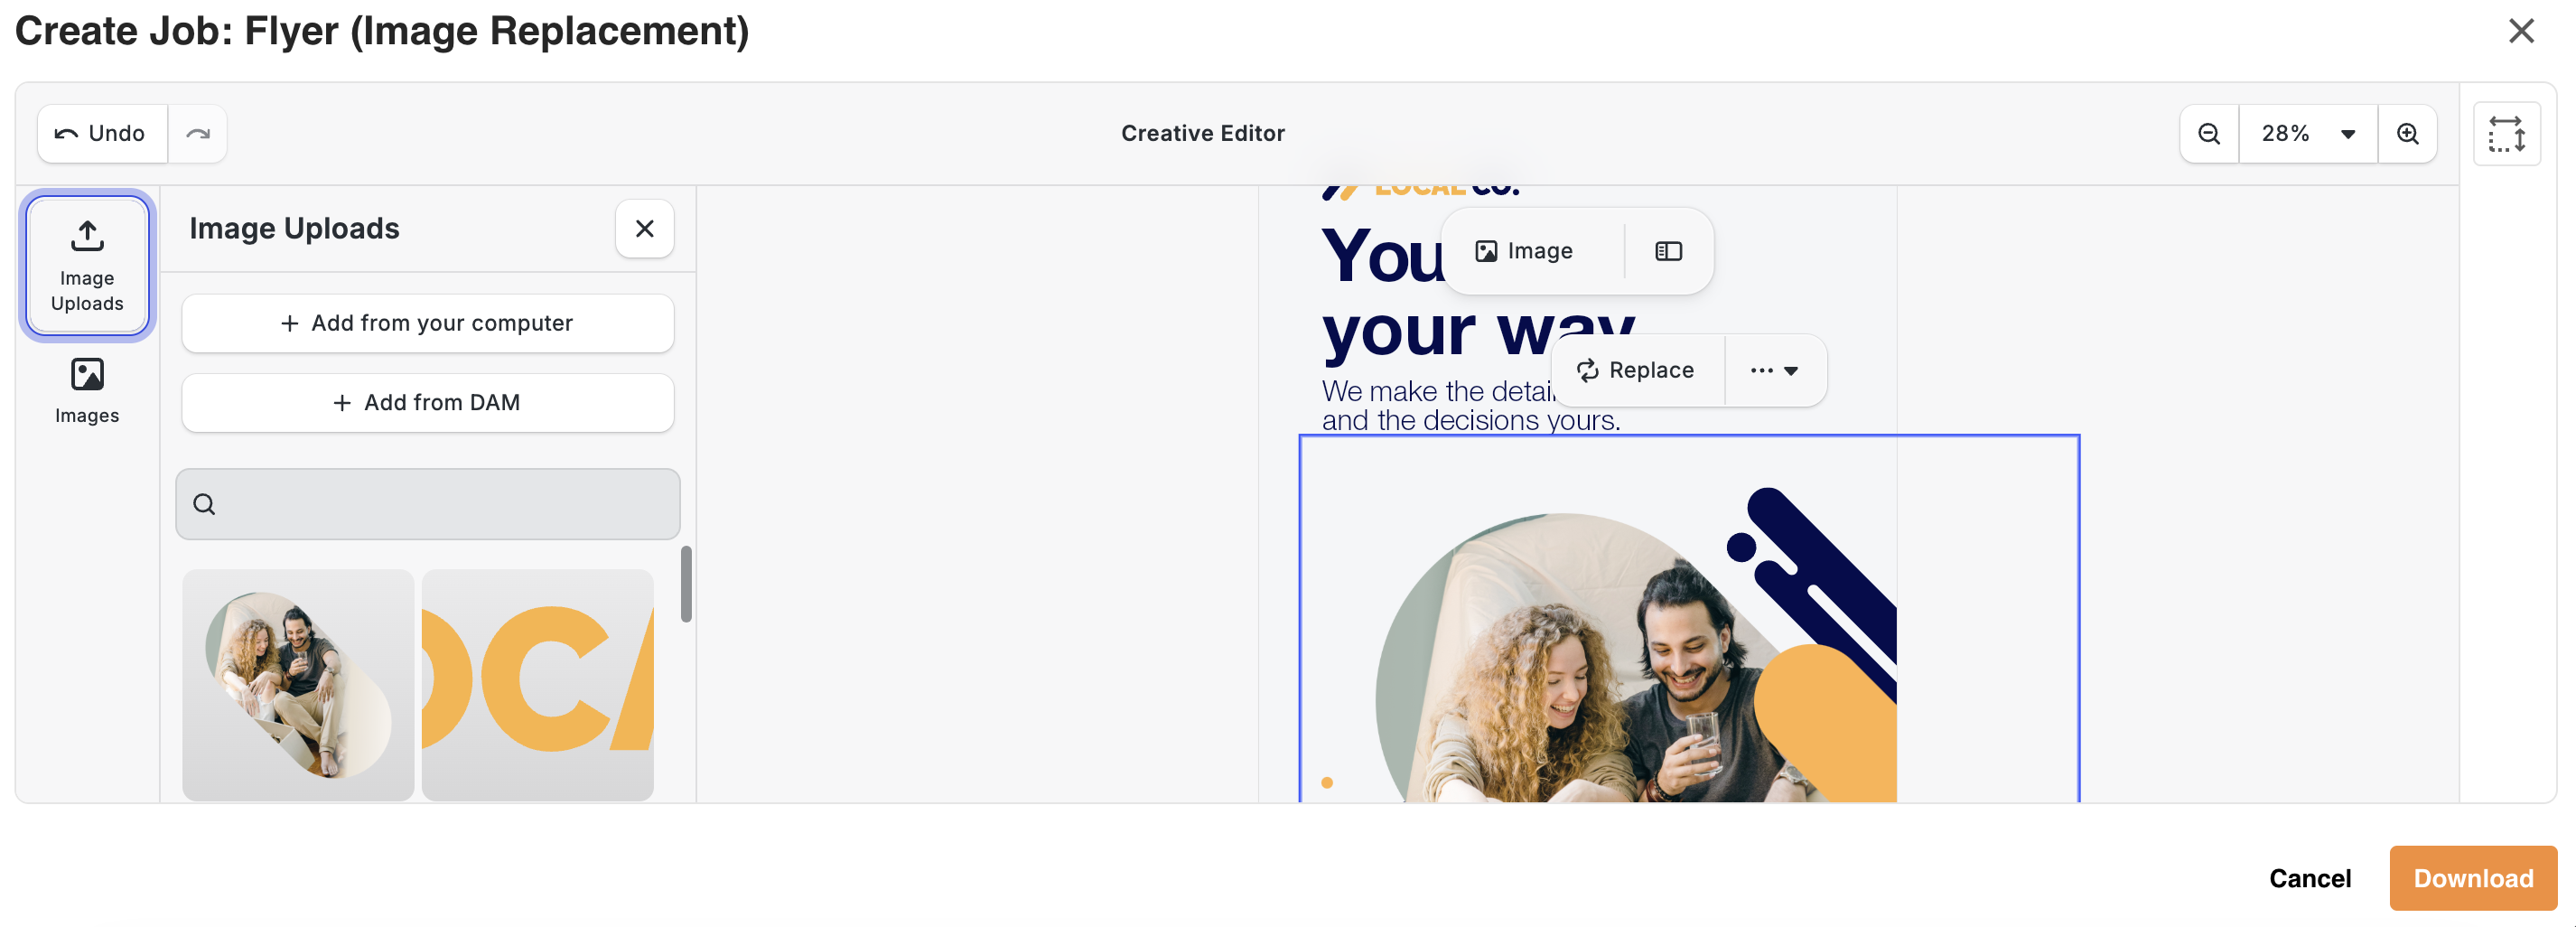 If adding from your computer, you will be able to add images saved locally on your computer to the images panel.
If adding from the DAM, once you click this option, your folder structure will display. You can search or navigate through folders to find your desired image(s). Select the image or images, then select ADD SELECTED on the bottom right side of the page, which will add the image(s) into the images panel.
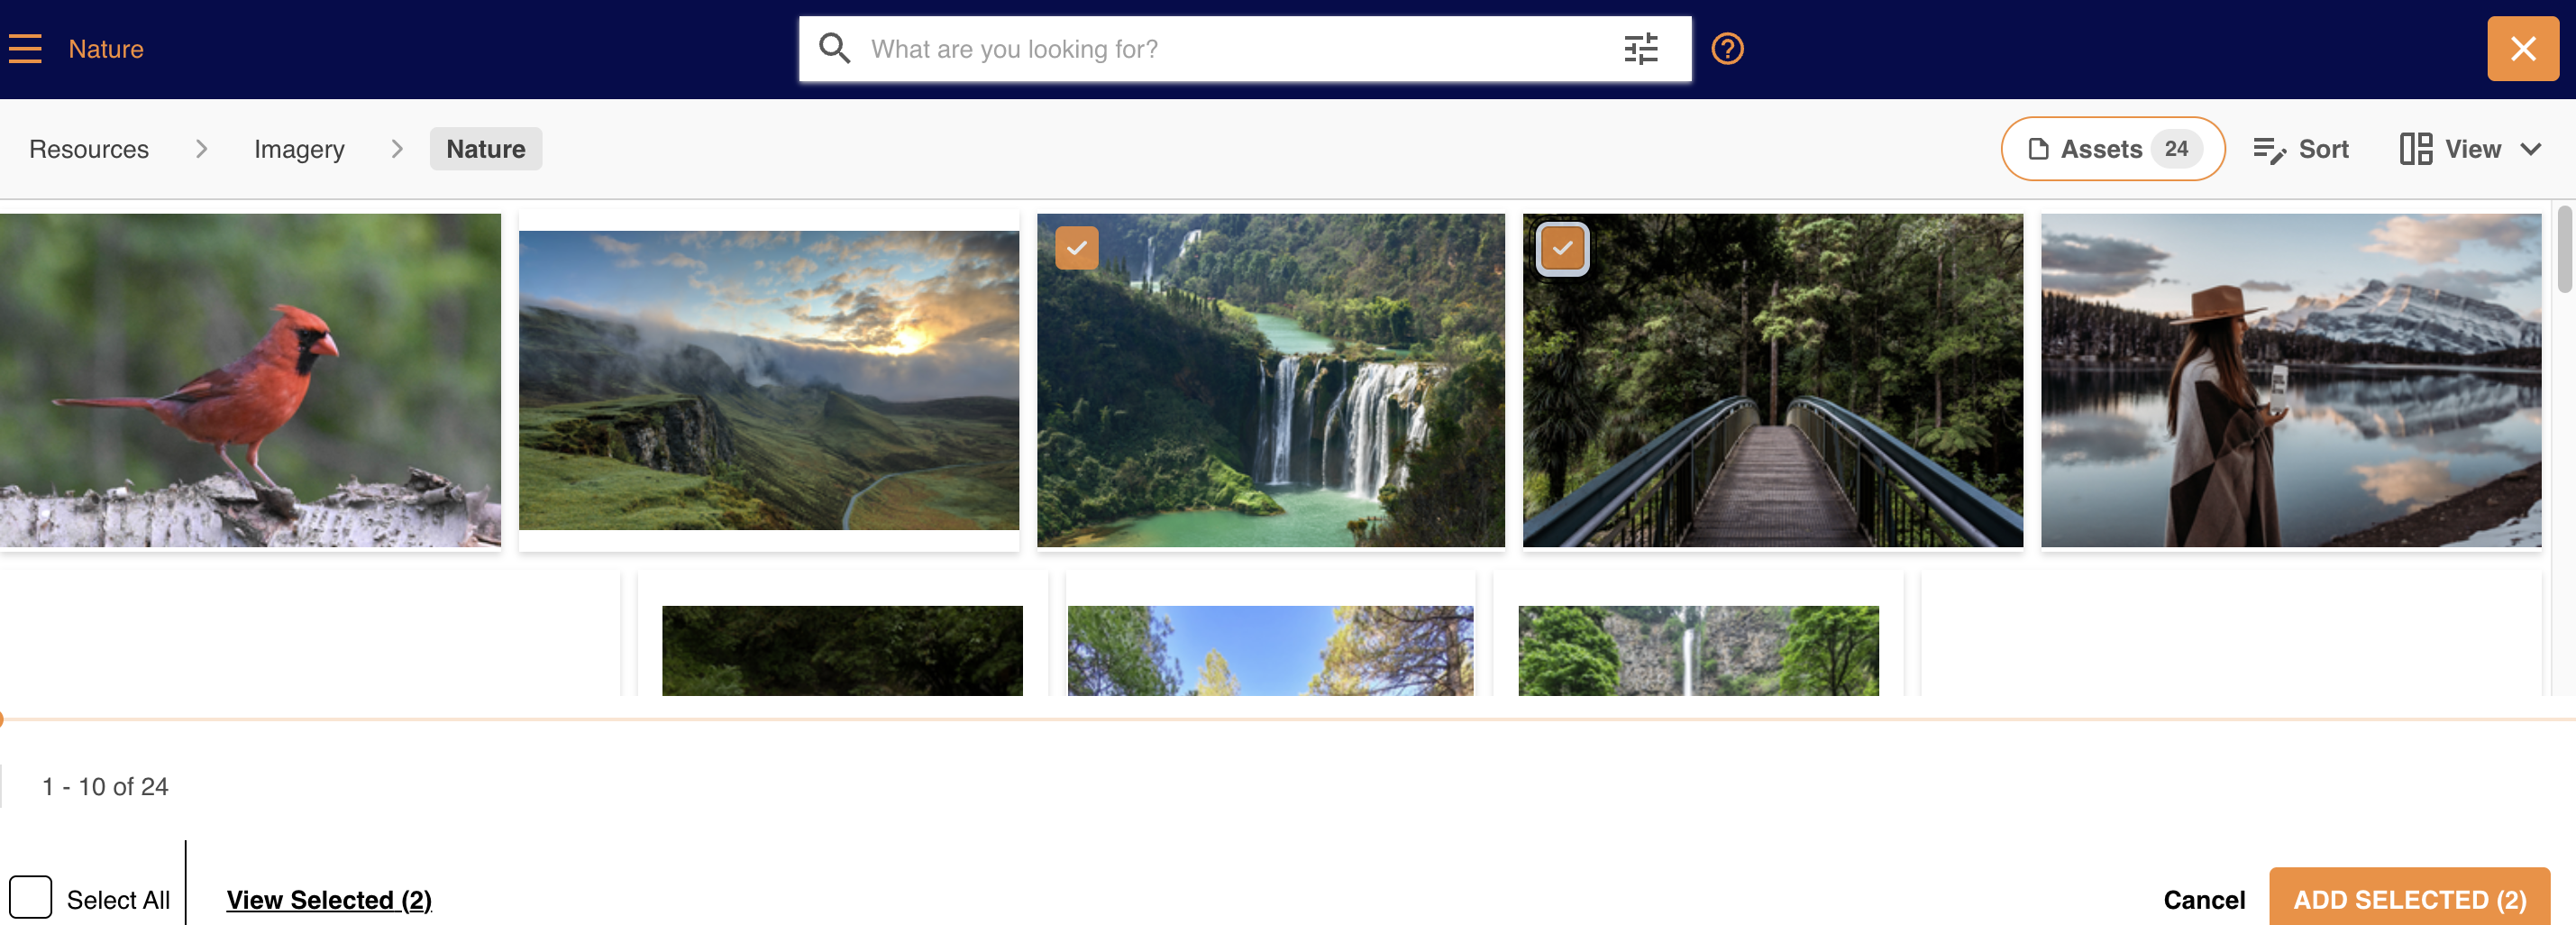
This will make those images available within the images panel as options to replace or add additional images into your template for that specific job.
Styling Options
Some templates also allow style edits, such as font, font size, font colour, and text alignment for text elements, or crop and reverse for image elements. Whether these options appear depends on how restrictively the template creator locked down that element.
Managing Available Sizes
Once you've finished editing in the Creative Editor, go to Manage Available Sizes for the template.
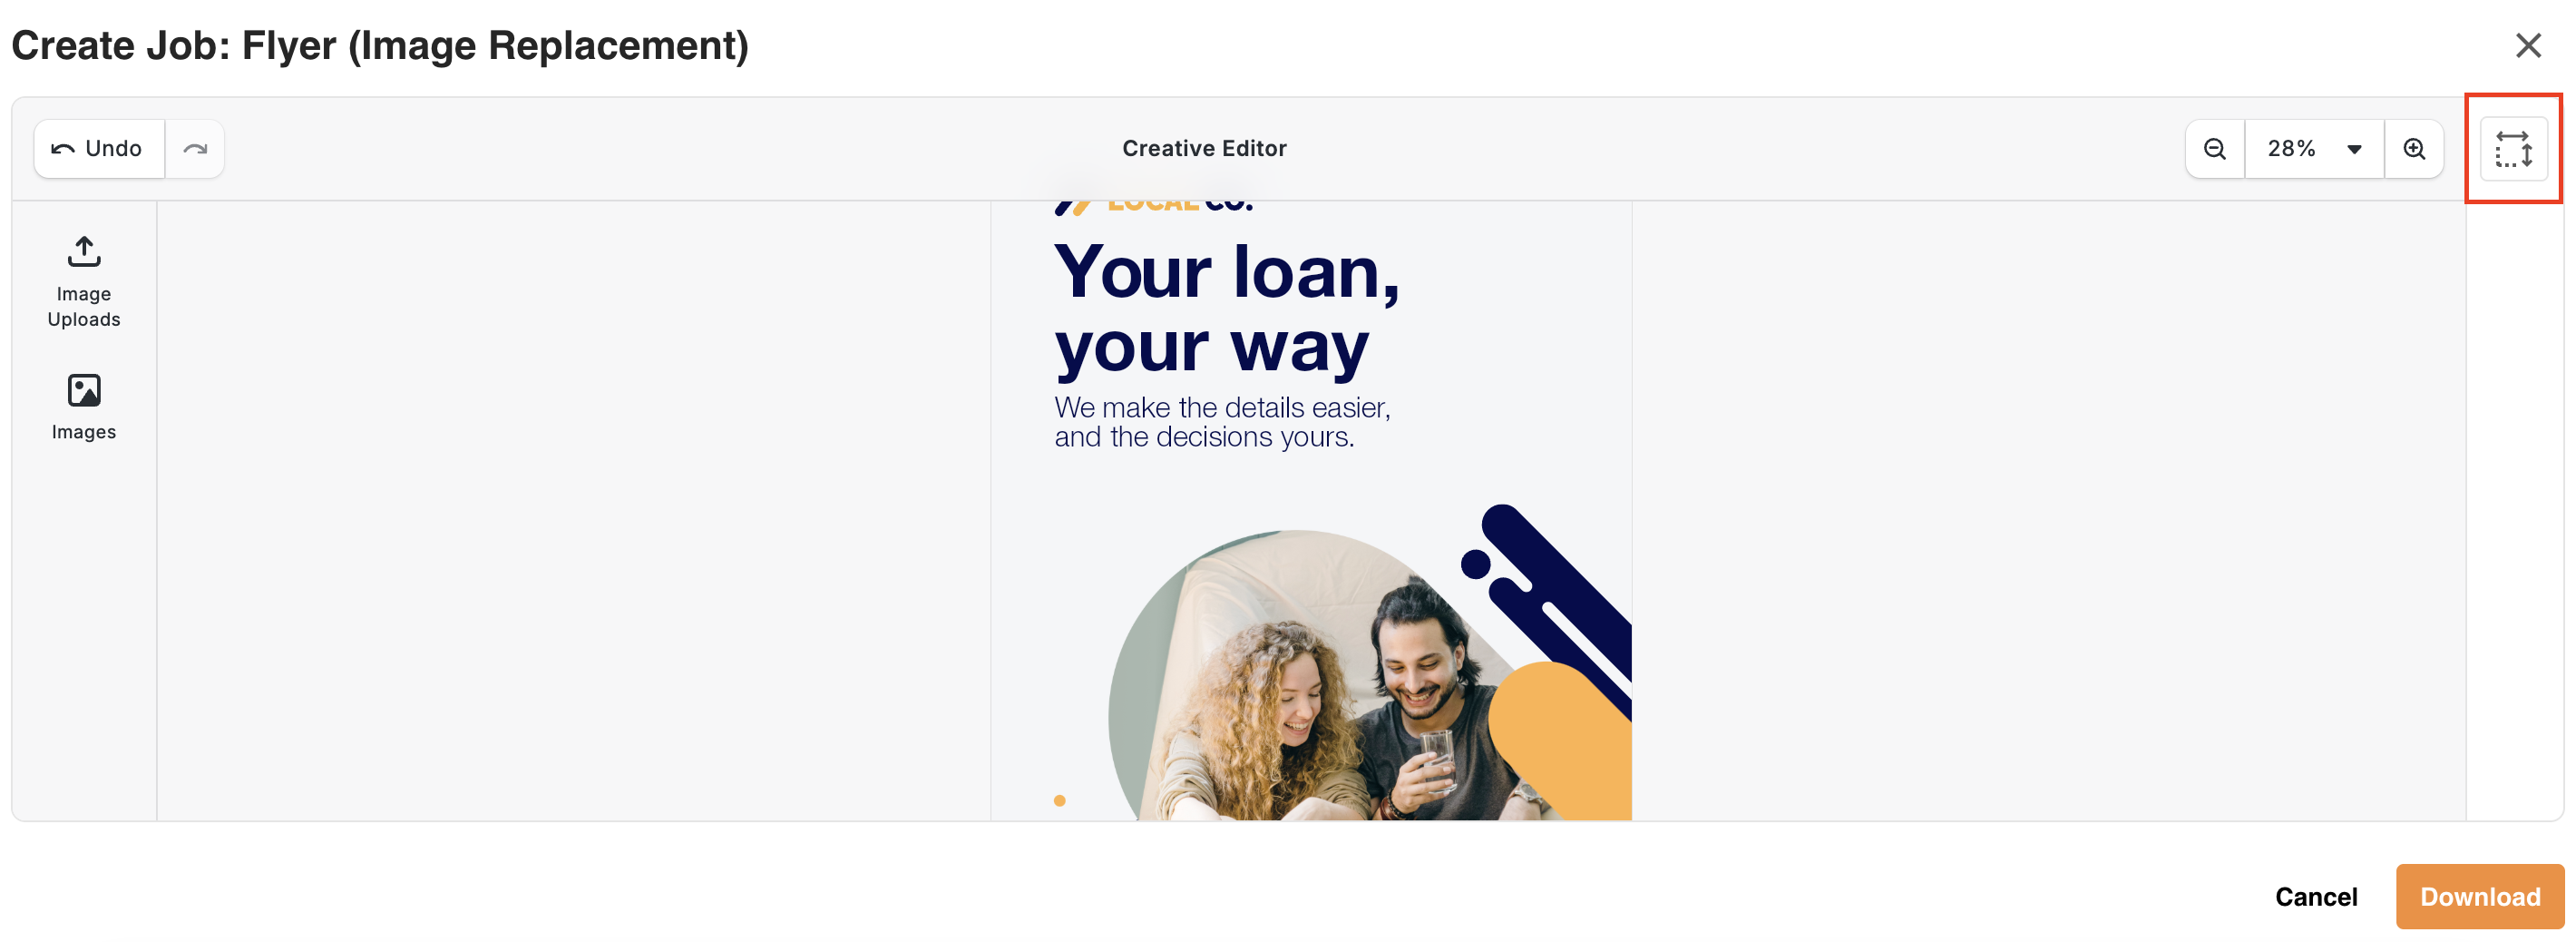
This is where you can adjust or potentially remove any other sizes associated with this template, that you may or may not need when downloading your job.
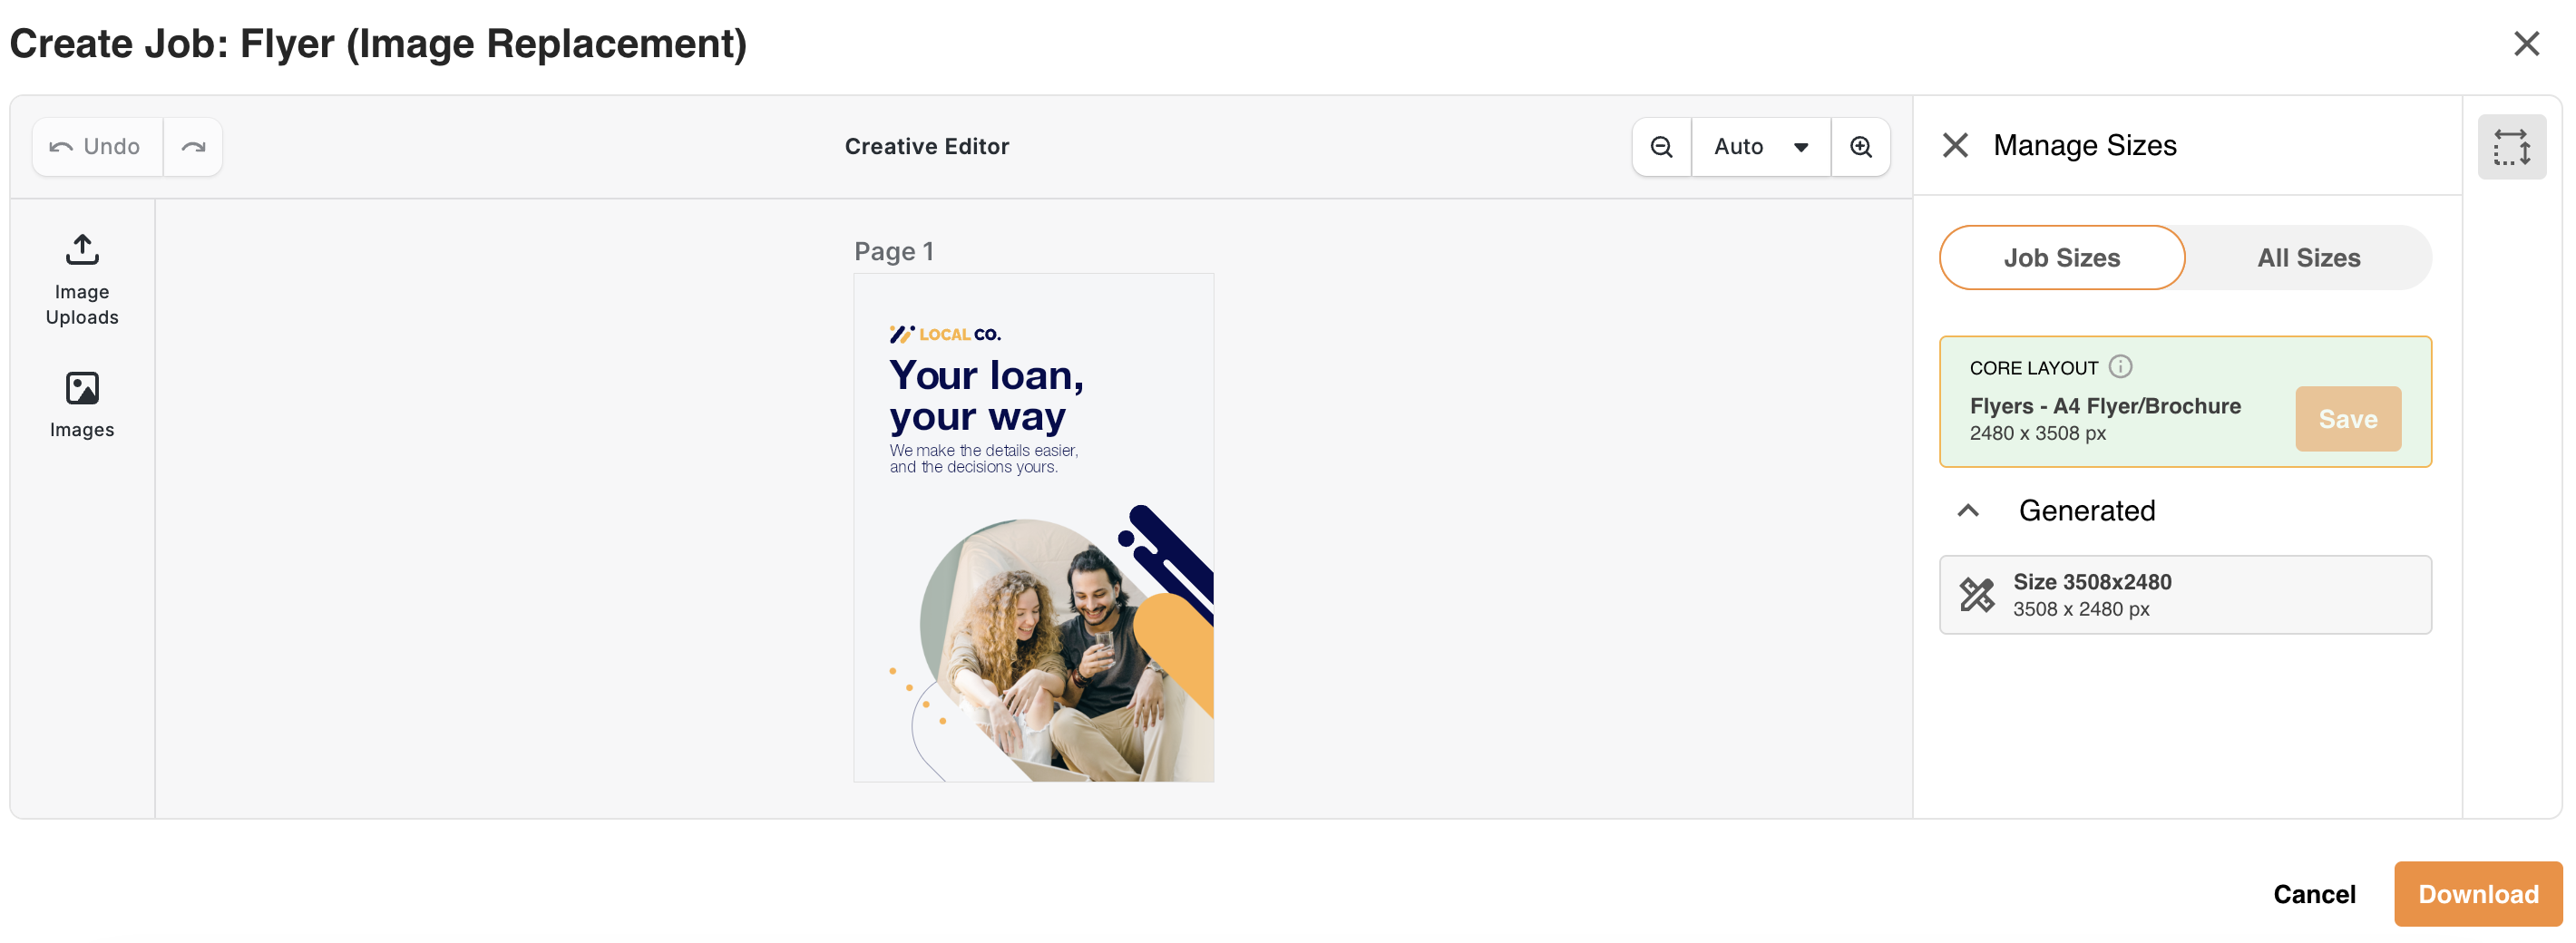
Within the panel that displays, you'll see:
- Core layout: Always listed at the top of the Job Sizes section. This is the base layout that gets created every time.
- Generated sizes: Additional sizes may be listed in the Generated section, based on whatever sizes were configured by whoever built the master template.
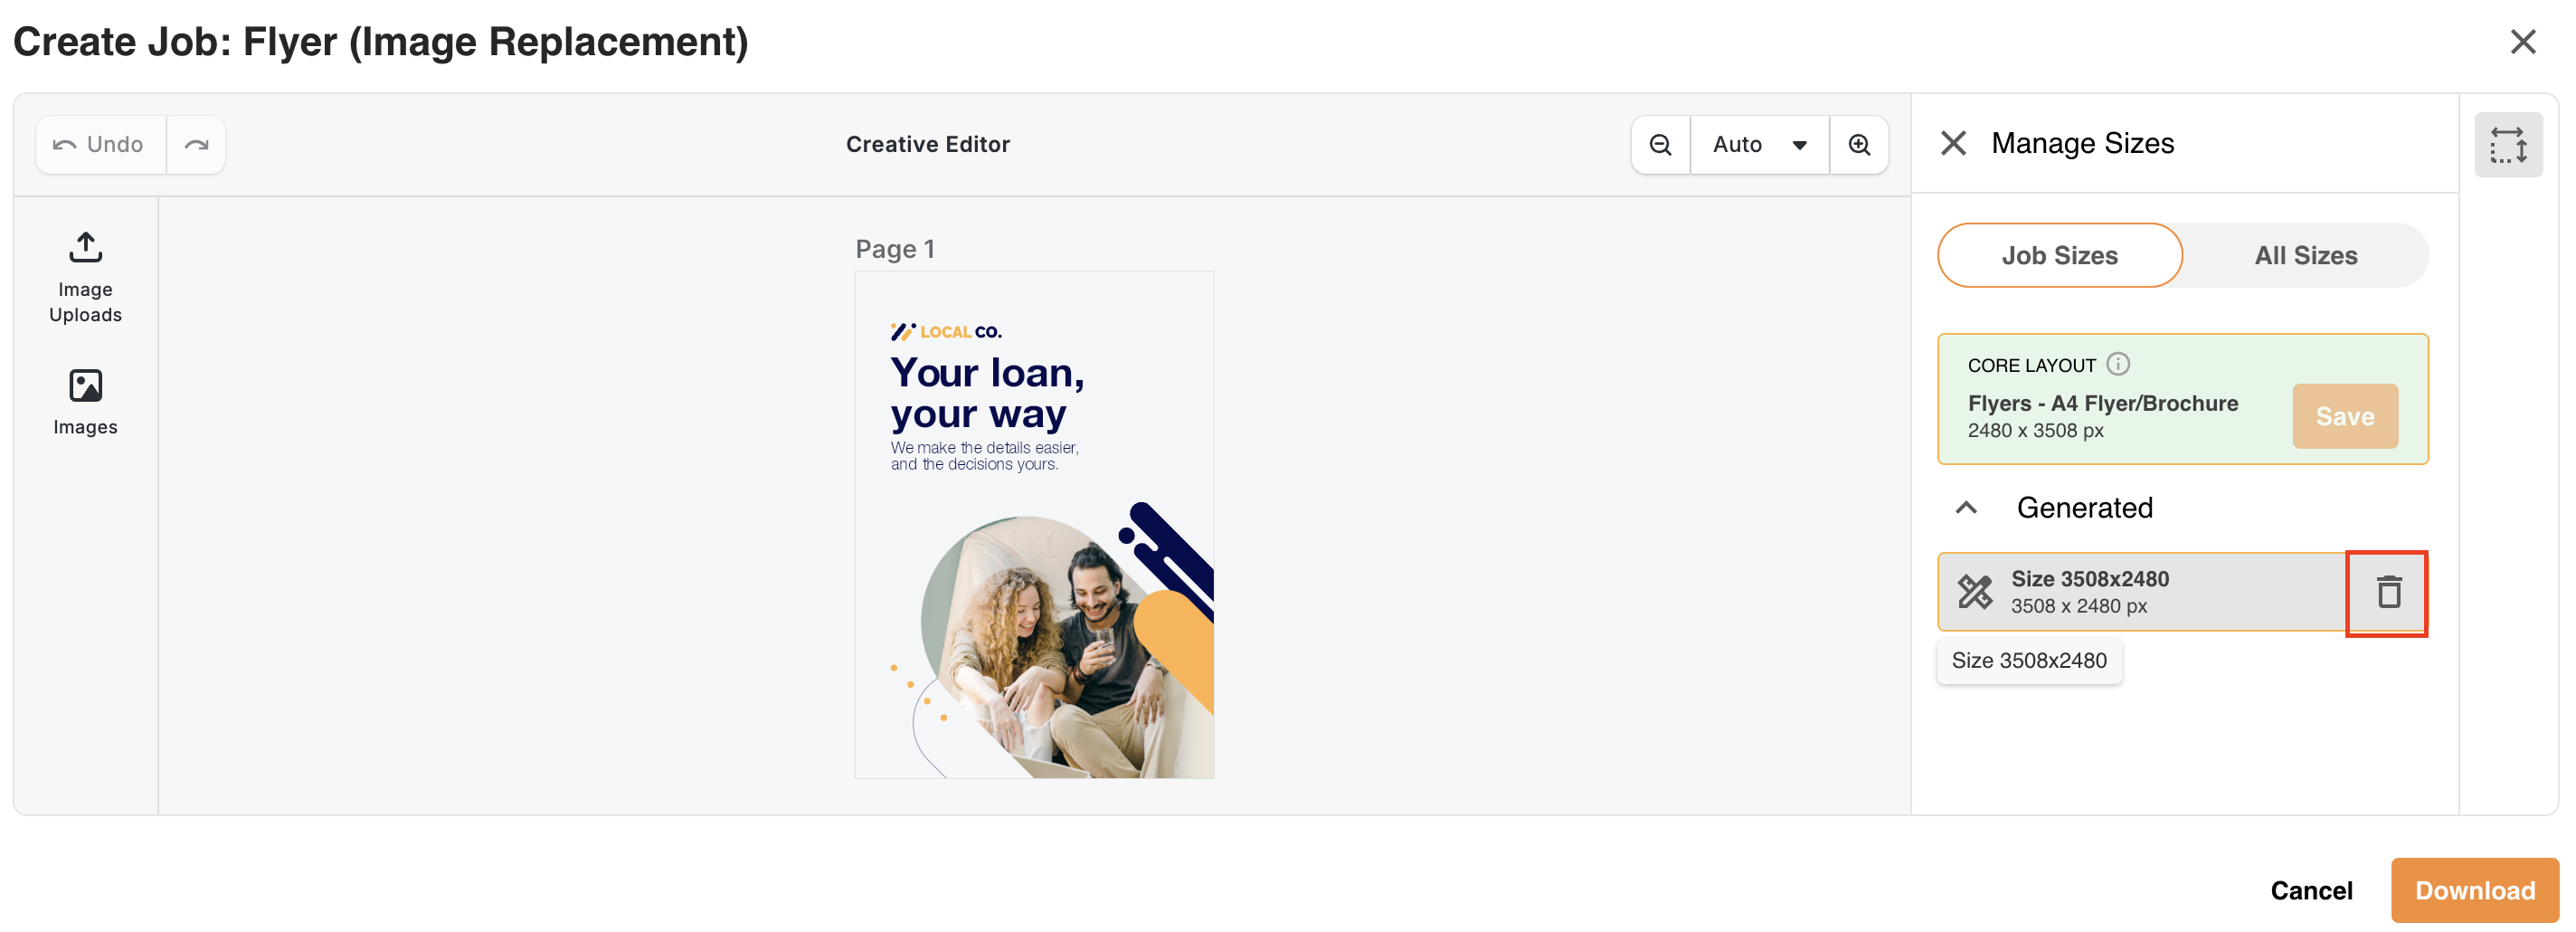
If you don't want certain additional/generated sizes to download with your core layout, select the trash can icon next to whichever size you don't need.
To add a size back in (for example, if you deleted one accidentally,) go to All Sizes, select Custom, find and select the size you need, then select Generate to add it back into the job.
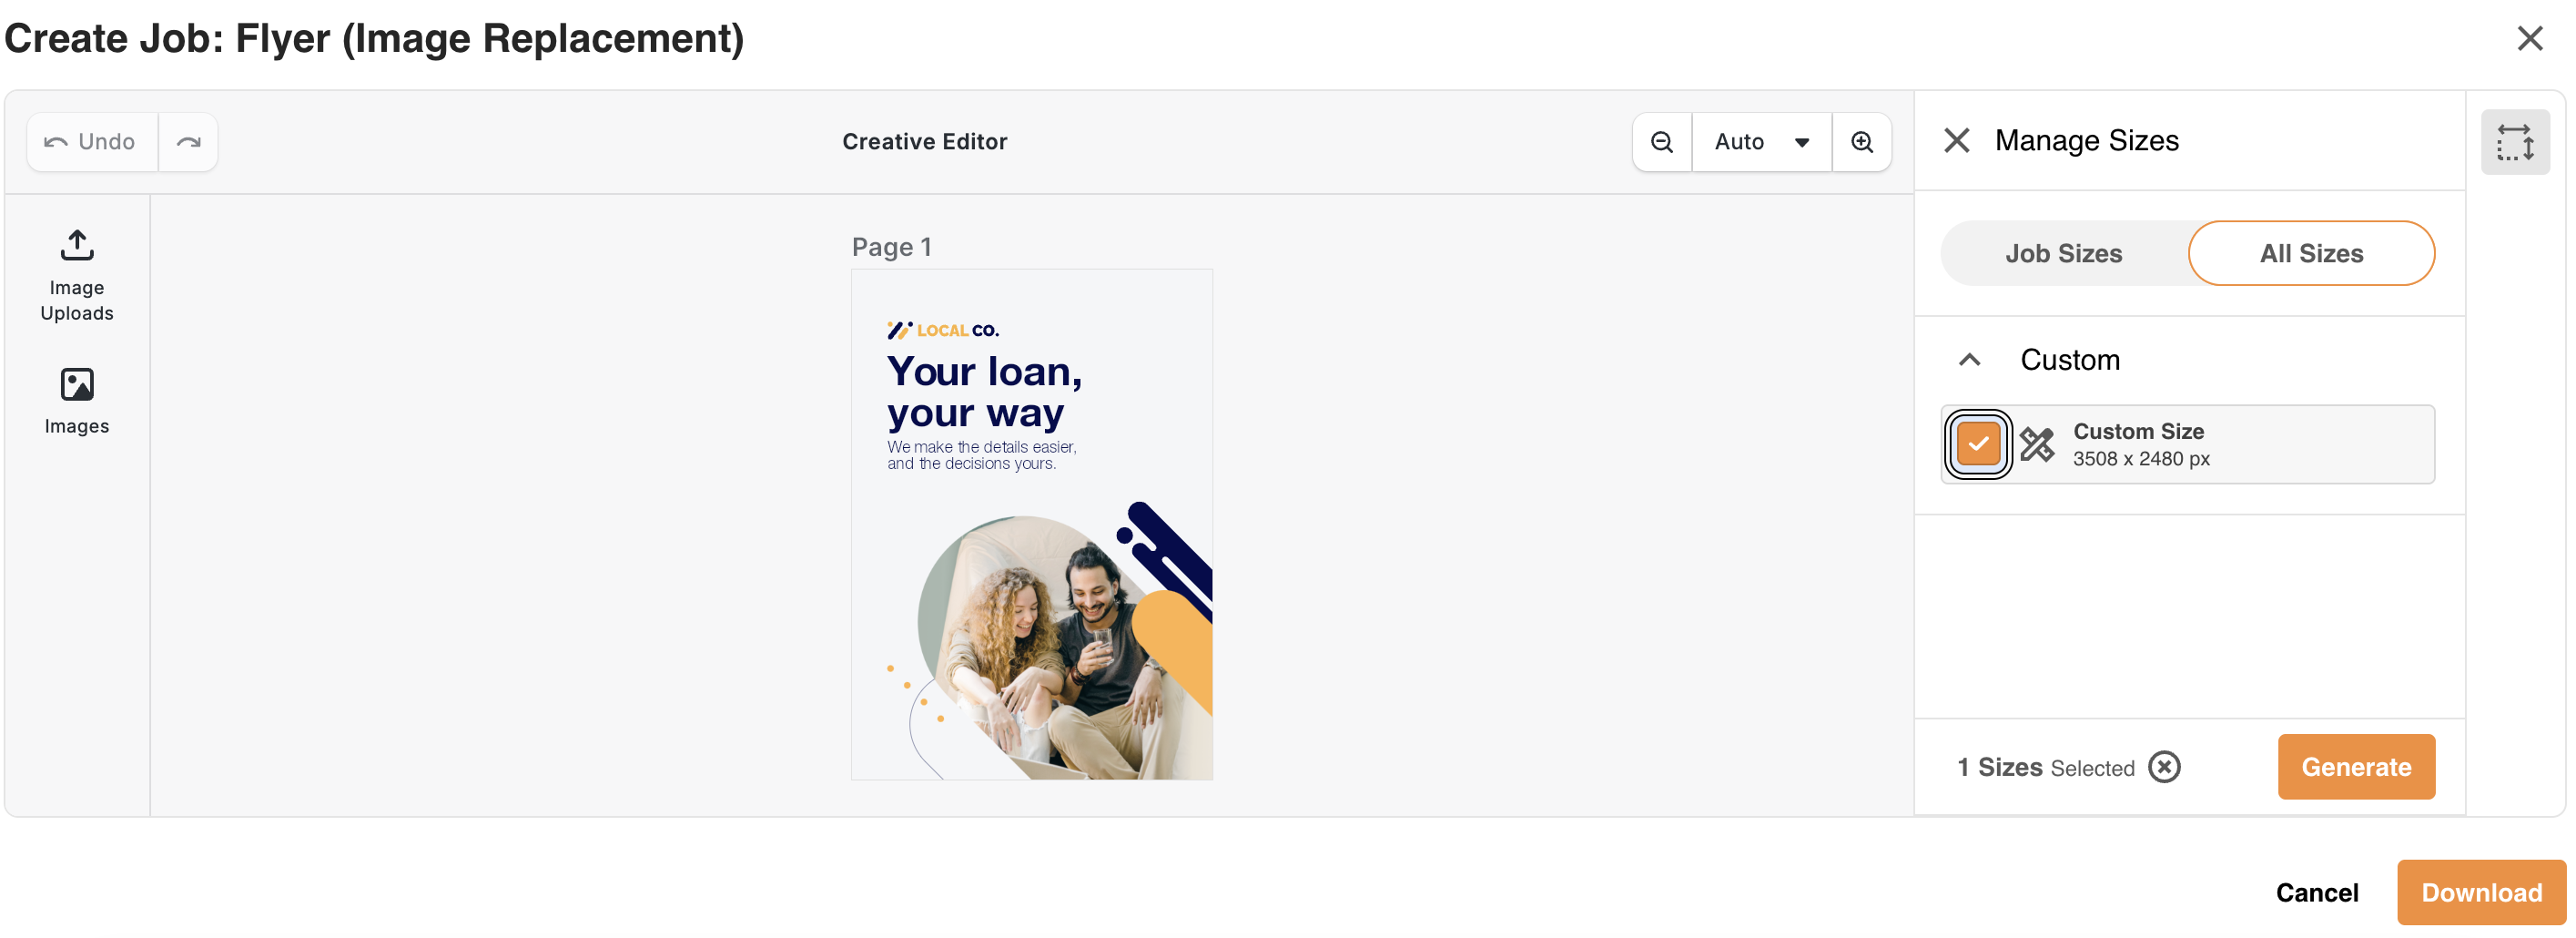
How Changes Propagate Between Sizes
When you open a custom size from the Manage Sizes panel, a pop-up confirms that core template content changes apply to all sizes, while custom layout edits on individual sizes remain unchanged.
Select Apply to proceed.
Downloading Your Job
Once you're ready to download, select the Download button.
| 1Name the job | Enter a custom job name. |
| 2Choose file format | Select the format for the downloaded templates: PDF, JPEG, PNG, or WebP. You can select more than one format at a time. |
| 3Download | Select Download. A zip file containing all sizes of the template will download automatically to your computer, ready to use. |
Accessing Previous Jobs
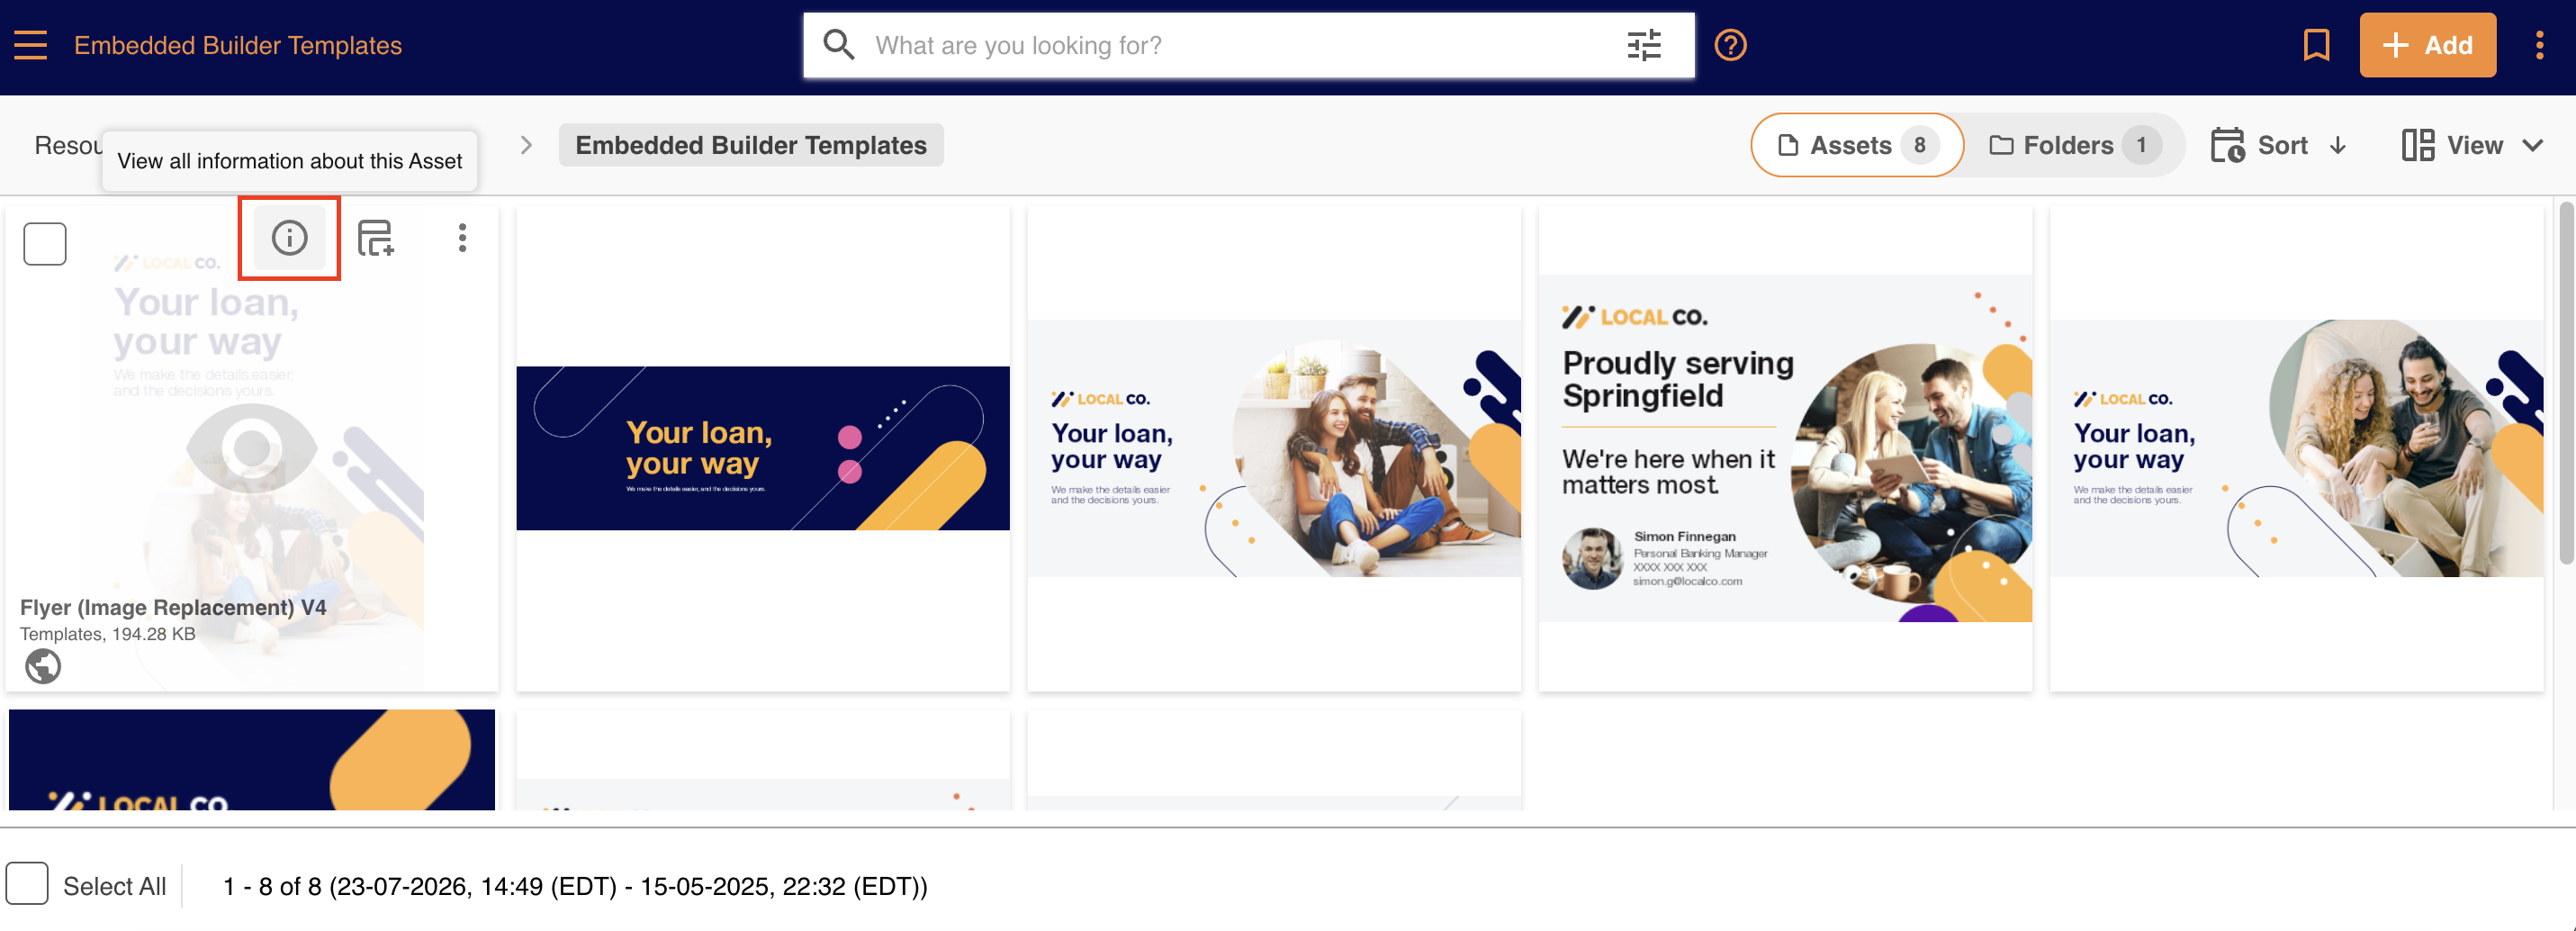
If you need to access a previous job you've created, you can do this by clicking on the Info Preview icon on the template.
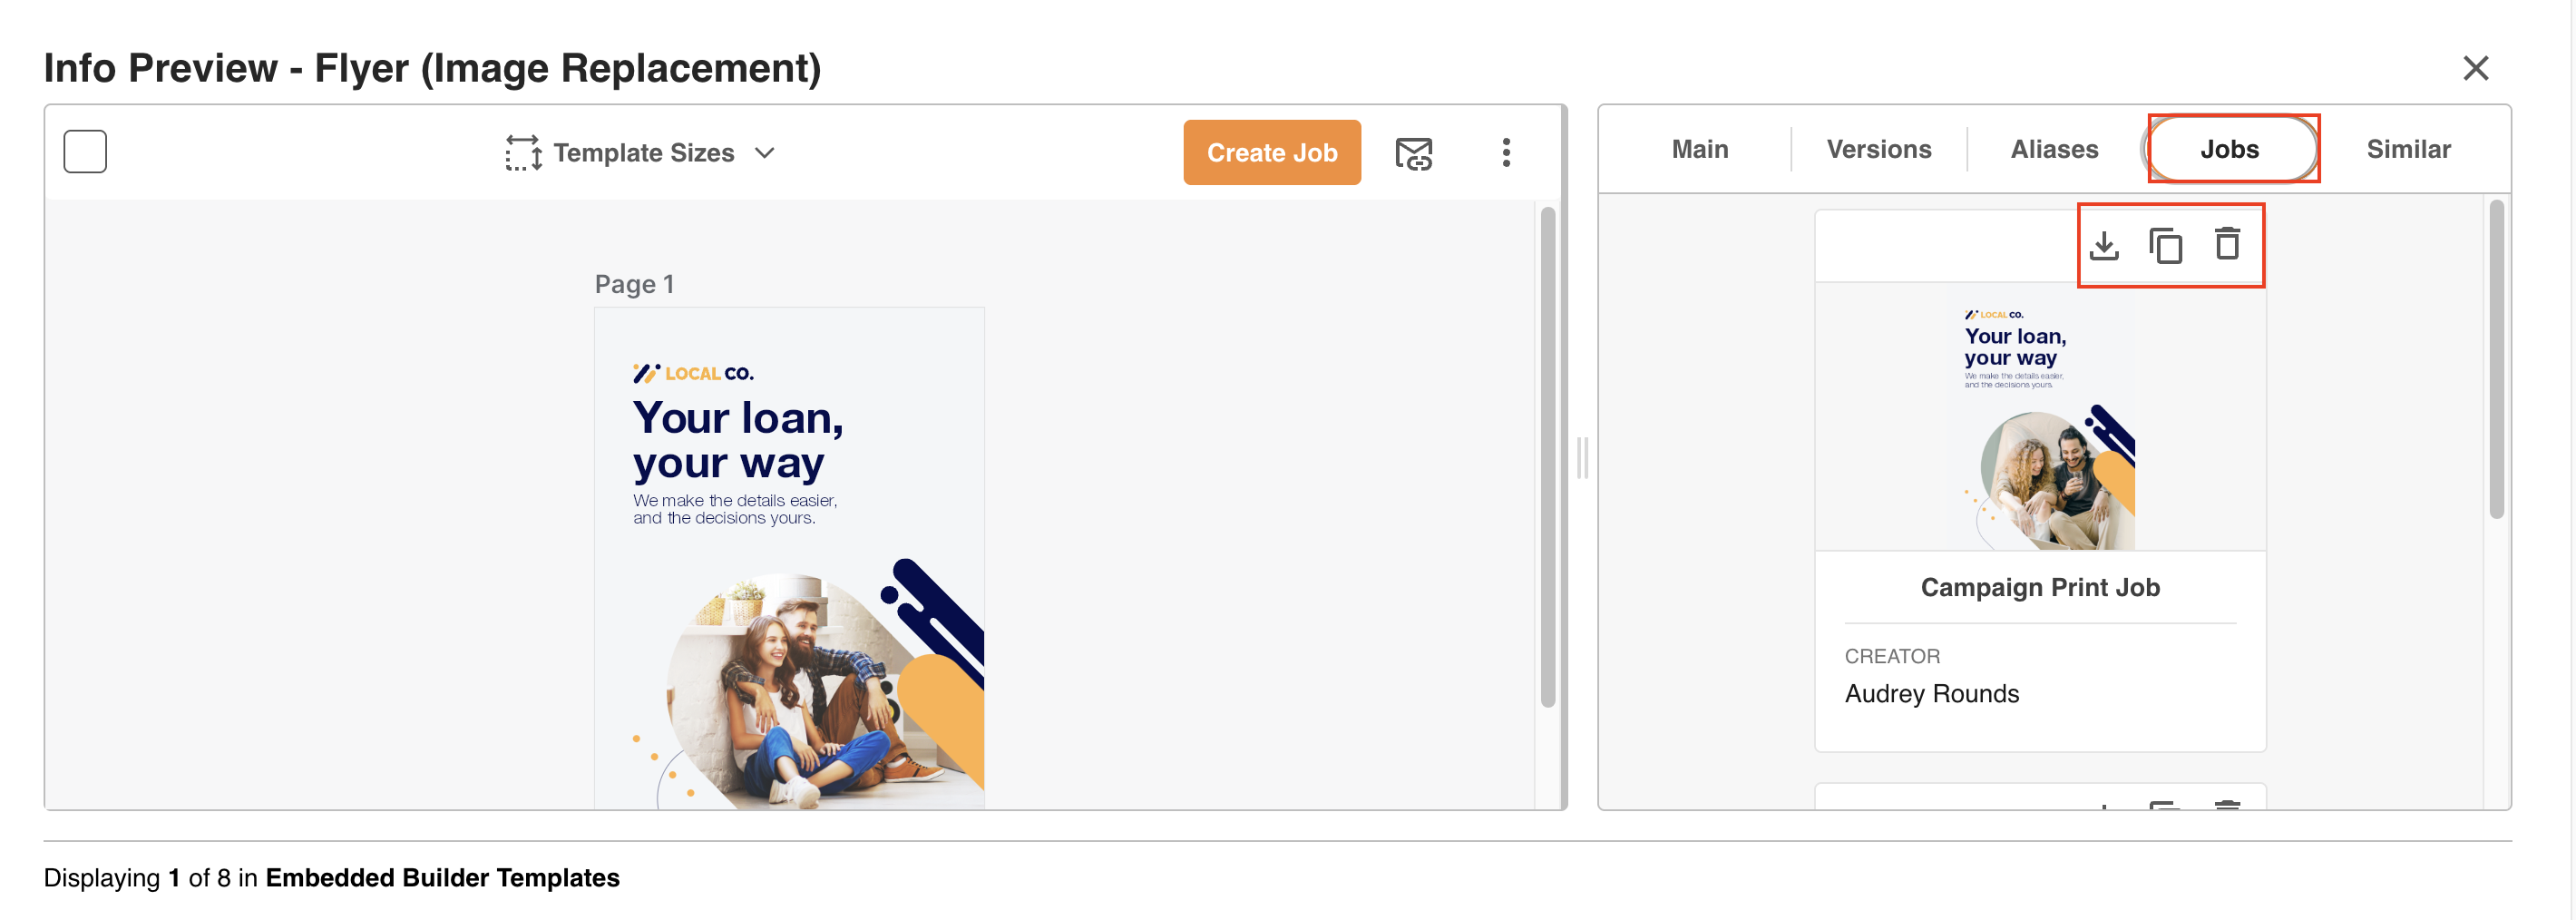
Then, click on the Jobs tab. You will see a list of all your previous completed jobs. From here, you can select the three icons on each job to either:
1. Download the job
2. Copy the job (this will open up a copy of the job in the Creative Editor, where you can make any additional adjustments and download. Consider copying jobs if it's easier to edit an existing job, versus starting a new job from scratch.)
3. Delete the job
Was this article helpful?
That’s Great!
Thank you for your feedback
Sorry! We couldn't be helpful
Thank you for your feedback
Feedback sent
We appreciate your effort and will try to fix the article