This article outlines how to configure a database form in the IntelligenceBank platform.
For more information about databases in general, review the About Databases article here.
Table of Contents
Create the Database
| 1Open Databases | Go to the Databases module. |
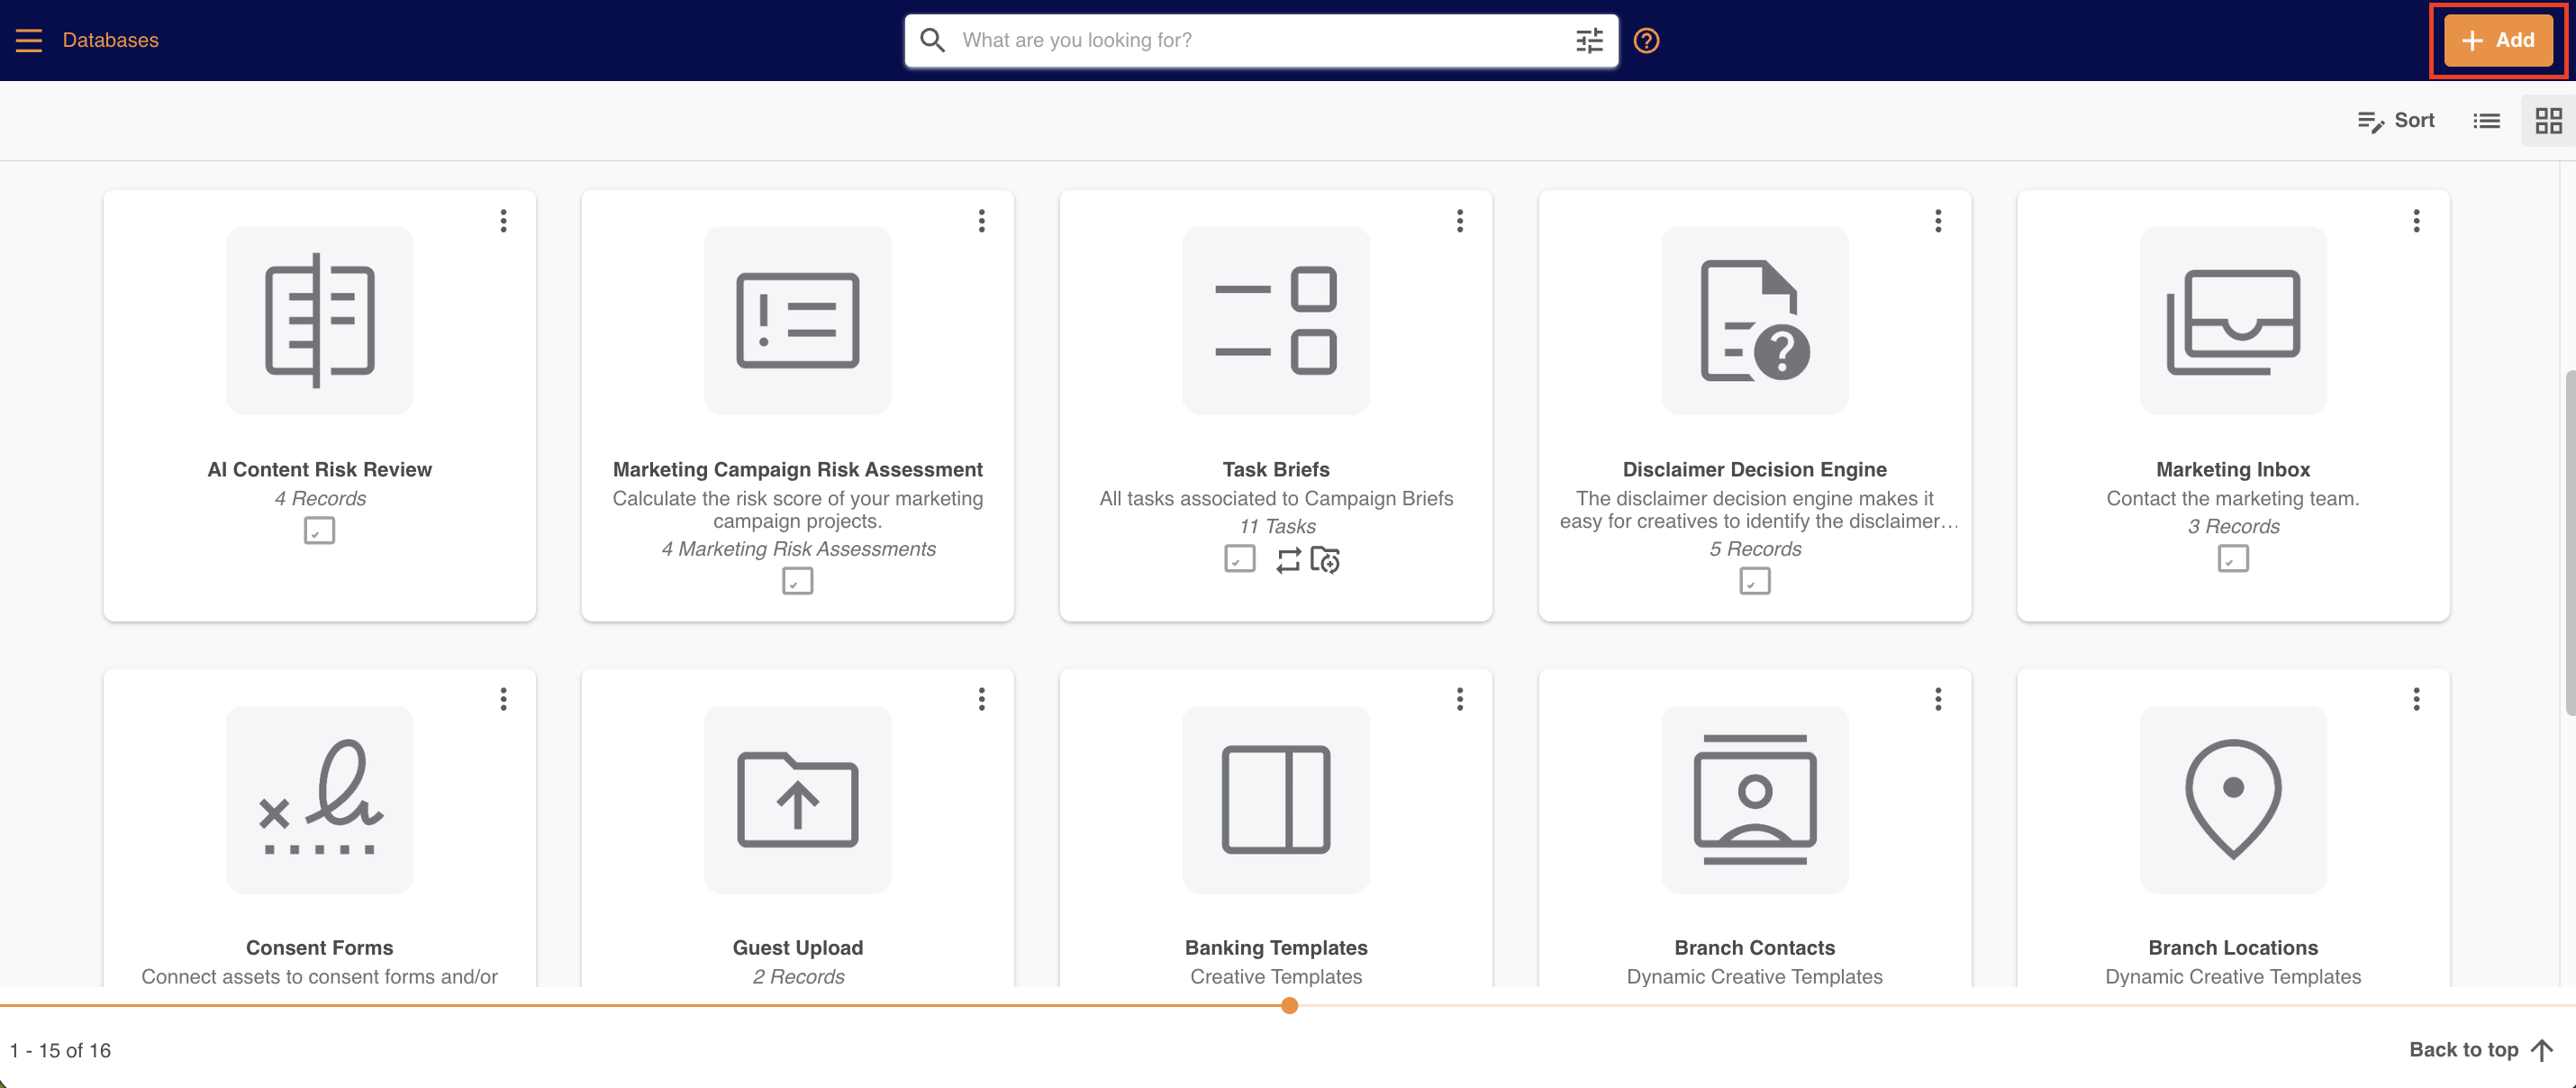
| 2Add a Database | Click the + Add button in the top right corner. The Database Settings page opens.
|
| 3Configure settings | Name your database, select the Submission Type and Default Order, and set any other database settings on the page as needed. |
| 4Save | When you're ready, click Save and Create Form. This takes you to the Form Builder. |
Build Your Form
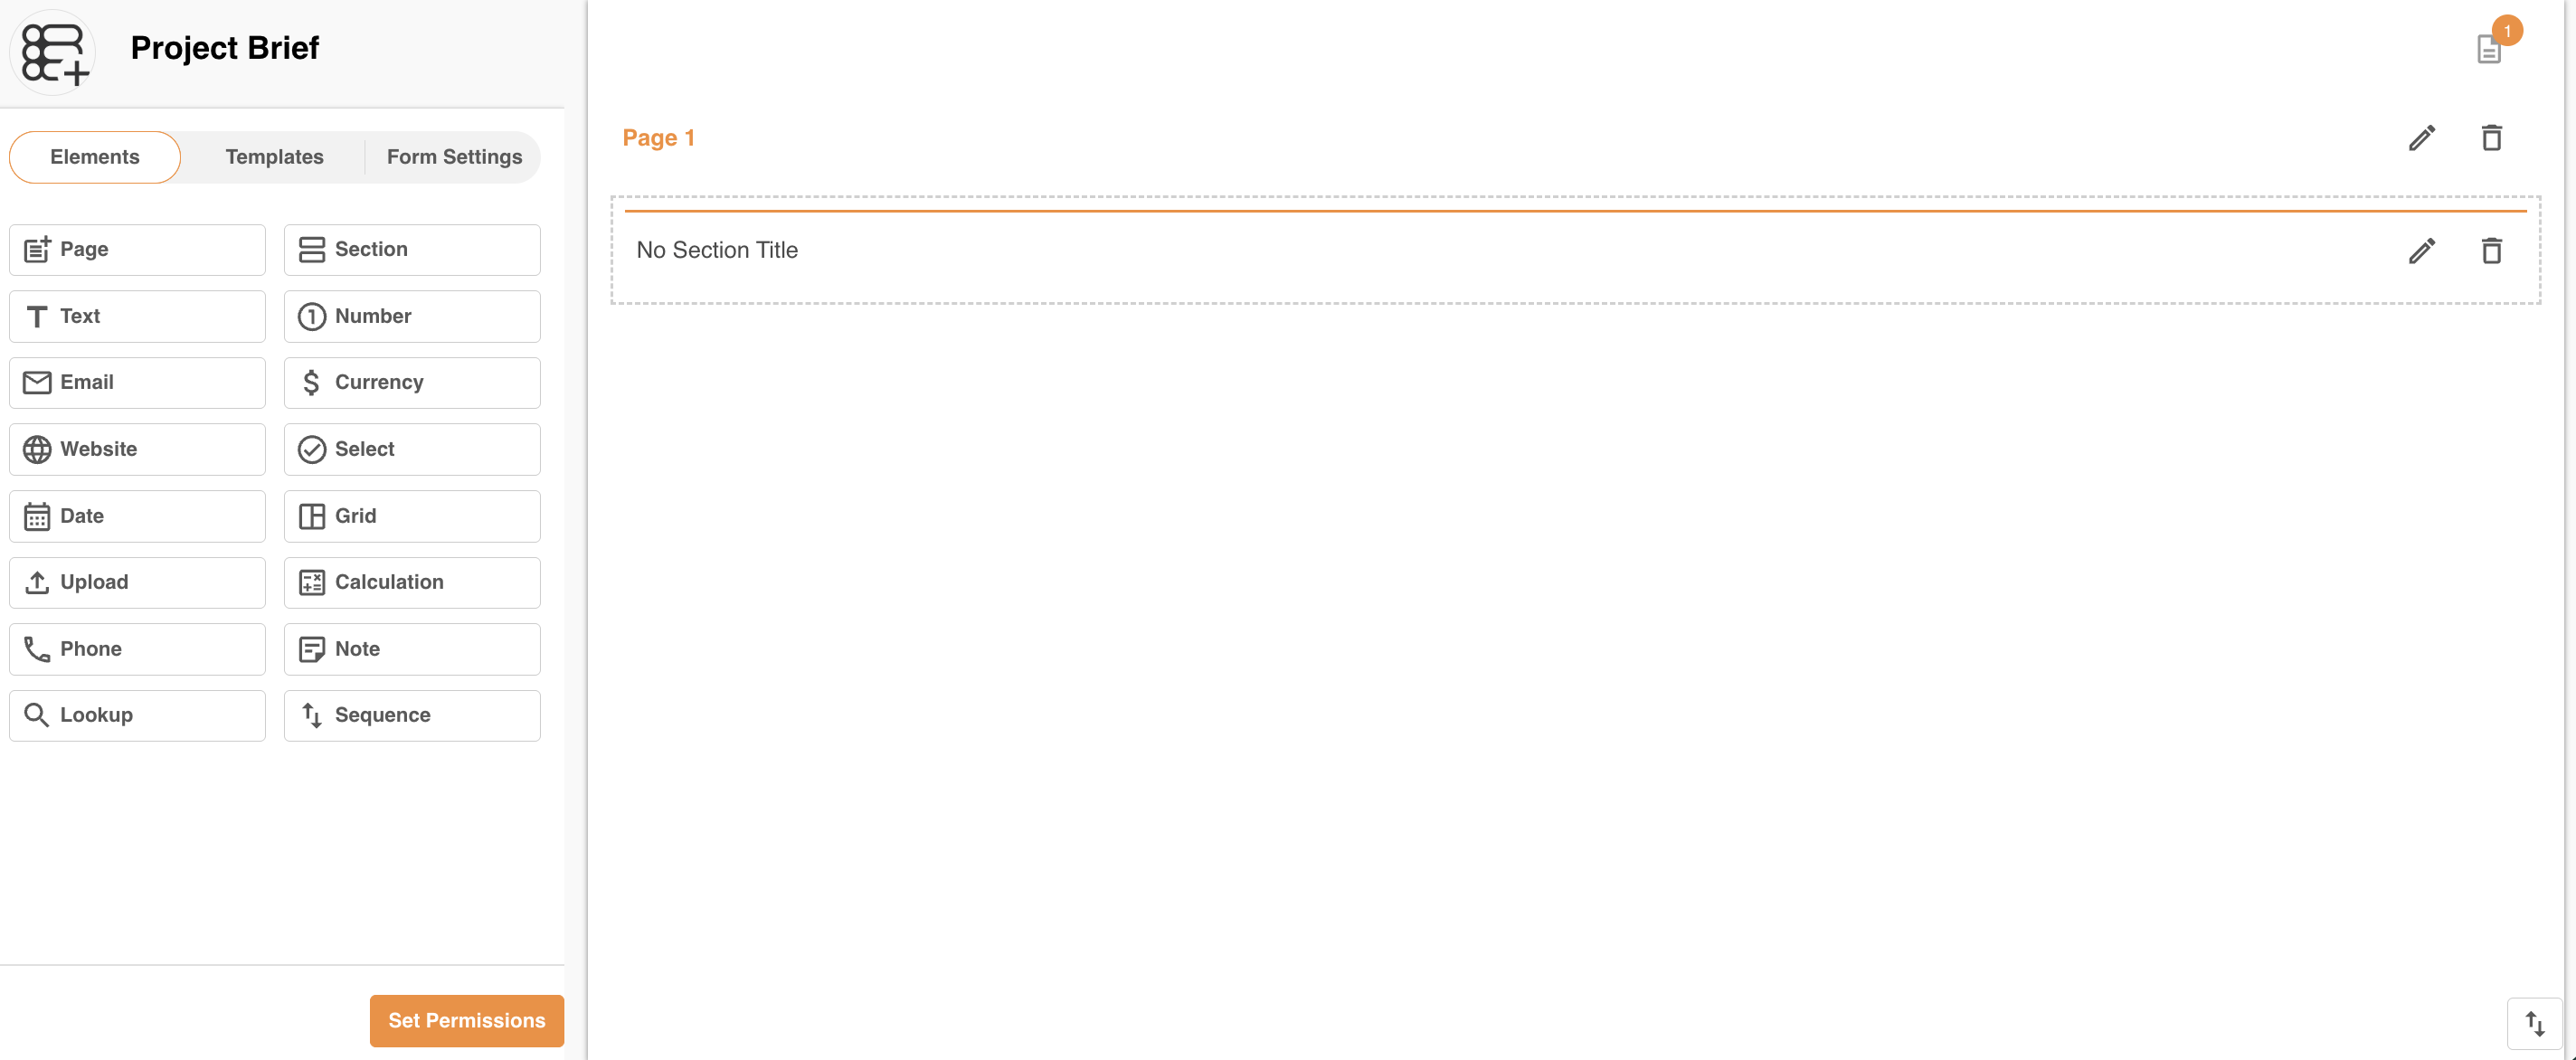
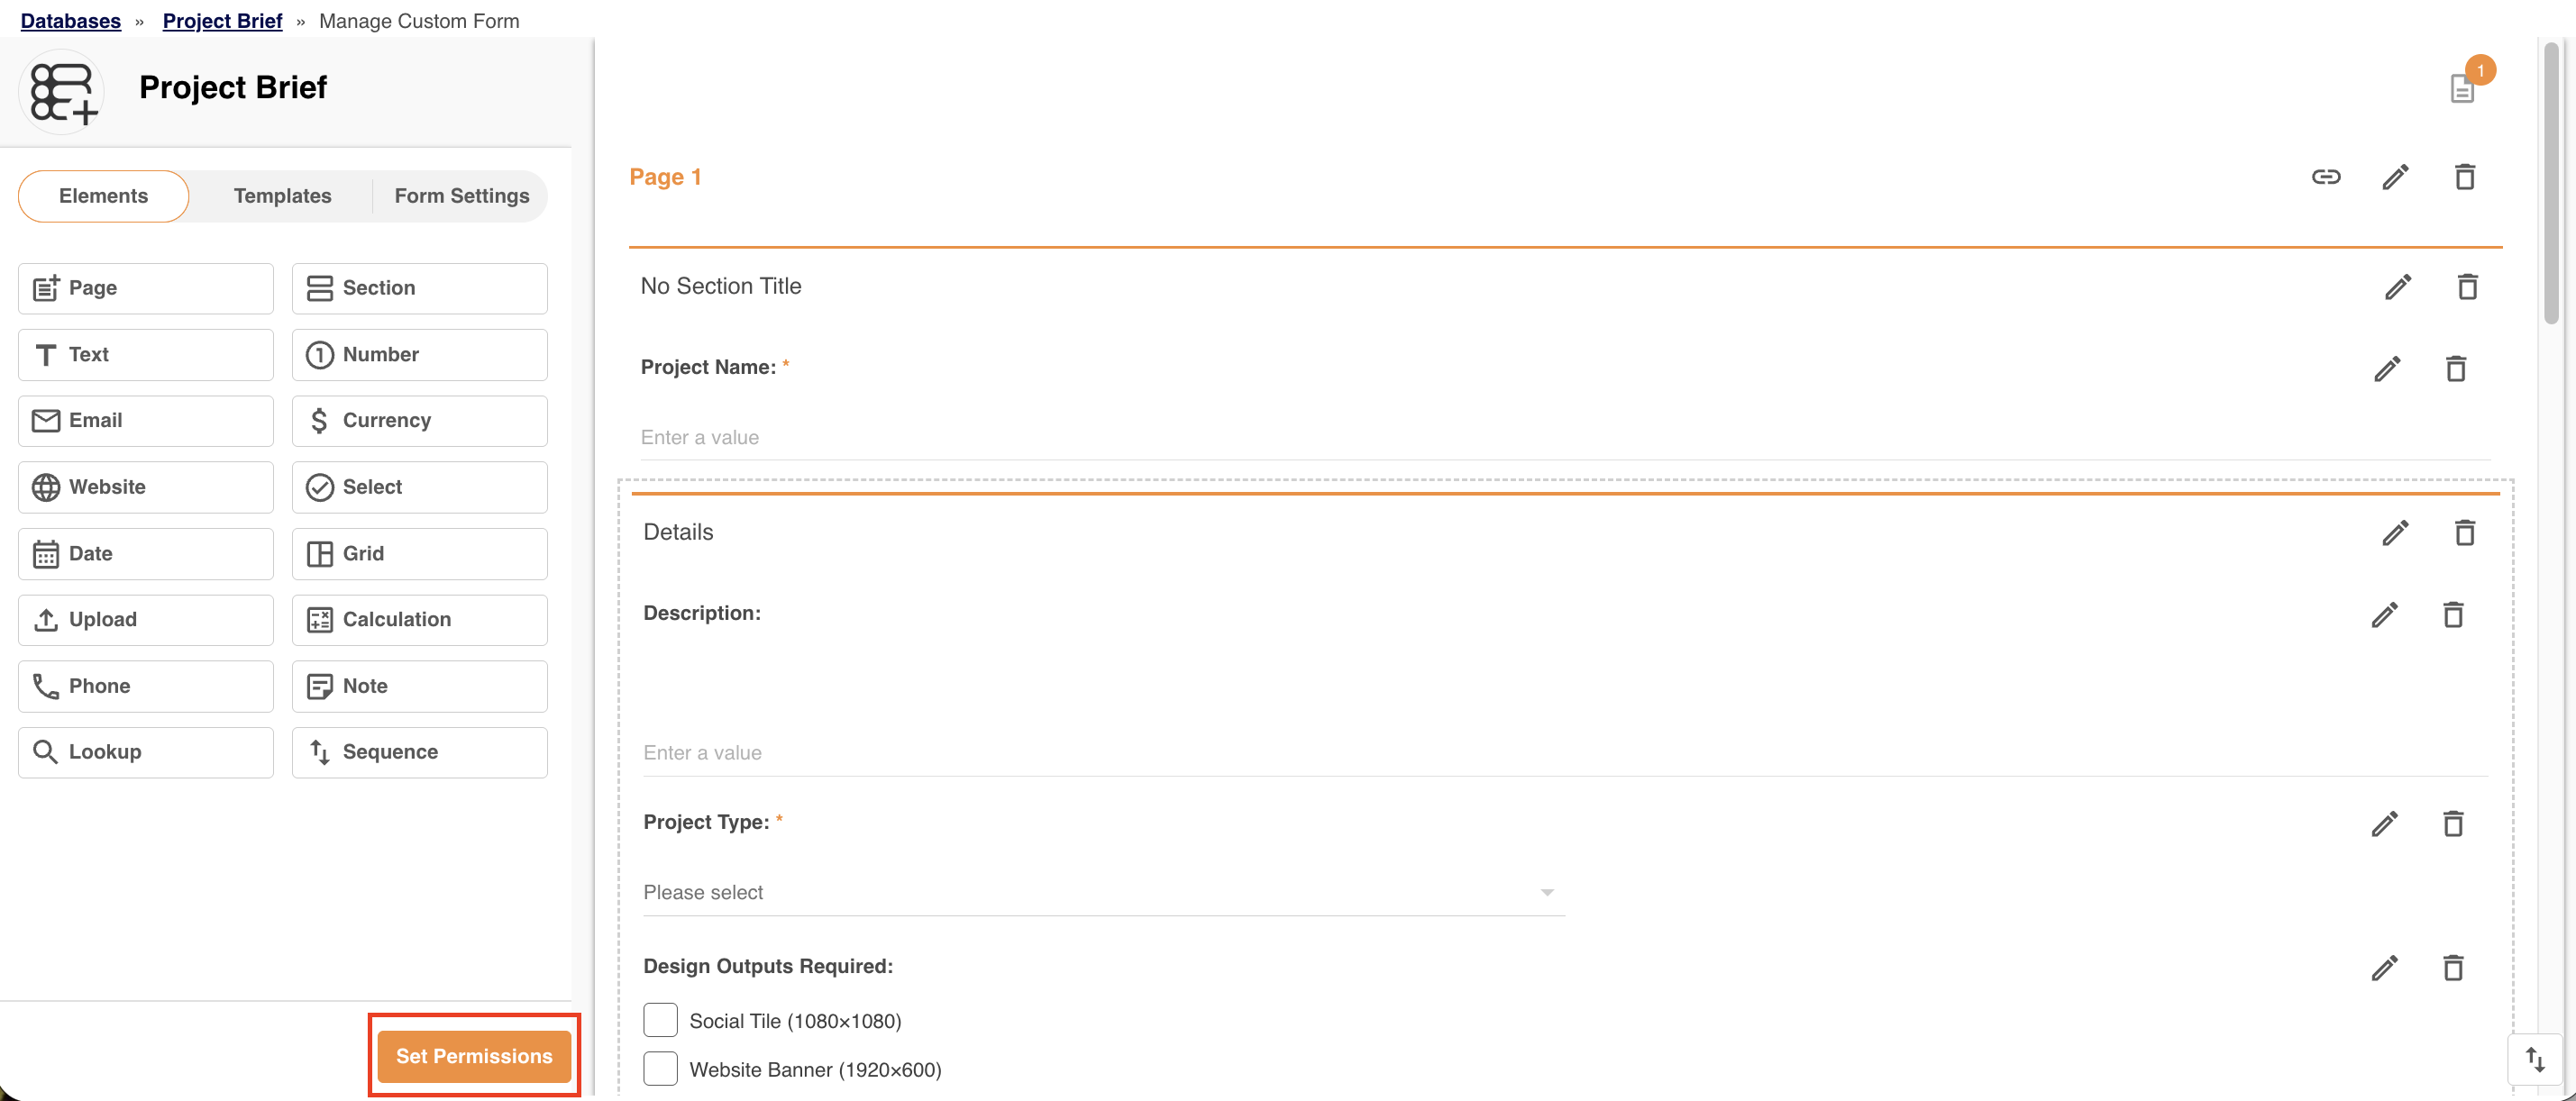
In the Form Builder, the left side lists the elements (field types) you can add to your database form. These would be the fields users see and fill out when they create records (or briefs, tasks, projects, etc.).
Available Elements
| Element | Use It To |
|---|---|
| Page | Add more pages to the form. |
| Section | Break a page into sections, so related fields are grouped together. |
| Text | Users can type in open text. |
| Number, Email, Currency, Website, Phone | These field options will be validated for their specific type of value. For example, a phone number field will ensure that users provide their information in a phone number format. |
| Select | Let users choose from a list of pre-defined options in either a drop-down, radio button, or checklist format. |
| Date | Capture a date within the form. |
| Grid | Add a grid of values to the record. |
| Upload | Attach files or URLs. See Upload Fields. |
| Calculation | Calculate a value from other fields. |
| Note | Show information or instructions on the form. |
| Lookup | Select users, groups, resources, or records from other databases. See Lookup Fields. |
| Sequence ID | Give each record an automatic ID number. See automatic ID numbers. |
Adding a Field
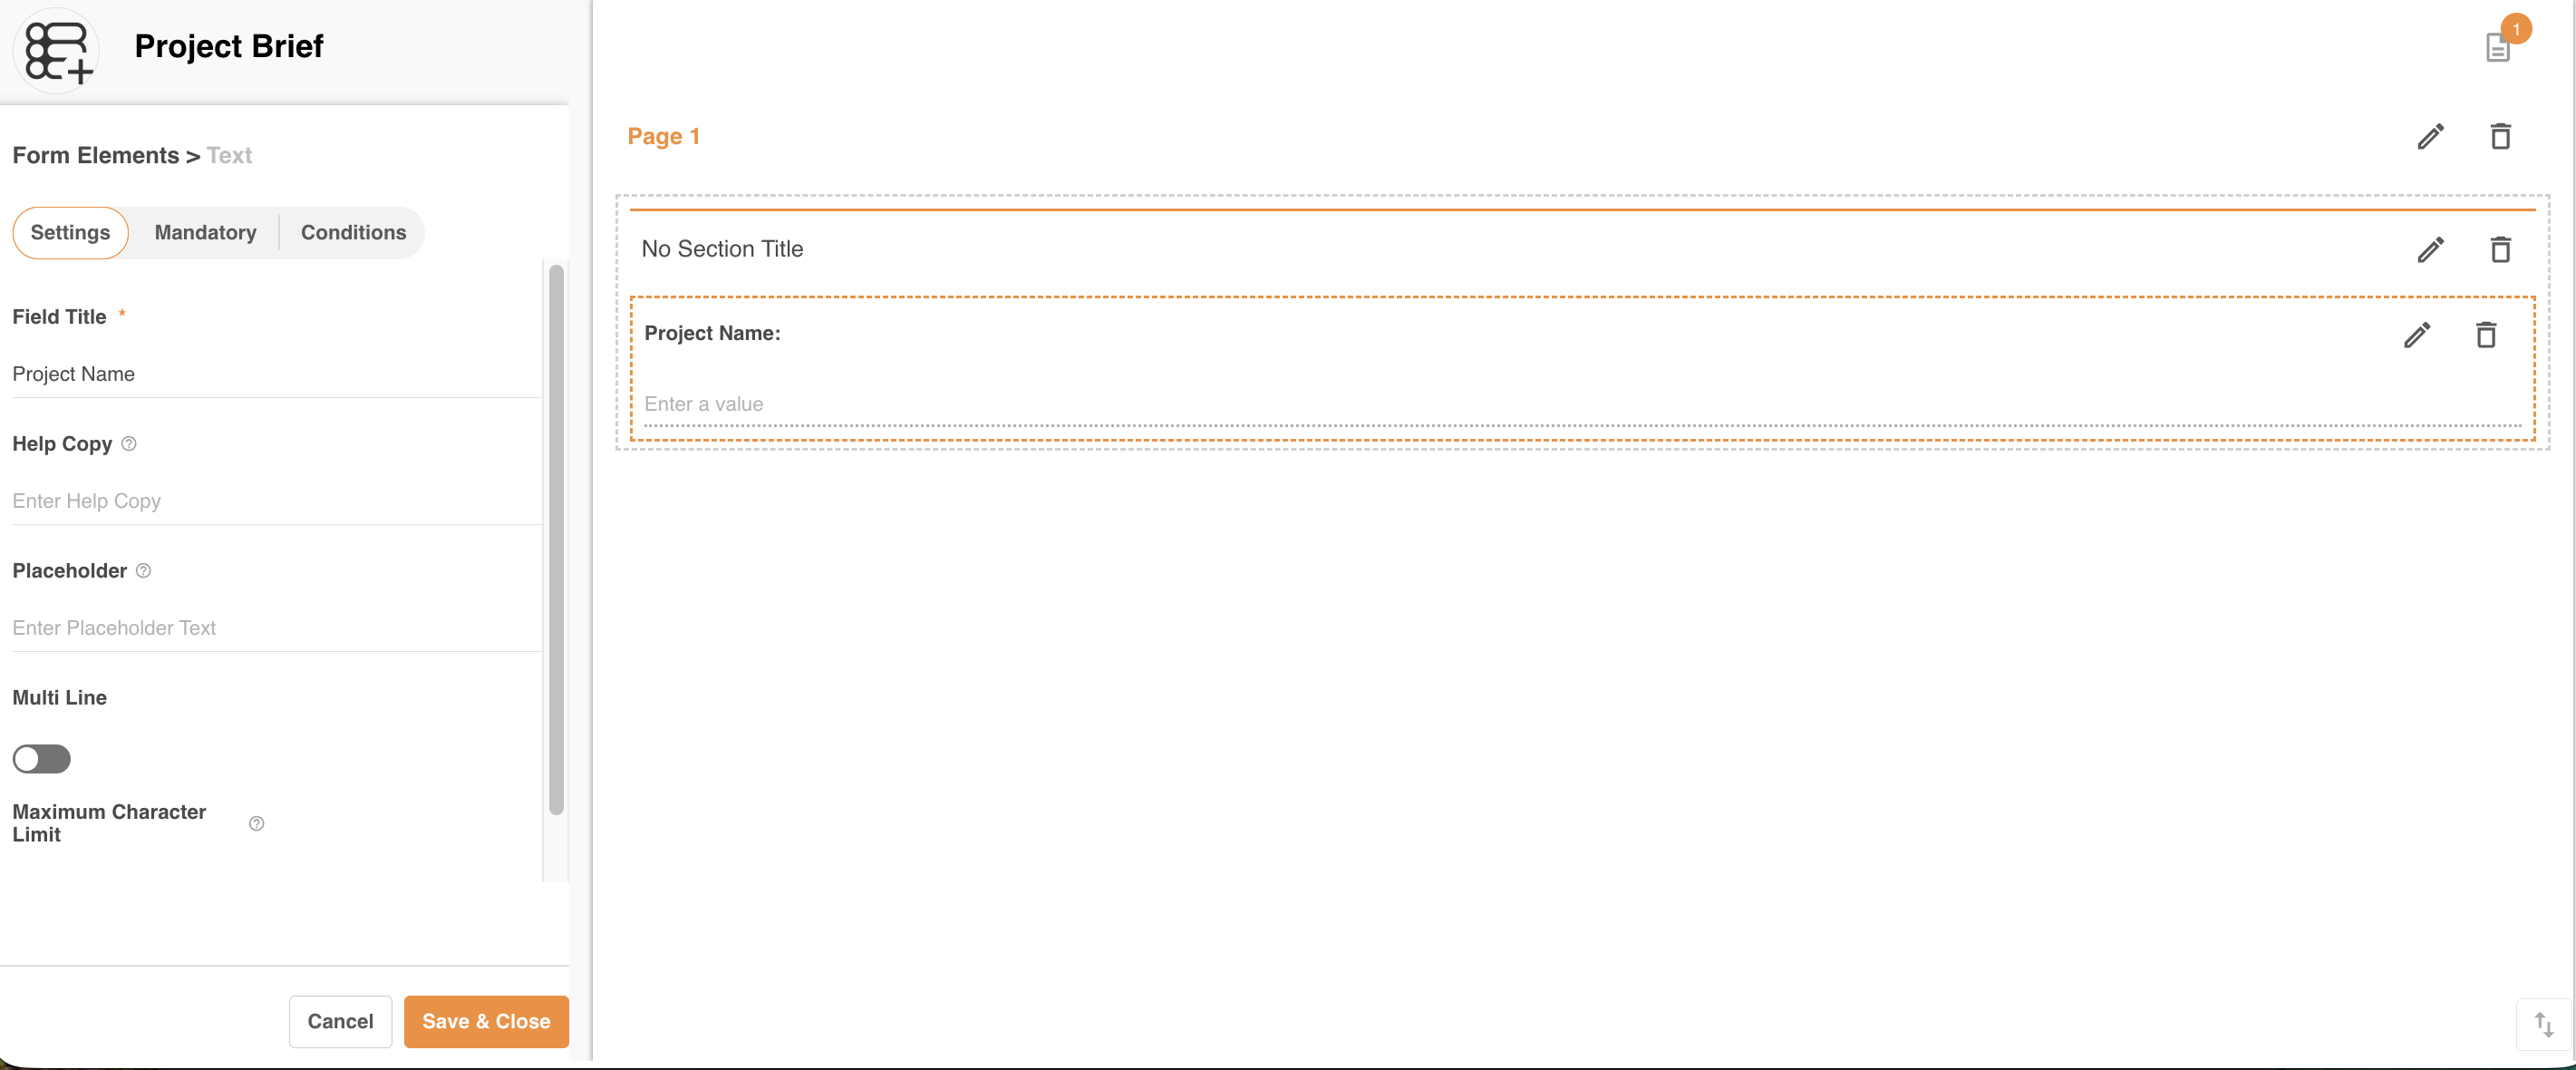
- Select an element from the list.
- Enter a field title, and fill in any settings specific to that field type.
- Click Save & Close. The field is added to the form, shown on the right side of the Form Builder.
Mandatory Fields
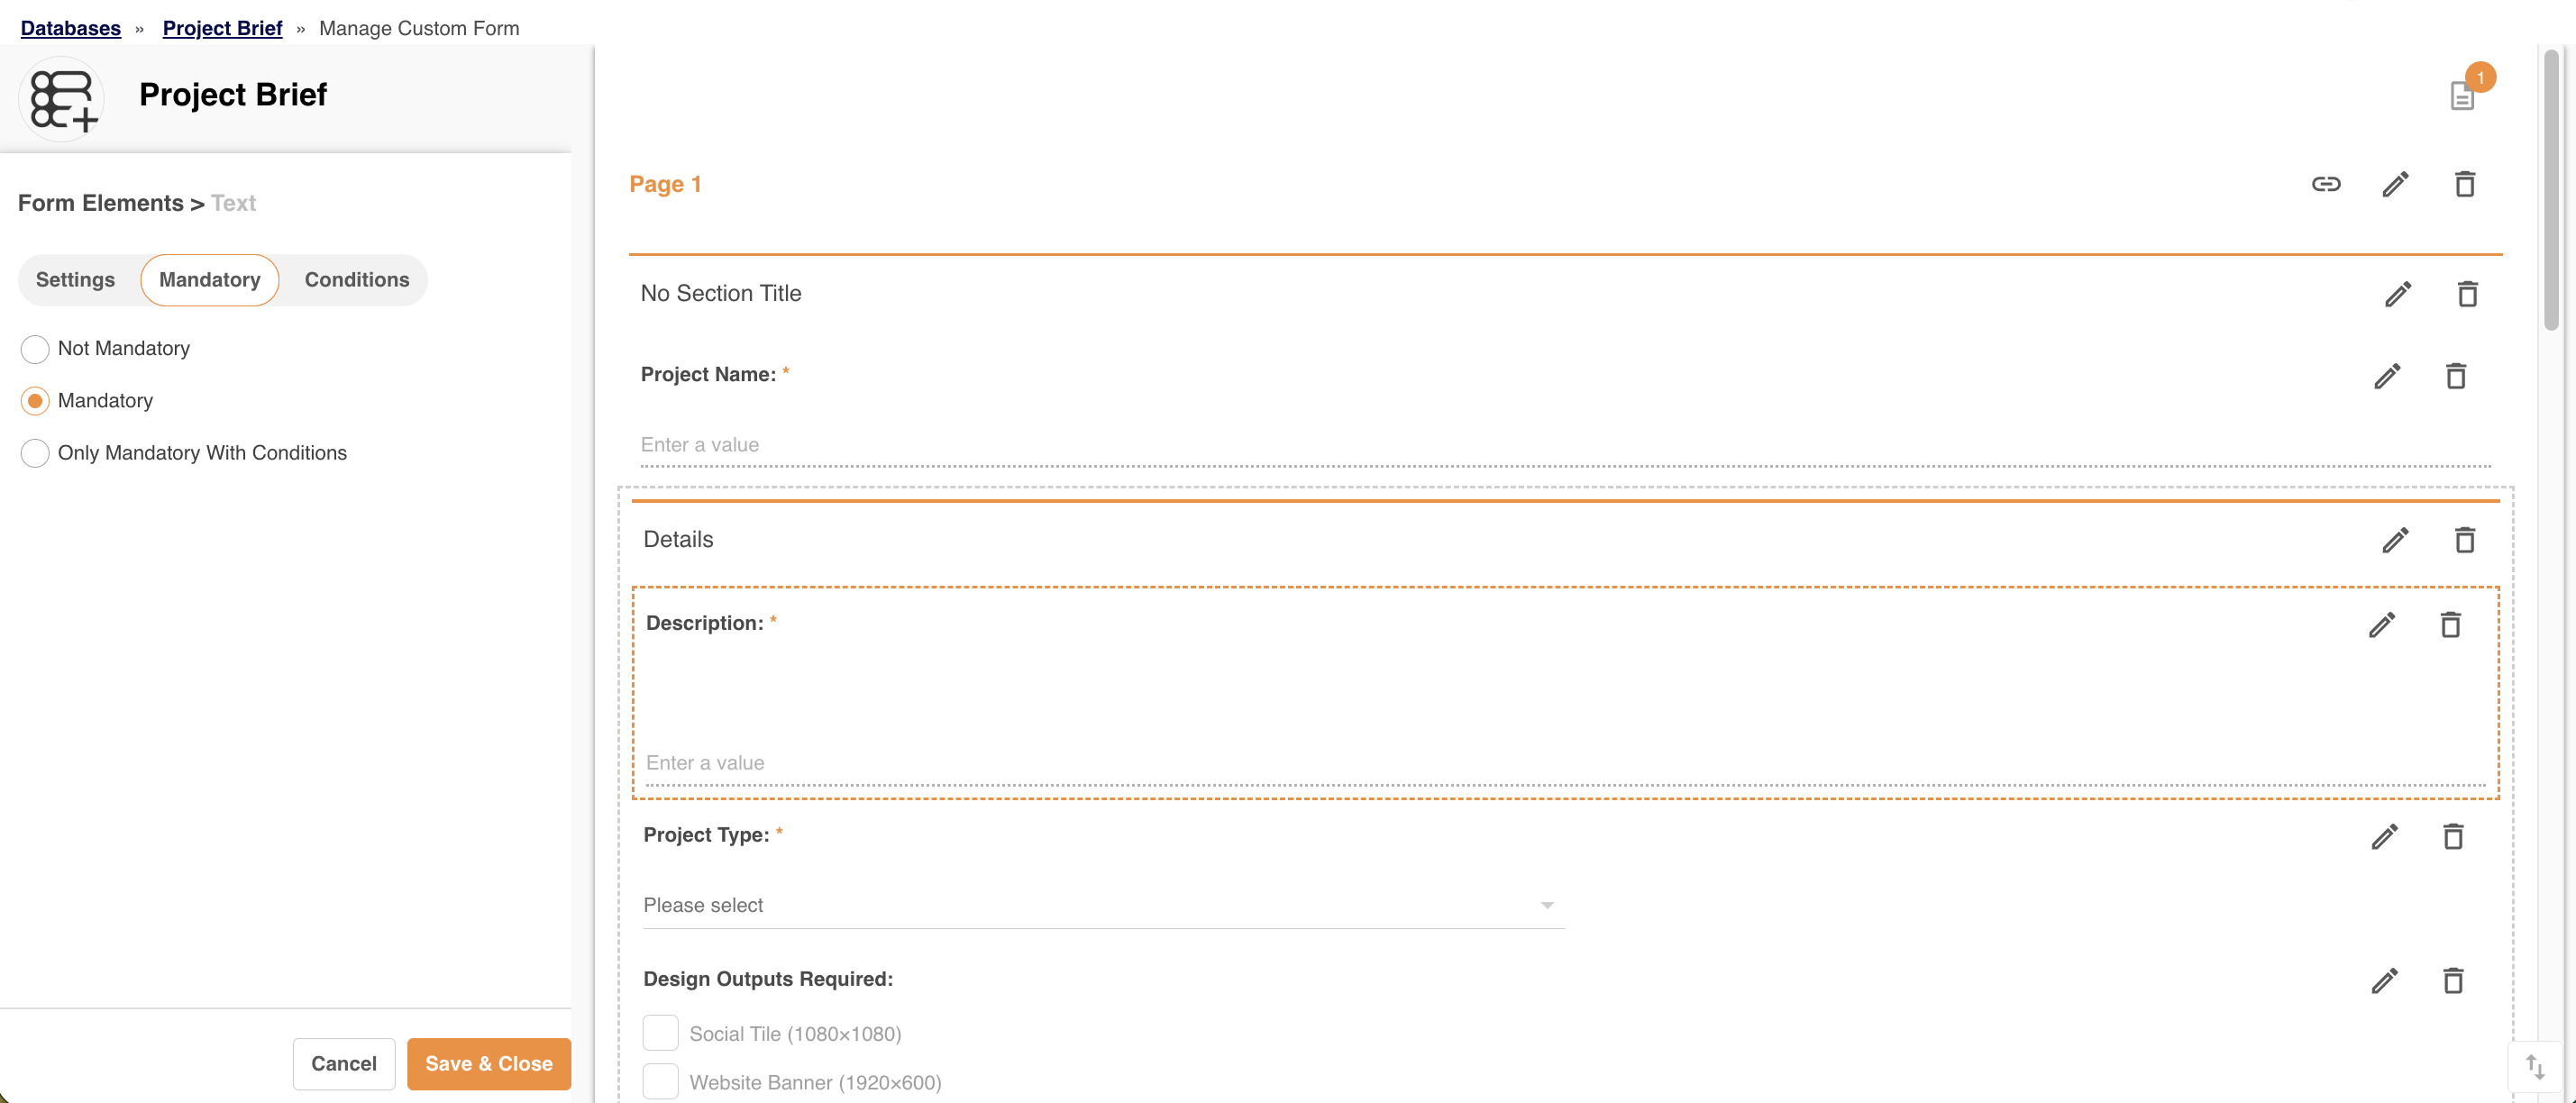
You can make many field types mandatory, so that users will not be able to save and publish a record without filling in those fields. Click the Mandatory tab within a field and select Not Mandatory, Mandatory, or Only Mandatory with Conditions (which lets you determine conditions when this particular field should be mandatory, based on other field selections in the form).
Any field marked as Mandatory will display an asterisk next to its field name in the Form Builder and on the form when users fill it out.
Any field that is Mandatory with Conditions will display an asterisk and a cross icon next to its field name in the Form Builder only. Users filling out a form will see the asterisk marking it mandatory only if the condition is satisfied.
Conditional Fields
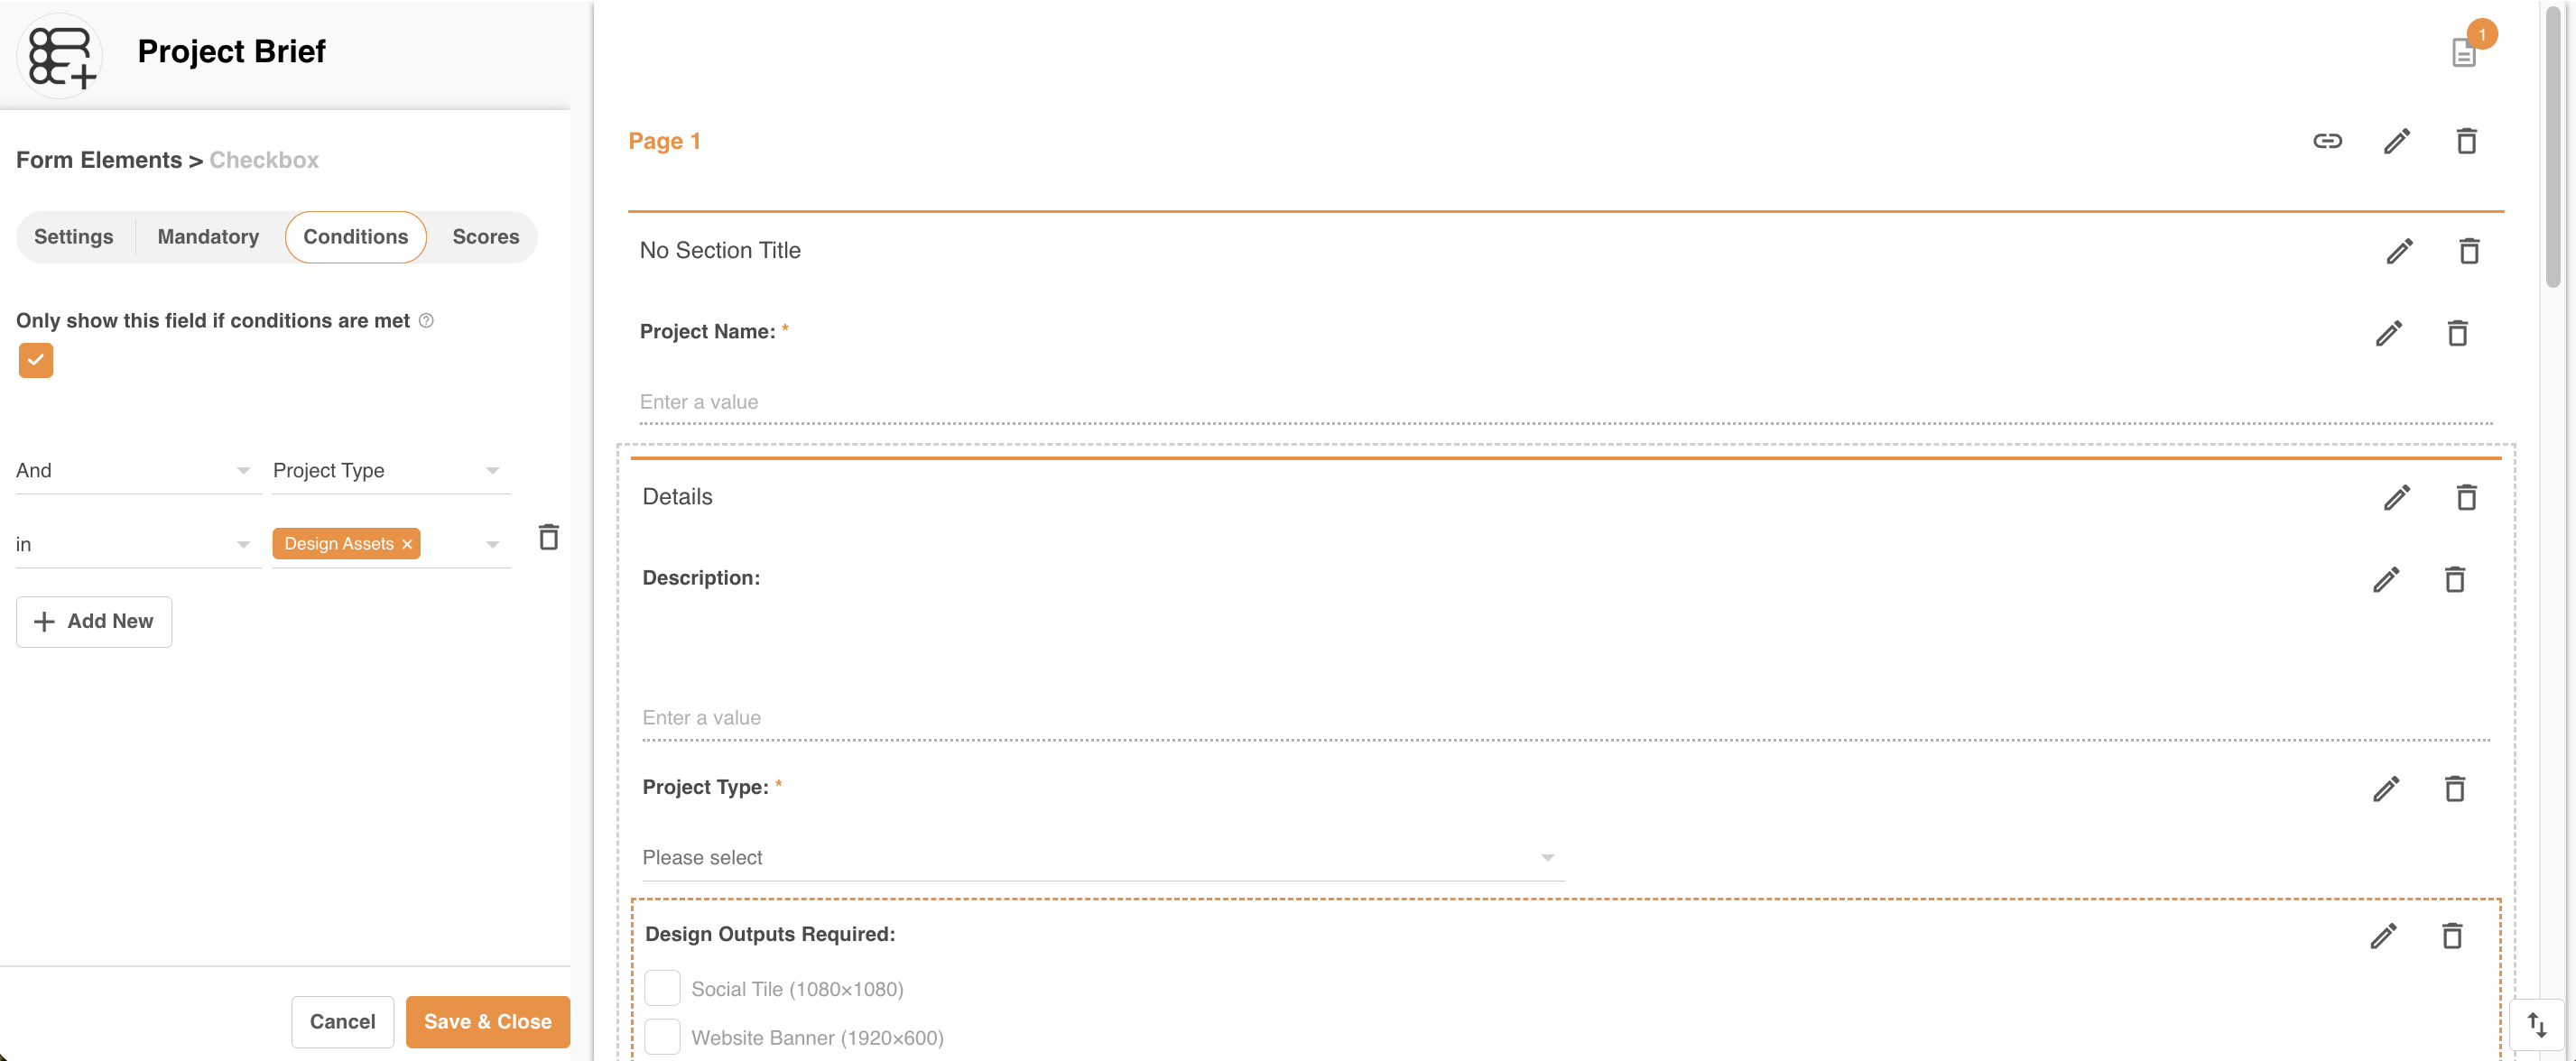
Many field types can also be made conditional, meaning they will only appear on the record form if other fields have particular values. To learn more about how to set up conditional fields, review this article here.
Form Settings
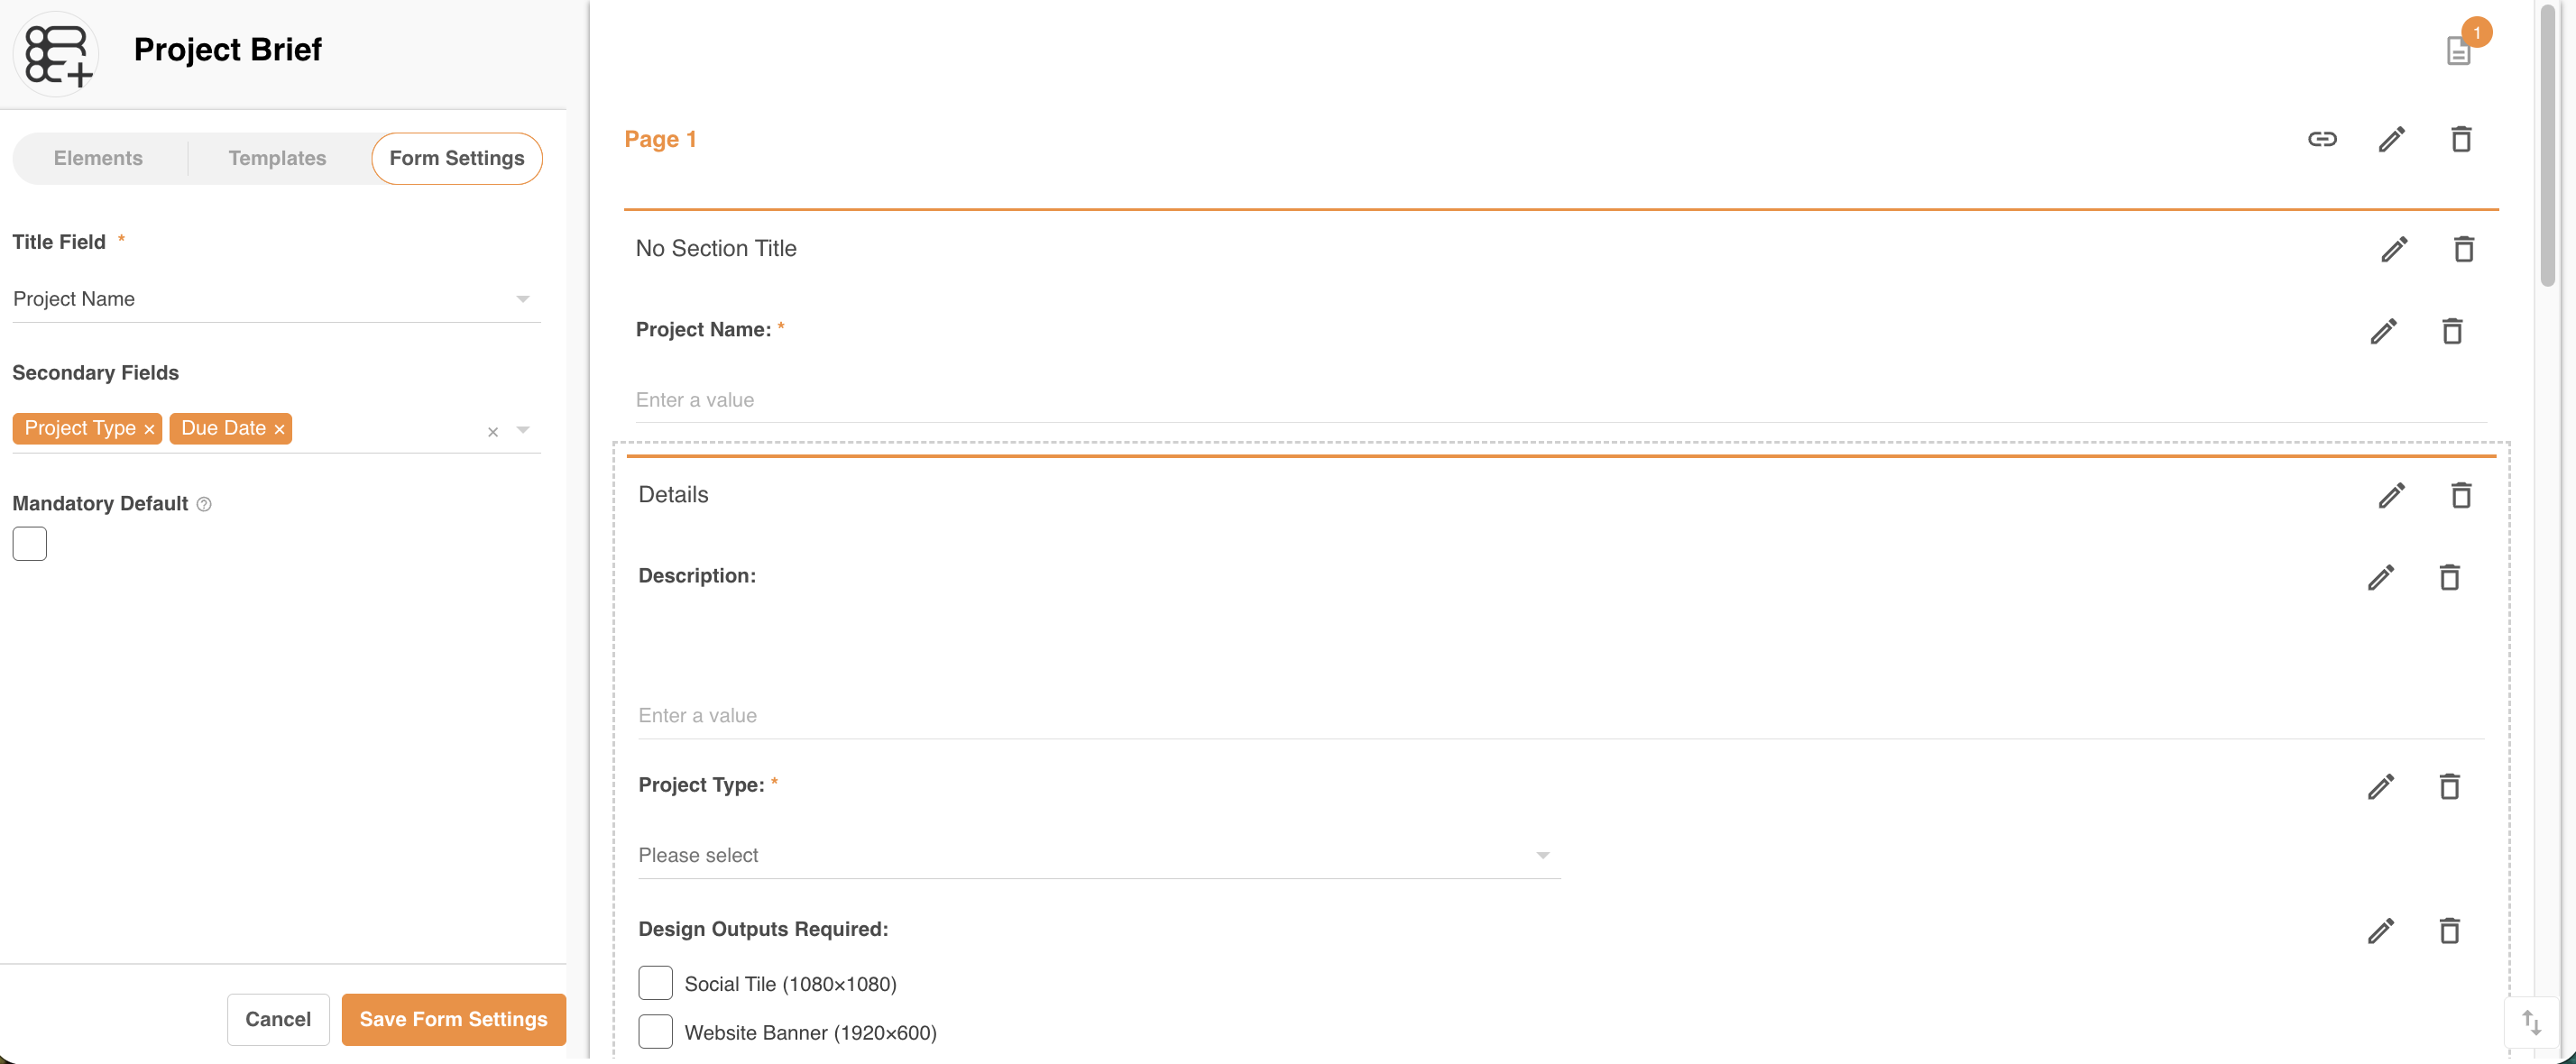
On the Form Settings tab, you can choose the Title field, which is the field shown most prominently when records are viewed, and any Secondary fields.
Reordering Fields
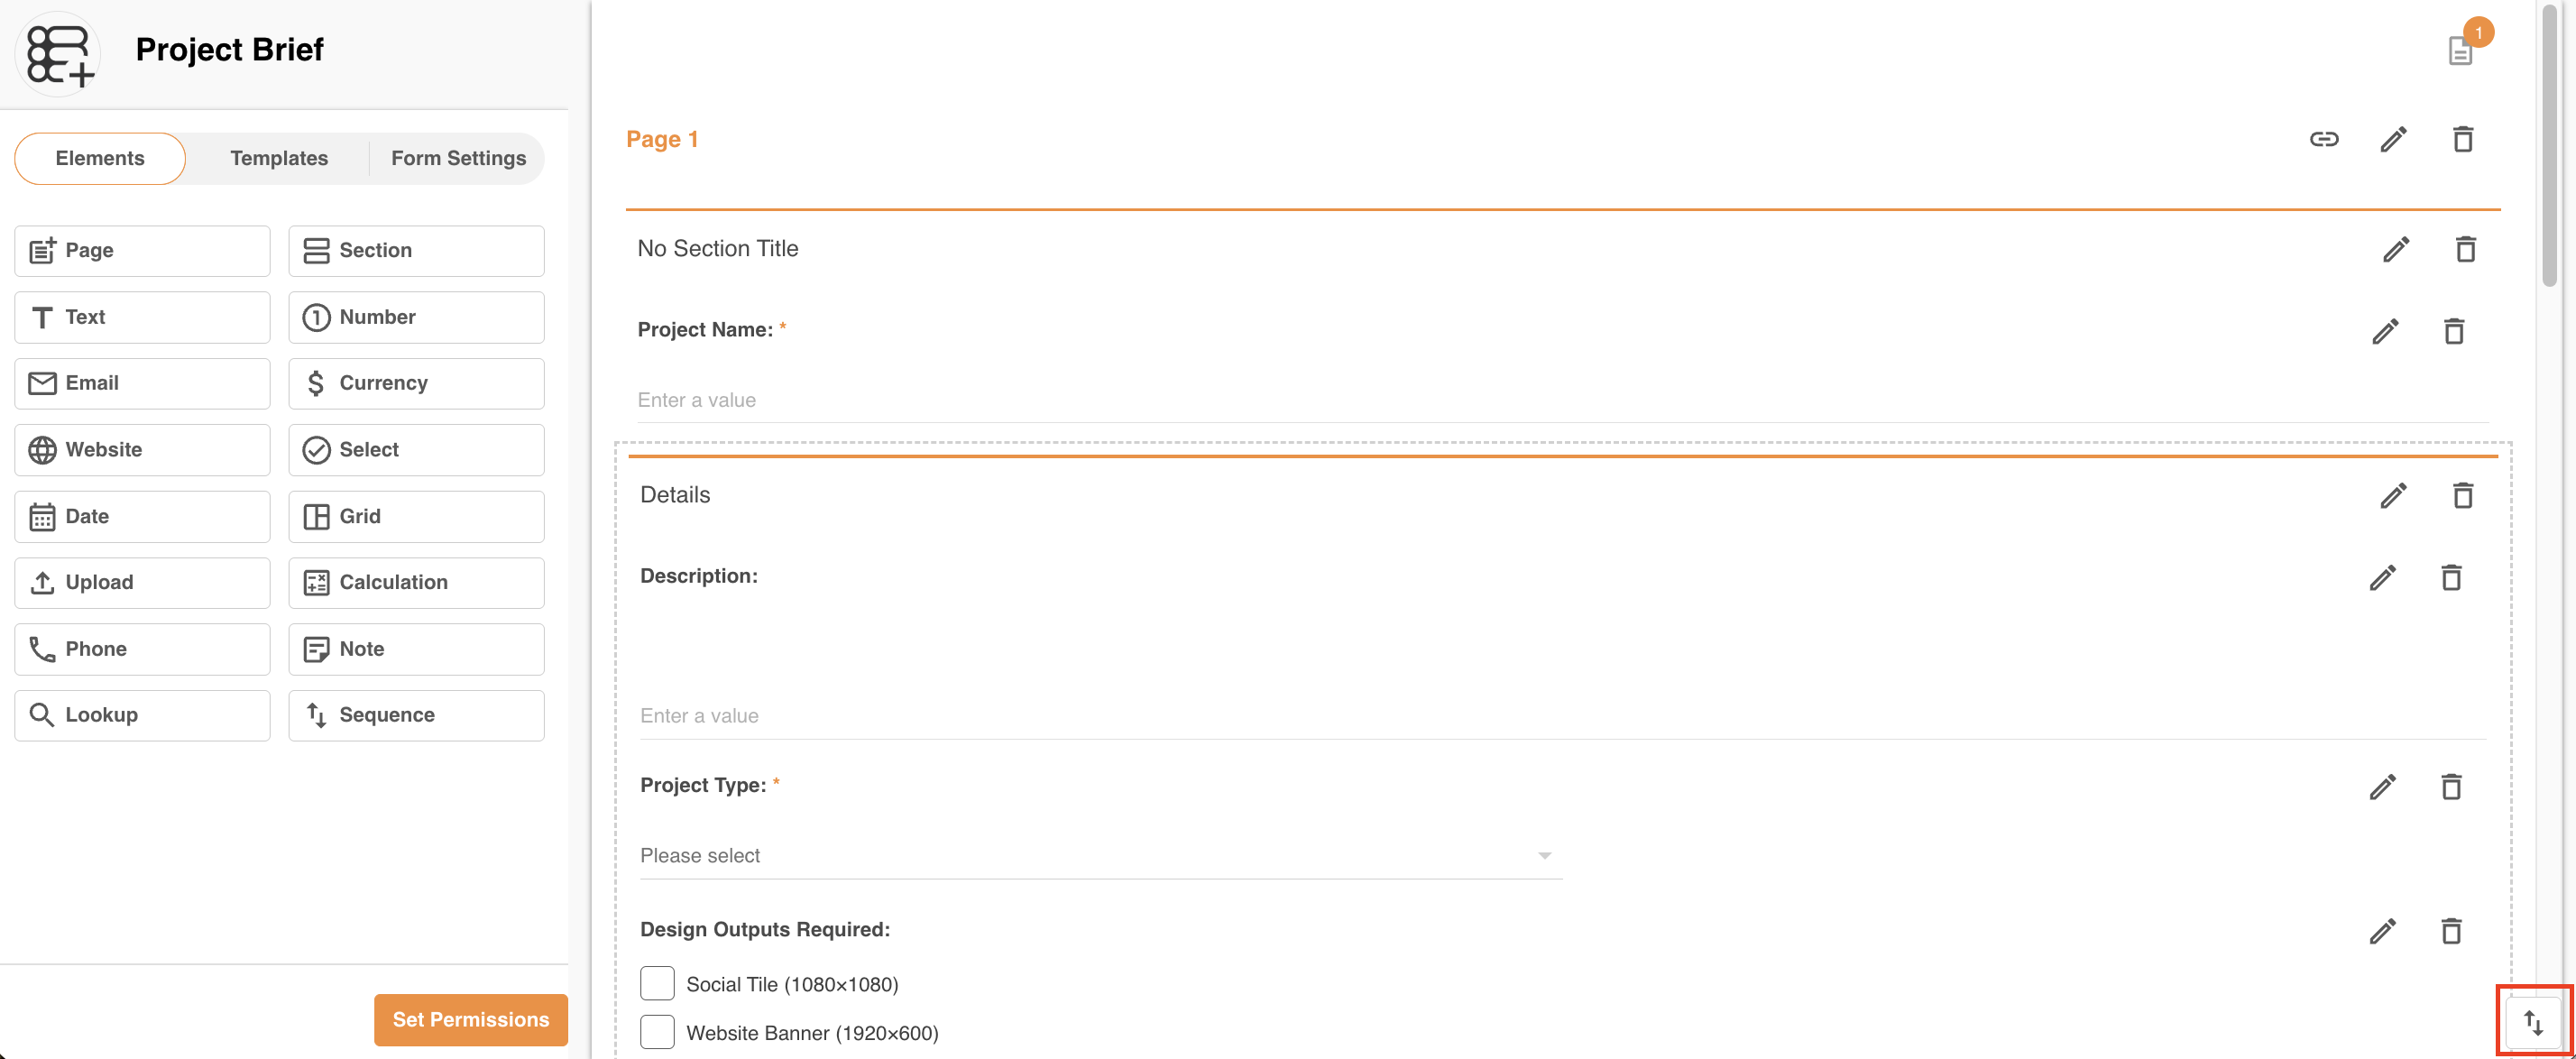
To change the order of your fields, click the arrows icon in the bottom right corner of the screen. A list of every field in the database will appear in a window. Click and hold a field, then drag and drop it into place. Then, select Save. The fields will then reorder in the Form Builder.
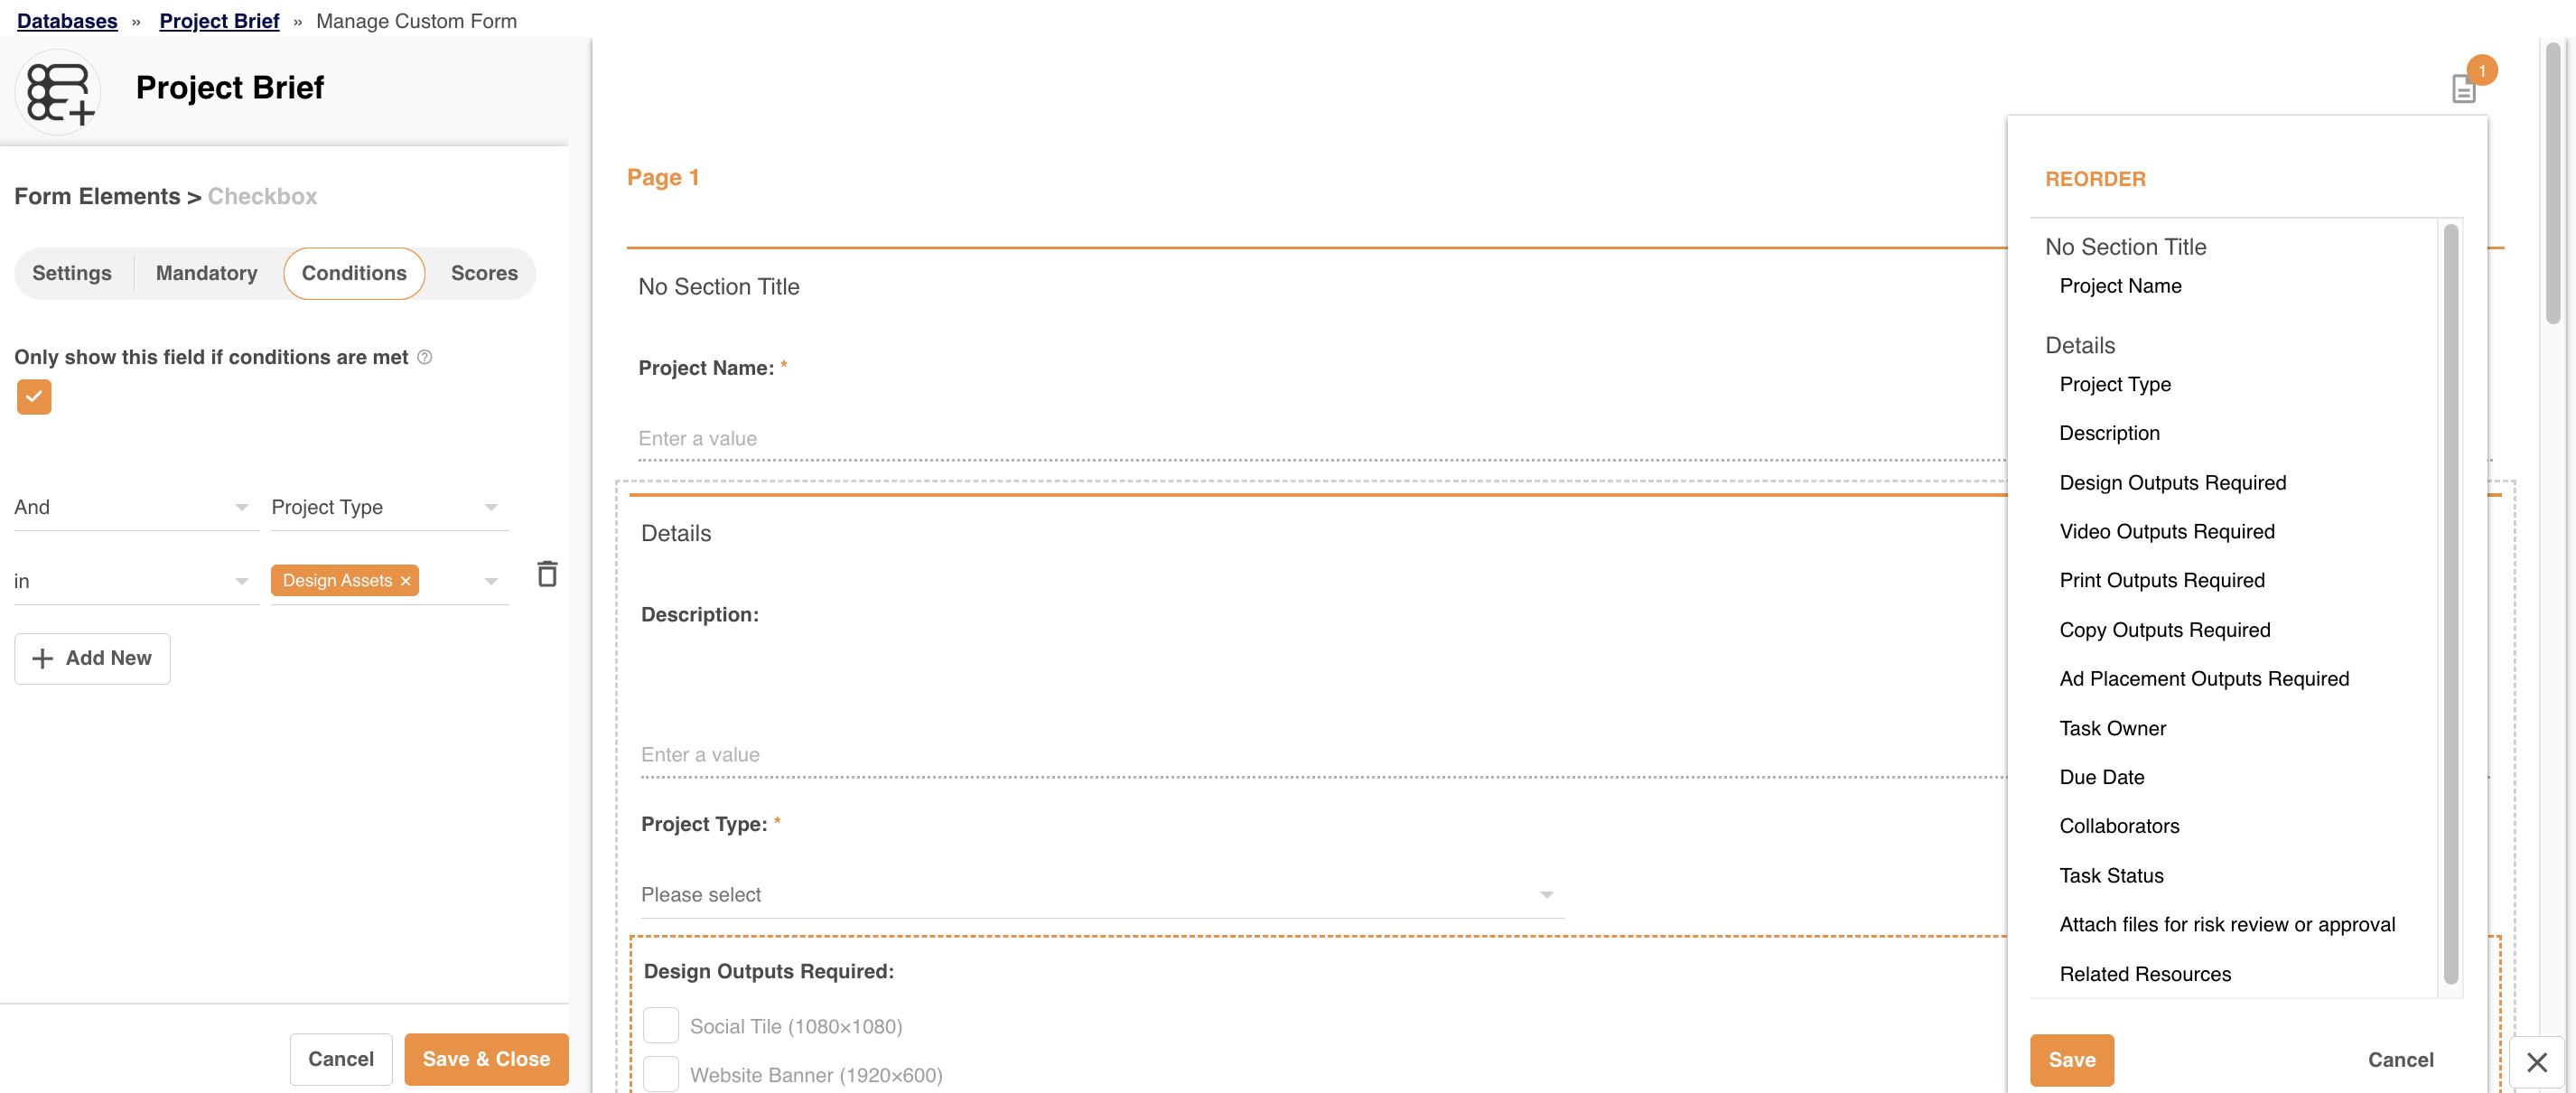
You can also reorder sections by selecting the section name and dragging and dropping it in the same fashion outlined above. Doing so will move all fields within that section (as well as the section itself) to whatever position you've reordered it in.
Set Permissions
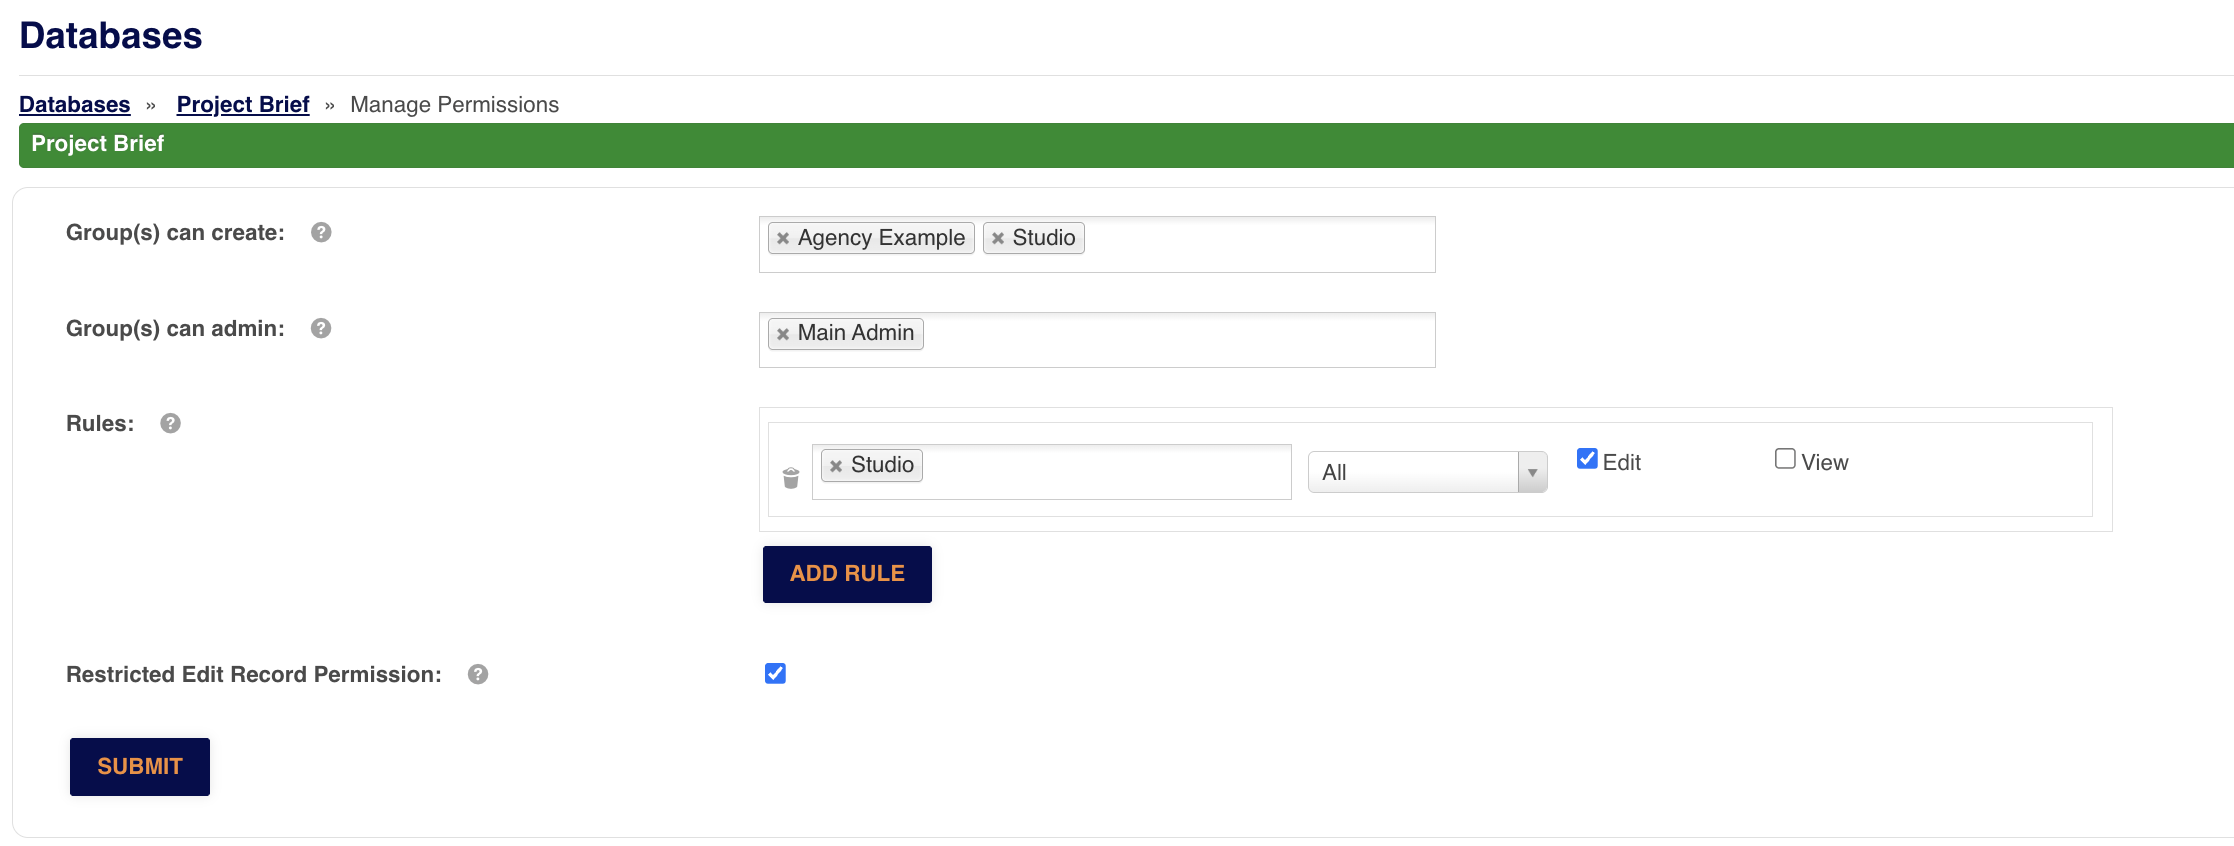
You can set permissions on the database directly from the Form Builder while you're creating it. Click Set Permissions to choose which groups have Create or Admin permission on records within this database. You can also add rules for which groups can Edit or View all or specific records.
This is also where you'll find the Restricted Edit Record Permission checkbox. When enabled, users with Edit permission can't delete records or manage permissions on them.
When you're ready, select Submit to save the configured permissions.
Was this article helpful?
That’s Great!
Thank you for your feedback
Sorry! We couldn't be helpful
Thank you for your feedback
Feedback sent
We appreciate your effort and will try to fix the article