This article provides a detailed overview of IntelligenceBank's Markup Comments and Annotations feature. For a more general overview, please reference this article.
Table of Contents
Accessing Markup Comments
The Markup Comments page is accessible in your Approvals List area or within links sent through email alerts that users involved in the request receive.
The following user roles are able to participate in Markup Comments for any given/supported pending approval request:
- Reviewer(s) - for staged approvals, only reviewers on an asset's current stage will be able to participate
- Requester
- Approval Admin(s)
- Main Admin(s)
- Collaborators
To access Markup Comments from the Approvals List area of the platform, follow the below steps:
- Navigate to the desired asset's request.
- Click the Review Request / Request Details action or the Markup Comments action.
- At the top right of the page, click the Markup tab.

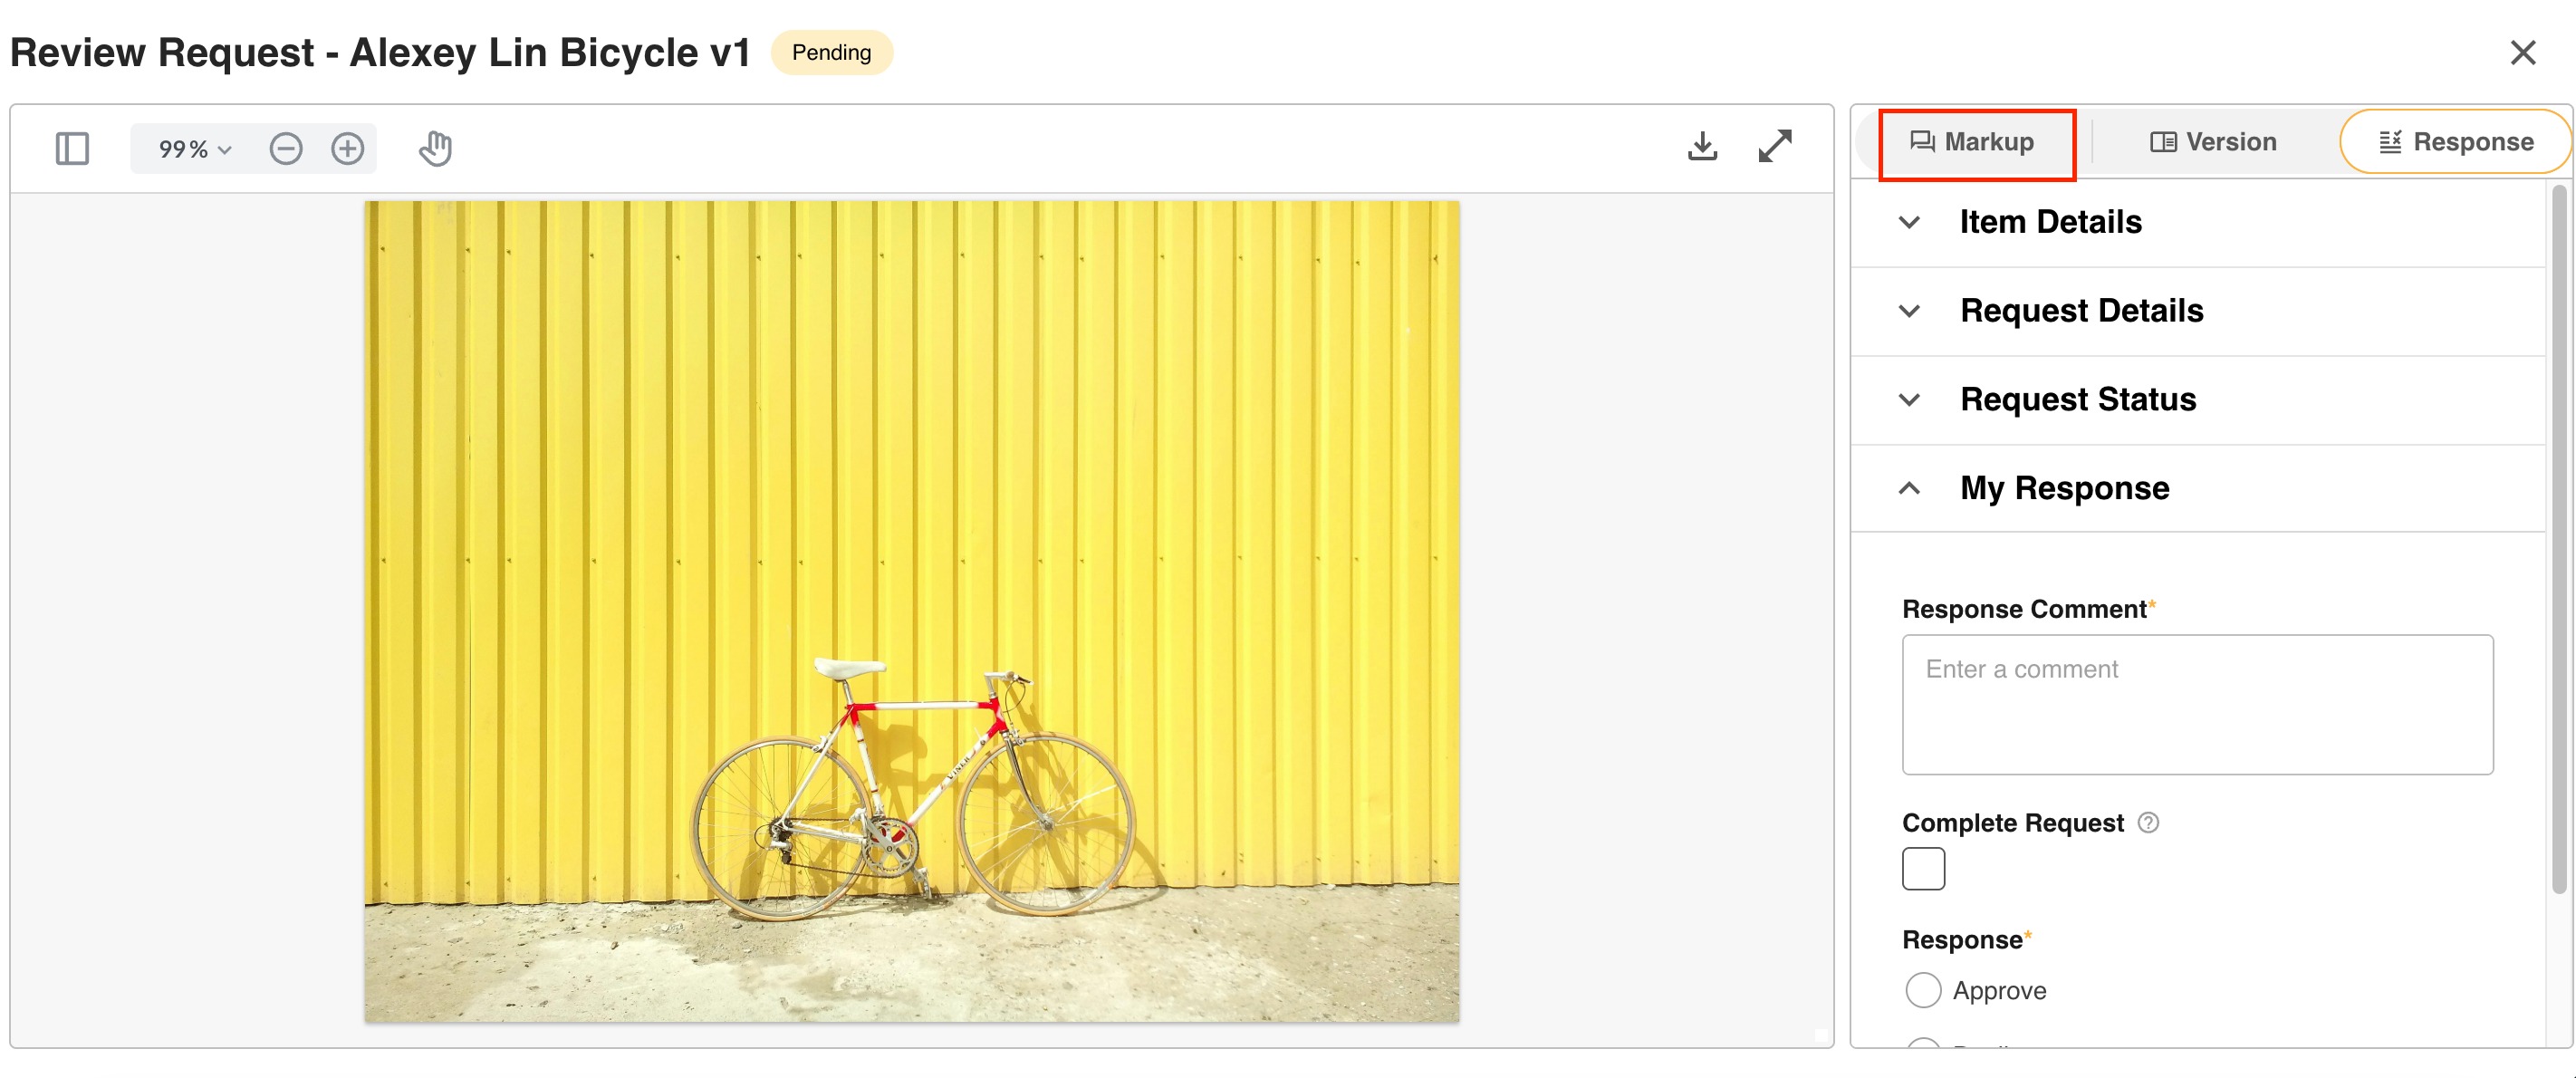
Once the Markup Comments tab is loaded, users will see a preview of the asset on the left of the page where they can add annotations or comments.
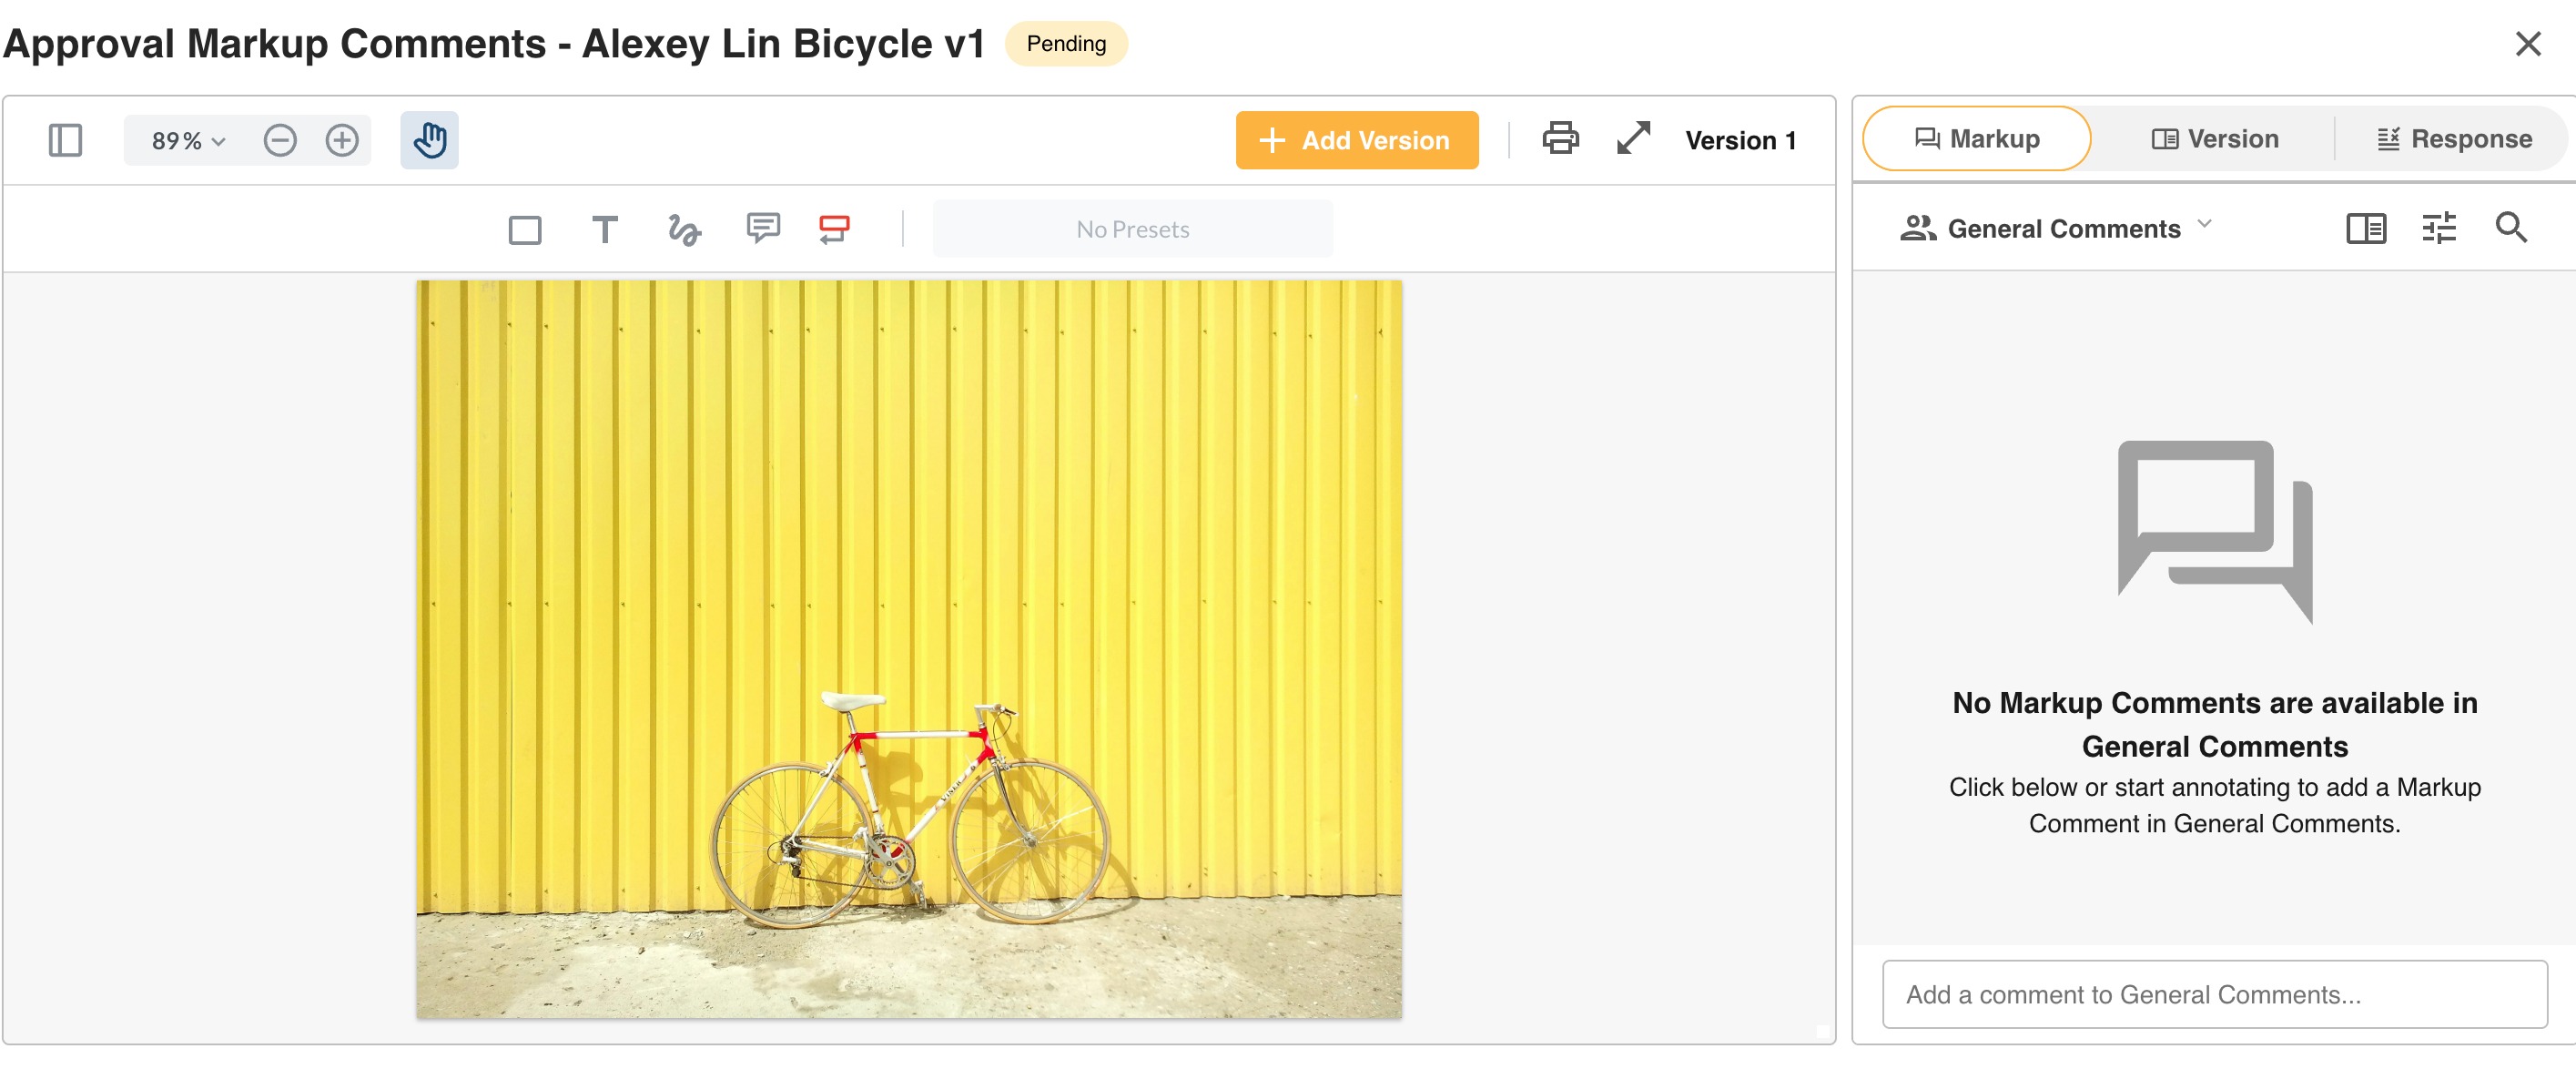
Markup Comments Panel
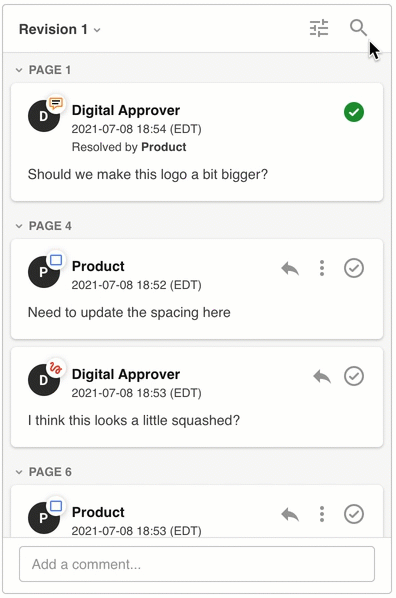
The Markup Comments Panel will by default always be open on the right side of the page. Users can view, add, reply, edit, or delete comments (as applicable) in this area.
Once Markup Comments (with annotations) have been added, clicking on the comment will highlight the corresponding annotation, updating your preview to the location of that annotation.
Comments are typically ordered by the date the parent comment (the first comment in a thread) was created, from oldest to newest. For documents, this updates to by page, and for videos or audio files, it will be based on the time from 0 to the end of the video/audio file.
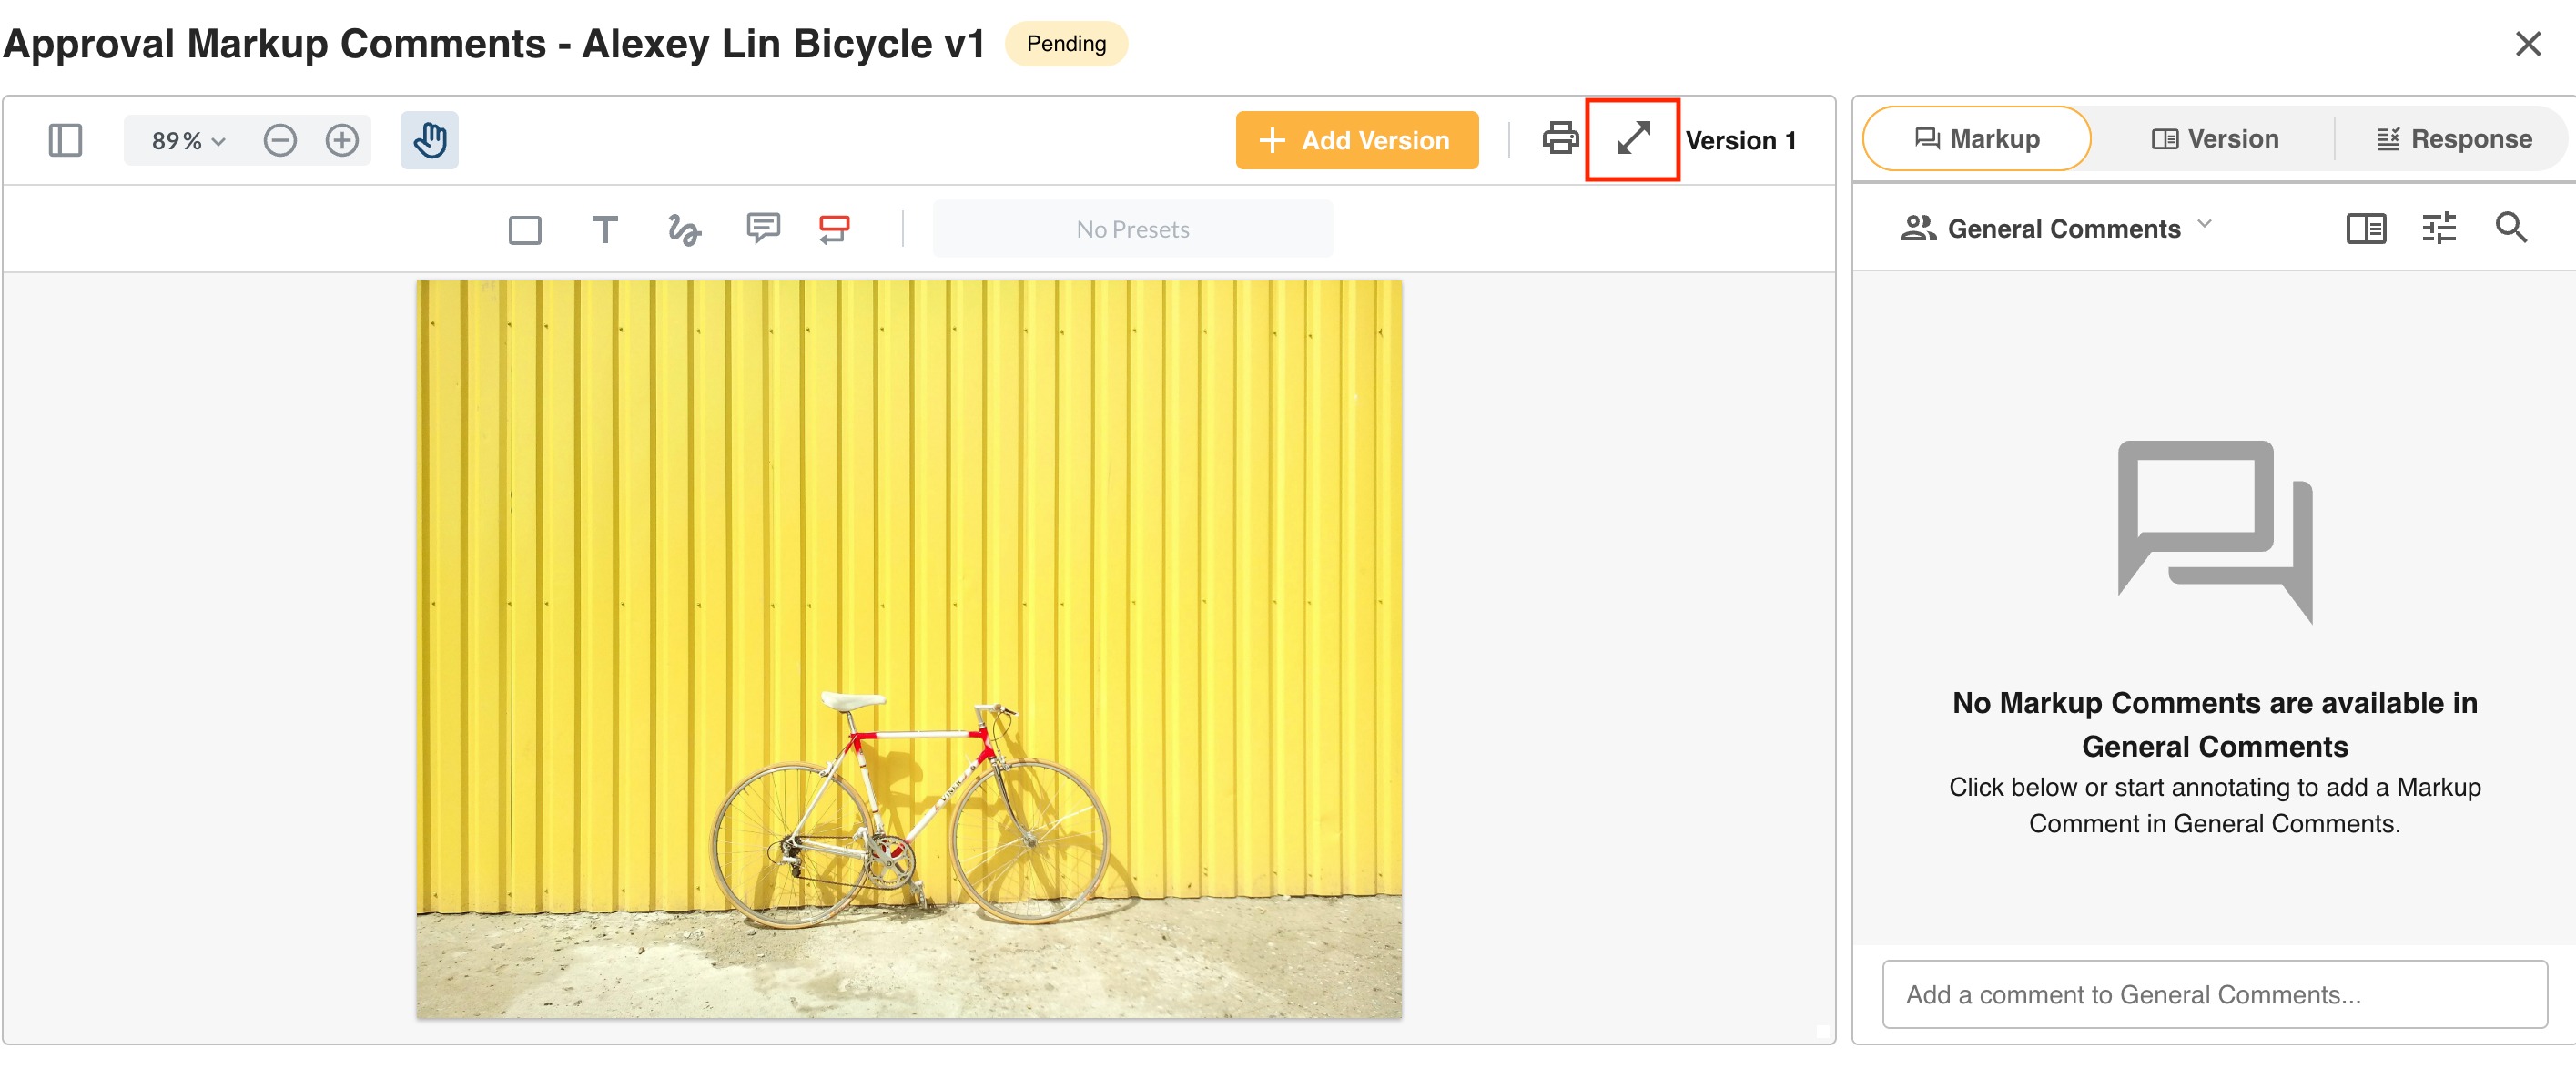
To open or close the comments side panel, click the icon noted below in the preview area.
Who Can View My Comments & Live Updates?
If a user can access the Markup Comments tab, they will be able to view all comments, annotations, and replies added by any user. This will apply at any time during the request and will continue once it's completed, allowing those involved to review the Markup Comments activity for that asset.
Typically this will include users participating within the request (the reviewer & requester) as well as Main Admins and Workflow Admins, but may also include any added Collaborators.
Users are able to interact with Markup Comments only while an asset is pending approval. Once the request is completed, all input options are locked and participants can only view what's occurred.
For pending requests, any changes to a comment, annotation, etc. will be immediately available to all users (within a 5 second timeframe). Users will not need to refresh their page to see updates to comments or annotations.
General Comments
General Comments are comments added without an annotation. Users may consider adding general comments if they have an overall question about the asset under review, or more generic feedback.
To add a general comment:
- Open the Markup Comments Panel and look for the "Add a comment" box that appears at the bottom of it.
- Add the comment in the text box.
- Click Save to save your comment.
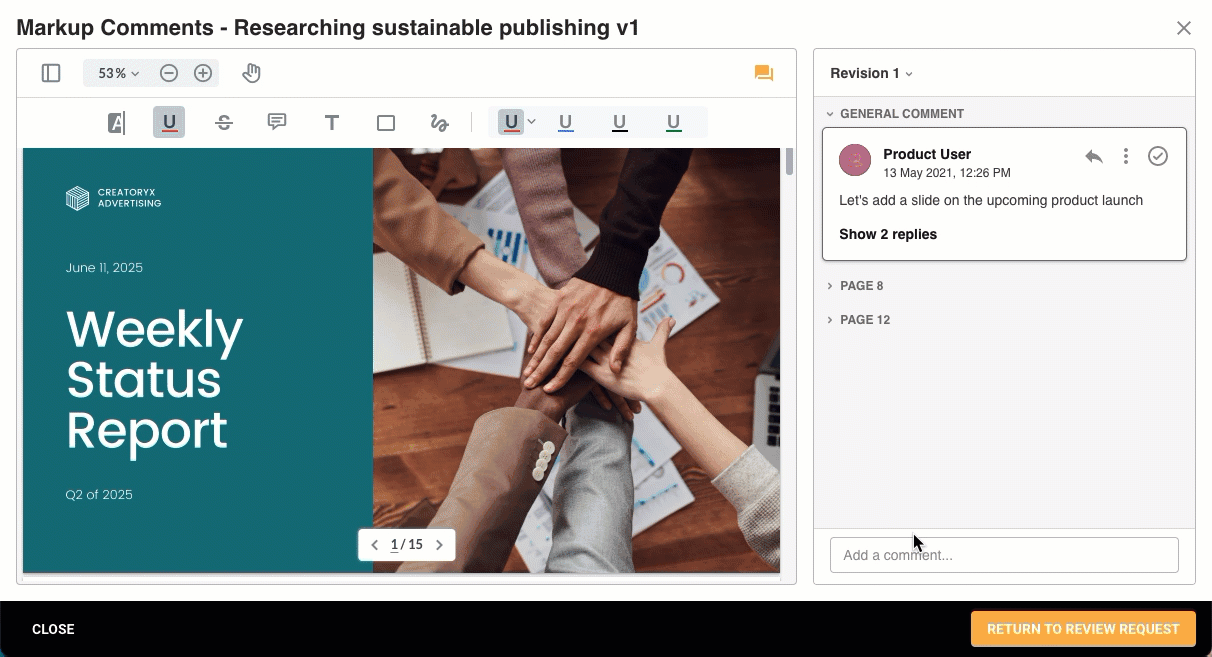
Markup Comments & Annotations
Annotations must always be added with an associated comment, ensuring the feedback about your markup can be understood and followed by all. The general method of adding a Markup Comment & annotation is the same for all options, though some annotations have additional features which are listed below.
Adding an Annotation
To add an annotation, complete the following steps:
- Select the annotation type in the row just above the file preview.
- If you need to customise the styling of the annotation, you can select the options in the presets panel on the right.
- Draw/Select the area of the preview you wish to add your annotation to.
- In the comment box, add any required commentary about your annotation.
- Click Save on the comment to save both the annotation and the comment.
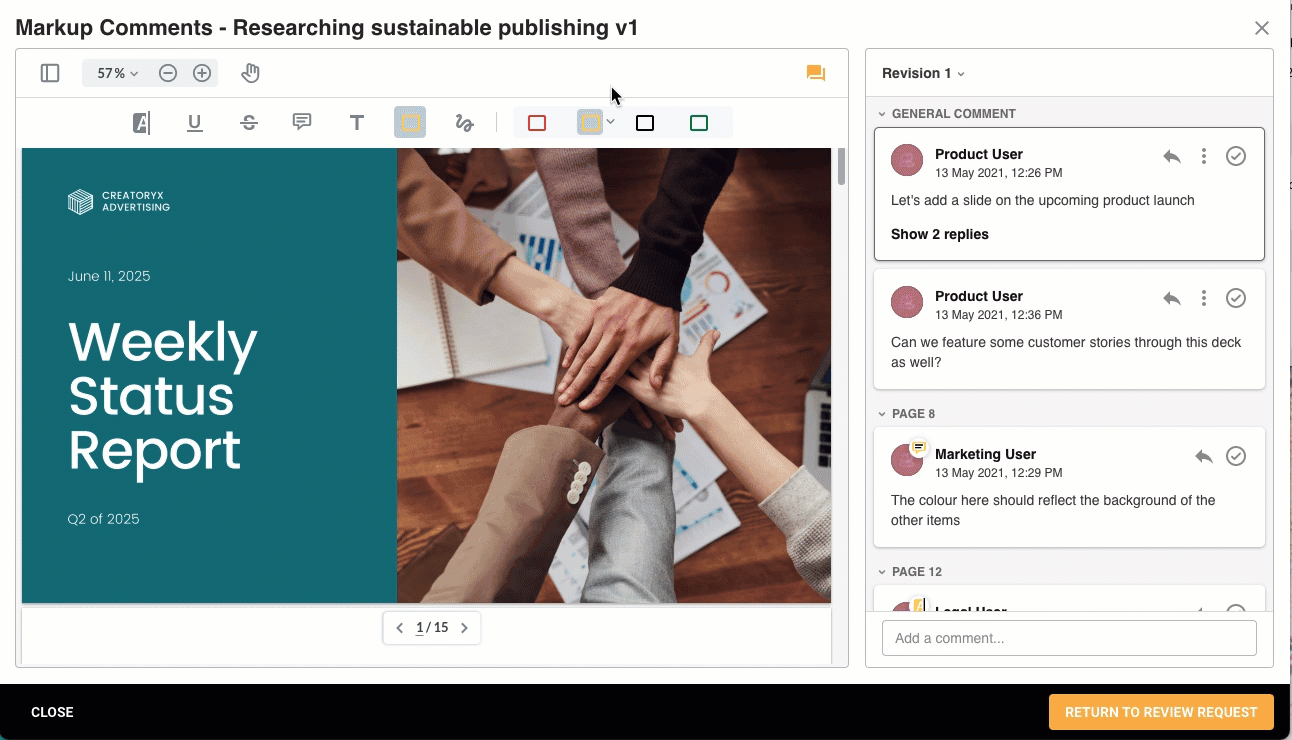
Annotation Presets
All annotation types have preset options. This allows you to customise styling aspects of the annotation like colour, weight, etc. These are available via dropdown menus to the right of the annotation selection. Clicking Custom will allow you to select a custom colour via a colour picker.
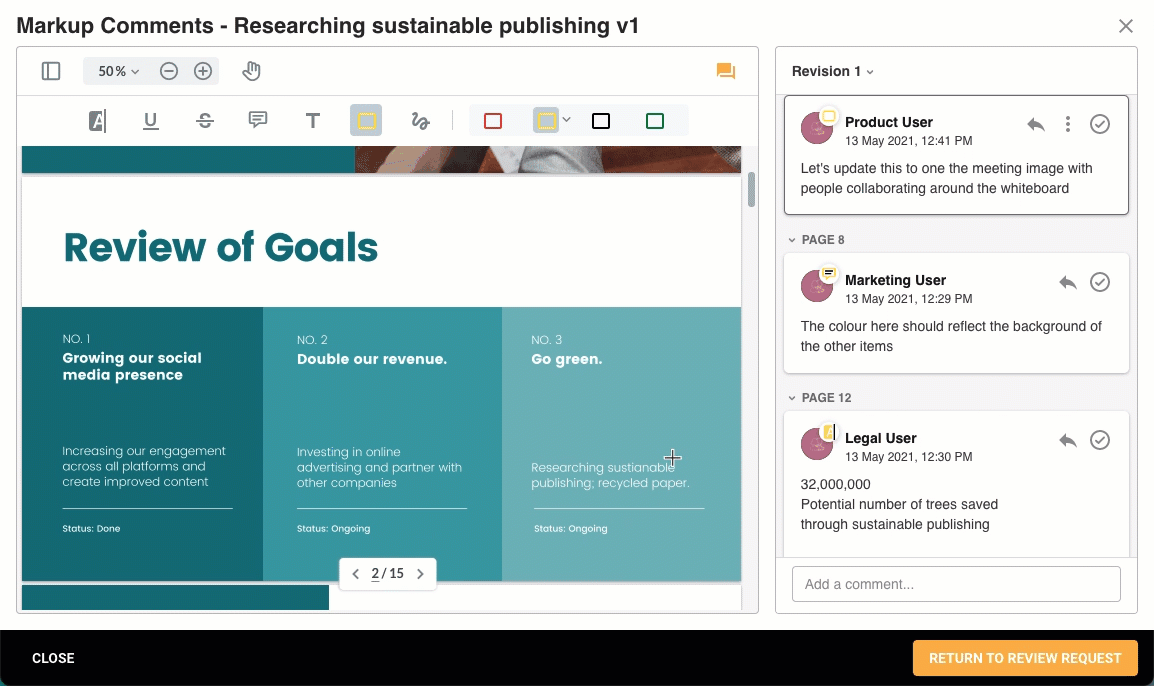
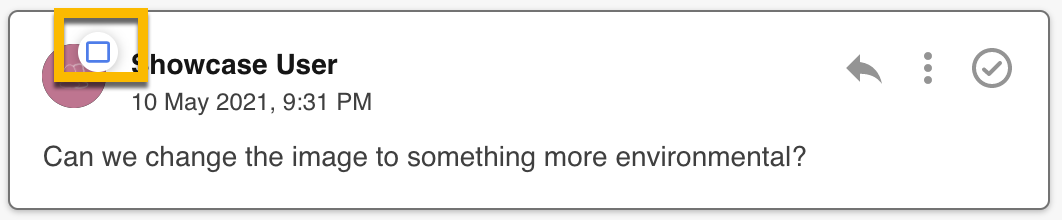
Once your annotation has been saved, the colour & icon reflecting the type of annotation added will be indicated against the comment:
You can also edit the styling of an annotation once it's been added on the preview itself. To do this, simply click on the annotation and the palette icon that appears.
General Annotation Types - Comment, Free Text, Rectangle, Free Draw & Callout
The annotation types below are available on any file which supports Markup Comments. They function the same on all annotations. Remember that for all of these, you need to add a corresponding comment before you can save both selections.

- Comment Annotation: The Comment (or Pin) annotation allows the user to add a comment icon to a specific area of the file preview.
- Free Text Annotation: This allows the user to add text in a text box directly on the preview. Note that by default, the content added here will also be added to the corresponding comment in the comment panel on the right. Once that entered comment is edited in the comment panel, it will no longer update with any changes to the annotation comment.
- Rectangle Annotation: The user can draw a rectangle over any area of the preview.
- Free Draw Annotation: This allows the user to free draw any shapes over the preview. Note that you can draw multiple shapes within a 2 second timeout limit. After that point, any new drawing will be added as a new Annotation.
- Callout Annotation: This allows users to pinpoint an area and add text to call out changes needed.
Editing or Deleting an Annotation or Comment
Users will only be able to edit or delete an annotation or comment if they have created it. Editing annotations includes moving or altering the style of the annotation.
Document Markup Comments
Document specific Markup Comments & Annotations are available on all PDF files where text is selectable (i.e. it will not be available if you scan a document and then upload it). The annotation options listed below all function the same way.
If using either highlight, underline, or strikethrough annotation options, the text you've selected will be added to the corresponding comment by default. This makes it easy for you to reference that specific text in your comment and suggest a revision.
Document Markup Comments & Annotations are grouped by the page the annotation is added on, or into a General Comments section.
In addition to the general annotation types, the additional document annotations include:
- Highlight Text: Allows the user to highlight blocks of text.
- Underline Text: User can underline blocks of text.
- Strikethrough Text: User can strikethrough blocks of text.
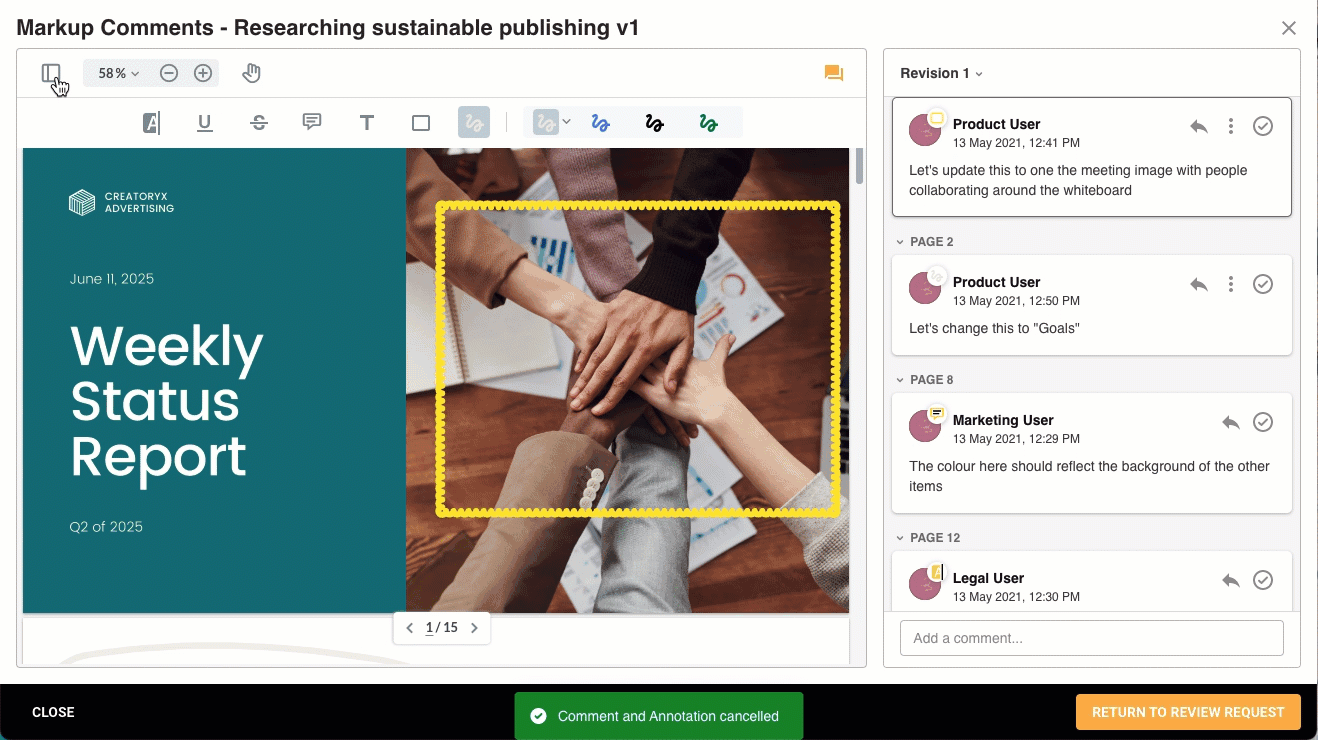
Search Document
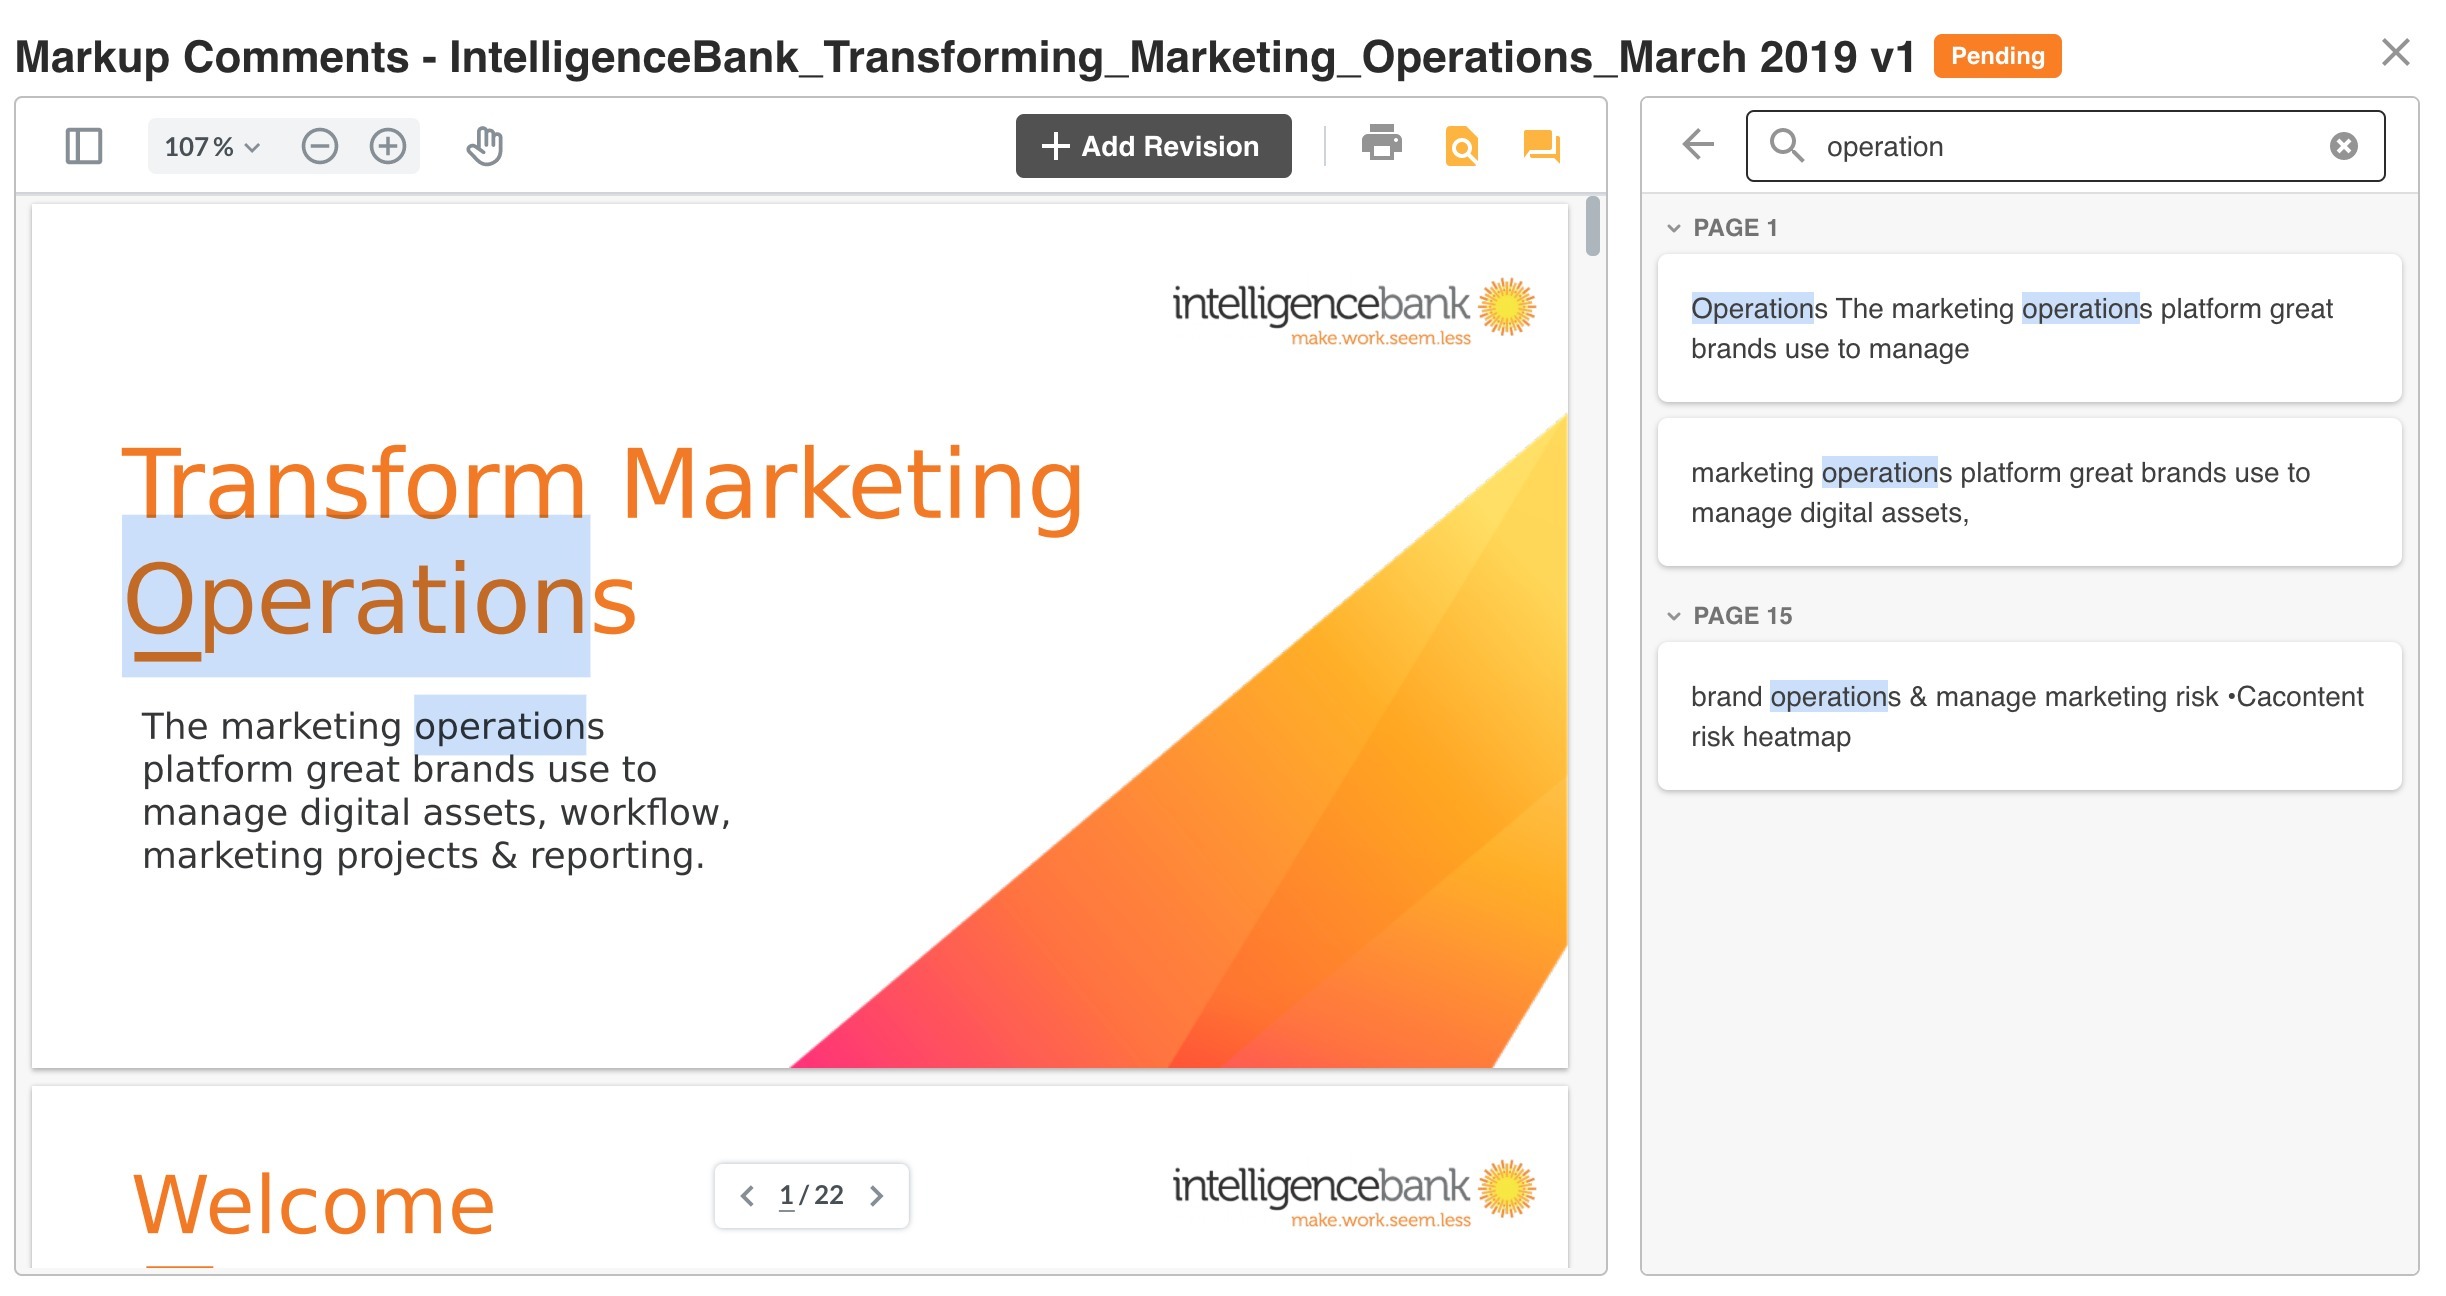
Users can search their documents for specific keywords or phrases. To do this, simply click on the search icon above the document preview. The comments panel on the right will update with a search bar where you can enter your search term.
Results will be indicated in the comment panel, with the matches appearing in a list, as well as being highlighted on the preview. You can click on a card to be taken to that match on the preview directly. To exit the view, just click the back arrow.
Comment Actions
Below outlines all actions that are supported on the comments within the Markup Comments panel. The options will be dependent on the status of the comment and who created it.
@mention a Specific User
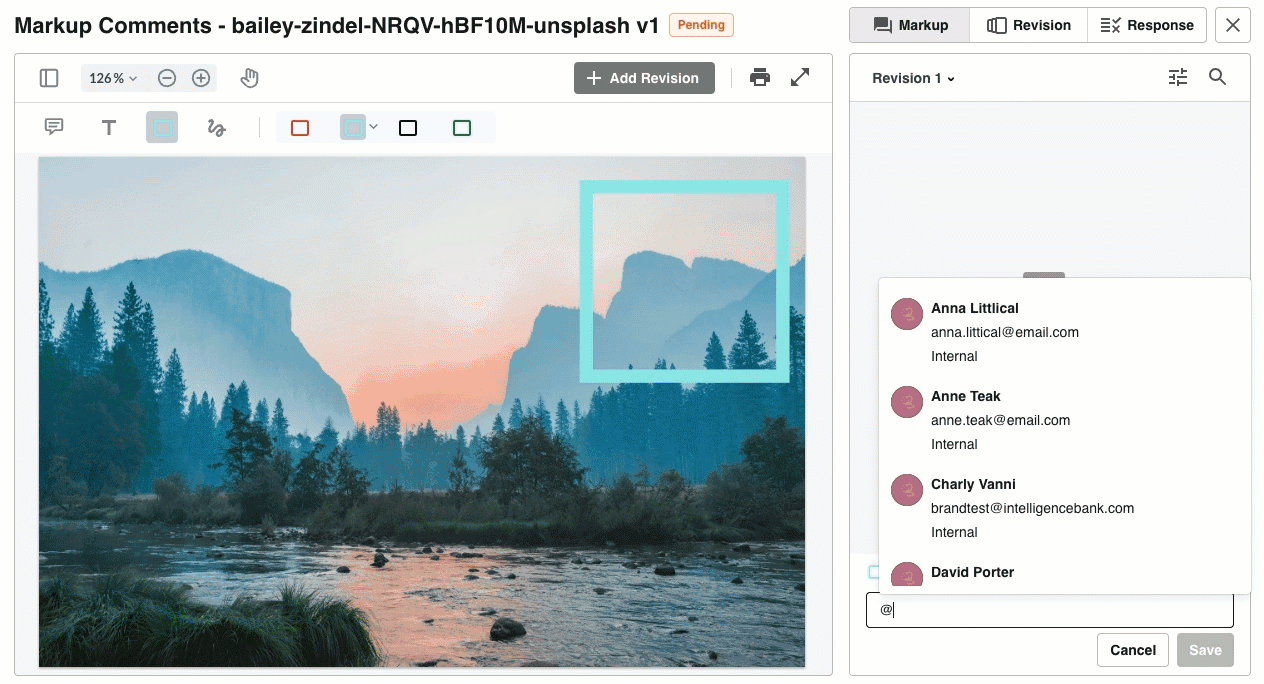
Users can type "@" to trigger a dropdown menu of users who can be tagged in the comment or reply. This is useful if you need to let a specific user know about the changes / feedback you're requesting.
Users tagged will automatically receive an alert, letting them know that they have been mentioned in a comment or a reply.
The users available for tagging will include any user who can currently add a comment in the Markup Comments page. This includes: Reviewer(s), Requester, Workflow Admins, Main Admins, and Collaborators.
Edit & Delete Comment
The option to edit or delete a comment is only available to the creator of the comment/annotation. This can be accessed via the more menu on the right of the comment box.
Editing a Comment will display an "edited" tag on the comment, whilst deleting a comment will delete the comment, all replies and any related annotation. Users can also choose to receive email alerts on these actions.
Resolve / Unresolve Comments
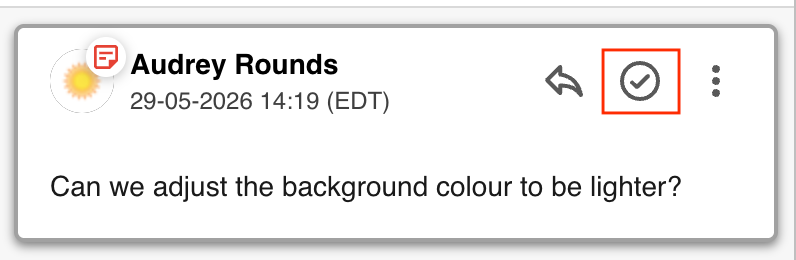
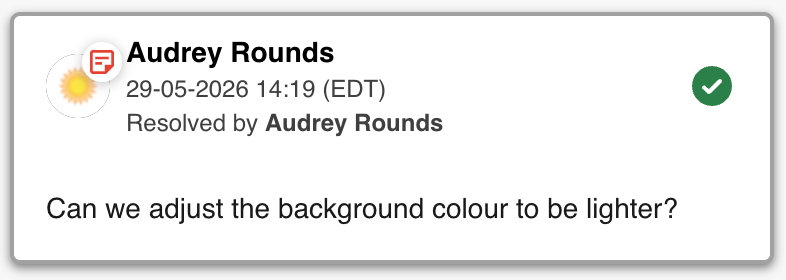
The Resolve / Unresolve action allows you to indicate whether the feedback that has been added in a comment has been addressed or not. This essentially treats each comment as a task and helps users keep track of the comments/tasks they've already addressed vs which ones still require their attention.
Once the feedback within the comment (& replies) has been addressed, any user who can view the comment will be able to mark it as resolved. They can also unresolve it, if required.
Once a comment is resolved, users will not be able to edit or reply to the comment or annotation, though they will still be able to view any replies. Users can also choose to receive email alerts on both resolve and unresolve.
Replying to Comments
Replying to comments allows users to truly collaborate and provide feedback during the course of the workflow. There is no limit to the number of replies that can be added to a comment and they should display to other users within seconds of a reply being saved.
General comments and those added with an annotation can both be replied to. In this instance, the original comment will always become the parent comment and all replies will be listed beneath it.
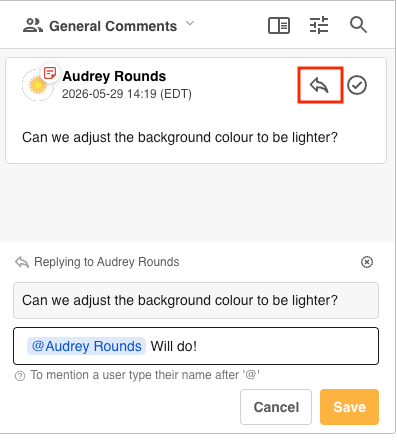
To reply to a comment, click the reply icon in the comment and add your response within the text box that appears. Once this is done, click Save to post your reply. You can choose to receive alerts when any reply is added, or restrict it to when a reply is added to your comment.
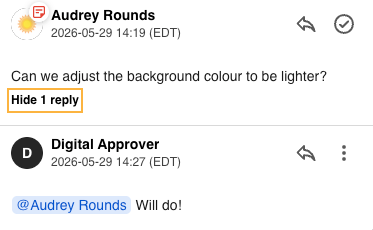
A comment's replies can be hidden or shown via the Show / Hide Reply text action.
Print Markup Comments
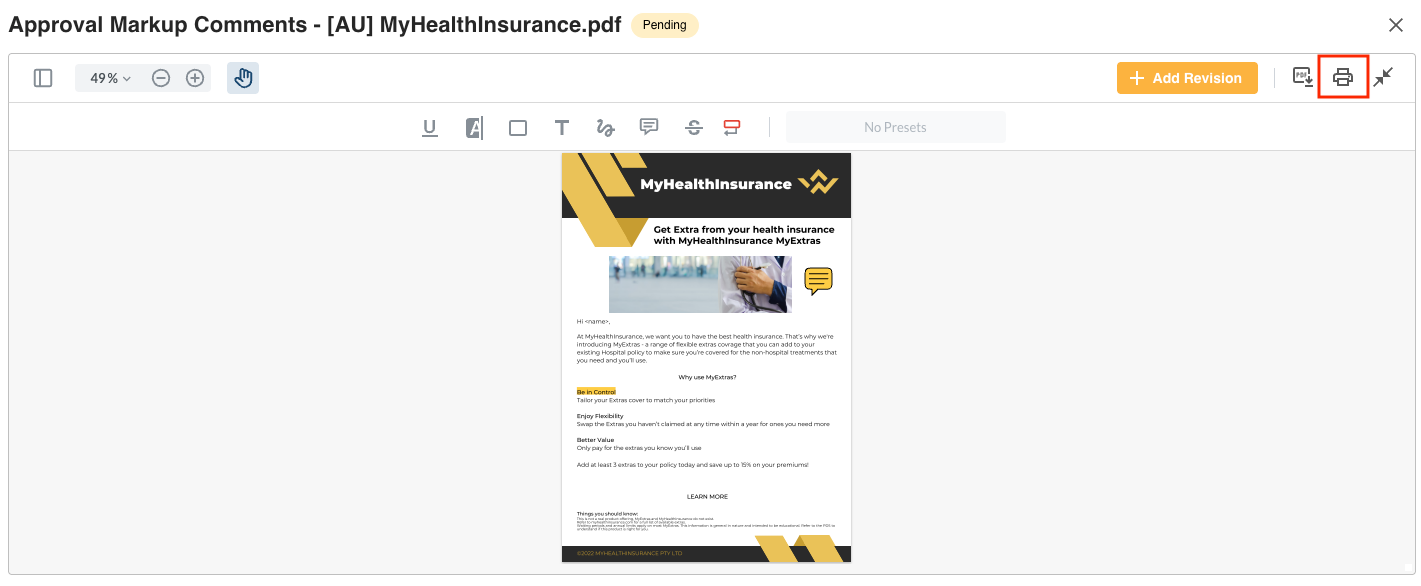
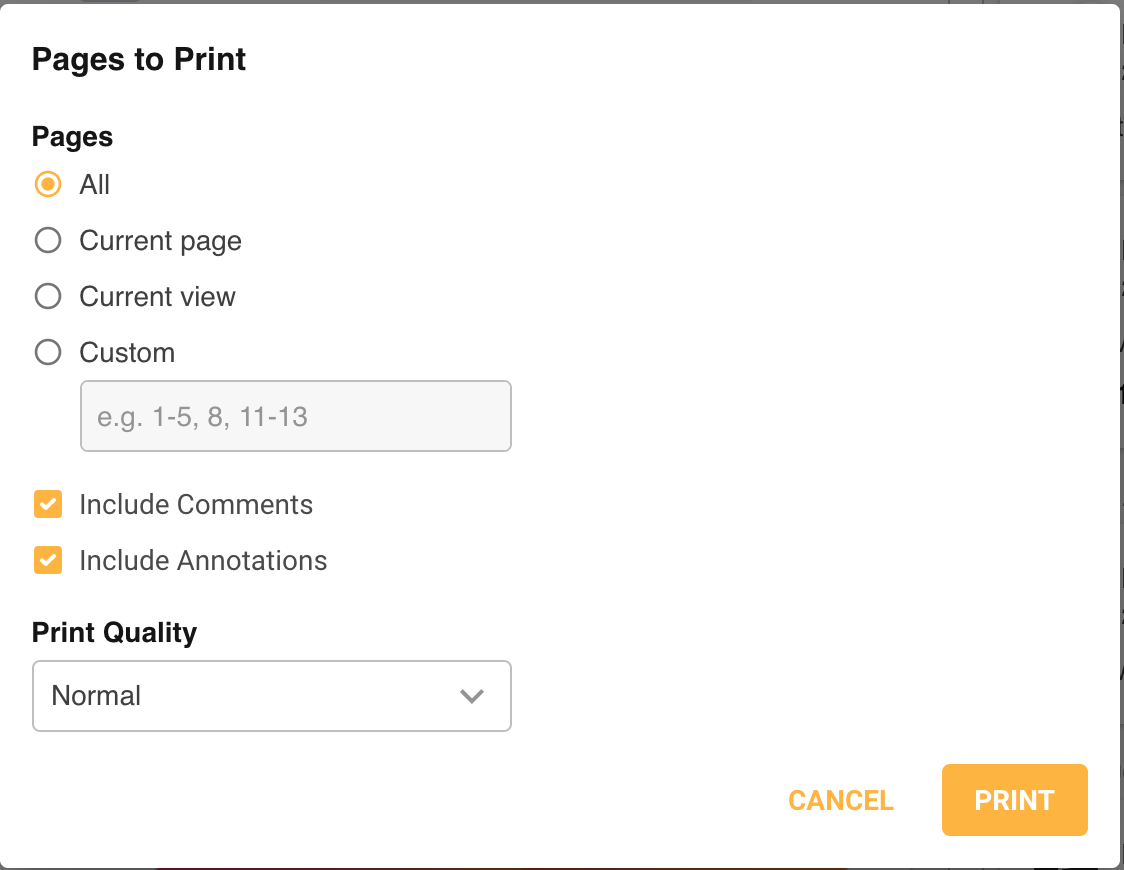
Markup Comments can be printed, which allows you to print or save the document or image under review, as well as the comments or annotations that have been added. You can also customise the pages or view you wish to annotate. Select the printer icon within the Markups panel to print.
When you print the file (or save it as a PDF), the file will be displayed with the annotations. The comments will be available on the following page, along with some additional information which should make it easy to link the comment to the corresponding annotation.
Navigating Markup Comments
Users can navigate through the comments panel by searching, filtering, or sorting through comments, making it easier to find specific comments, particularly if there is a lot of back and forth during a review.
Searching Comments
Click the search icon located at the top right of the Comments Panel. Enter your search term and the results will automatically filter beneath. If the result matches a reply, then the parent comment will also appear, allowing you to fully understand the context of the comment.
To clear the search and return to your normal comment view, you can click the clear icon or click the back arrow next to the search box.
Sort and Filter Comments
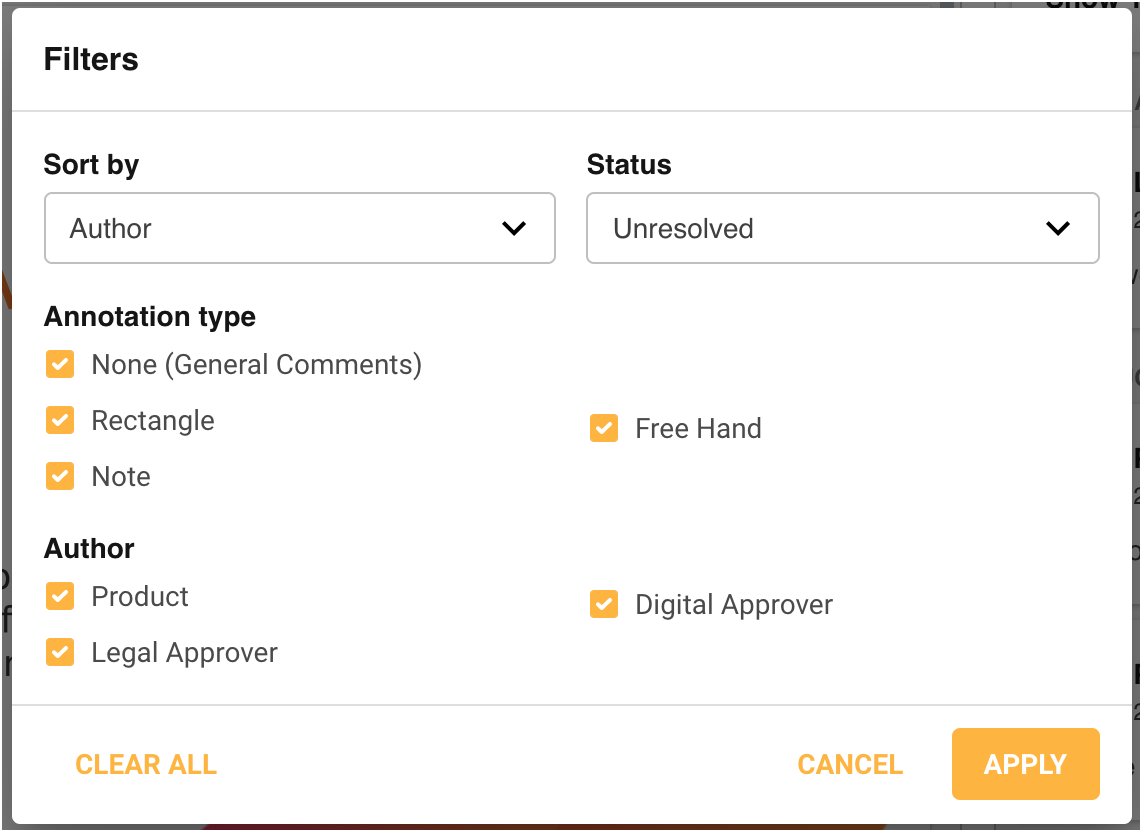
Users can filter out comments based on the status (Resolved / Unresolved), the Annotation Type, or the Author. This might come in handy if, for example, a user just wants to focus on the comments that are unresolved so they know what's left for them to action.
Sorting options allow users to group comments by: Position, Date Created, Last Updated, Status, Authors, Annotation Type, Timecode (Video & Audio only). Users might find it easier to address comments by sorting them in particular ways that best help them in their workflow.
Was this article helpful?
That’s Great!
Thank you for your feedback
Sorry! We couldn't be helpful
Thank you for your feedback
Feedback sent
We appreciate your effort and will try to fix the article