Item List widgets are one widget type you can add to a dashboard. This widget will display a dynamic list of results in a list format/view.
Consider using an Item List widget if you'd like to visualise your information in a way that lets you easily view particular items (ie: Recently Added Assets) or for taking quick action (ie: tasks assigned to me, or pending approval requests).
For more information on dashboards in general, please reference the Dashboards - Overview article.
How to Set Up an Item List Widget
To create an item list widget:
| 1 | Click + Add Widget on your desired Dashboard. |
| 2 | Choose the Item List widget type.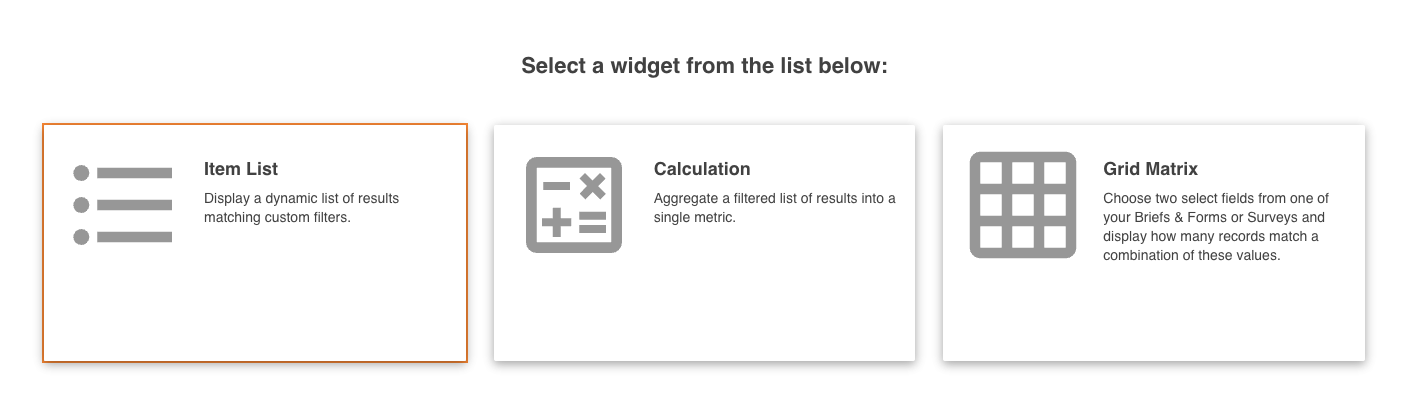 |
| 3 | Enter the widget's Main Details, which include:
|
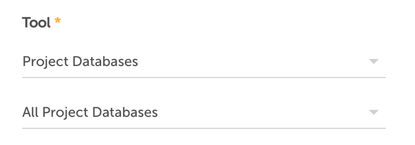
| 4 | Select Next and select your data source. This controls what area of the platform information will display from. In the Tool dropdown, the options are:
|
| 5 | Select any Filtering Conditions. Filtering conditions will filter the information to specifically what you're looking to display (ie: just display approval requests that are still pending, or just display assets with a review date within the next 30 days). Note that filtering conditions may vary depending on what Tool option is selected in step 4.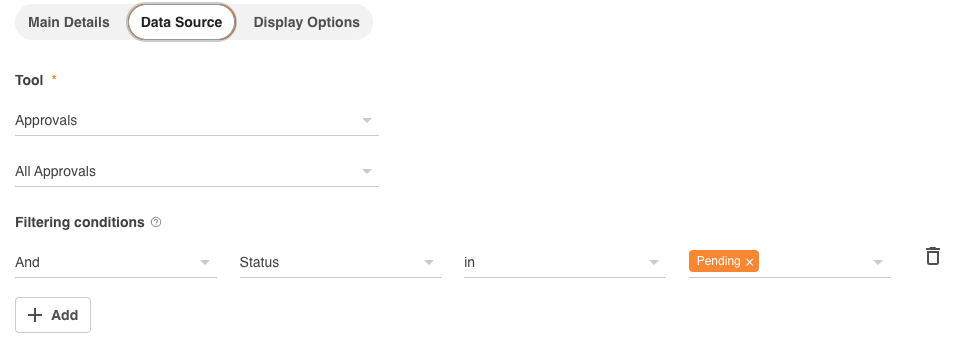 |
| 6 | After this is complete, click Next to continue to set data display options. Here, you can pick your Featured Column Field to show which information you want to highlight as the most important. Note, the available featured column data options will vary depending on what tool you select in step 4. |
| 7 | Select the Default Sort Order, which will dictate the ordering of how your results are displayed. |
| 8 | Select up to three secondary fields for additional information you want to display within the widget. The secondary field options will also vary depending on what tool is selected. |
| 9 | Click Finish to complete your widget creation. It will then display on the dashboard.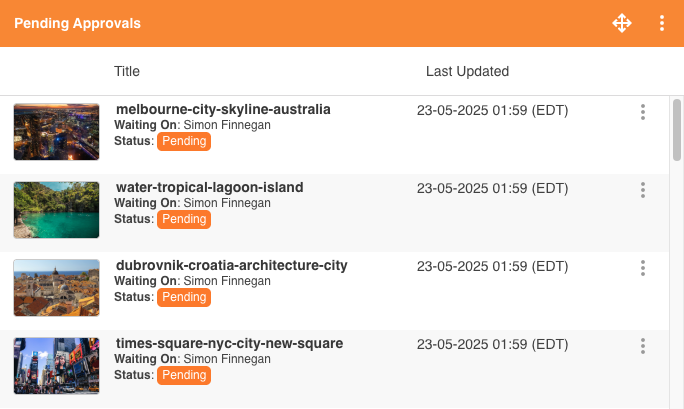 |
Item List Widget Filtering Conditions for All Workflows or All Databases
If you are setting up a widget to display information across all your databases or approval workflows, there are specific filtering conditions that will display.
Displaying information on all your databases/workflows allows you to view results from across the platform and/or module. Each of these options has specific filtering options available once selected, which you can view below.
Filter by All Workflows
When setting up your data source, you can select All Workflows. Selecting this will ensure that the data is sourced from all workflows in the platform.
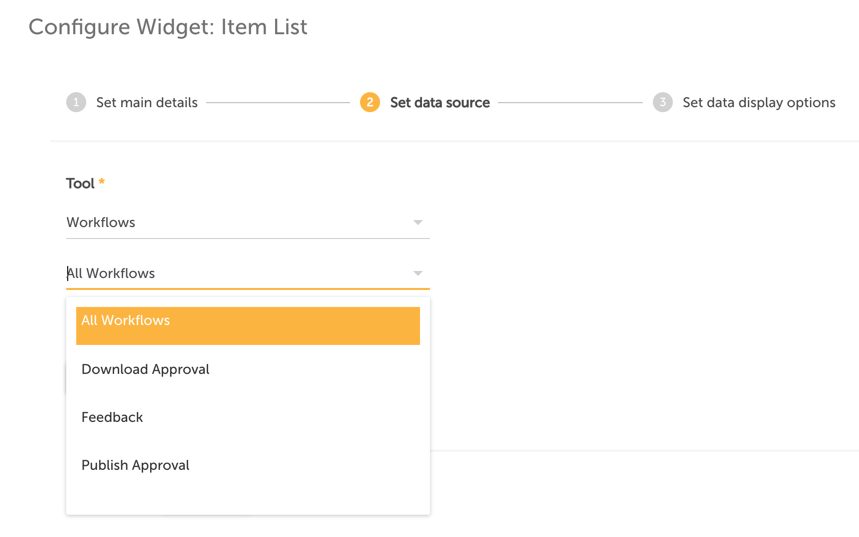
Once selected, the filtering conditions available will update to contain those values that can apply across all workflows. The list of conditions to choose from is as follows:
- UUID
- Approval Stage
- Complete Time
- Item Name
- Item Type
- Last Updated
- Last Updater
- Markup Comment Revisions
- Request Time
- Requester
- Required By
- Reviewer
- Reviewer Responded
- Stage Reviewers (All)
- Status
- Waiting On
These enable a variety of reports to be run and displayed in your widgets. For example, if you wanted to view all assets/resources that are pending approval, you could select assets/resources as the Item Type and Status as pending.
Filter by All Databases
Similar to the workflow options above, the All Databases option allows you to select All Databases, tracking specific values across this module (ie: all your tasks, spanning all databases). If you select All Databases without adding any filtering conditions, it will show you all approved records that exist within your databases that you have access to.
Once selected, the filtering conditions available will update to contain those values that can apply across all databases. The list of conditions to choose from is as follows:
- UUID
- Name
- Created Time
- Creator
- Last Updated
- Last Updater
- Version Number
Item List Markup Comments Widget
Markup Comments is a specific tool option unique to Item List widgets and can streamline how creative teams view their markup comments notifications and respond within a collaborative project.
It allows users to have an easy location to find the comments they've been mentioned in. This improves engagement within the team and makes it easier to locate and manage feedback, resulting in a more efficient collaborative process.
When creating an item list widget, select Markup Comments as the Tool.
You can then choose if the Markup Comments will include:
- All Markup Comments
- Markup Comments in Approvals
- General Markup Comments
Note that the options may depend on the modules available to your platform.
Filtering Conditions will decide what Markup Comment data is filtered into the widget. The options include:
- Comment Status - Resolved / Unresolved
- Created Time
- Last Updated
- Mentioned By - Logged In User
- Mentioned User - Logged In User
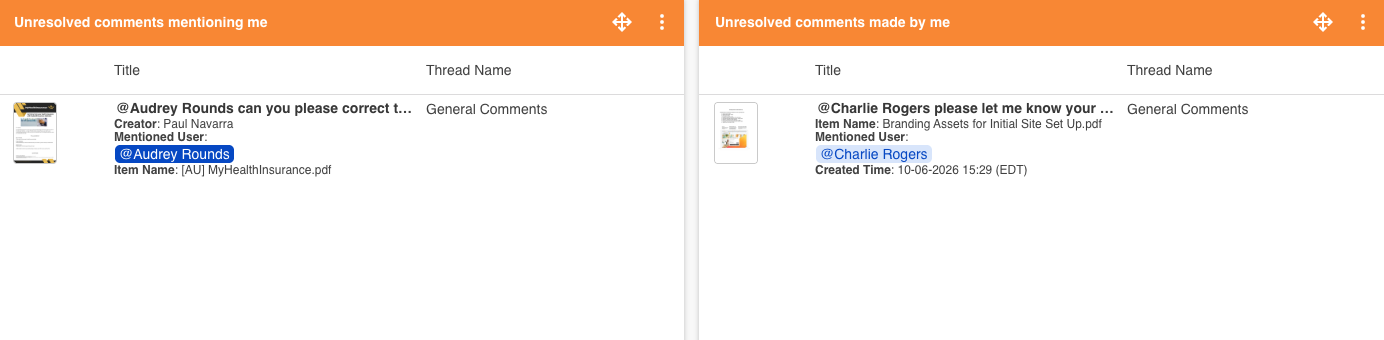
Some important points to note about Mentioned User and Mentioned By filtering conditions:
- Selecting Mentioned User - Logged In User will filter and display only Markup Comments that the current logged-in user has been mentioned in.
- Selecting Mentioned By - Logged In User will filter and display only Markup Comments that contain a mention and were created by the current logged-in user. This could be useful to view if you need to see a list of Markup Comments where you've tagged users for feedback and need to follow up with them.
Note that in all instances above, you will only be able to add a widget to see comments related to the Logged In User. This ensures that a single widget will work for all users of the platform.
Set Data Display Options
Within the data display options, you can pick your Featured Column Field to show which information you want to highlight as the most important. You can choose from the following options:
- Comment Content
- Comment Status (Resolved / Unresolved)
- Created Time
- Creator
- Item Location
- Item Name
- Last Updated
- Mentioned User
- Thread Name
Default Sort Order will dictate the order of how the Markup Comments results are displayed within the widget, based on either:
- Date Created
- Last Updated
You can select up to three Secondary Fields to show additional information:
- Comment Status
- Created Time
- Creator
- Item Location
- Item Name
- Last Updated
- Mentioned User
- Thread Name
Was this article helpful?
That’s Great!
Thank you for your feedback
Sorry! We couldn't be helpful
Thank you for your feedback
Feedback sent
We appreciate your effort and will try to fix the article