The Approvals List contains all requests a user has permission to access, all in one place. Within this area of the platform, a user can access and manage items they need to approve, or follow up on requests they may have submitted.
Having all approval items in one centralised area helps users manage their requests and what they may need to review more efficiently and effectively, eliminating confusion on what they need to action.
Within the Approvals List, users can also access Markup Comments for applicable requests, which allows them to collaborate and consult other team members on the work being requested.
The Approvals List area can be broken down into 2 main areas: Requests and Filters.
Table of Contents
Requests Area
The Requests area is where users can view requests that they have permission to access. Typically, this area will show which requests that particular user has made or which require their review.
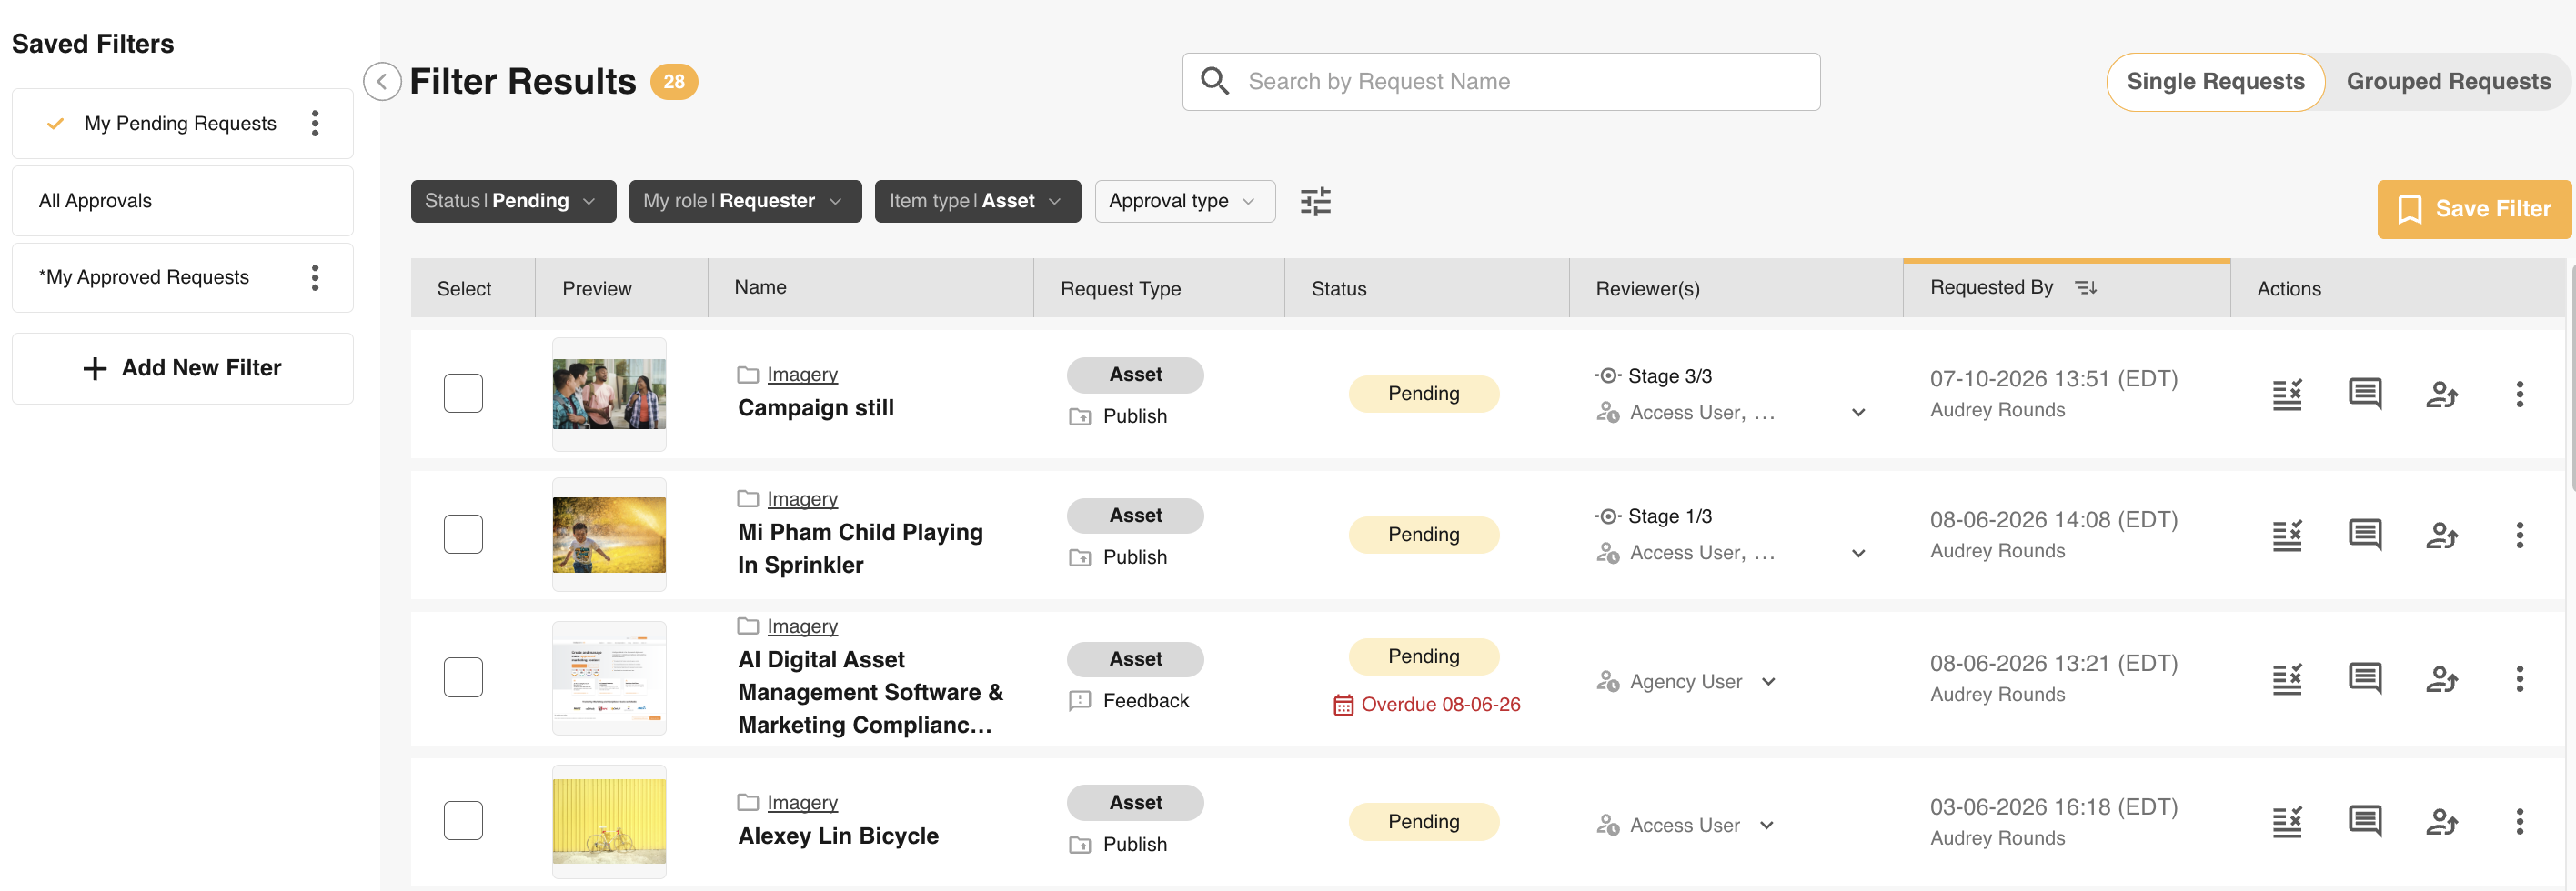
Within this space, users can search for specific request names in the top search bar. They can also view key information about each request, from its status to the users who may still need to review it. Actions for each request can be viewed on the right of the screen.
Clicking on the thumbnail or name of each request will load the Request Details or Review Request screen, allowing users to easily access more information or action the request.
Quick Filters
Most of the time, you only need one of a few filters to find what you're after. Four are now sitting right above the list, no panel to open:
| Filter | Narrows the list by |
|---|---|
| Status | Pending, approved, declined, cancelled, reviewed, or completed. |
| Approval type | Publish, download, or feedback. |
| Item type | Asset, record, or record file. |
| My role | Requester, reviewer, or collaborator, matched to you specifically. |
Select Save Filter next to the chips at any time to save your current combination for next time.
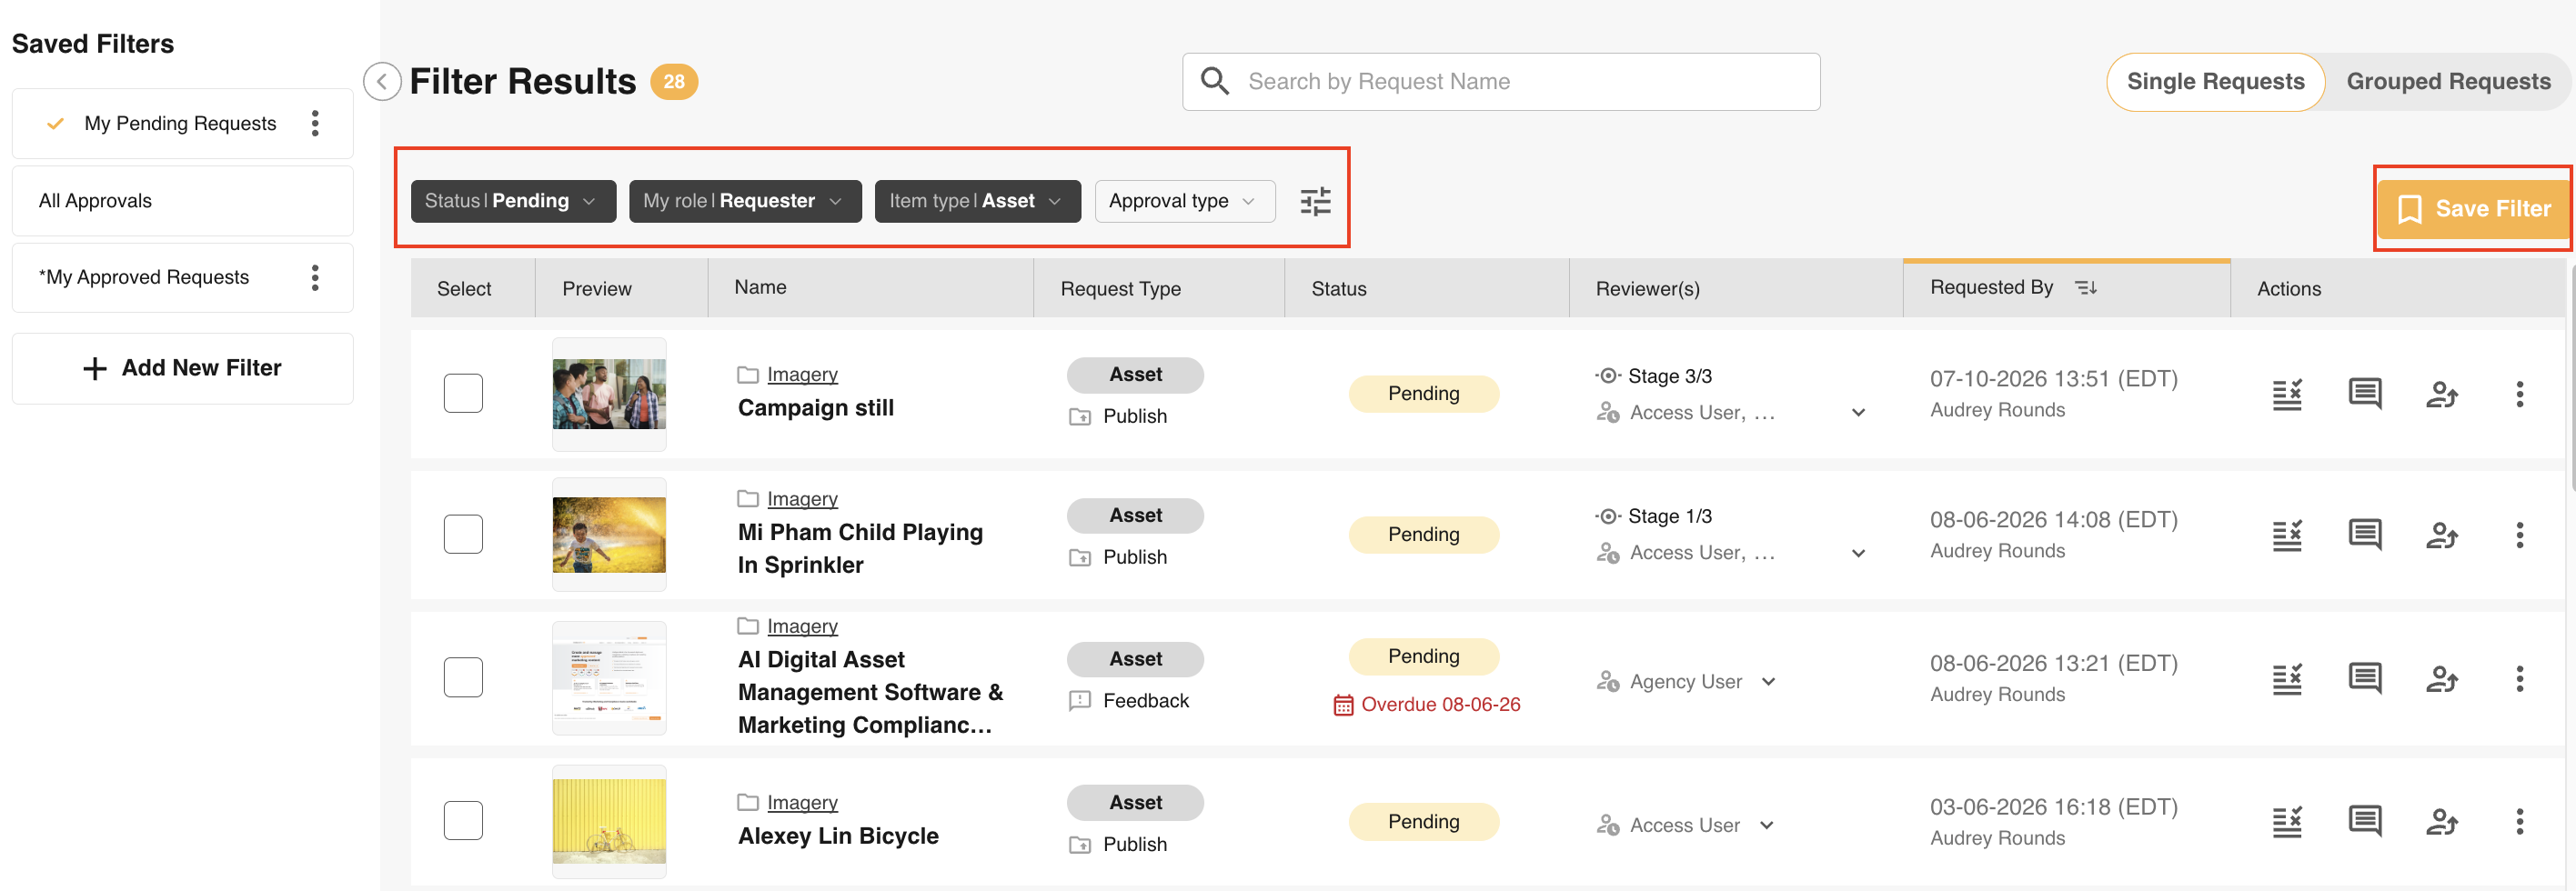
The Full Filter Panel
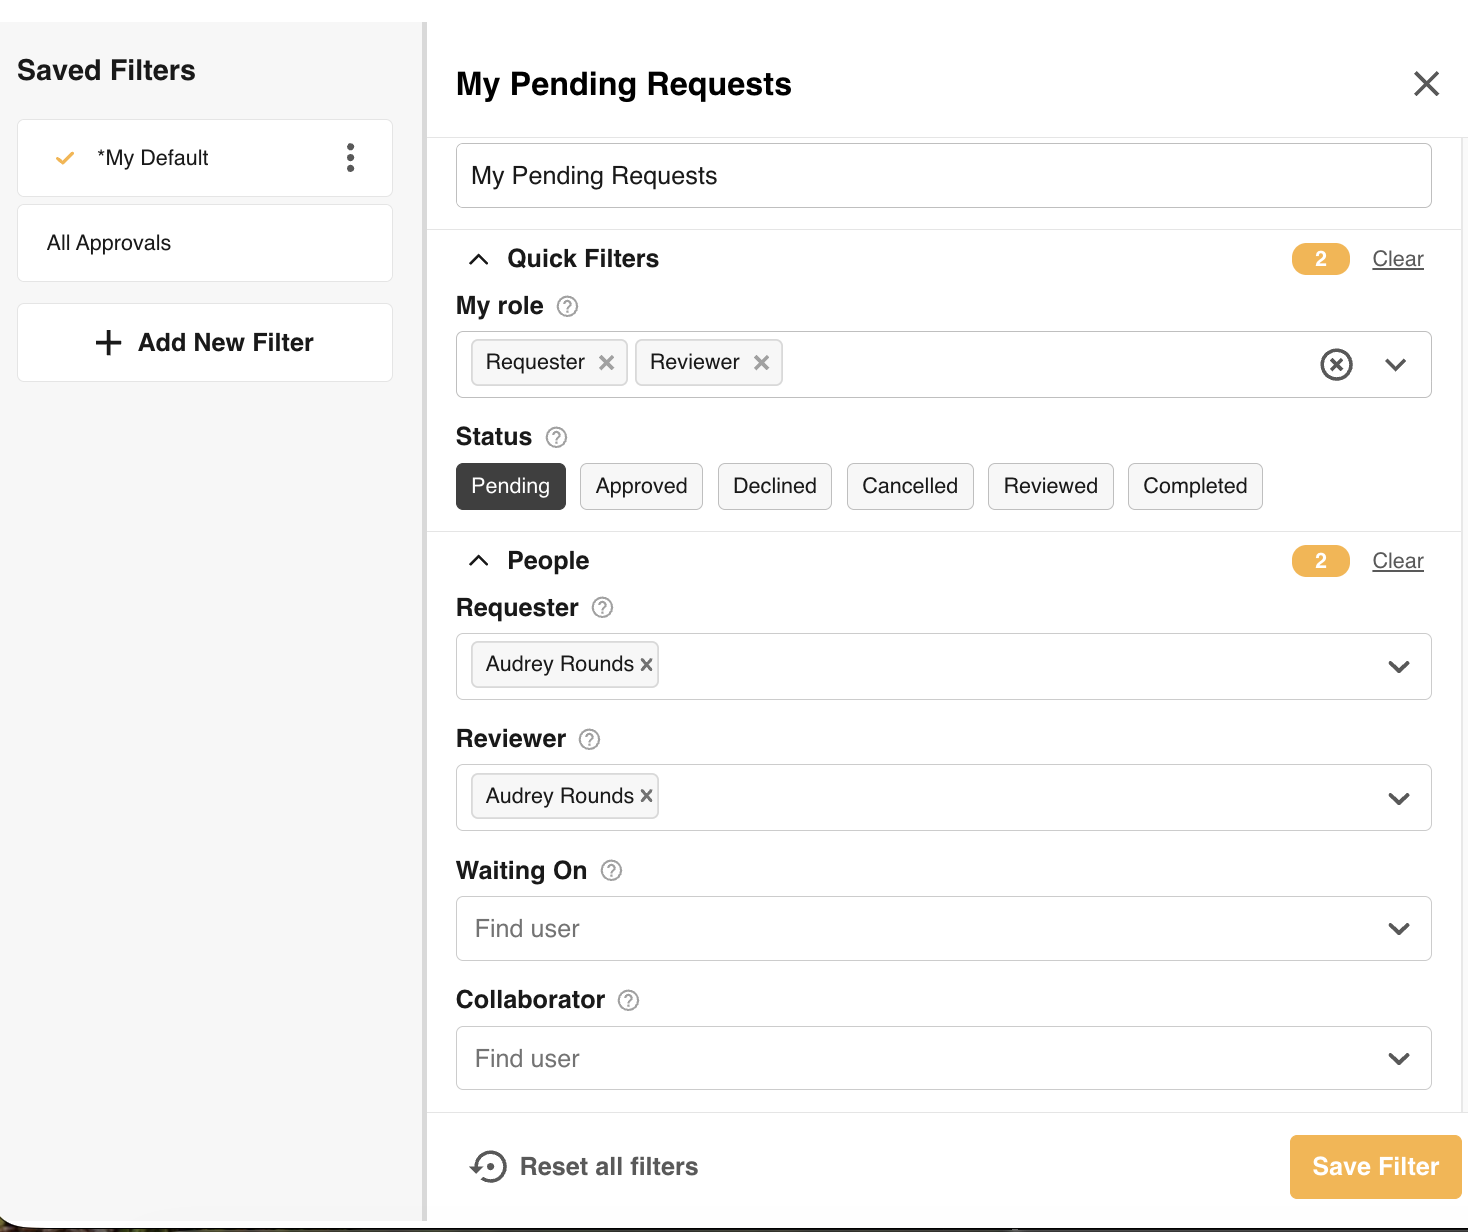
When the quick filters aren't specific enough, select the filter icon to open the full panel. It's organised into four sections, ordered from what you'll use every day down to the most granular:
| Section | What you can filter by |
|---|---|
| People | Requester, reviewer, collaborator, or who it's currently waiting on. Search for anyone with "Find user". |
| Request | Item type, approval type, a specific folder ("Find folder"), or a specific database entry, shown using your platform's own name for that module. |
| Date | Request time, required by, needed until, or approved until. |
| Workflow | A specific approval workflow. |
Saving Filters
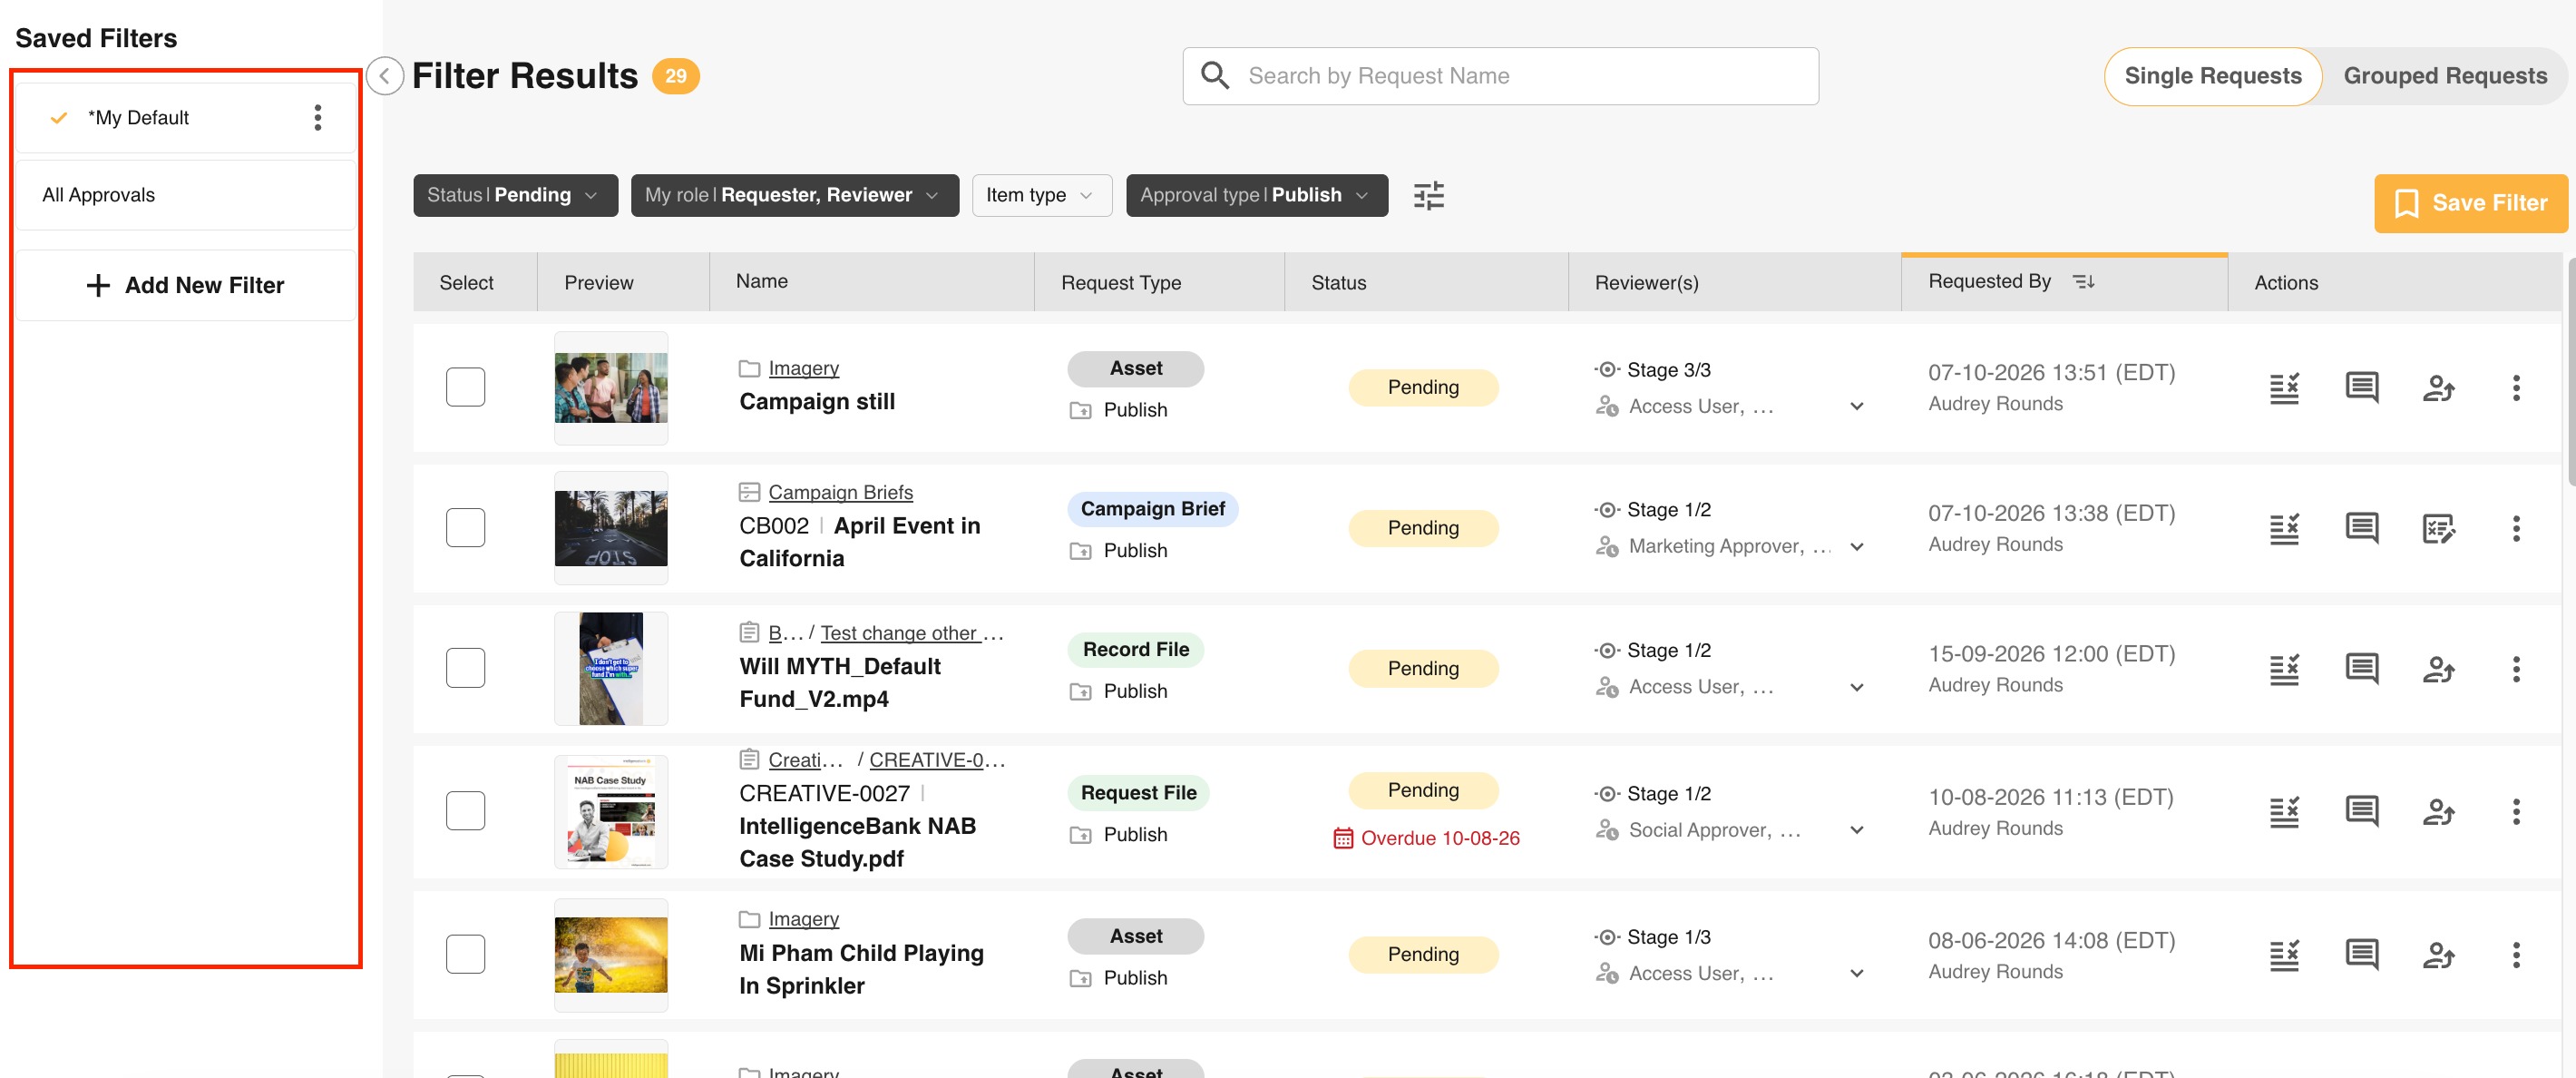
To save a filter within your Approvals List, follow the steps below. Saved filters can be edited, removed, and selected as the default filter for each user.
| 1Open Filters Panel | Navigate to and open your Filters Panel. |
| 2Add Filter | Click the Add Filter button. |
| 3Name your filter | Give your filter a descriptive name so you know what it filters, for example "My Pending Requests". |
| 4Add Condition | Click Add Condition and add the condition(s) you wish to filter by. As you add complete conditions, the requests list behind the Filters Panel will update in real time. |
| 5Save | Click Save Filter to save your new filter. Filters are personal - they will not appear for other users. You can save a maximum of 20 filters. |
Selecting a New Default Filter
Users will automatically have a "My Default" filter located at the top of the filters panel the first time they access the Approvals List.
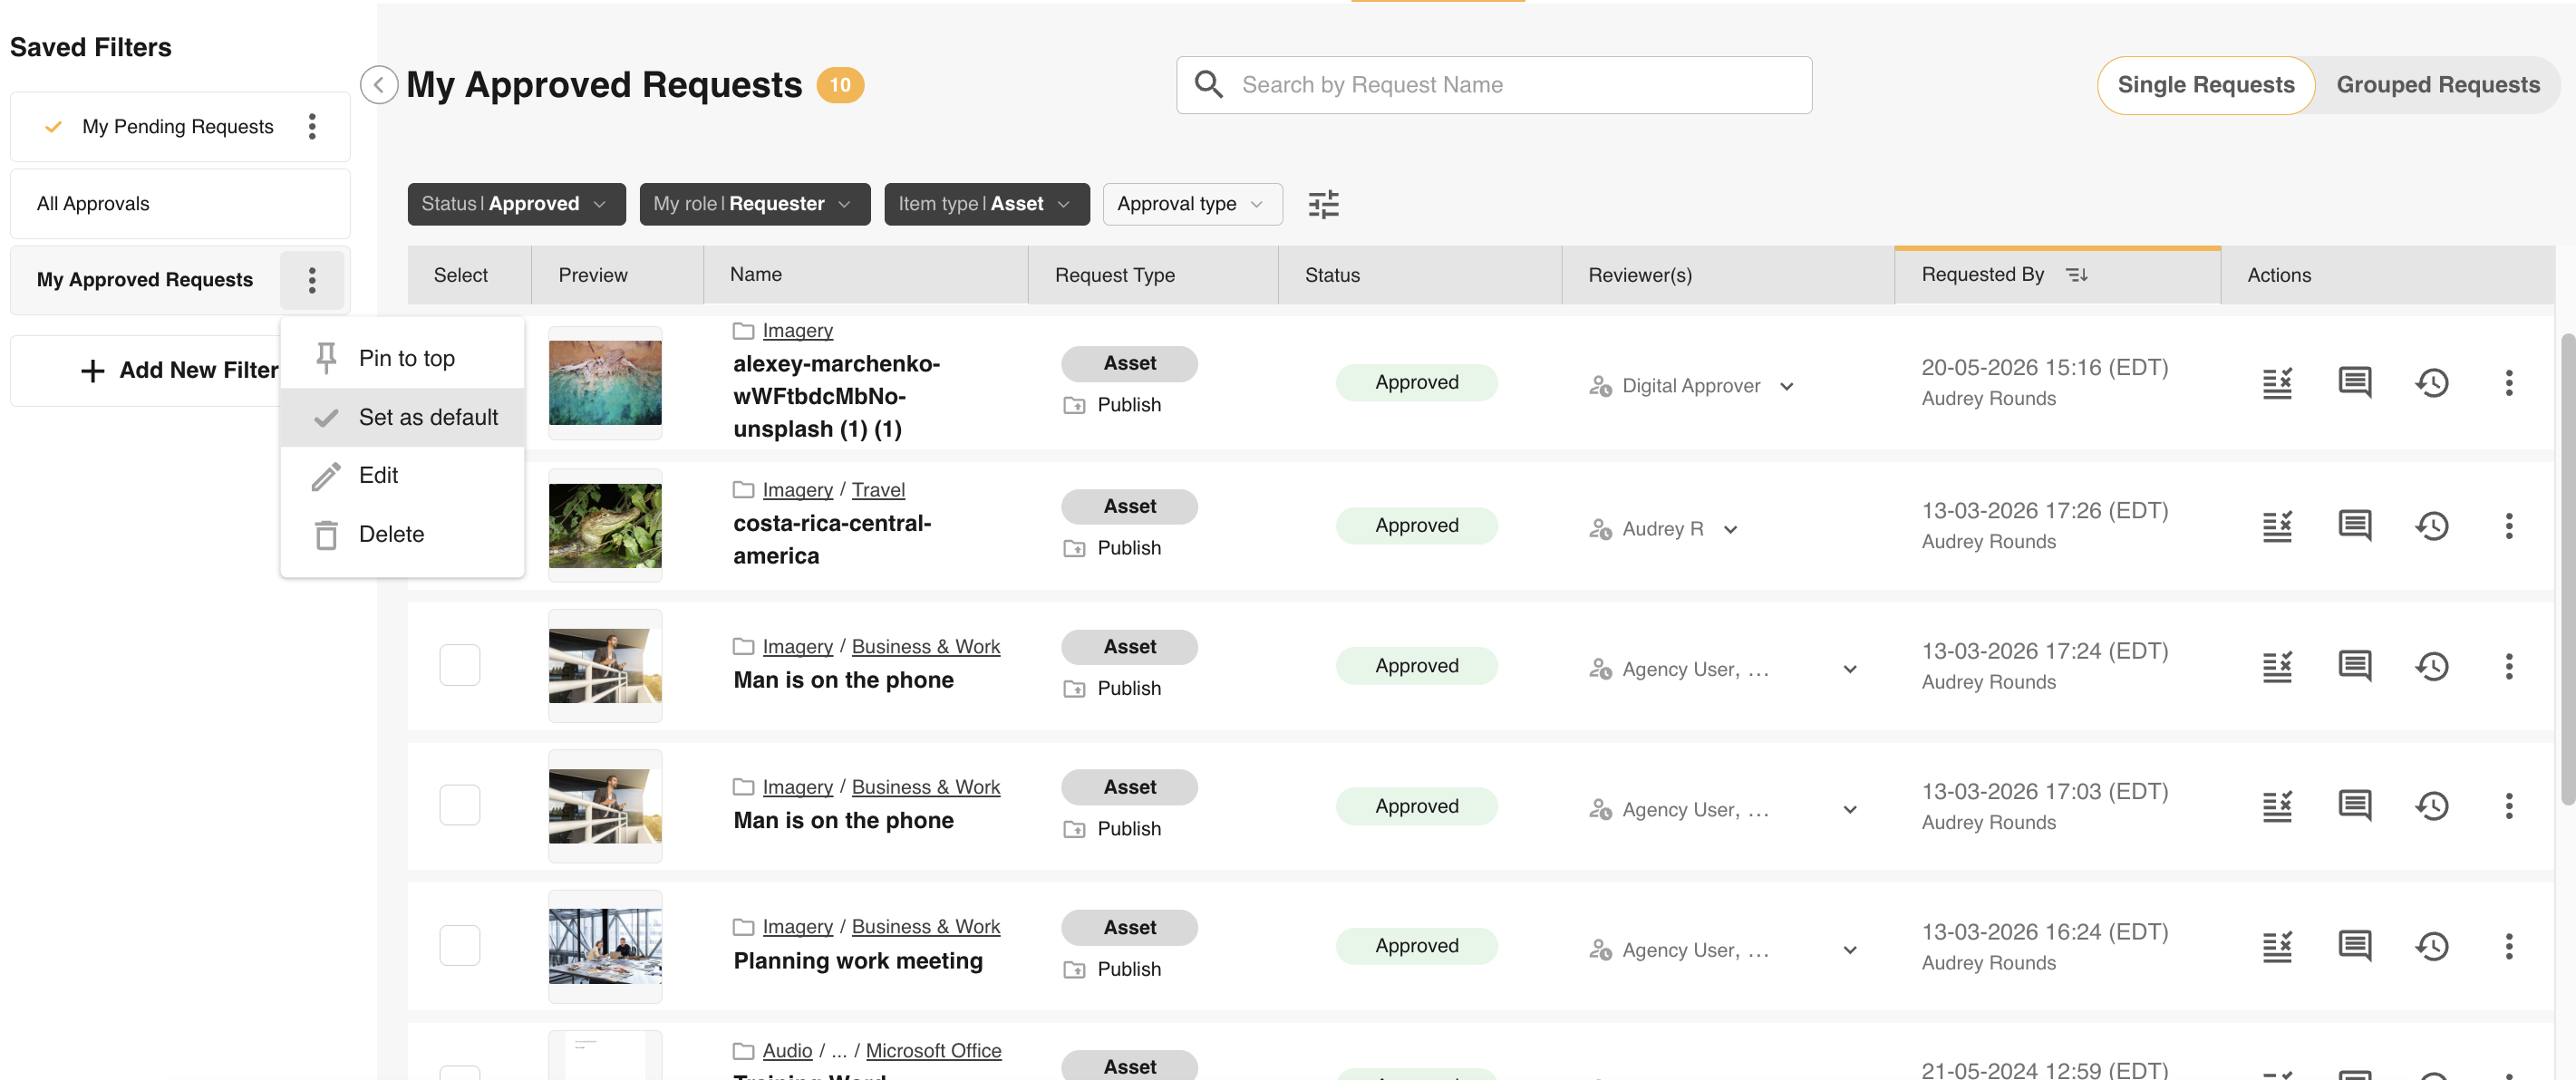
Users can update the conditions in this default by selecting Edit in the filter dropdown menu (located by hovering over the filter and clicking the 3 dots). They can also select another saved filter in the filter panel and click the Default option in the dropdown. You can see how to do this below.
Sort Your List
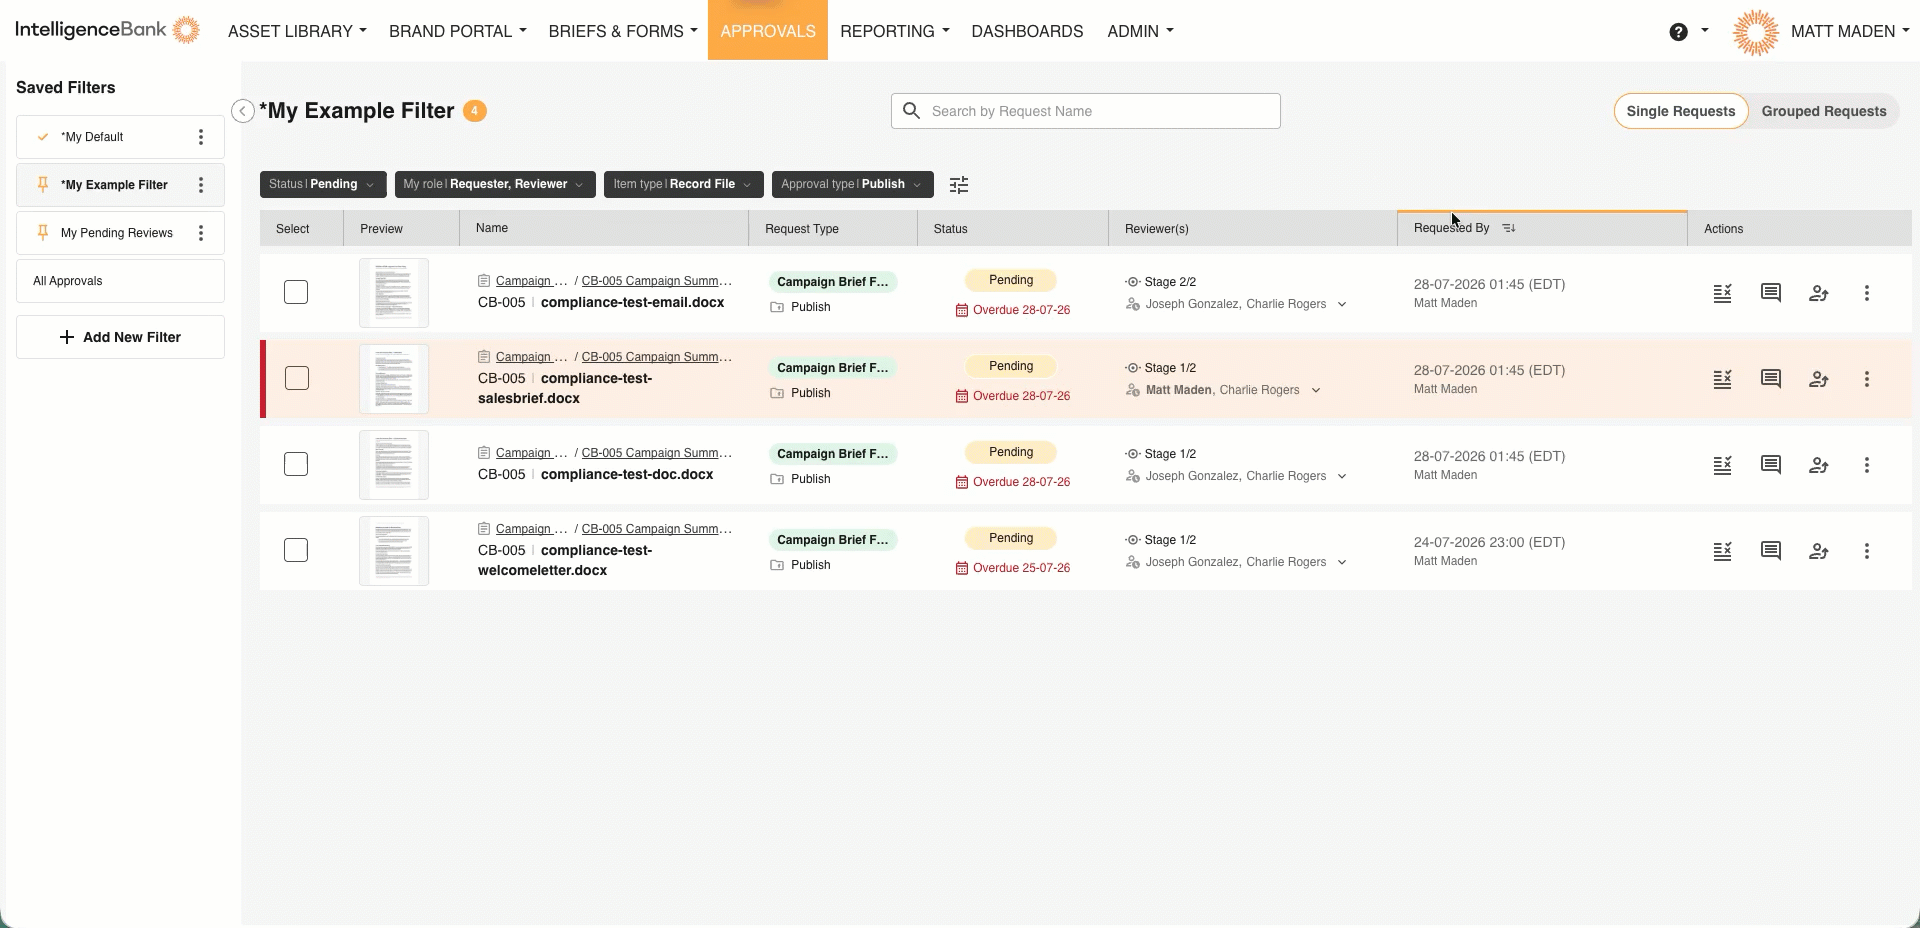
Select a column header to sort the list. You can sort by name (A to Z) or by submission date (oldest to newest), whichever order matters more for how you work.
Was this article helpful?
That’s Great!
Thank you for your feedback
Sorry! We couldn't be helpful
Thank you for your feedback
Feedback sent
We appreciate your effort and will try to fix the article