Set up an upload field for Per-File Risk Filters, then change the risk filters on an individual file and check what it will be reviewed against.
Table of Contents
Set Up an Upload Field (Admins)
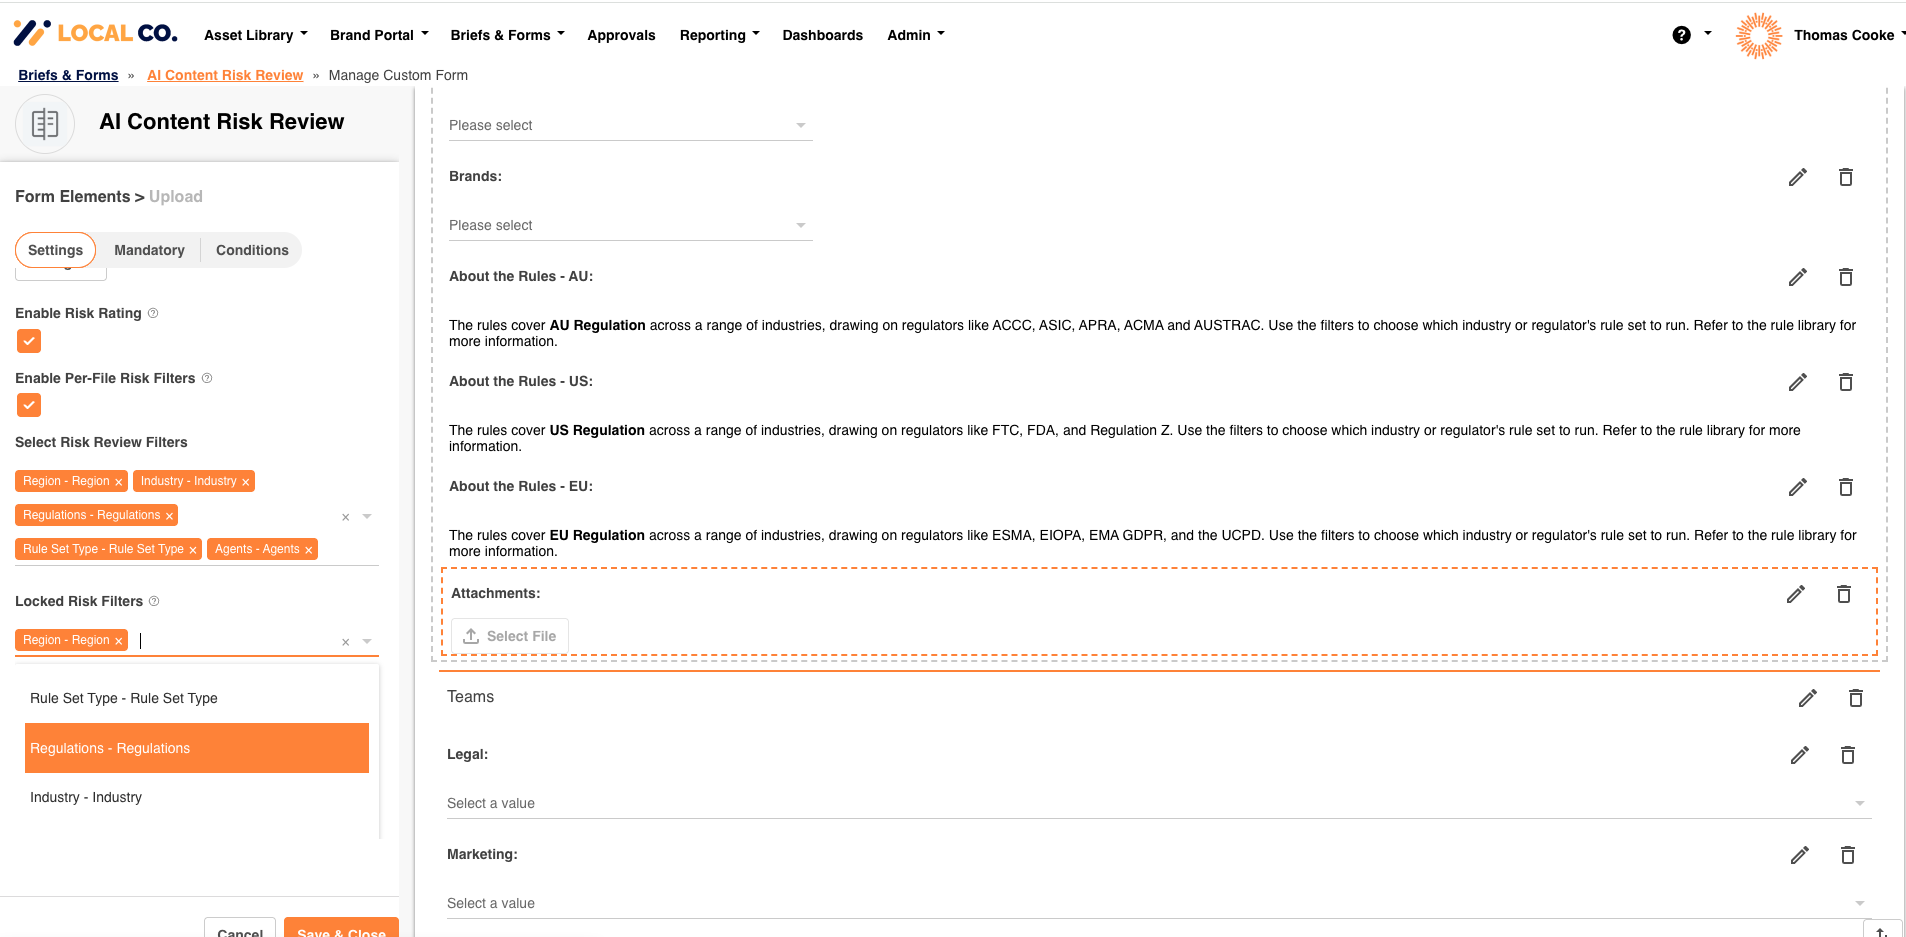
Per-File Risk Filters is set up for each upload field in the database's form template. It is off by default. If you cannot see the settings below, ask your Customer Success Manager or IntelligenceBank Support to switch it on for your site.
- Open the form template for the database and select the upload field used for risk reviews.
- In Settings, check that risk reviews are enabled and that the filters that decide which rules apply are chosen under Select Risk Review Filters. Only these filters can be changed per file. See Setting Up a Database for Content Risk Reviews.
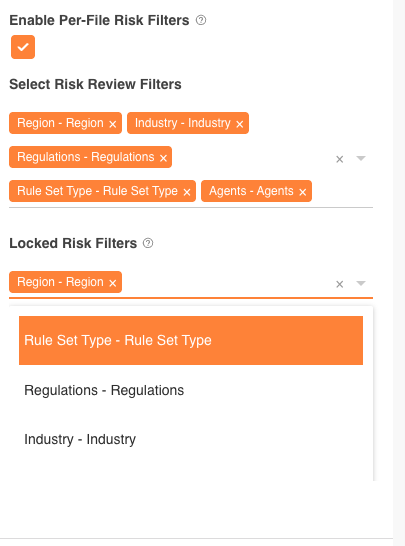
- Tick Enable Per-File Risk Filters.
- Optional: use Locked Risk Filters to choose filters reviewers cannot change. The list only offers filters you selected under Select Risk Review Filters.
- Select Save & Close.
Change a File's Filters
You can do this while adding files to a new record or while editing an existing one.
- Open or create a record and add your files to the upload field.
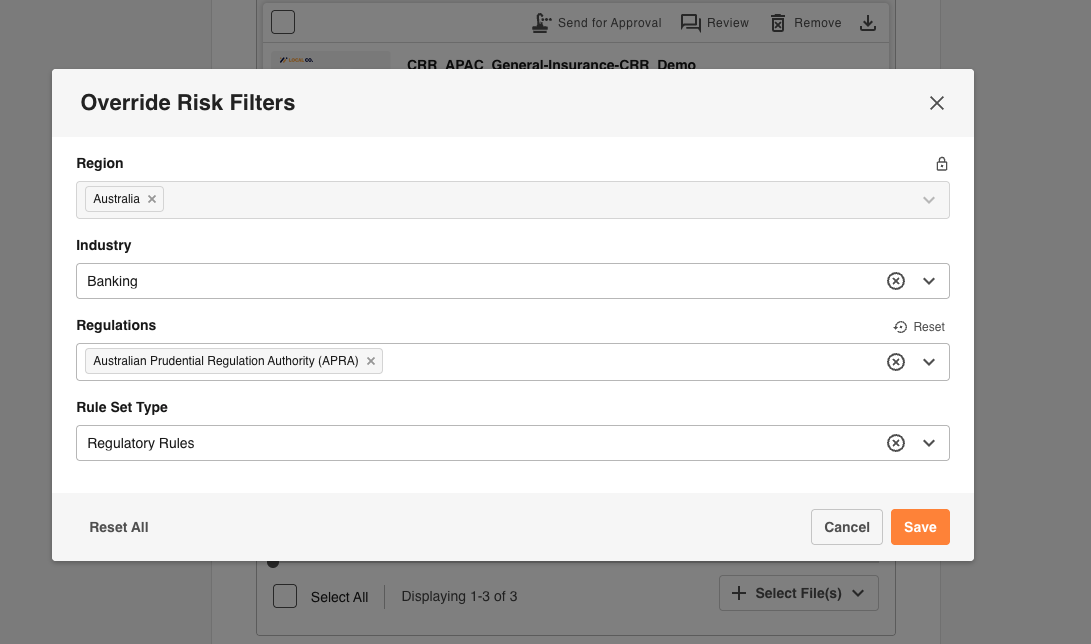
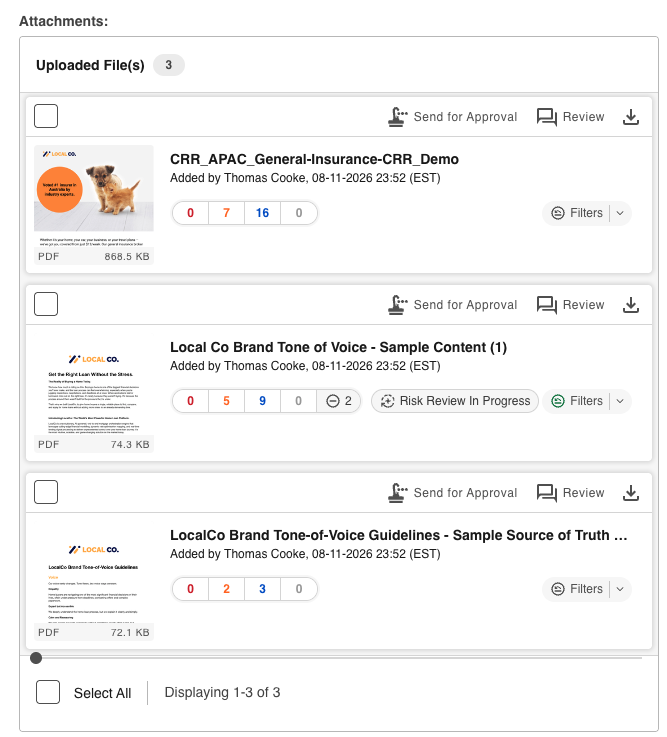
- On the file card, select Filters. A popup opens listing the risk filters for the field.
- Change the value of any filter that should be different for this file.
- A filter you have changed shows Reset. Select it to return that one filter to the record's value.
- Select Reset All to clear every change on this file.
- Select Save in the popup.
- Save the record. A file's filters are saved with the record. If you cancel your edit of the record, the changes are dropped.
Check the Values a File Will Use
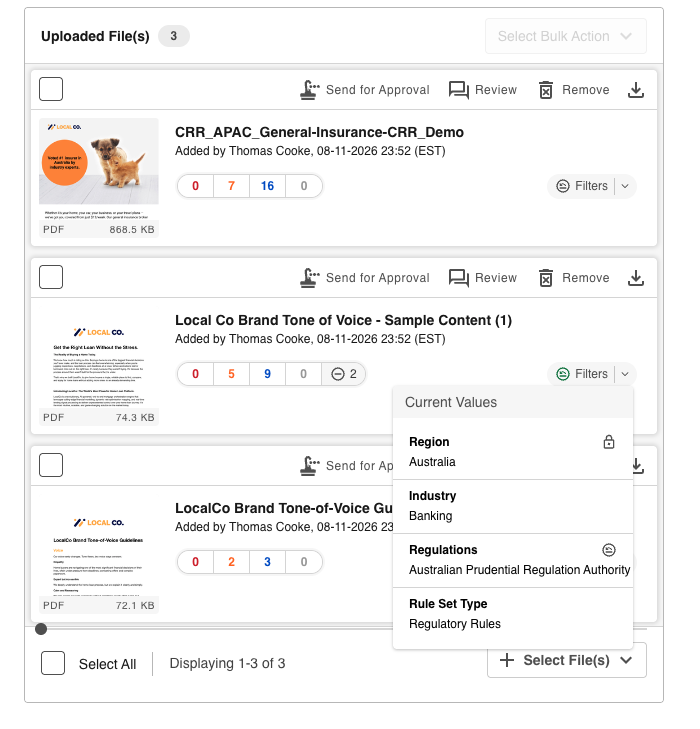
Select the small arrow beside Filters on a file card to open Current Values. It lists the filter values the file will be reviewed against, so you can see the result without opening the popup.
- A lock icon beside a filter means it is locked.
- A small filter icon beside a filter means this file has its own value for it. Filters without an icon follow the record.
Locked Filters
A locked filter always uses the record's value. In the popup it is greyed out with a lock icon and cannot be changed for an individual file. Use locked filters for values that must be the same across the whole record, such as Region.
After You Save: Running the Risk Review
- Each file is reviewed against its own filter values, not the record's, wherever they differ.
- If your upload field runs reviews automatically, a file that has been auto-saved shows Risk Review Not Yet Run. One review runs when you save the record.
- If you run reviews yourself, select Update Risk Review on the file.
- If you change a file's filters after a review has run, the change is used the next time a review runs.
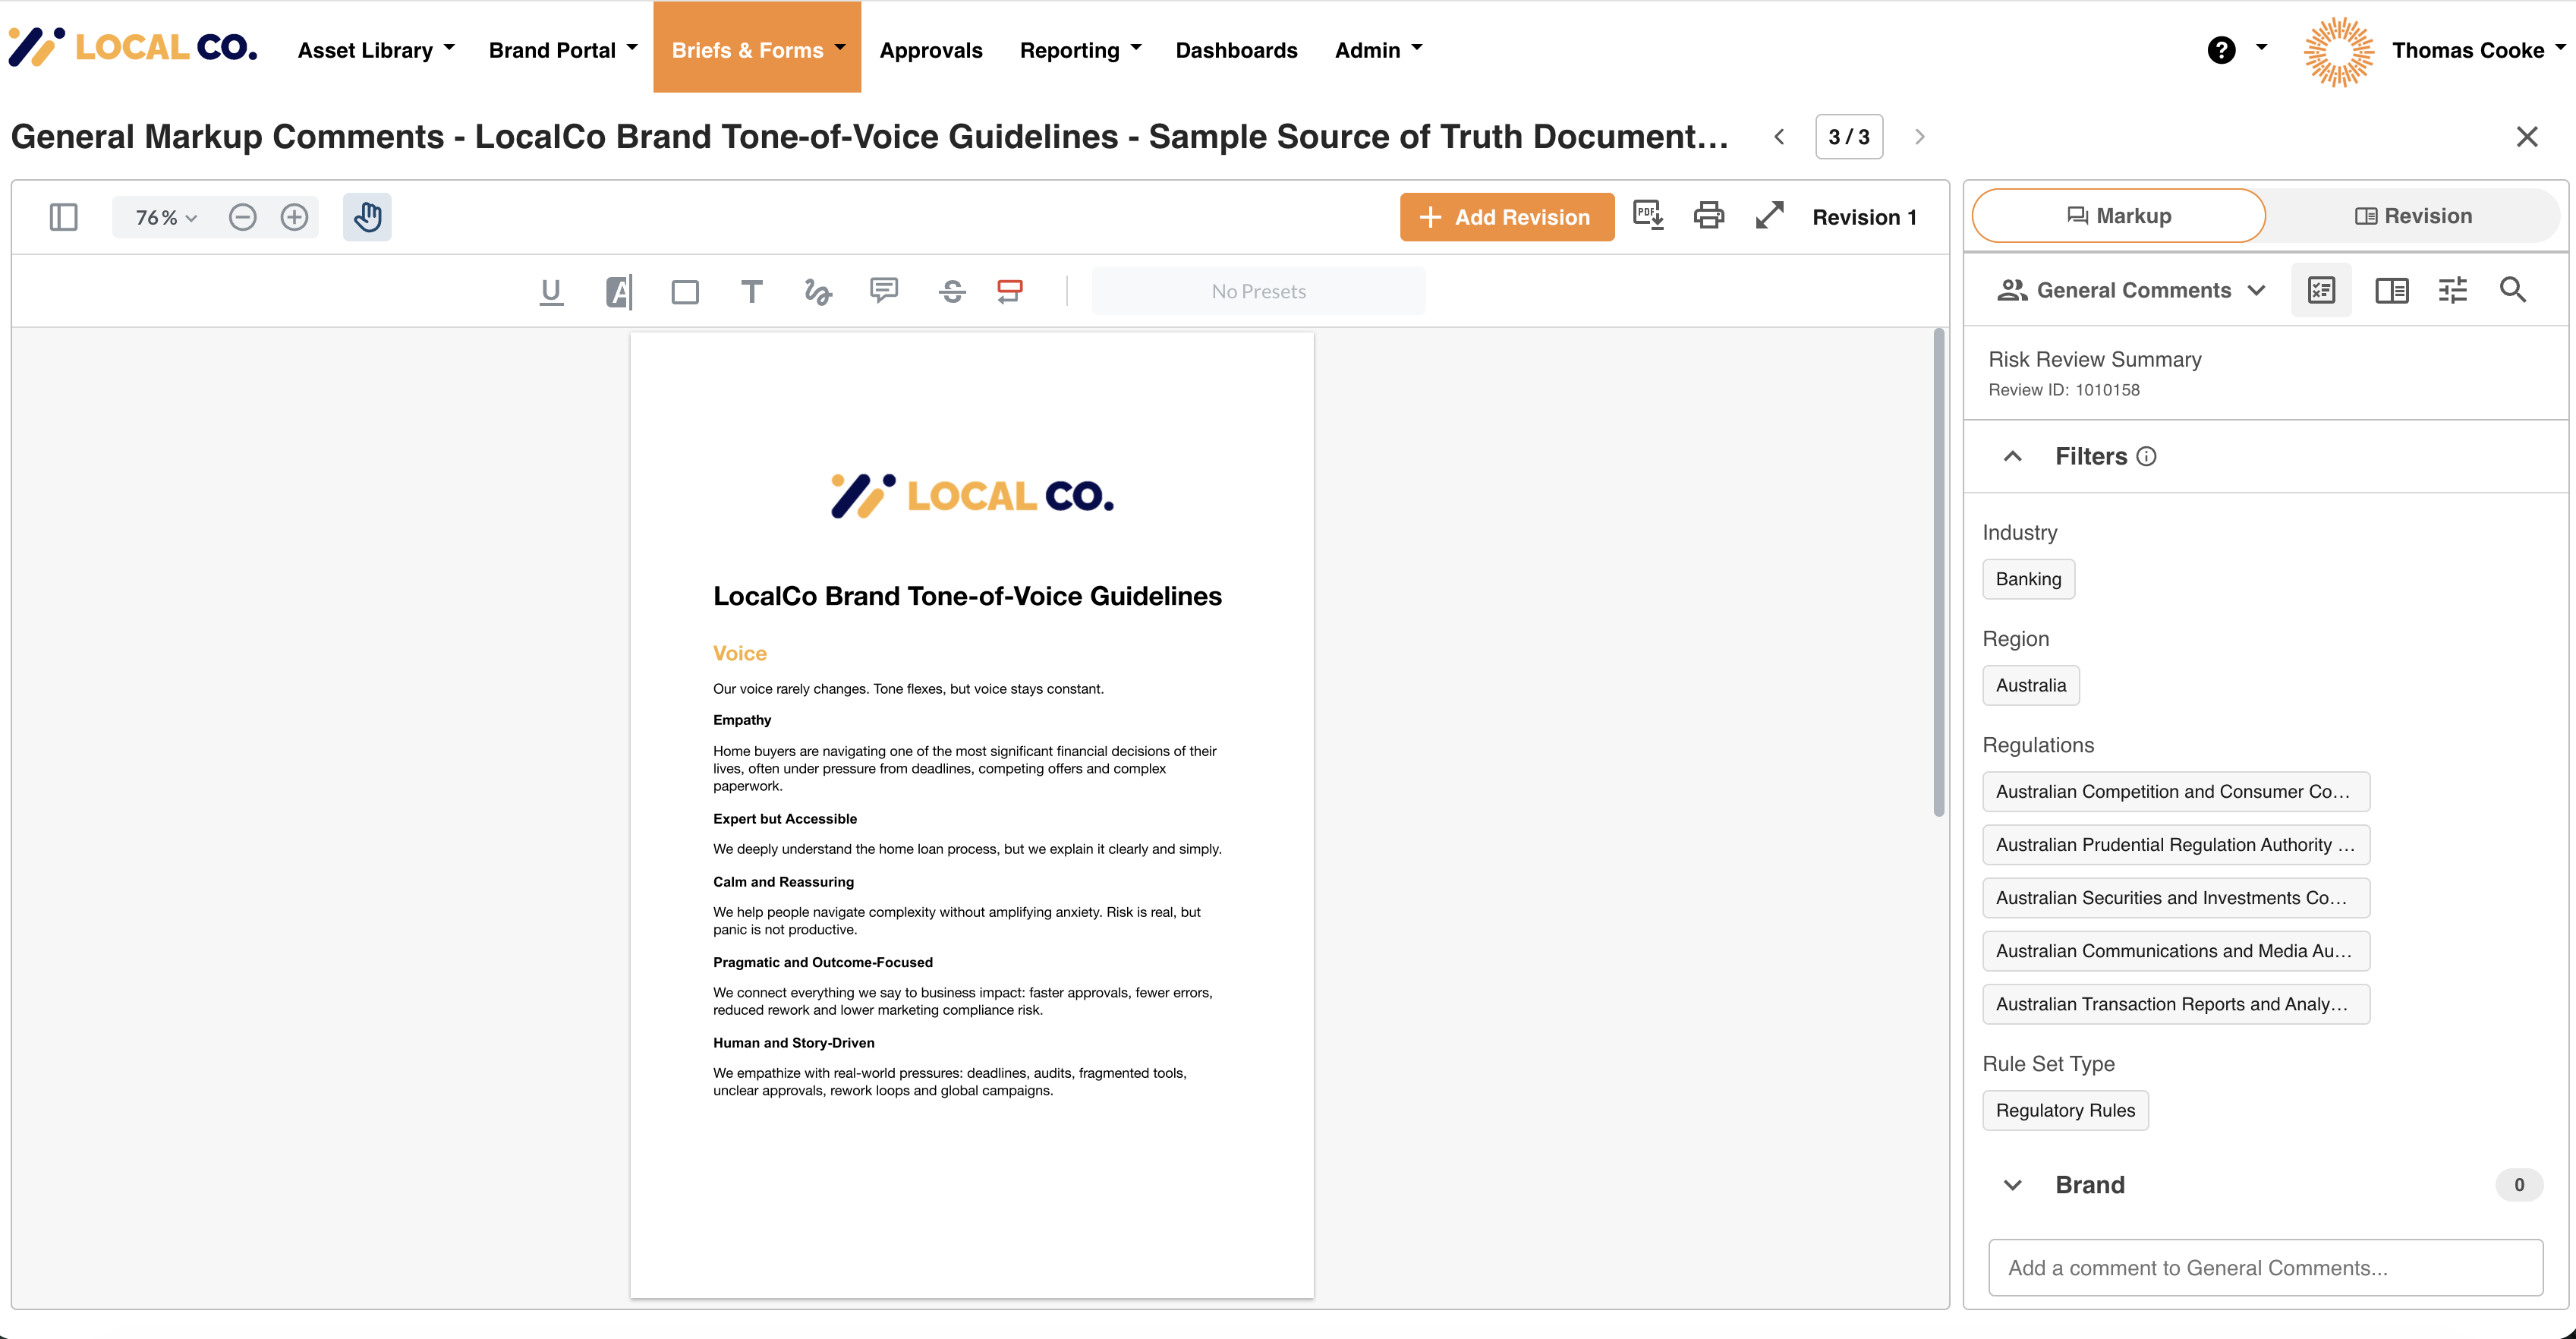
When you open a file's review, the Risk Review Summary in the sidebar lists the filters it was reviewed against.
Need Help?
If you cannot see the Enable Per-File Risk Filters setting in the form template, or a file card does not show Filters, contact your Main Admin or IntelligenceBank Support.
For limits and common questions, see Per-File Risk Filters: FAQs and Limits.
Contact SupportWas this article helpful?
That’s Great!
Thank you for your feedback
Sorry! We couldn't be helpful
Thank you for your feedback
Feedback sent
We appreciate your effort and will try to fix the article