Review Dates are date fields that you can assign to assets within your Asset Library, either while uploading or editing assets.
Review Dates can be mandatory, optional, or hidden completely. They can be set as a default admin setting to apply across all folders in the DAM, or customised as a part of individual folder settings.
Table of Contents
Key Benefits
Review Dates are useful for tracking any sort of "expiry date" particular assets may have, based on, for example, usage rights. They can also be used for setting a date when assets should be re-evaluated periodically by your team to determine whether a new version is needed, or if these assets should be purged from the system.
This helps teams remain compliant with their asset usage and encourages good data hygiene.
Review Date Alerts and Actions
Review Date Alerts and Actions are used frequently in conjunction with Review Dates, and can also be configured as a default admin setting, or customised on particular folders.
Alerts allow select users/groups to receive email notifications when the Review Date on an asset has been reached, so they know to review it. Actions are automated once Review Dates on assets are reached and include:
- Deleting the asset from the platform completely
- Moving the asset to another folder (ie: an Archive folder with restricted permissions, thus ensuring it's not accessible by your wider organisation after its Review Date has been met)
- Deleting Annotation from the file (if any are made)
How to Enable and Configure Review Date Settings
If you are a Main Admin, you can enable Review Dates in the Admin>Settings area of the platform.
Global Review Date Settings
To enable Review Dates and set a global, default review date setting:
| 1Navigate to Review Date settings | Navigate to Admin>Settings>Assets - Review Date. |
| 2Enable Review Date | Select the checkbox next to Enable Review Date (note, this setting is typically already enabled by default). |
| 3Set mandatory (optional) | Select the checkbox next to Mandatory Review Date if you'd like the Review Date field to be a required field on your assets when users either upload or edit. |
| 4Configure alerts (optional) | If you'd like any Review Date Alerts, select the checkbox next to the Review Date Alerts field. If selected, an Alerts Recipients field will populate, where you can input who should be alerted when assets meet their Review Dates. The options available are:
Note: Only users with a minimum of Publish permission on the asset at the time the review date is reached will be alerted. If Group(s) are selected as Alert Recipients, only up to 100 users will be alerted. |
| 5Configure actions (optional) | If you'd like to add any Review Date Actions, select which ones from the Review Date Action(s) field:
If you select Move Files, a Destination Folder button will populate. Select this button to choose which designated folder you'd like assets to move to upon meeting their Review Date. 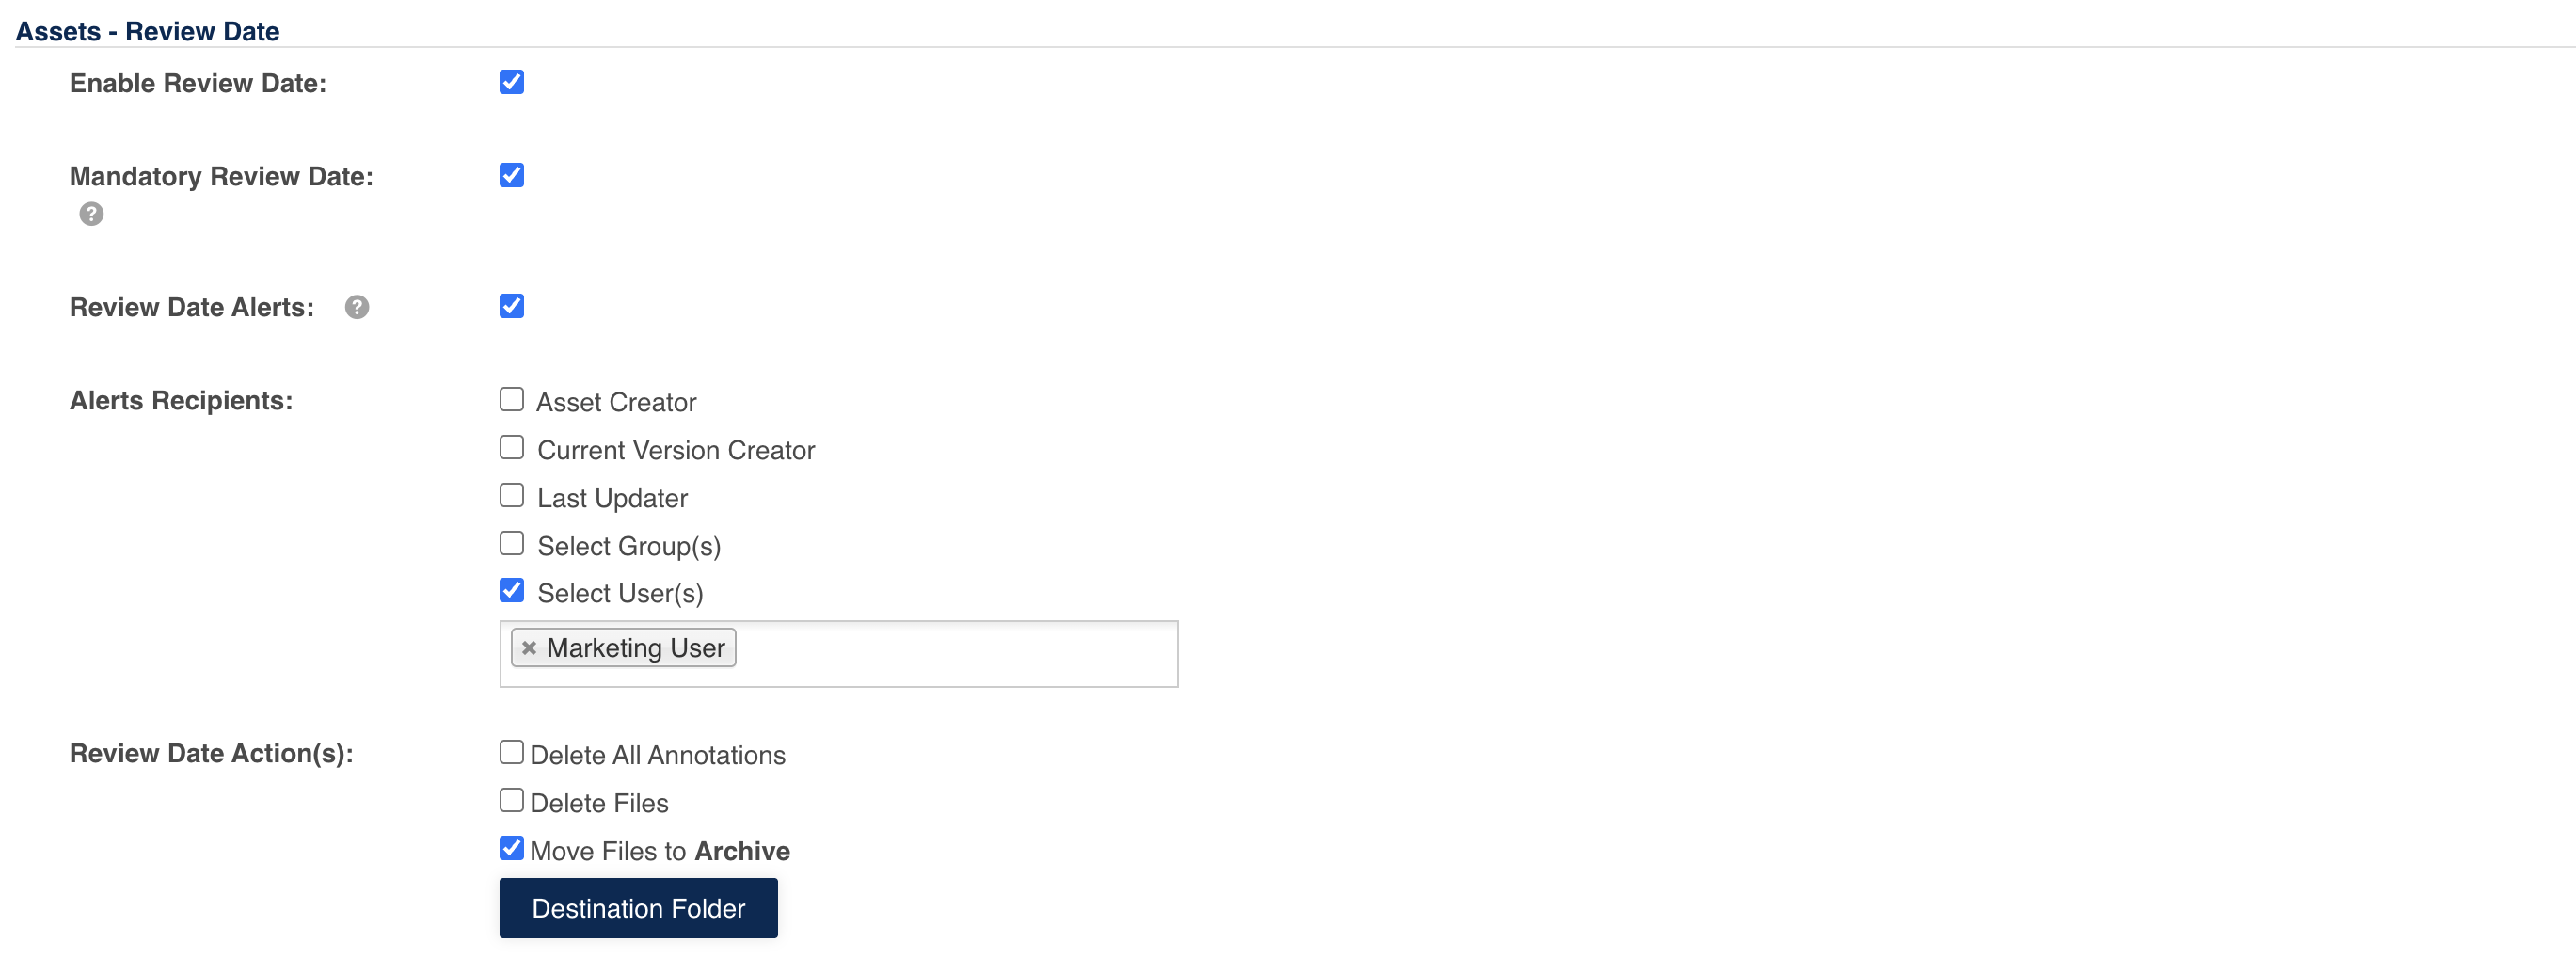 |
| 6Save settings | Once you are done selecting your desired Review Date settings, scroll to the bottom of the page and select Save. |
Folder Specific Review Date Settings
Main Admins and Folder Admins can adjust Review Date settings on a folder by folder level. This enables more flexibility and the ability for Review Date settings to be managed differently on different folders. For example, maybe not all of your assets require Review Dates - just images stored in specific folders, or process documentation. Or perhaps different folders need different Review Date Alert recipients.
To set or change Review Date settings on specific folders:
| 1Open Folder Settings | Navigate to the folder you'd like to update Review Date settings on. Select the three vertical dots in the upper right hand side of the folder, then select Folder Settings.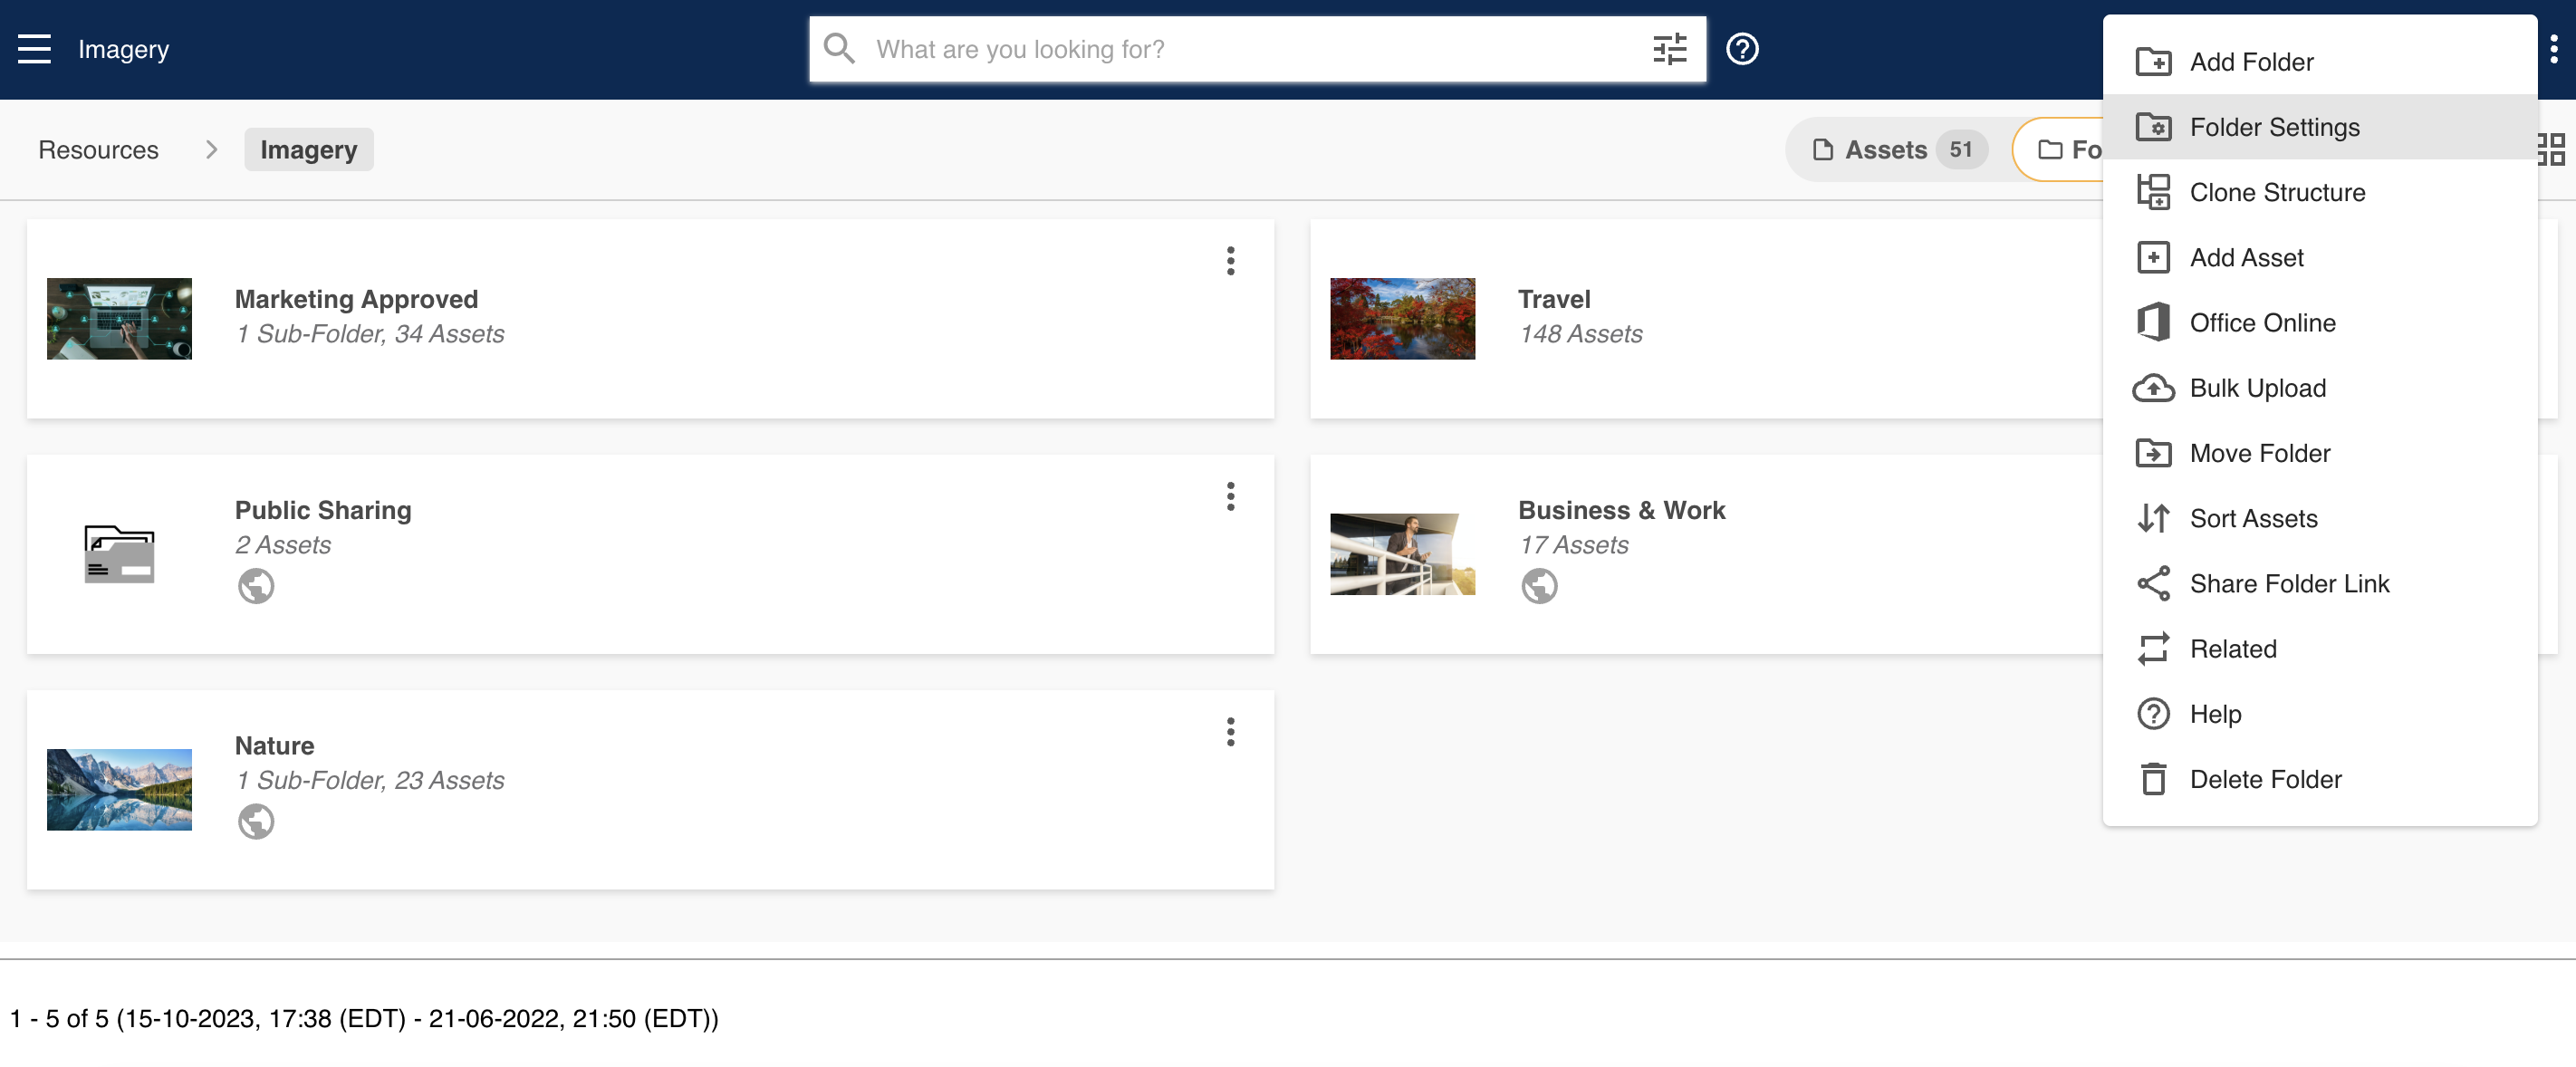 |
| 2Select Custom settings | Under Advanced Options, you'll see the same Review Date setting fields outlined in the section above. To customise these on this particular folder, select Custom in the Applicable Settings field. This will allow you to update the Review Date settings for this folder.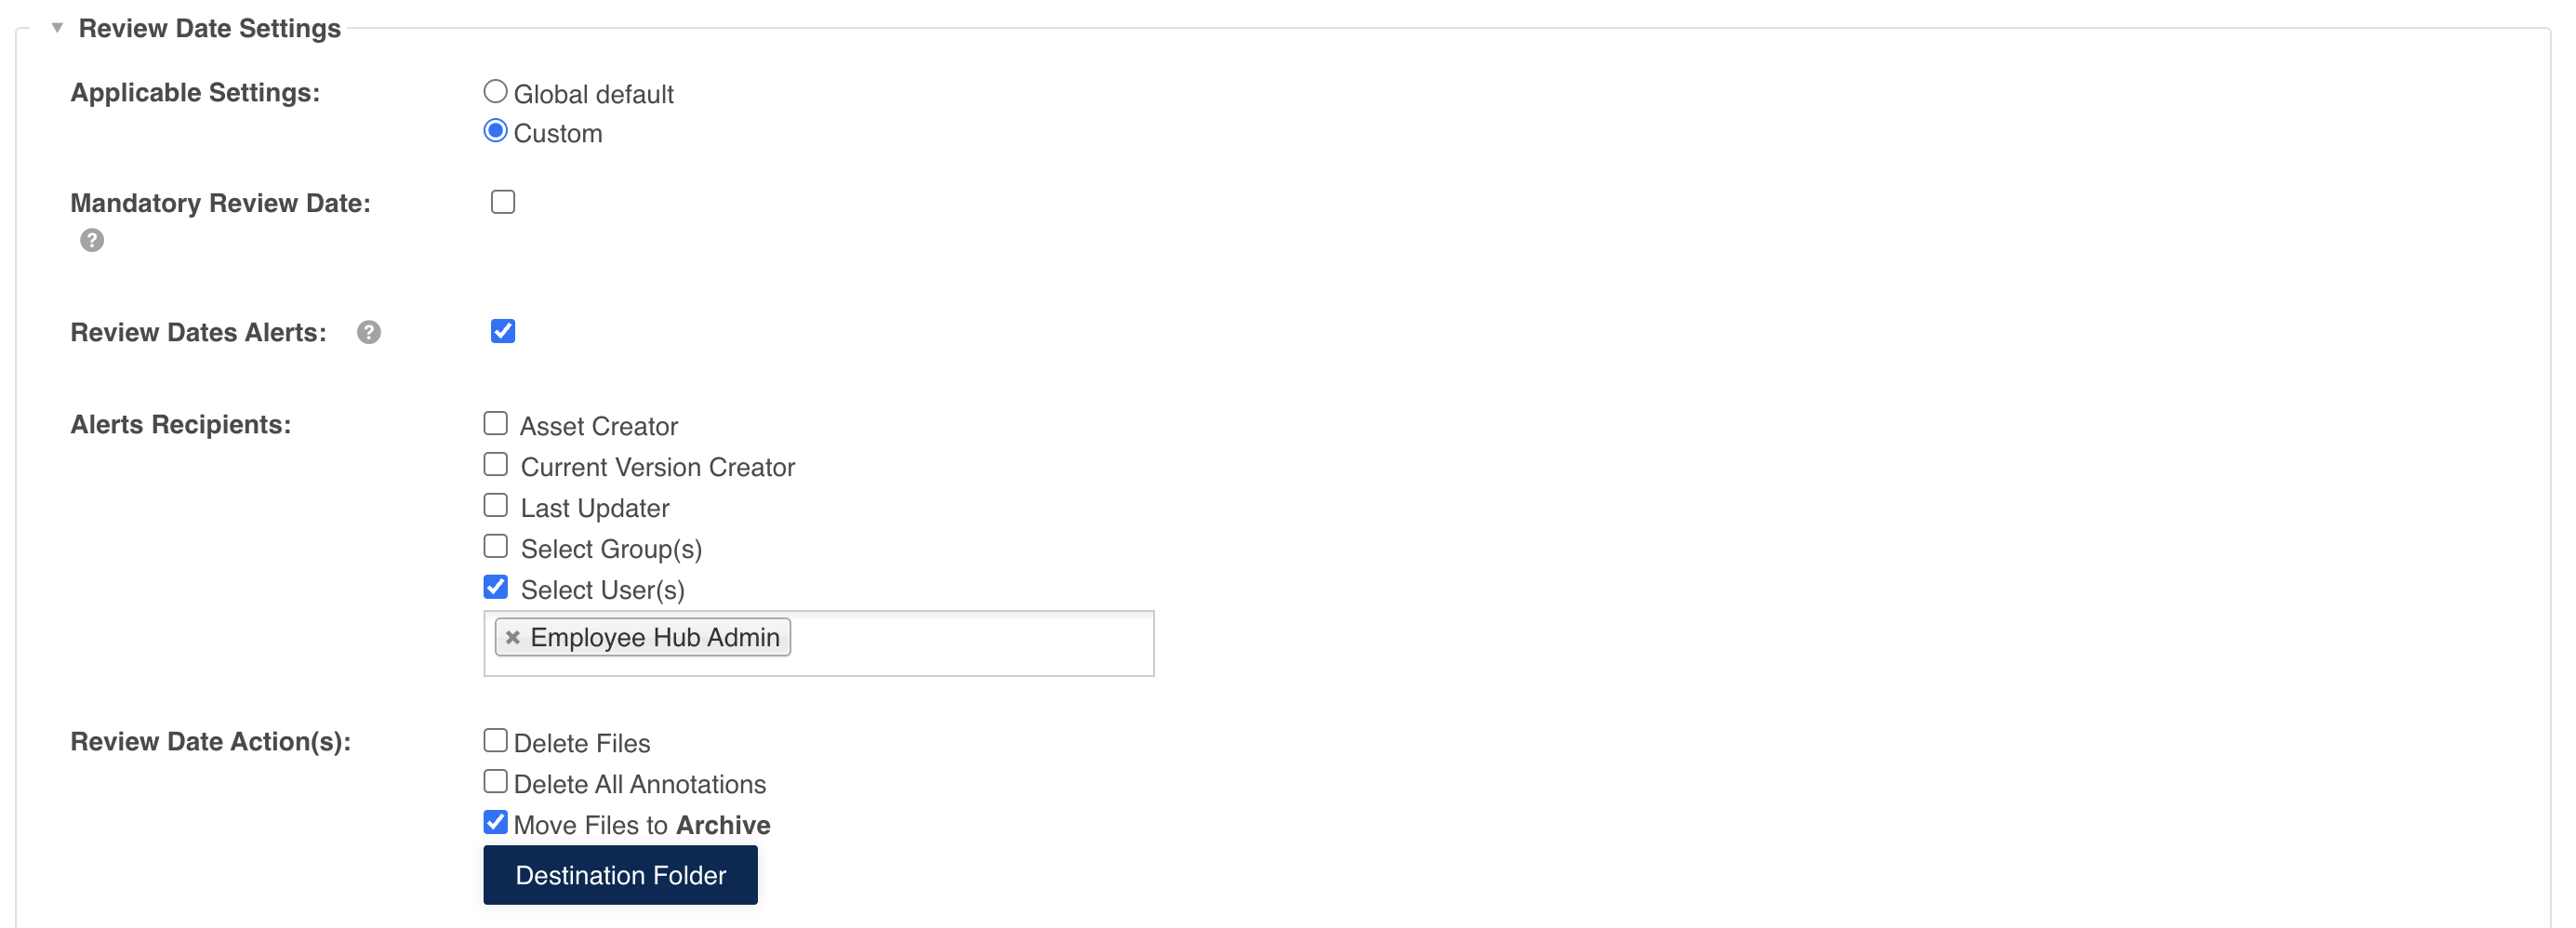 |
| 3Save folder settings | Make your desired changes, then select Save to save your folder settings. |
How to Assign Review Dates to Assets
Once Review Dates have been enabled, users who have Publish permission or higher will be able to assign Review Dates on assets.
Review Dates can been assigned either when uploading or editing. Users can assign Review Dates on individual assets or in bulk as well.
Upon Uploading
To assign a Review Date while uploading an asset:
| 1Navigate to folder | Navigate to the folder you'd like to upload within and select +Add in the top right of the folder. |
| 2Select upload type | Select either Add Asset or Bulk Upload (depending on how many assets you're uploading).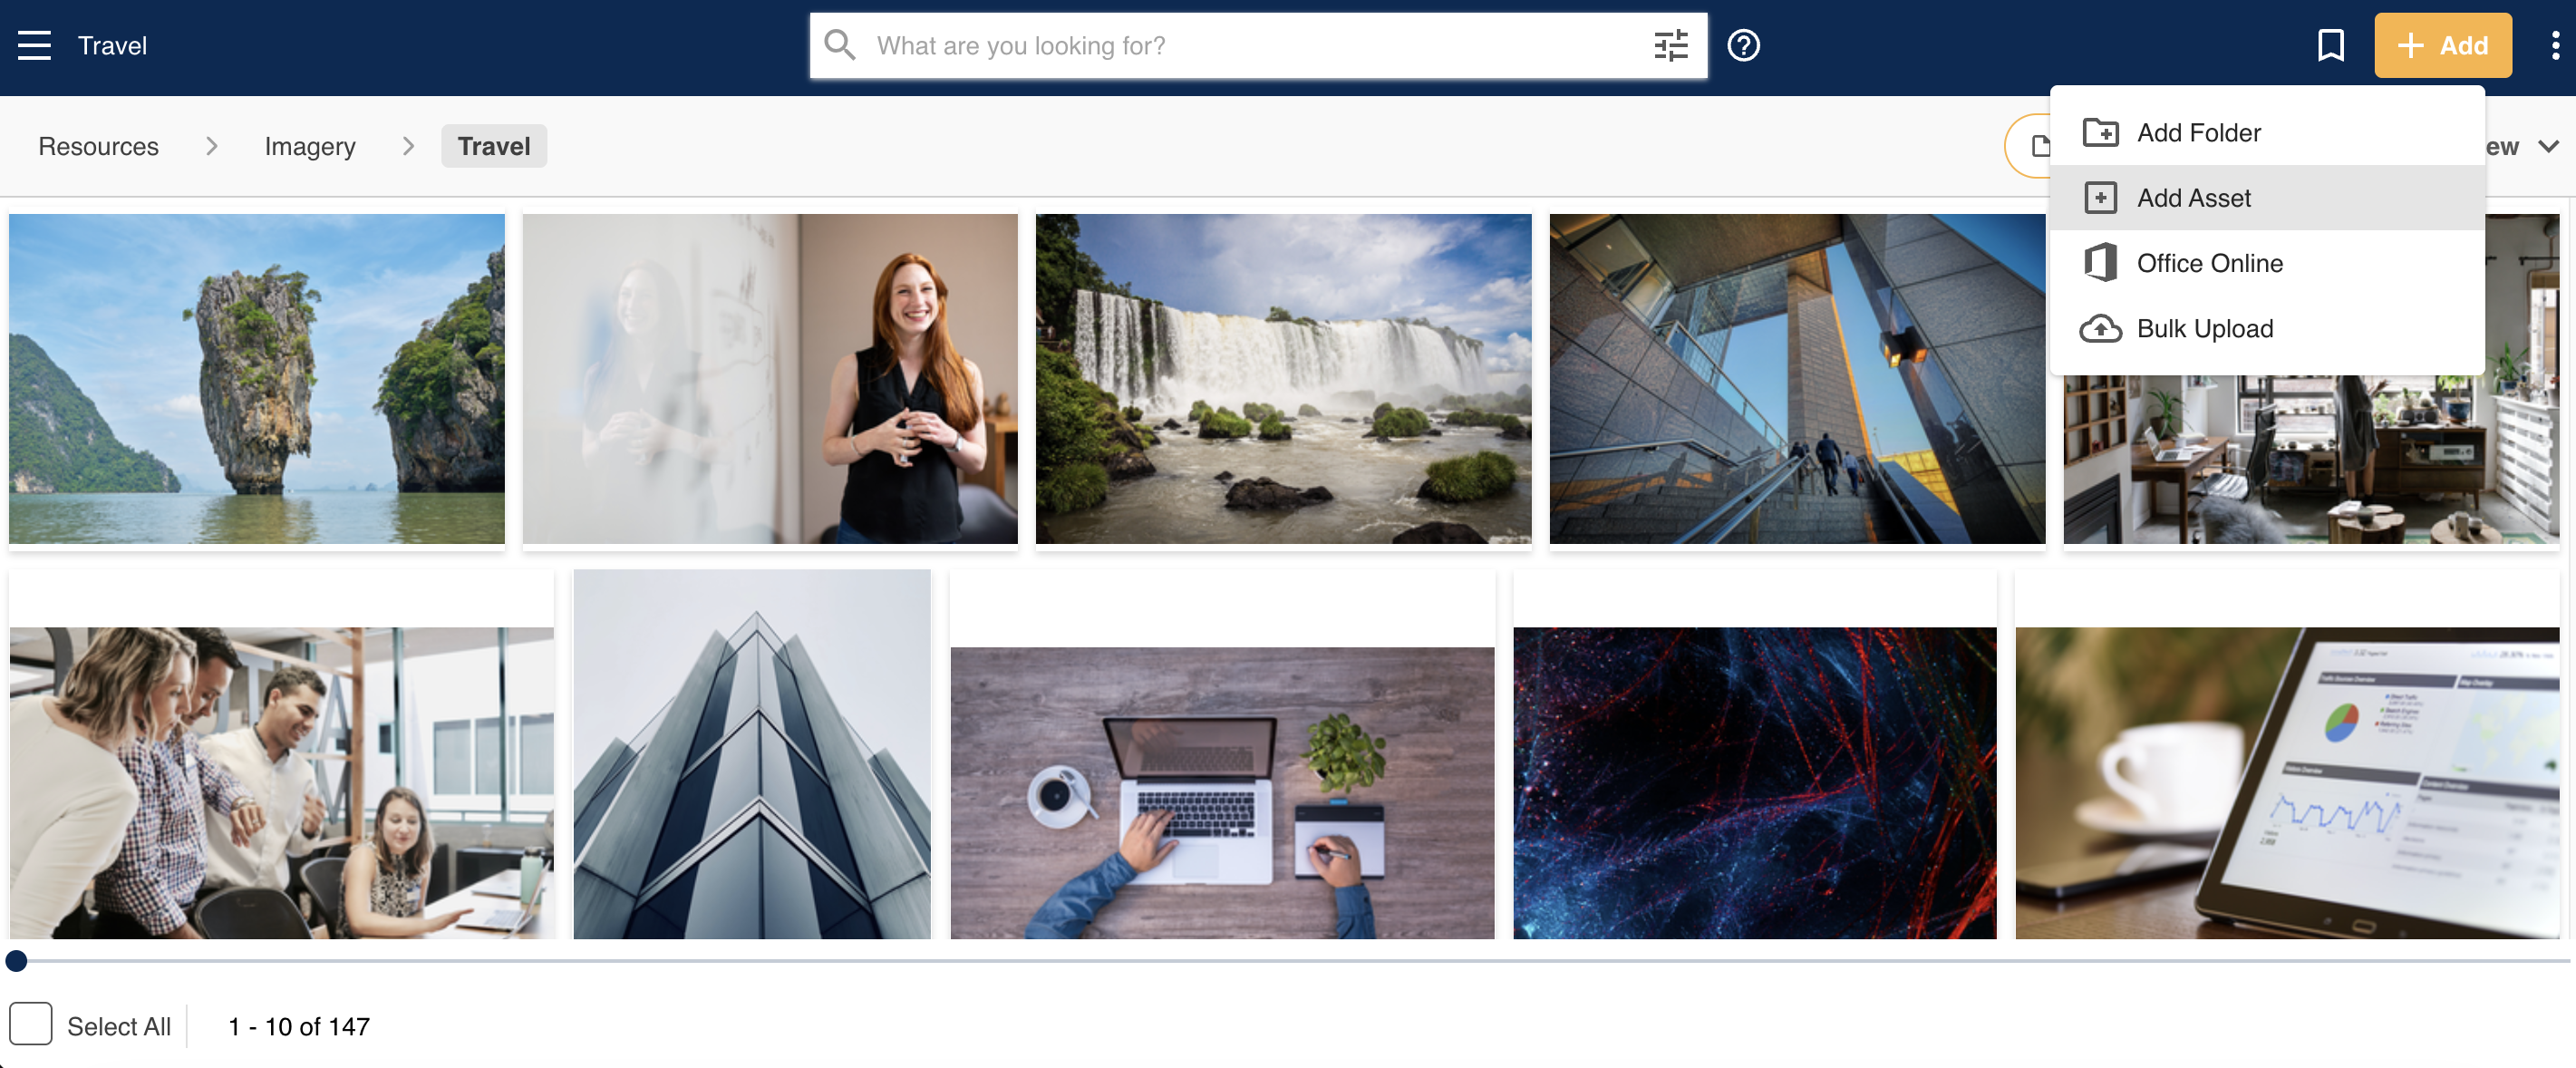 |
| 3Upload assets | Drag and drop your asset(s) into the lefthand side of the screen. The upload process will begin. |
| 4Set the Review Date | In the Review Date field, select the calendar icon indicated below. This will open up a calendar, where you can find and assign your desired Review Date.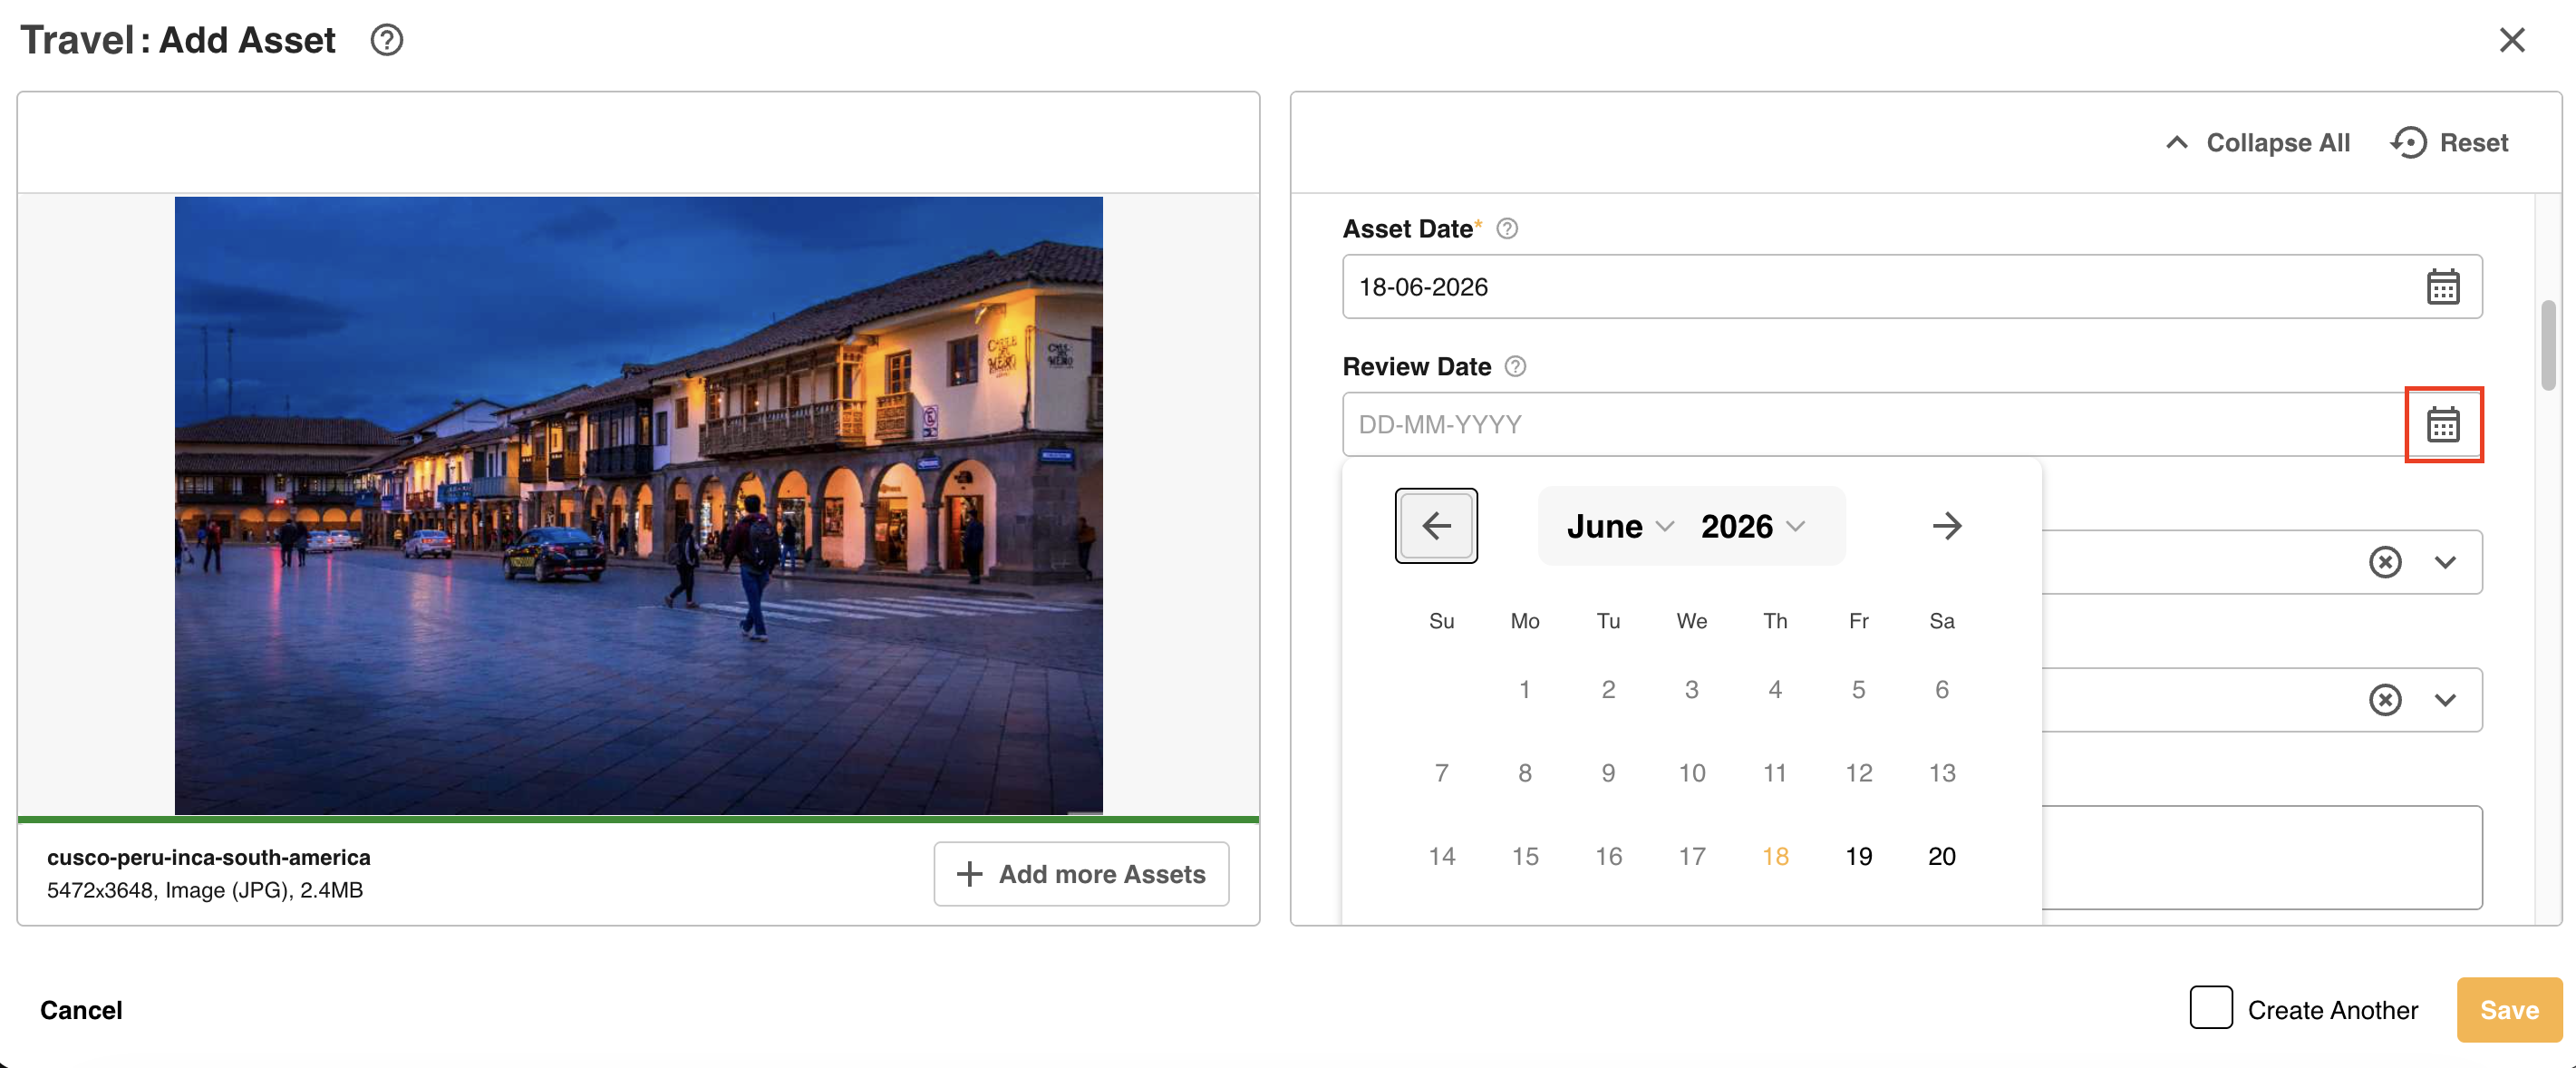 |
| 5Save the asset | Once you select a date, it will populate in the Review Date field. Add any other metadata (as relevant) and select Save to save your asset. If you are bulk uploading assets, you can either edit each asset within the queue to assign different Review Dates to assets, or apply the same Review Date to assets in bulk via Apply to Selected.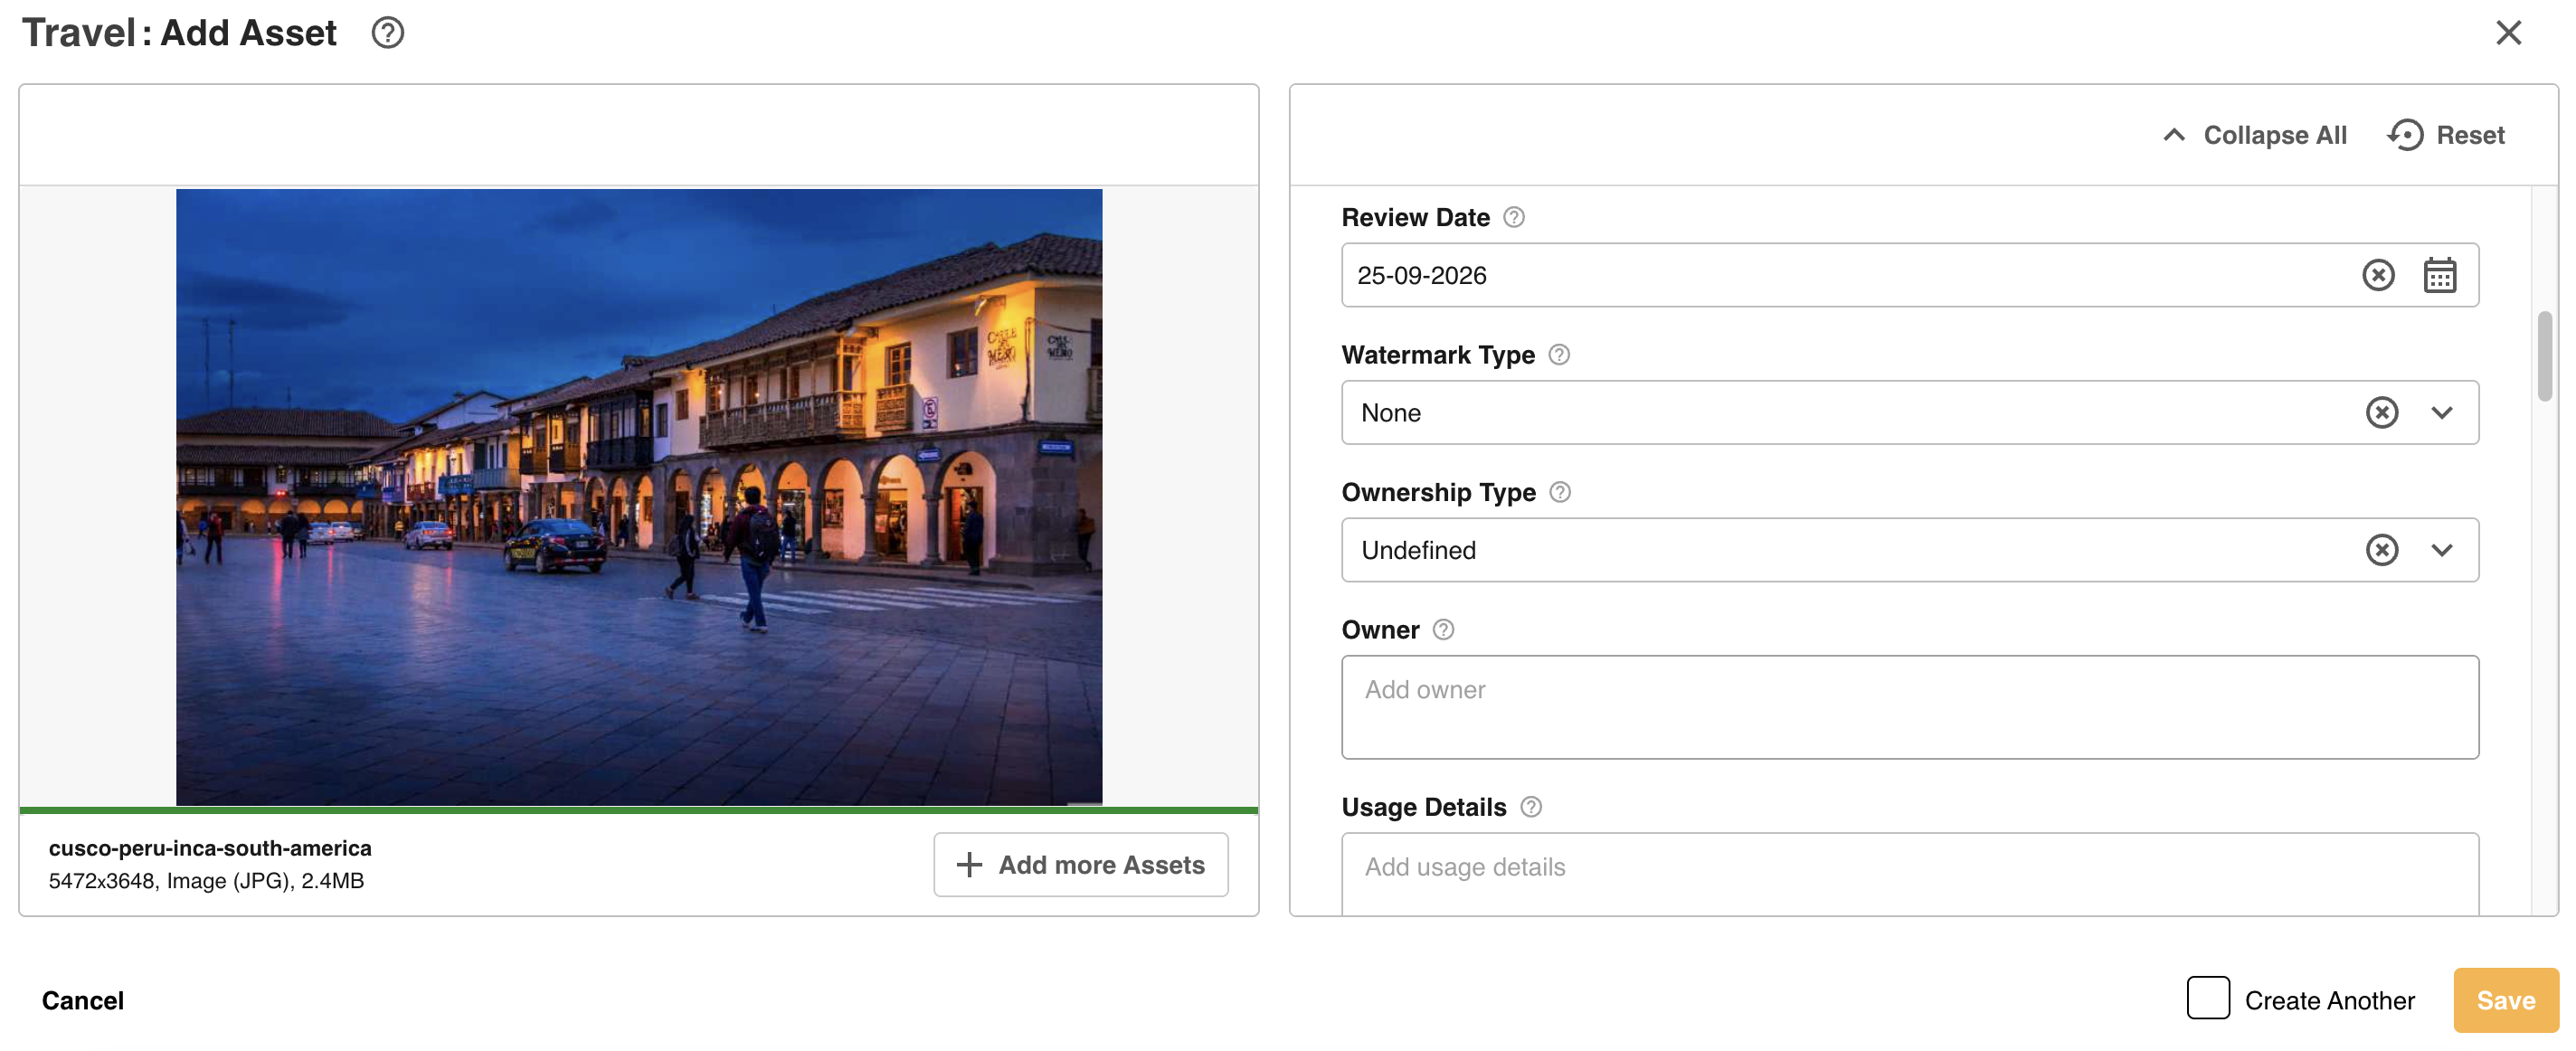 |
Upon Editing
If you need to edit an asset to assign a Review Date after it's been uploaded to a folder:
| 1Open the asset for editing | Navigate to the asset you want to edit. Select the three vertical dots that appear in the upper righthand side of the asset, then Edit/New Version.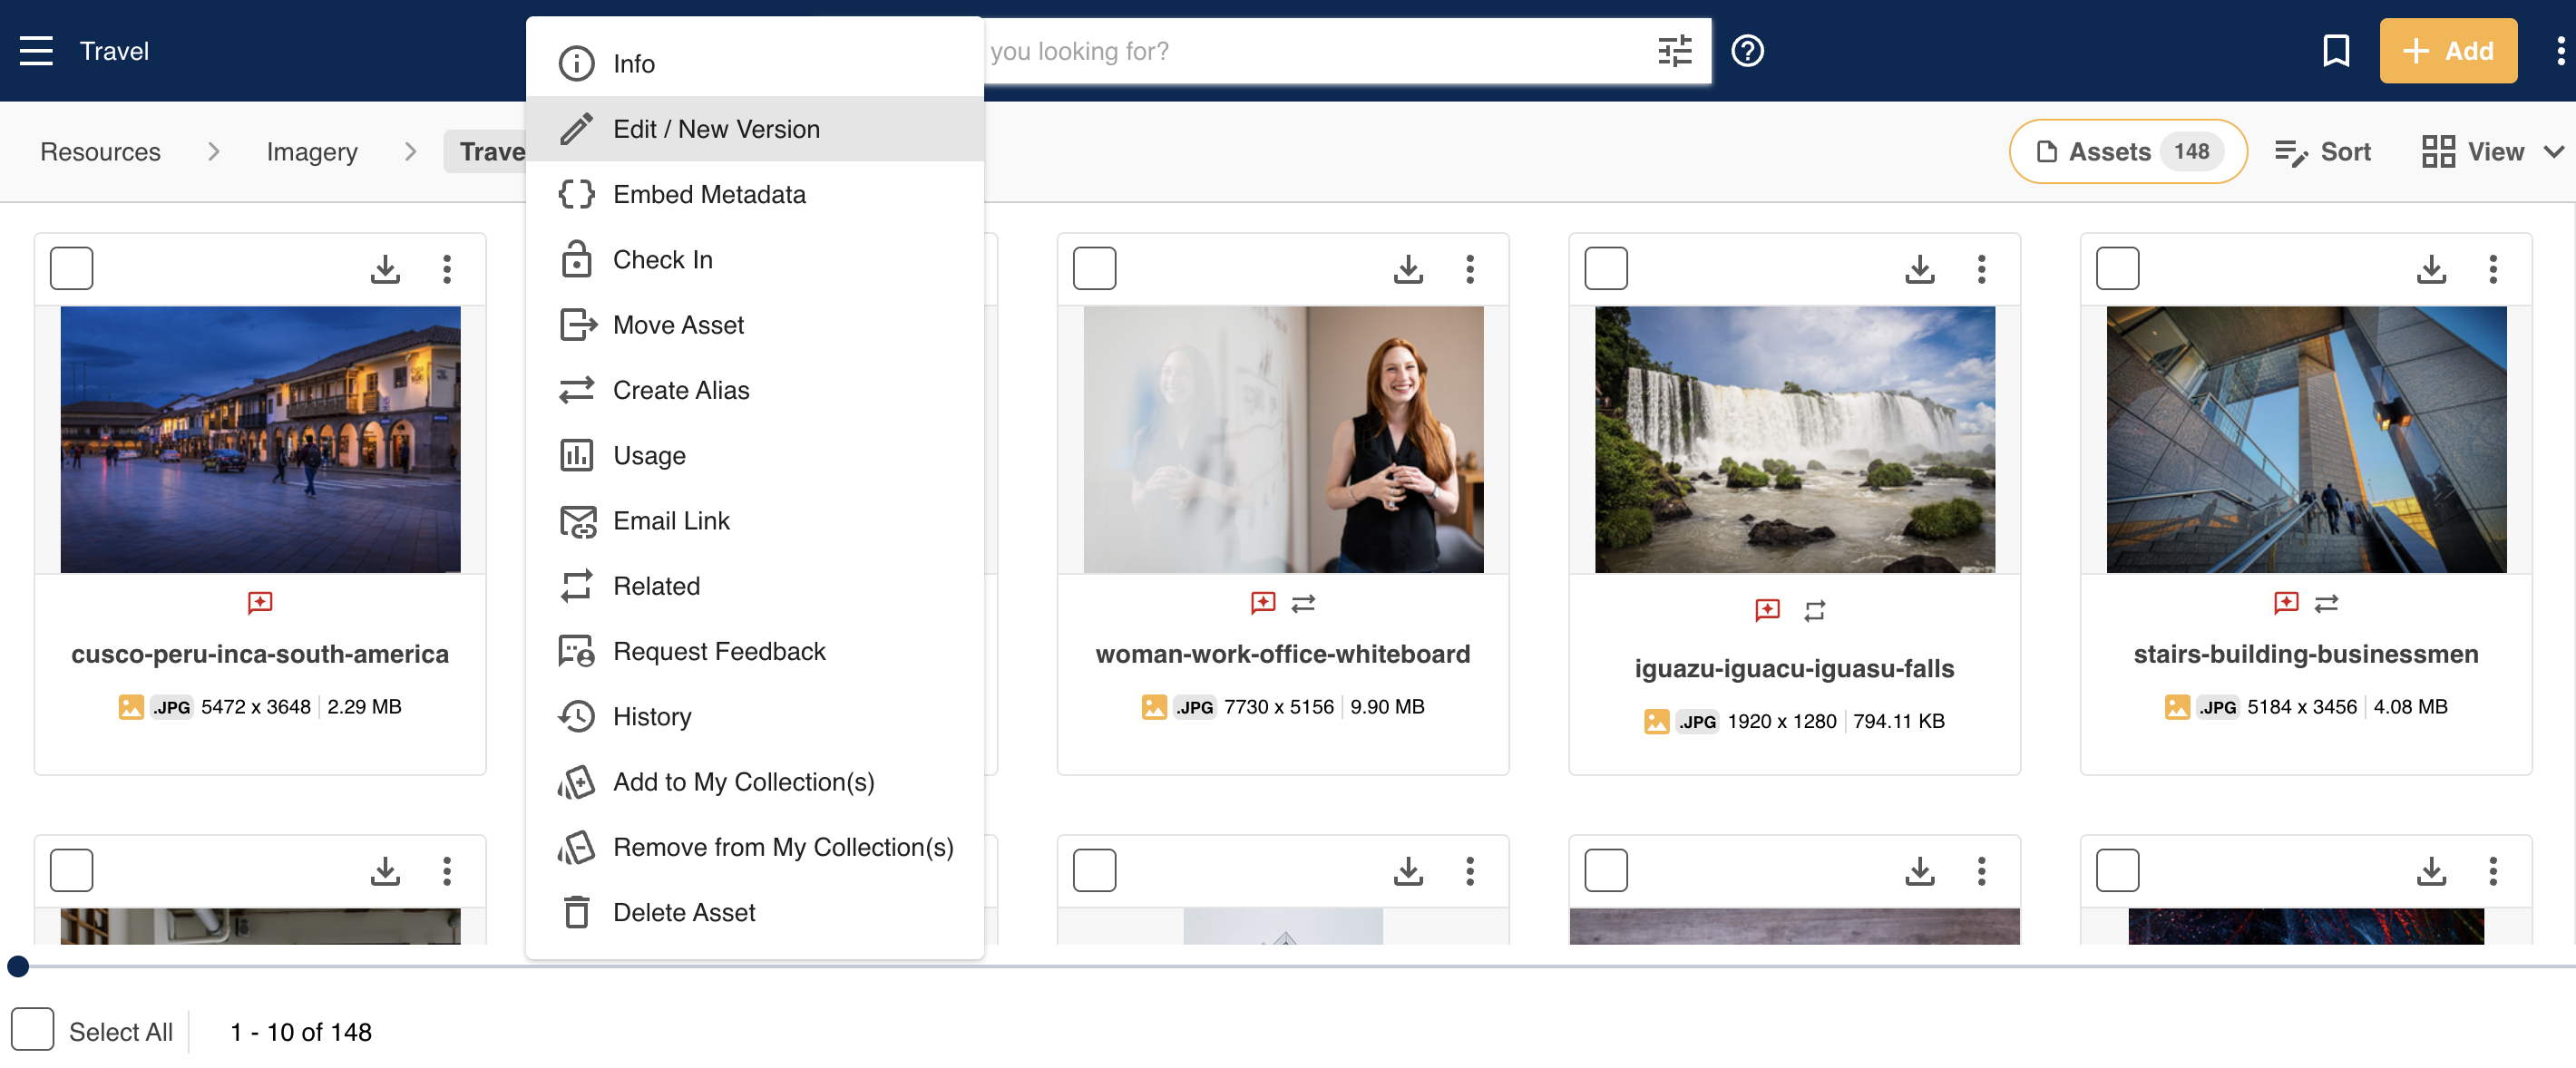 |
| 2Locate the Review Date field | This will open up an editable view of the asset. Locate the Review Date field and select the calendar icon noted below.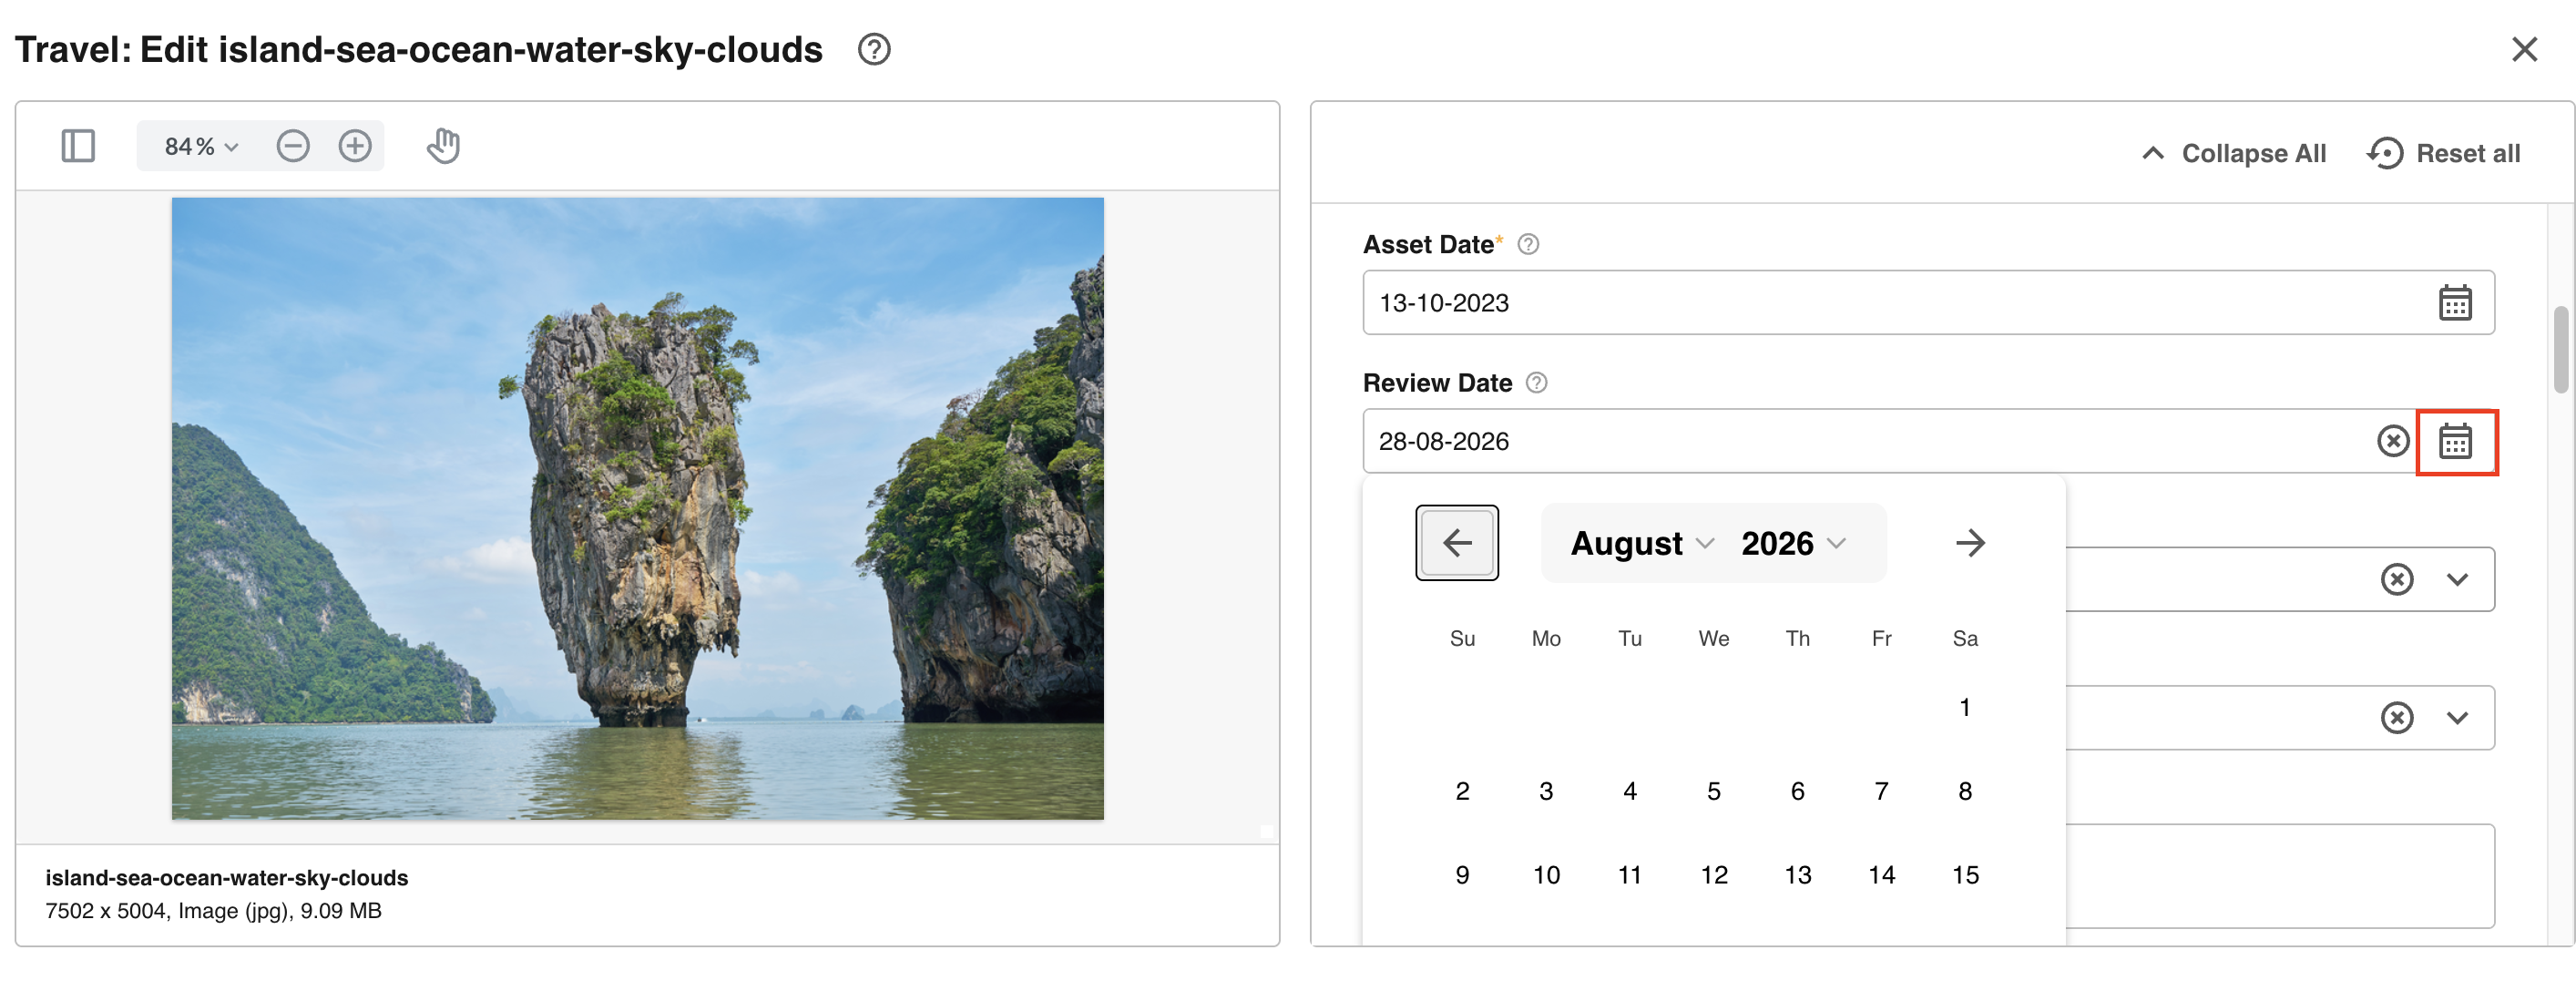 |
| 3Select date and save | Select the date through this calendar, which will then populate in the Review Date field. Select Save Changes to make this update against the asset.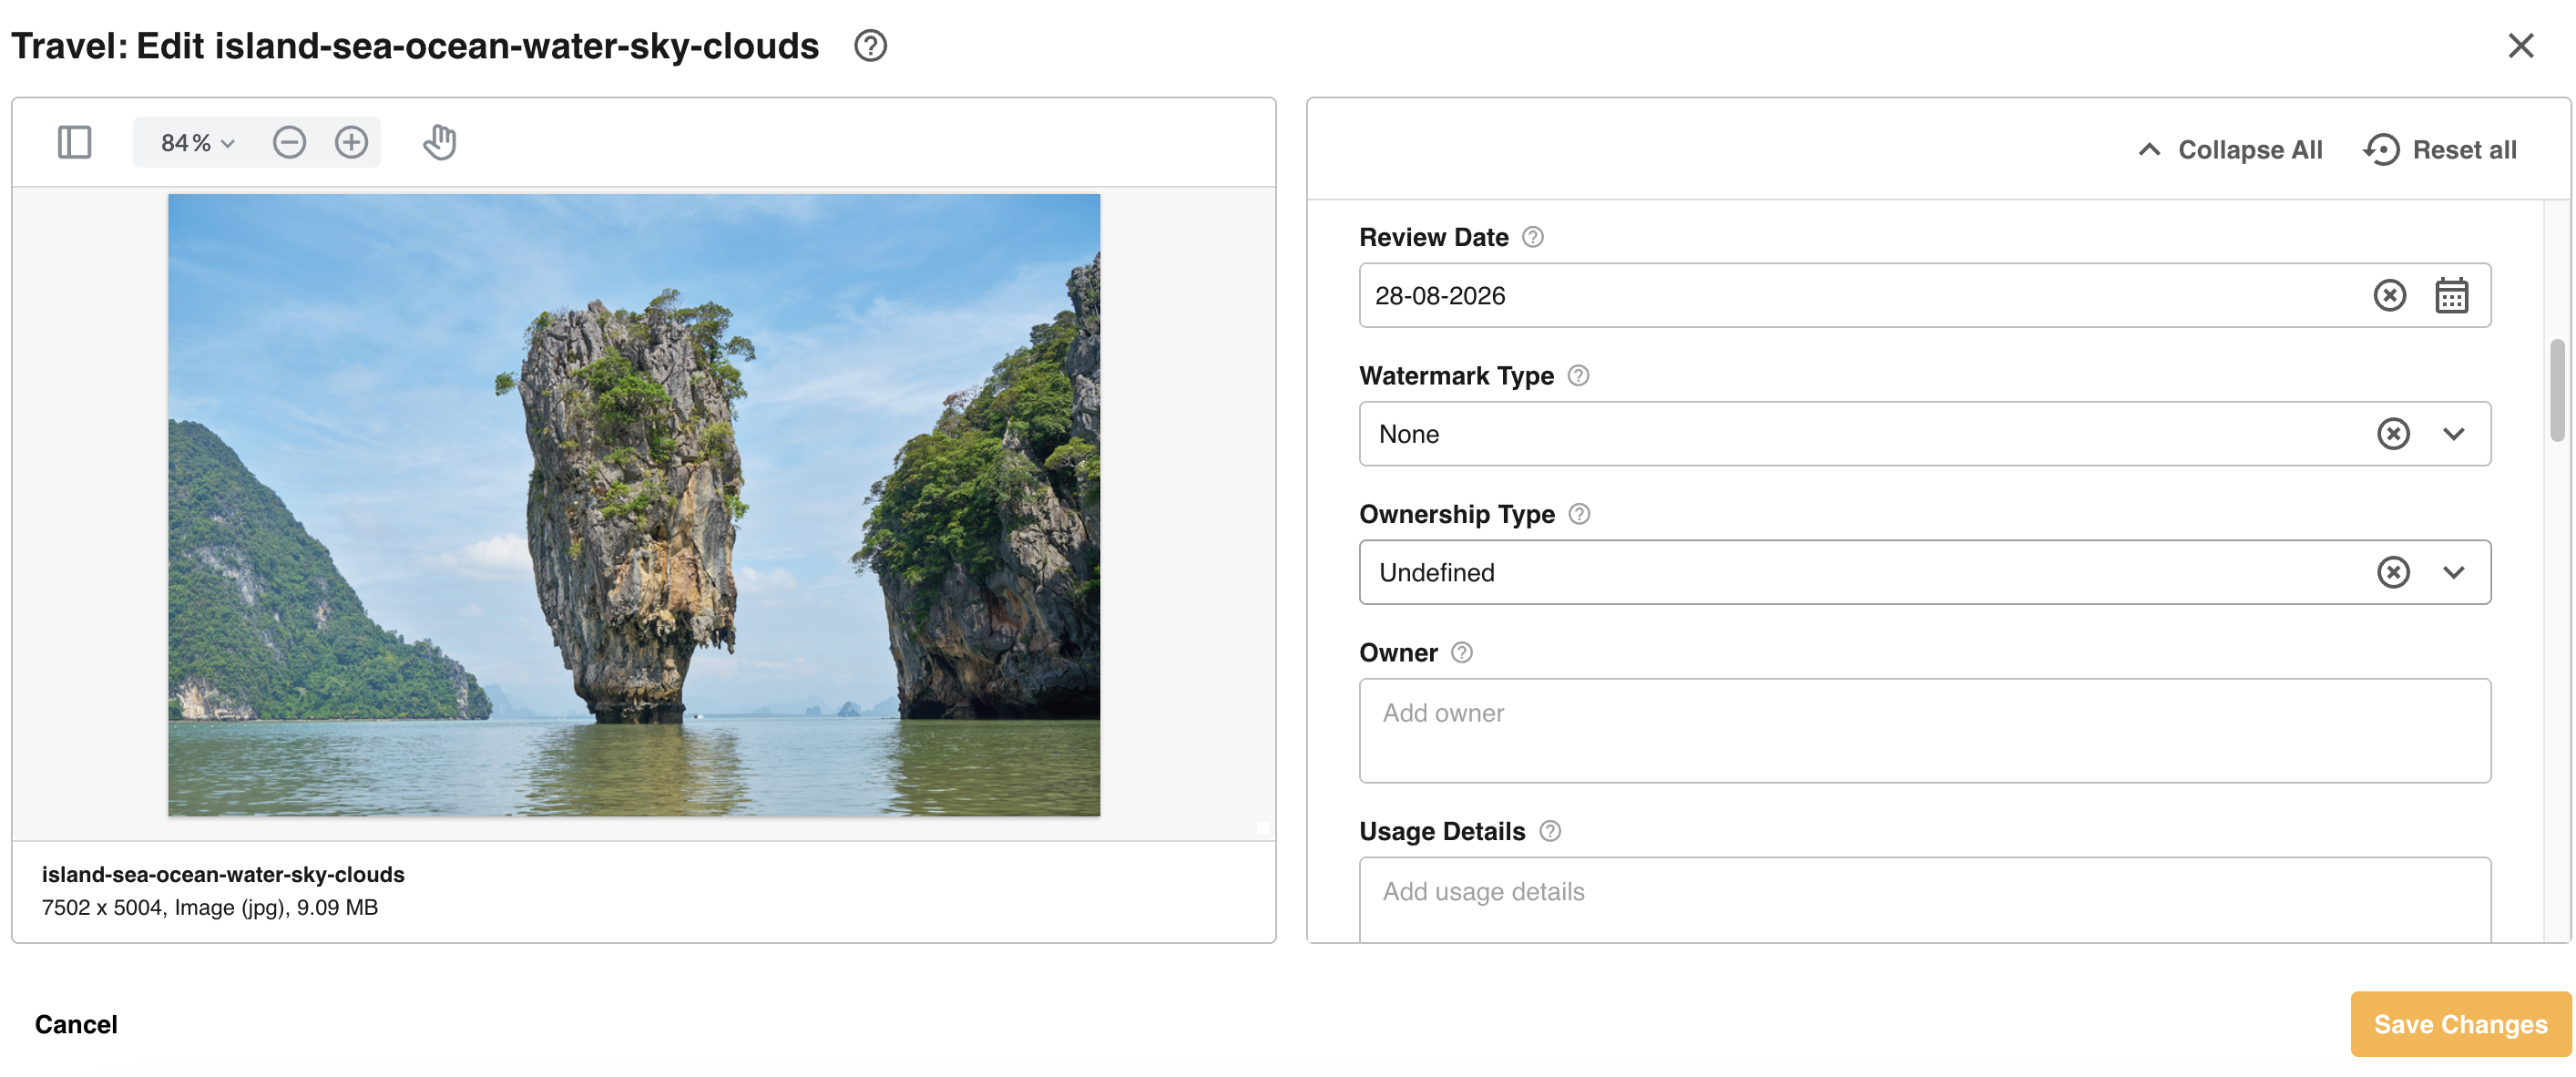 |
Viewing and Tracking Review Dates
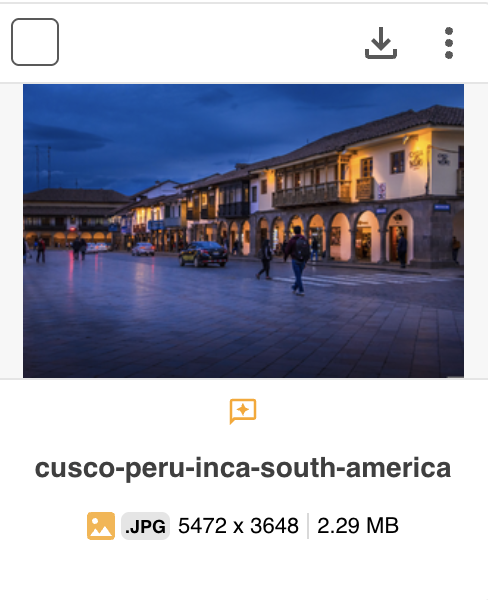
Once the asset is published to the folder, users will be able to view the Review Date in the asset's Info Preview page. If the Review Date is within the next 30 days, it will display an orange icon illustrated below to indicate that its Review Date is approaching.
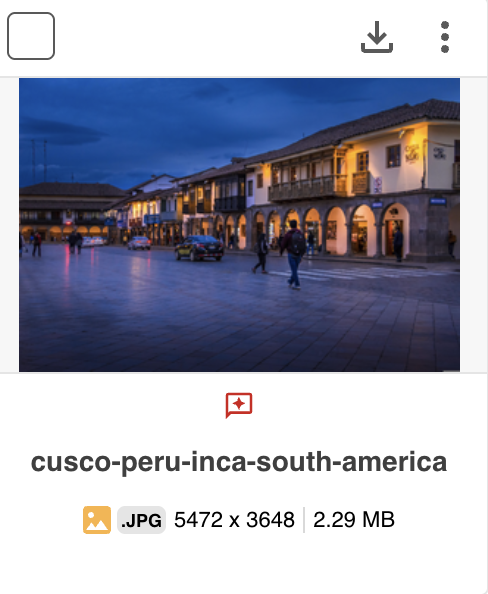
If the asset's Review Date has been reached or is past, the icon will turn red.
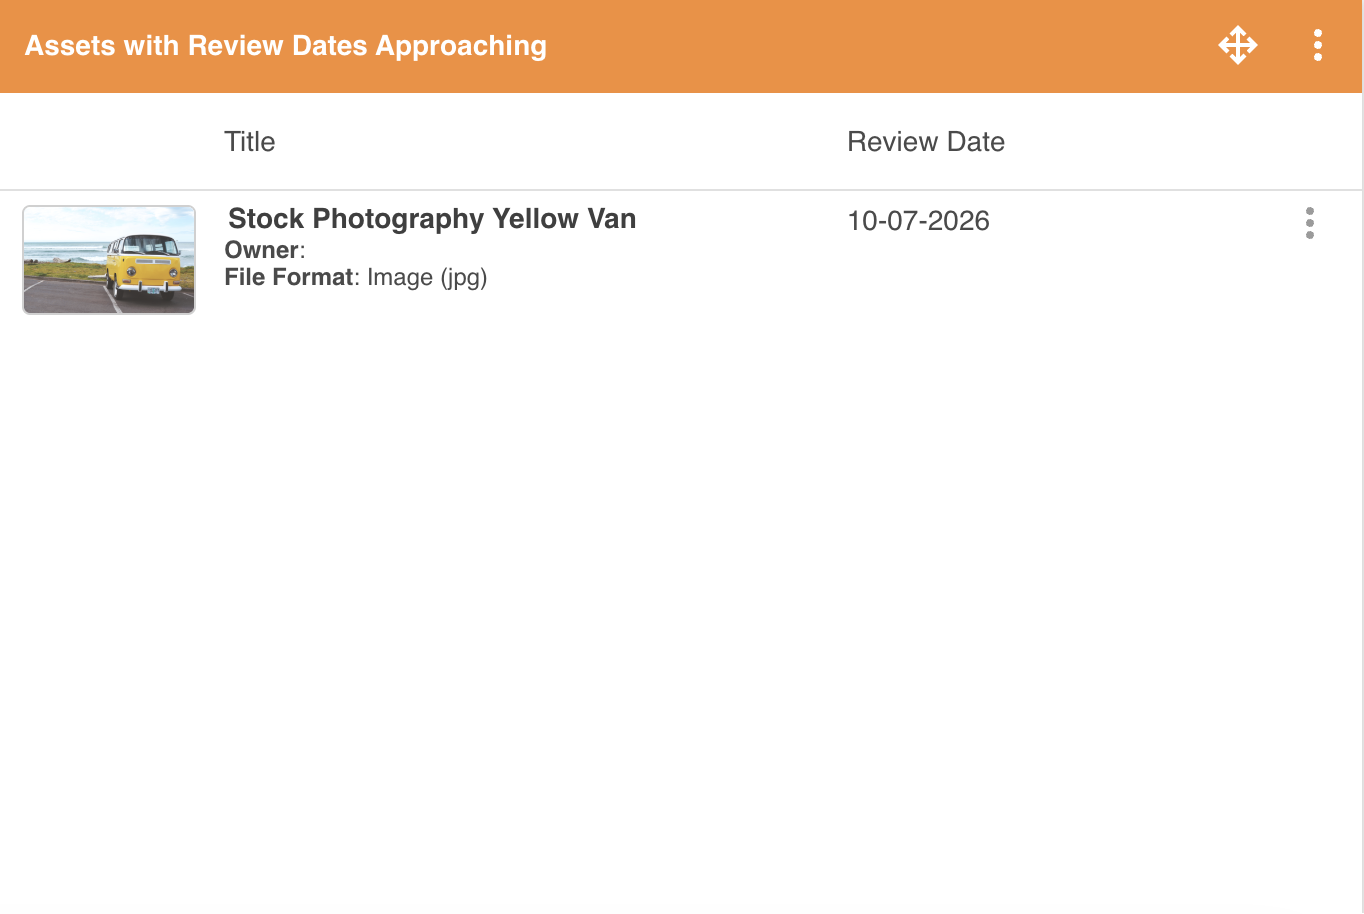
To keep on top of which assets have Review Dates approaching, dashboard widgets can often be useful to set up so users can see which assets will be meeting their Review Dates within the next 30 days, 60 days, etc, or assets that have already expired. This enables users to be more proactive when reviewing their assets, if needed.
To learn more about how to set up and use Dashboards, please refer to the article here.
Was this article helpful?
That’s Great!
Thank you for your feedback
Sorry! We couldn't be helpful
Thank you for your feedback
Feedback sent
We appreciate your effort and will try to fix the article