IntelligenceBank’s Facial Recognition feature allows users to identify individuals’ faces featured in image and video files. Those individuals can then be detected and automatically tagged in existing or future images/videos uploaded to the system, eliminating the need to manually tag them.
Facial Recognition also helps ensure accurate tagging and enhances search capabilities for specific individuals.
Table of Contents
Enabling Facial Recognition in the Platform
Main Admins can enable Facial Recognition in their platform by following the steps below:
1. Navigate to the Admin>Settings area of the platform
2. In the Assets - Asset Intelligence section, locate the Enable Image Auto-Tagging checkbox and make sure this is selected. Then locate the Facial Recognition checkbox and click to enable. Note that this one setting covers both images and video — there is no separate switch to turn it on for video specifically.
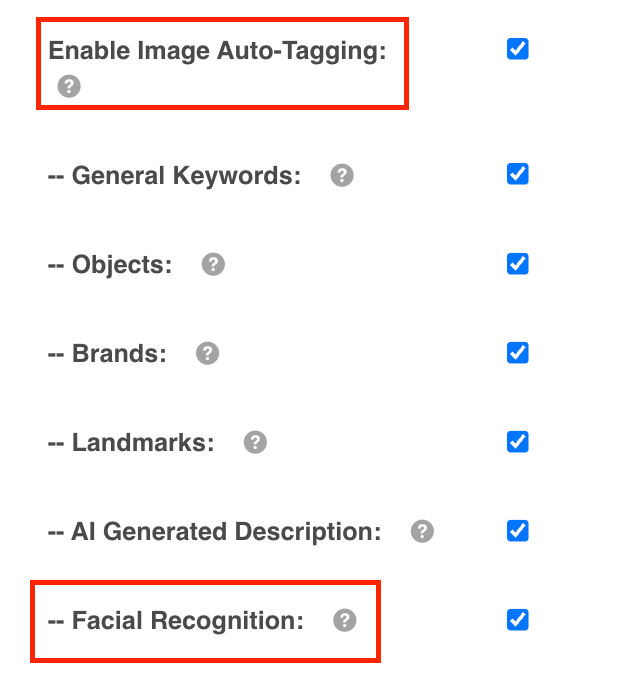
3. Then, scroll to the bottom of the page and select Save to save your settings.
If you need Facial Recognition off for a specific upload, that can be set per upload without changing the setting for the rest of your account.
Enabling Facial Recognition on Images and Videos
Once enabled in the Admin section, users will need to enable it on assets in the platform.
Users with at least Publish permission can do this when uploading or editing an image or video. From an upload or edit page, locate the Faces section under Tags, then enable the toggle and save the asset(s).
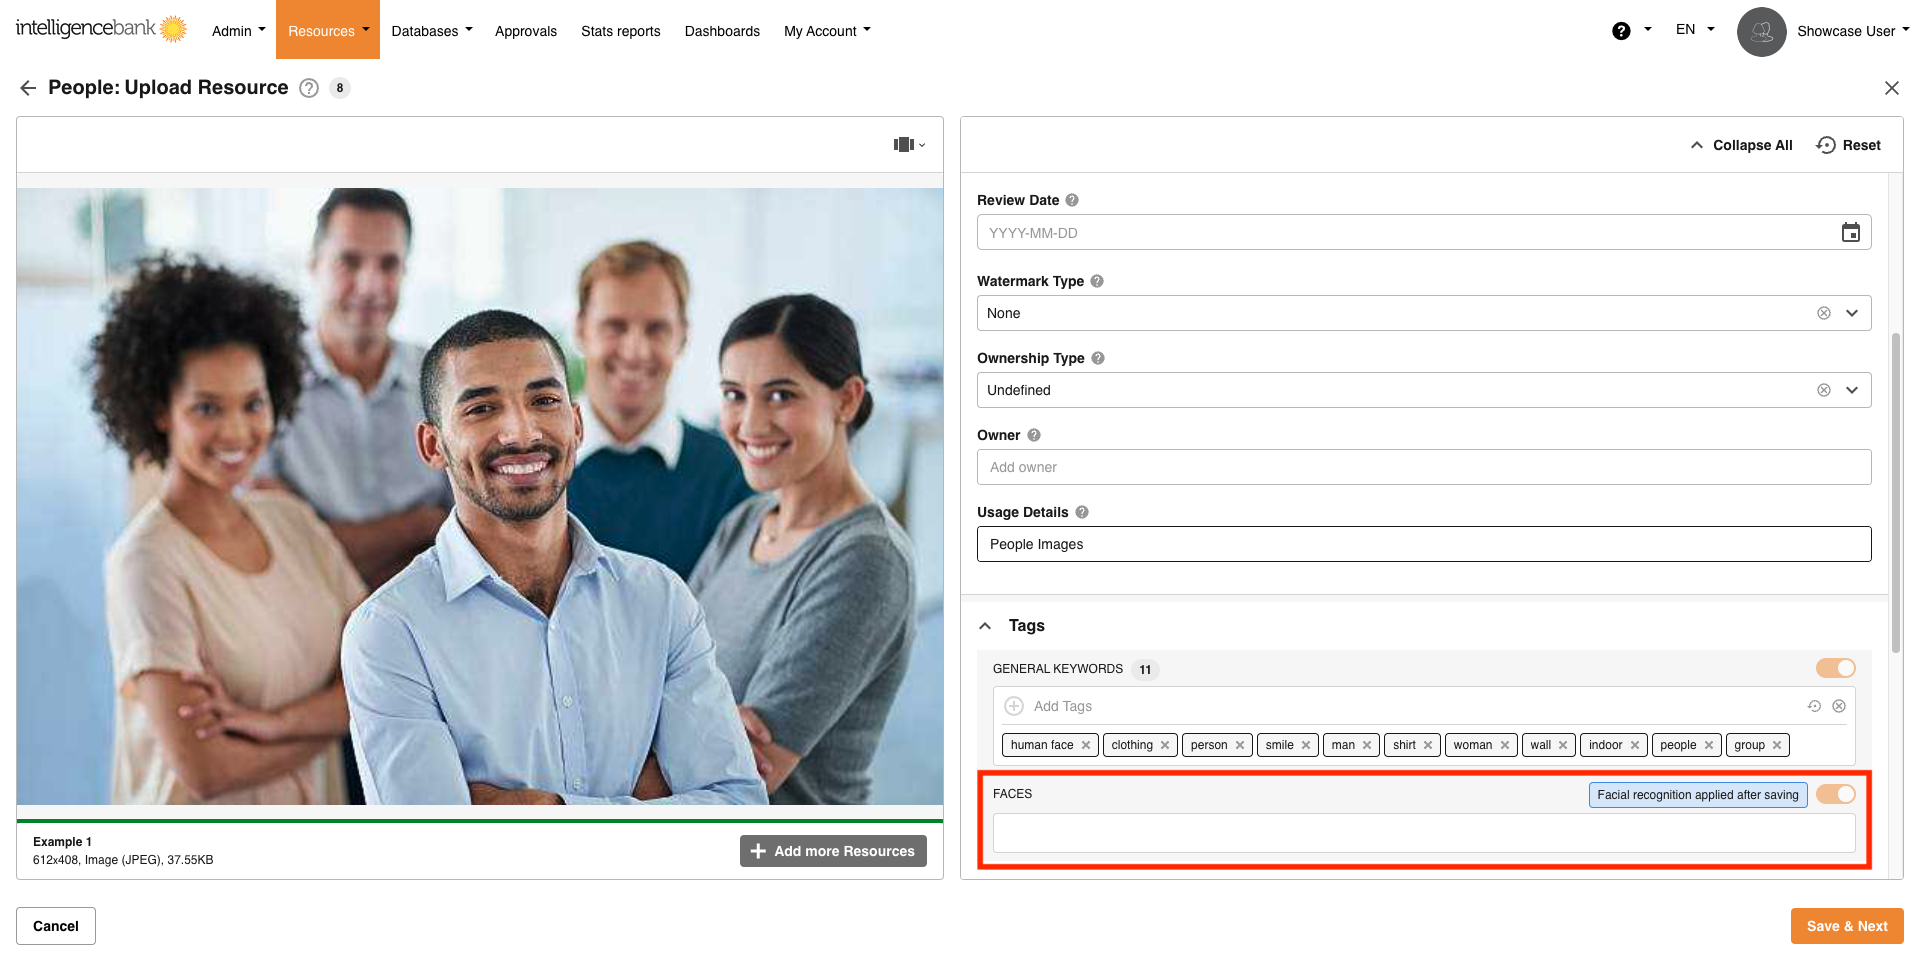
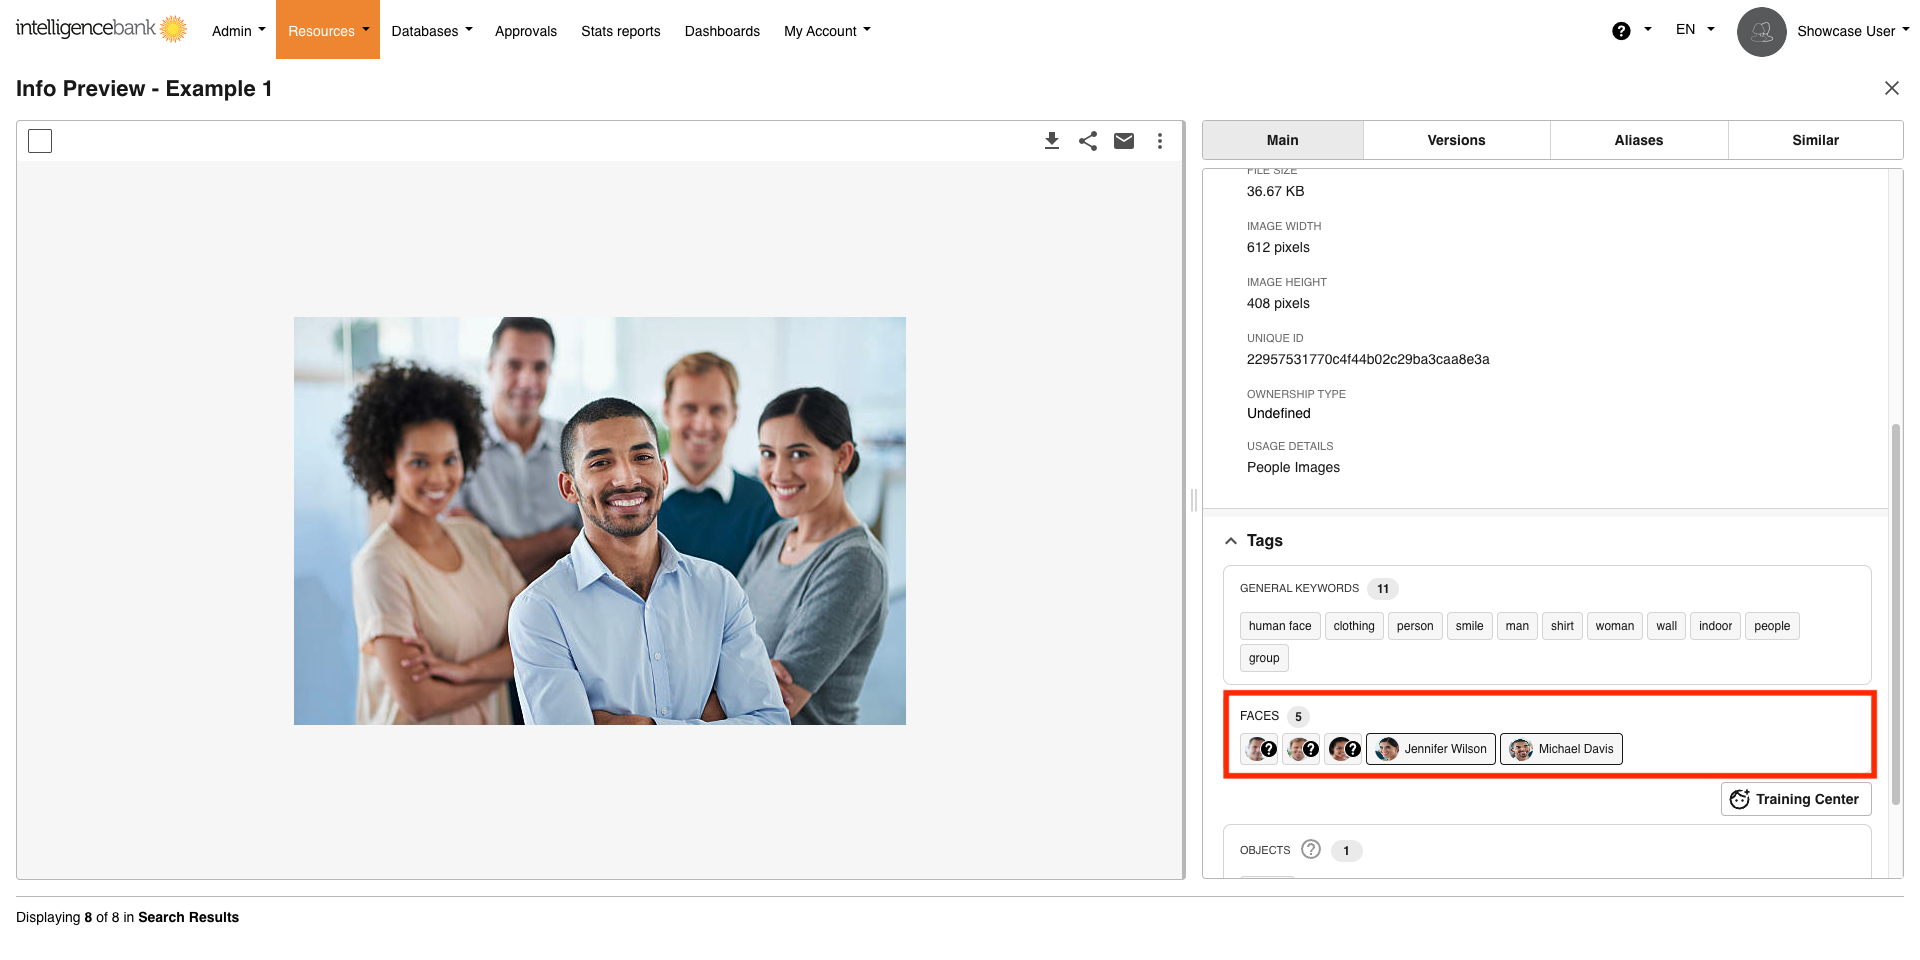
Once the assets are saved and Facial Recognition has been processed, users can navigate to the assets’s Info Preview page. In the Faces section under Tags, they will see a list of faces detected by Facial Recognition, with question marks to indicate any unknown faces.
Training Center
From the Training Center, users with at least Publish permission can add names for unknown faces as well as rename, detach, delete, or view the profile of existing known faces — for faces found on images and videos, from the same place.
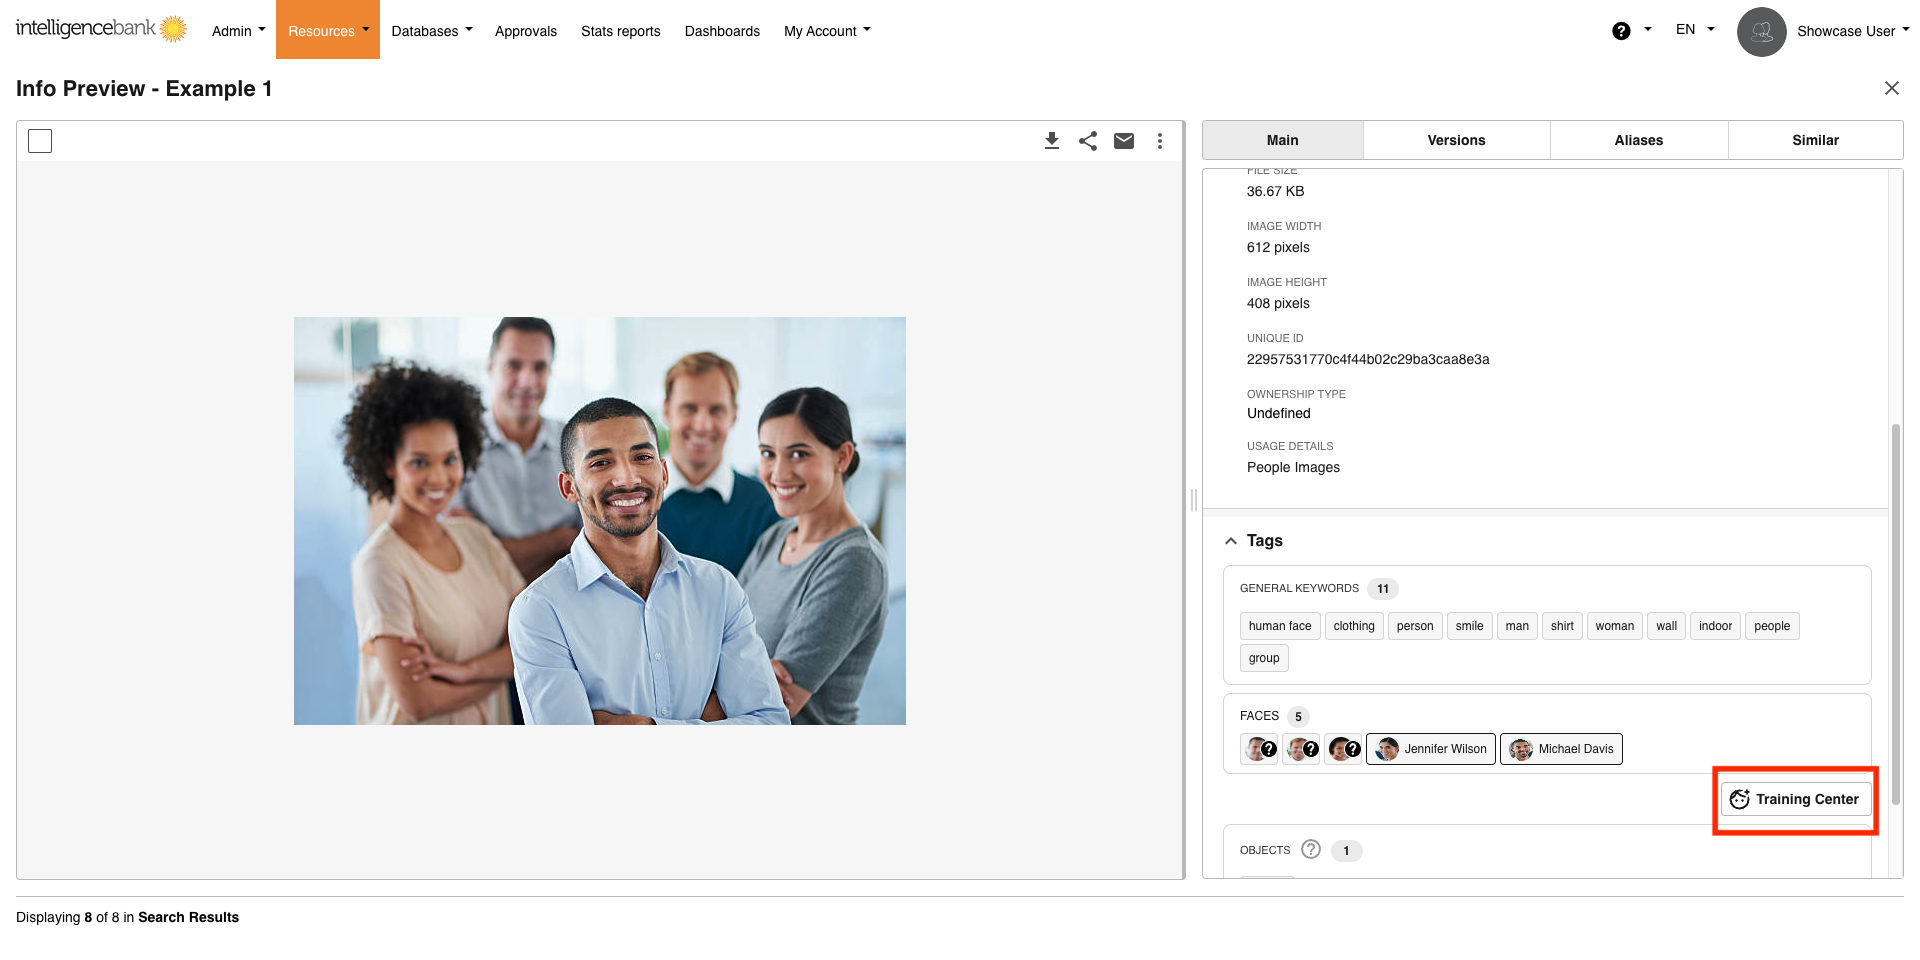
Click on the Training Center button off of the asset’s Info Preview page to perform the training actions outlined below.
Add Names to Unknown Faces
If a face cannot be matched with any existing known face, it will appear as unknown.
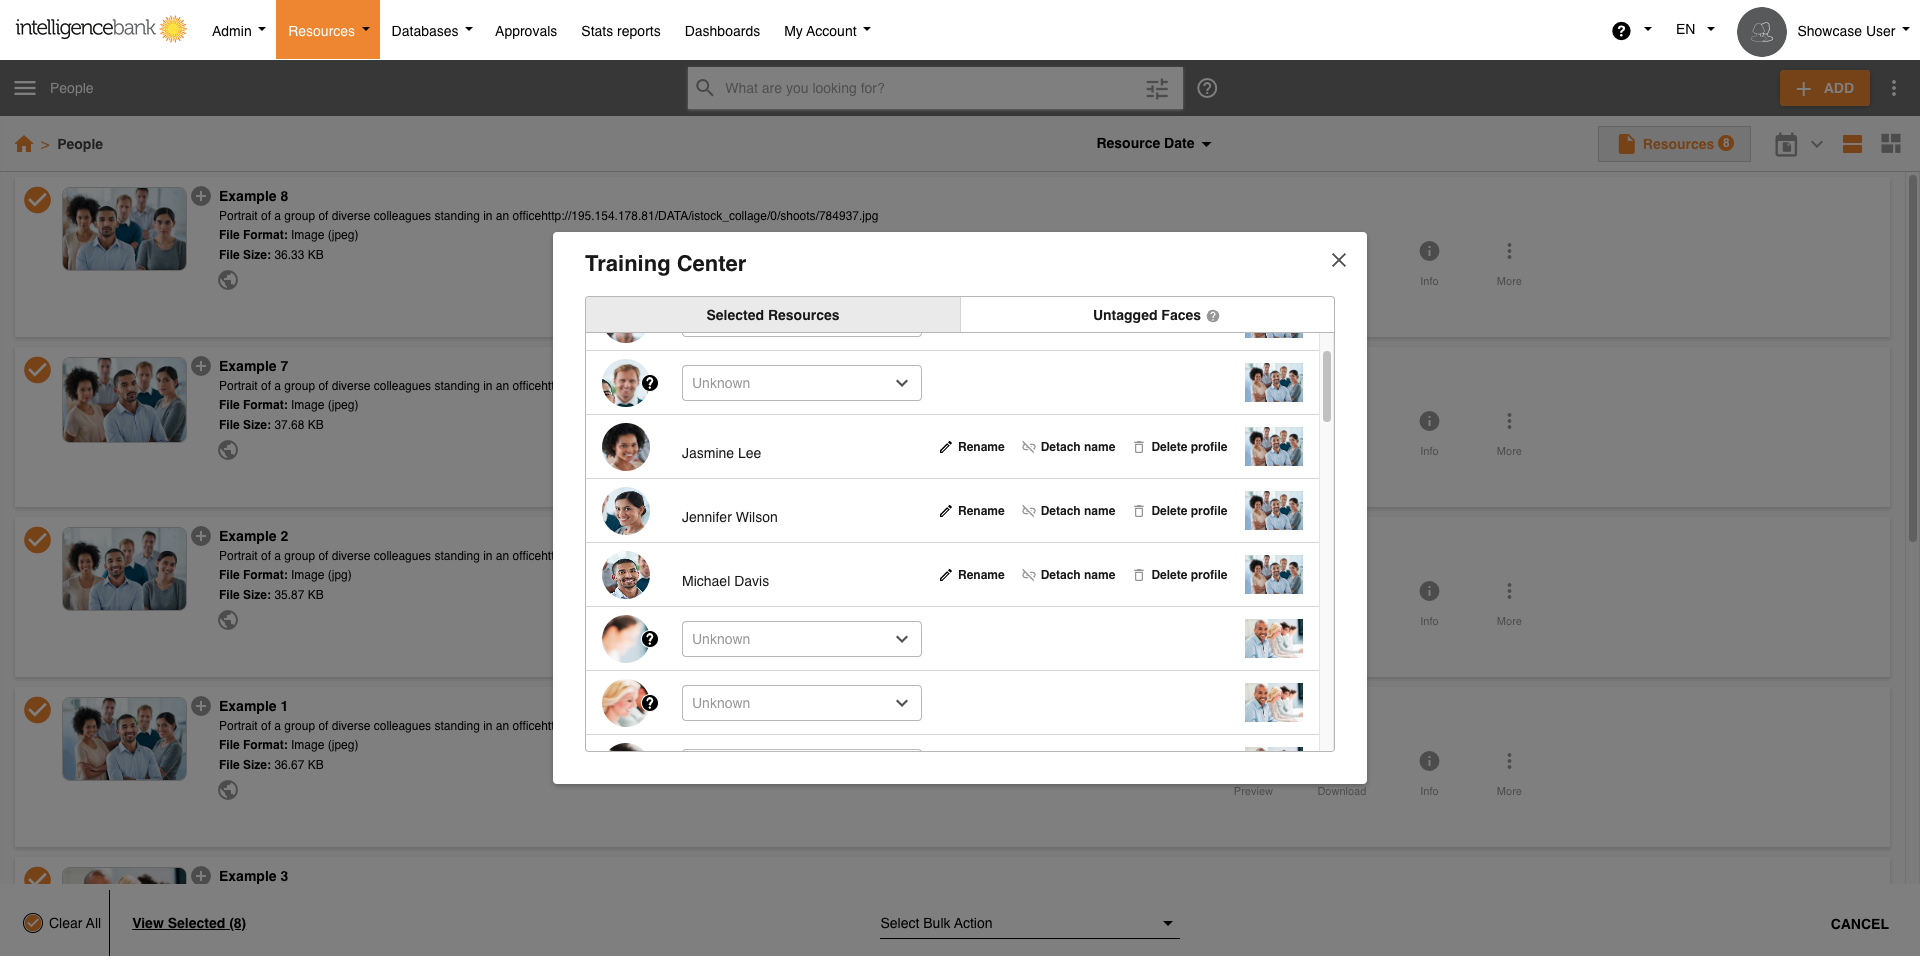
To add a name, click on the drop-down menu, either select the person's name or type in a new name, then select Create from the drop-down.
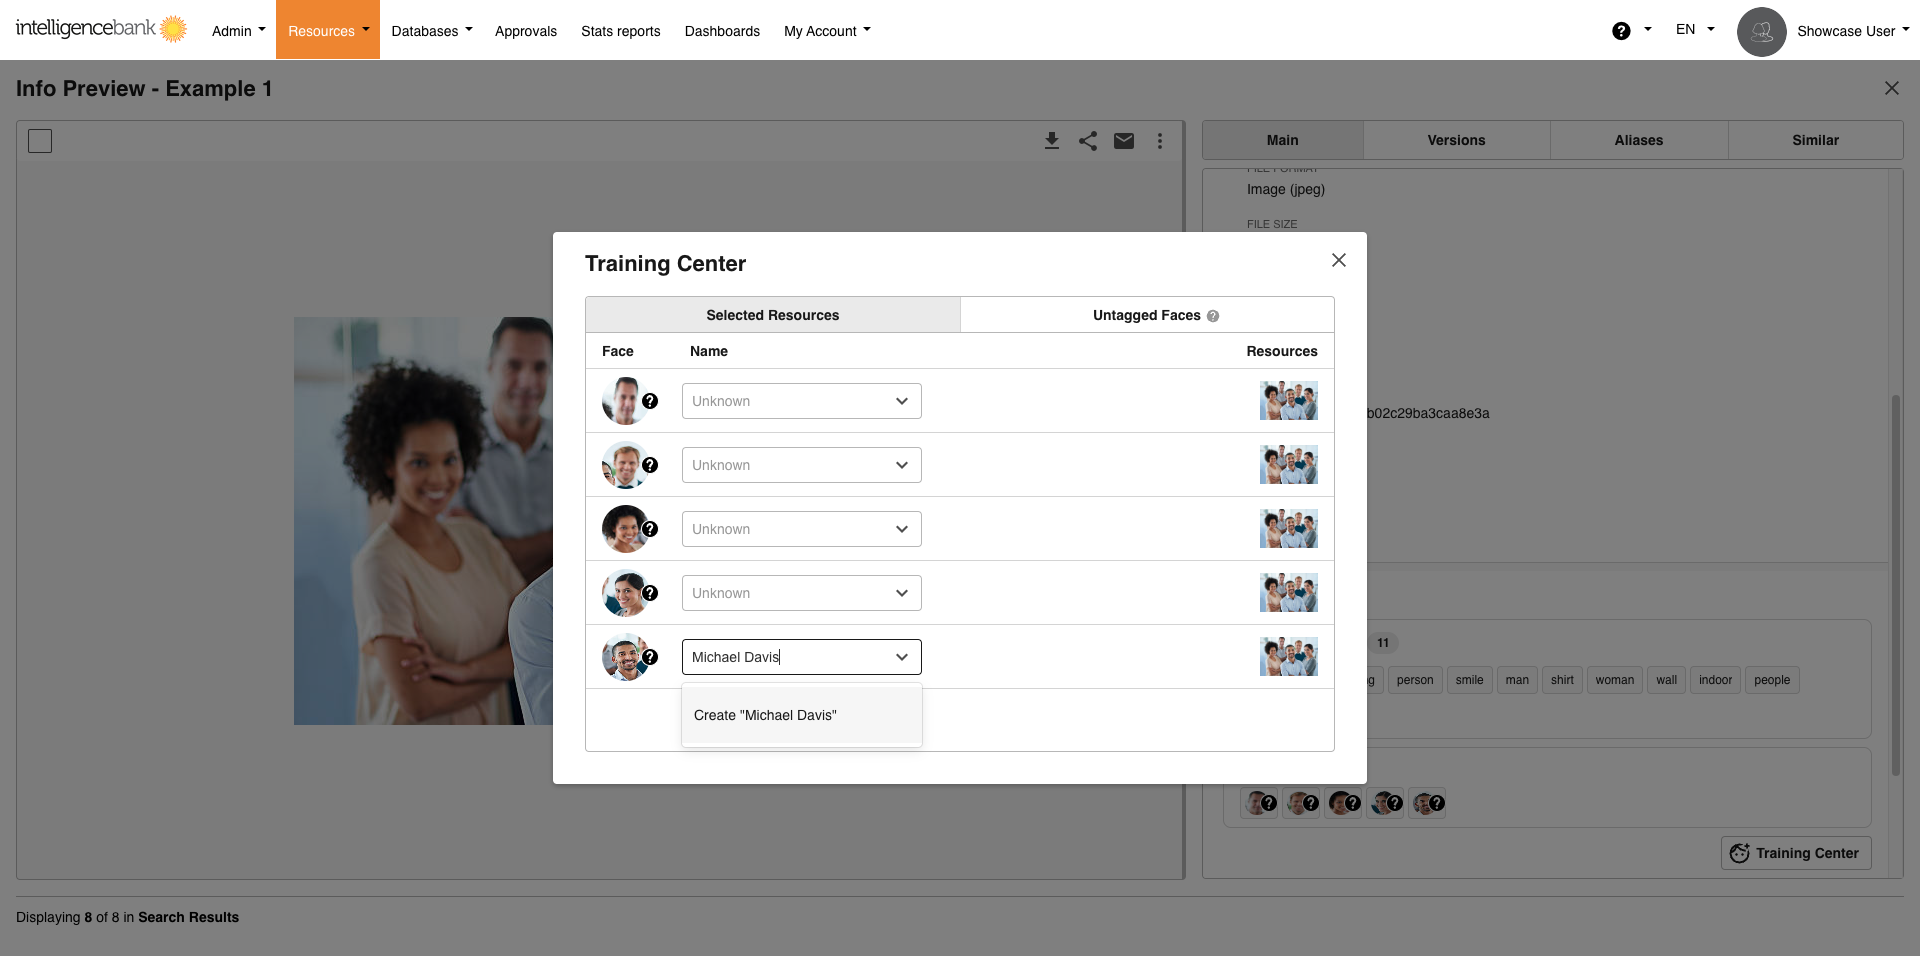
Once you've named an unknown face, it will be used to automatically tag existing and future images and videos that feature that person.
Rename Known Faces
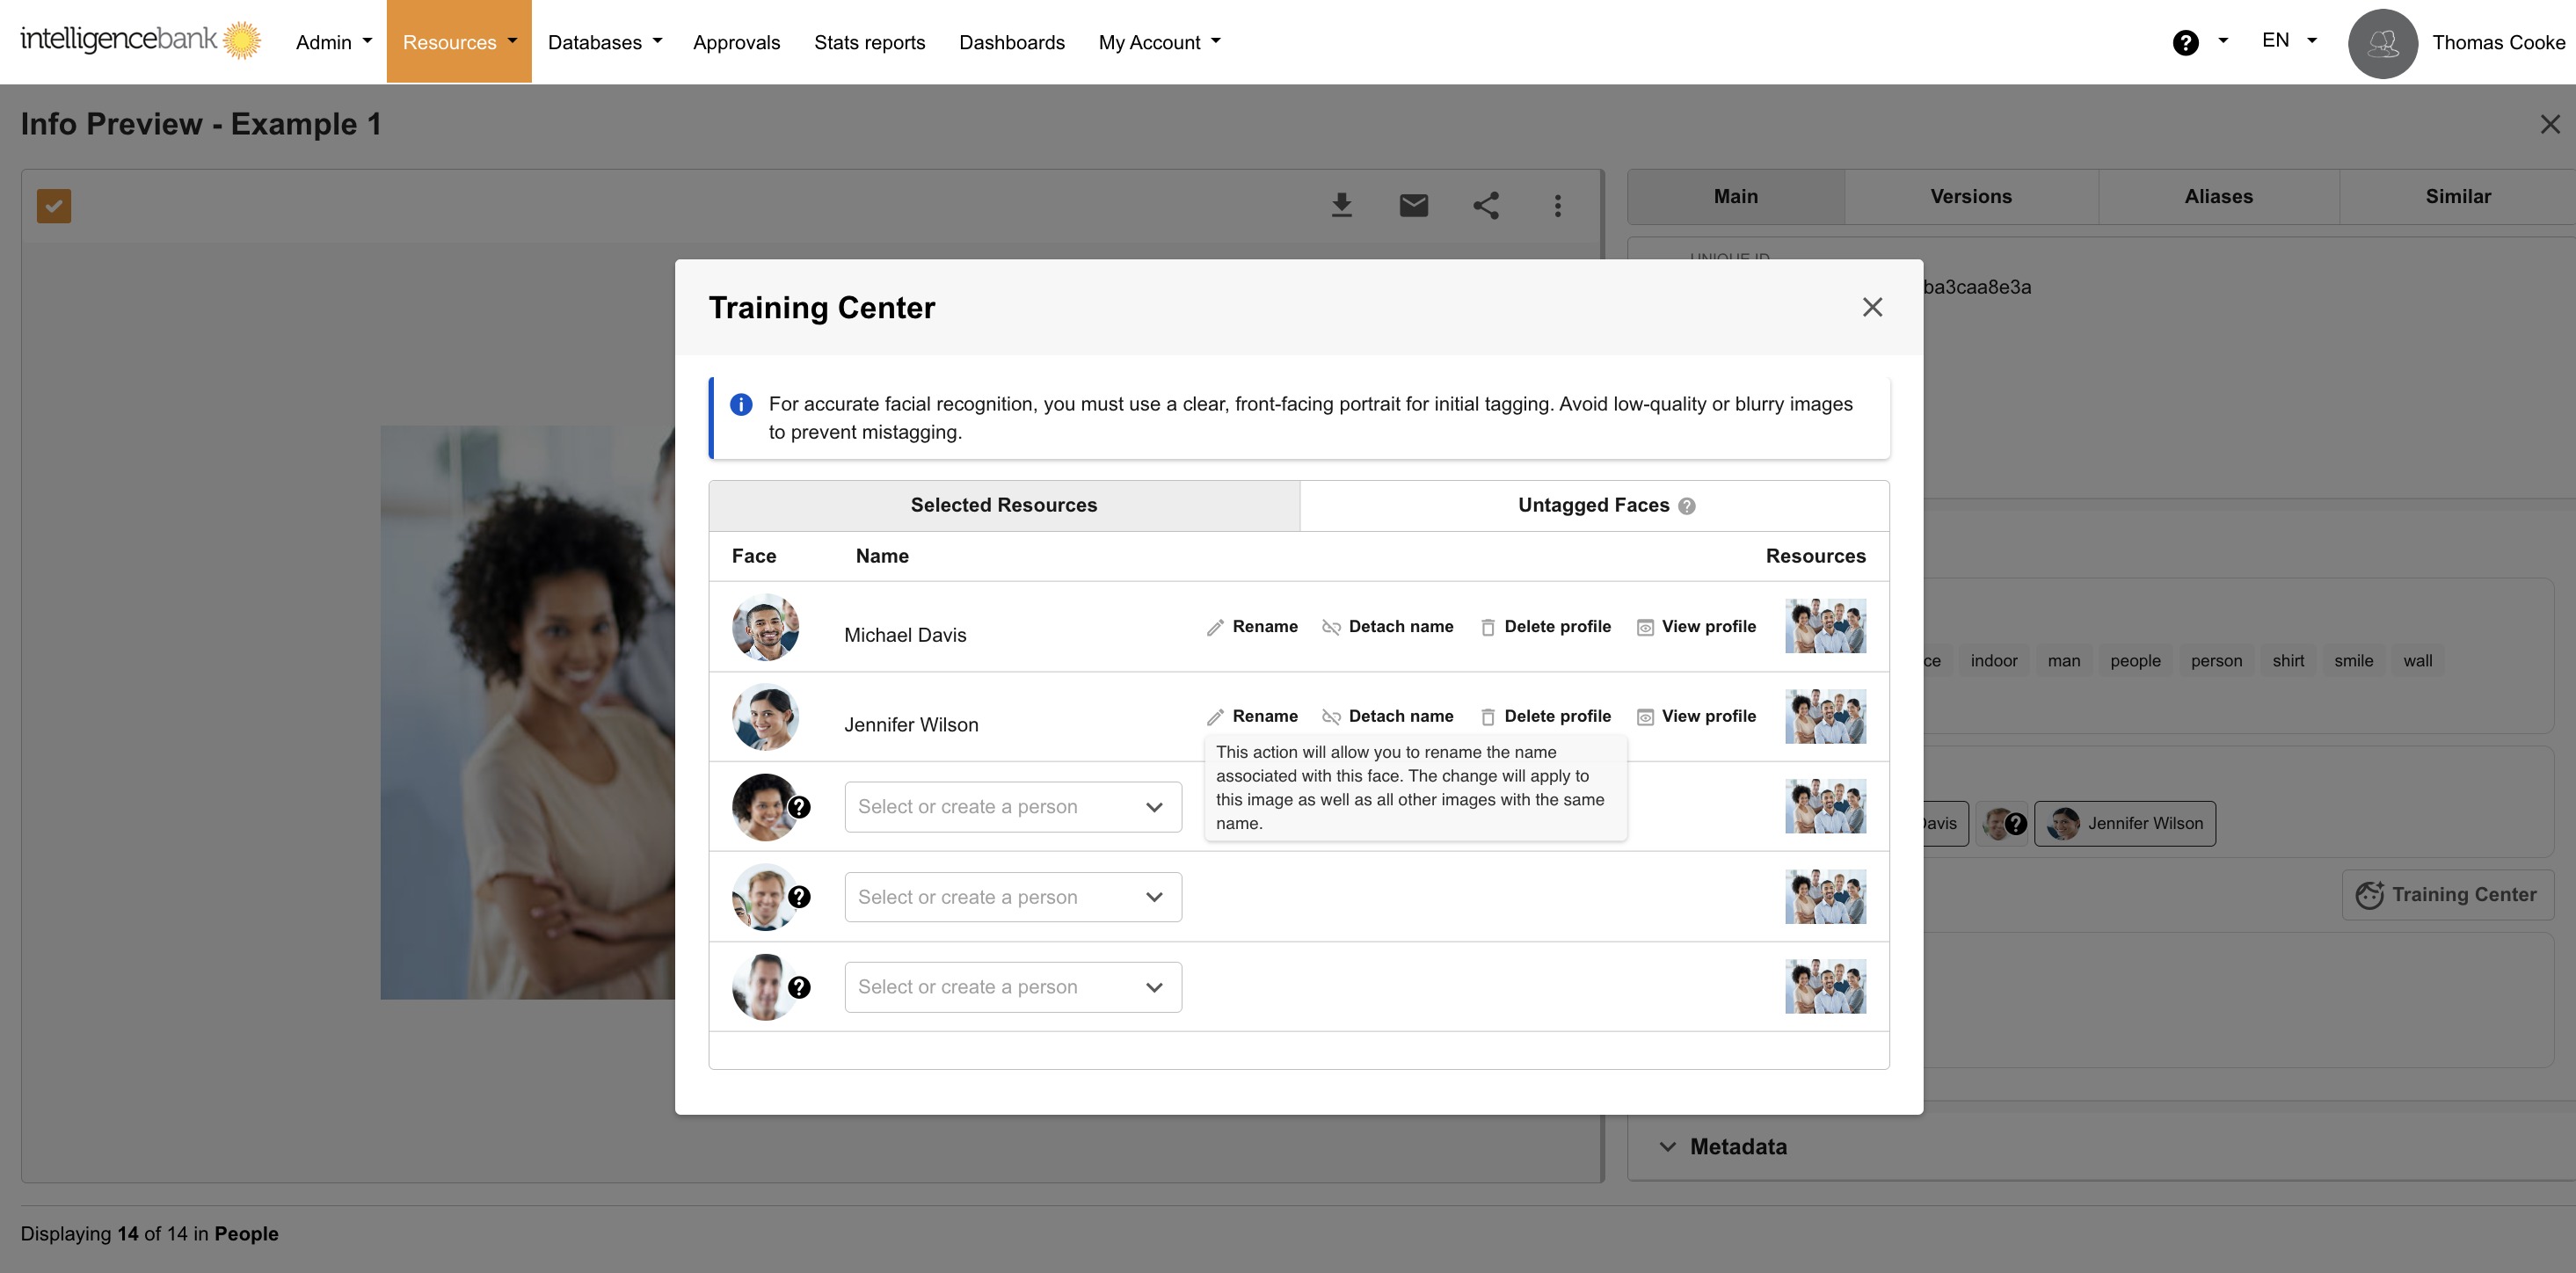
If you need to rename a known face, click on Rename and confirm the action — this renames that person across every image and video they appear on.
Detach Known Faces
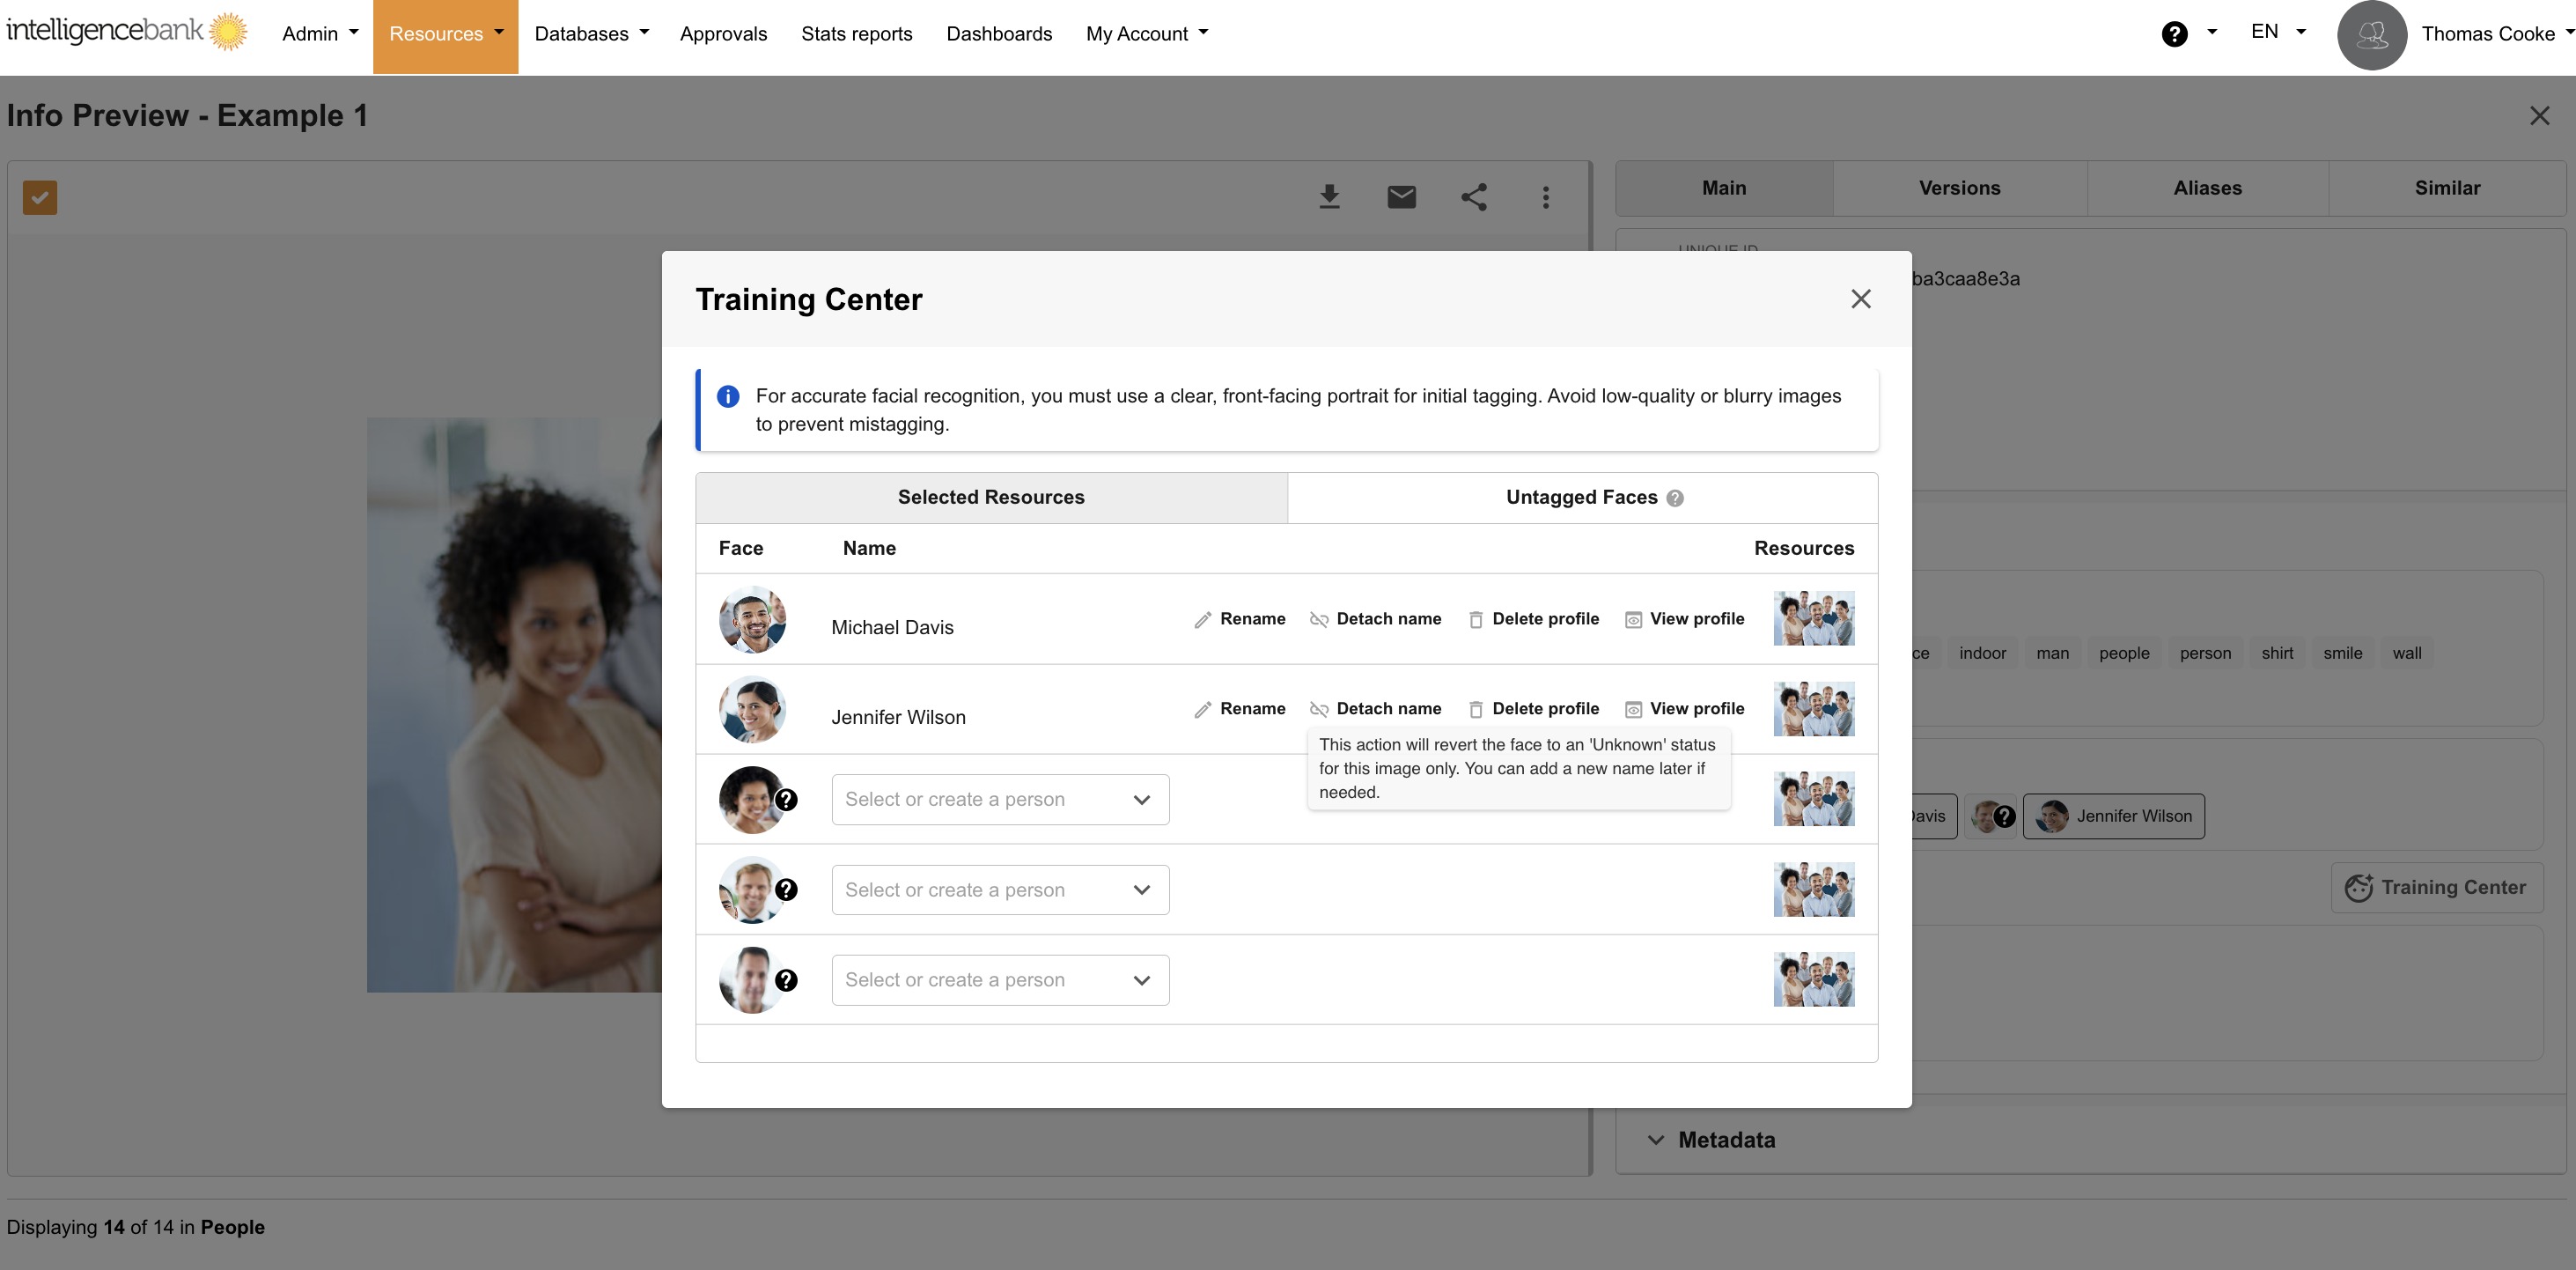
Detaching a face will remove the name associated with that face on that asset and return it to an unknown face. You can then re-name the face if required.
Delete Known Faces
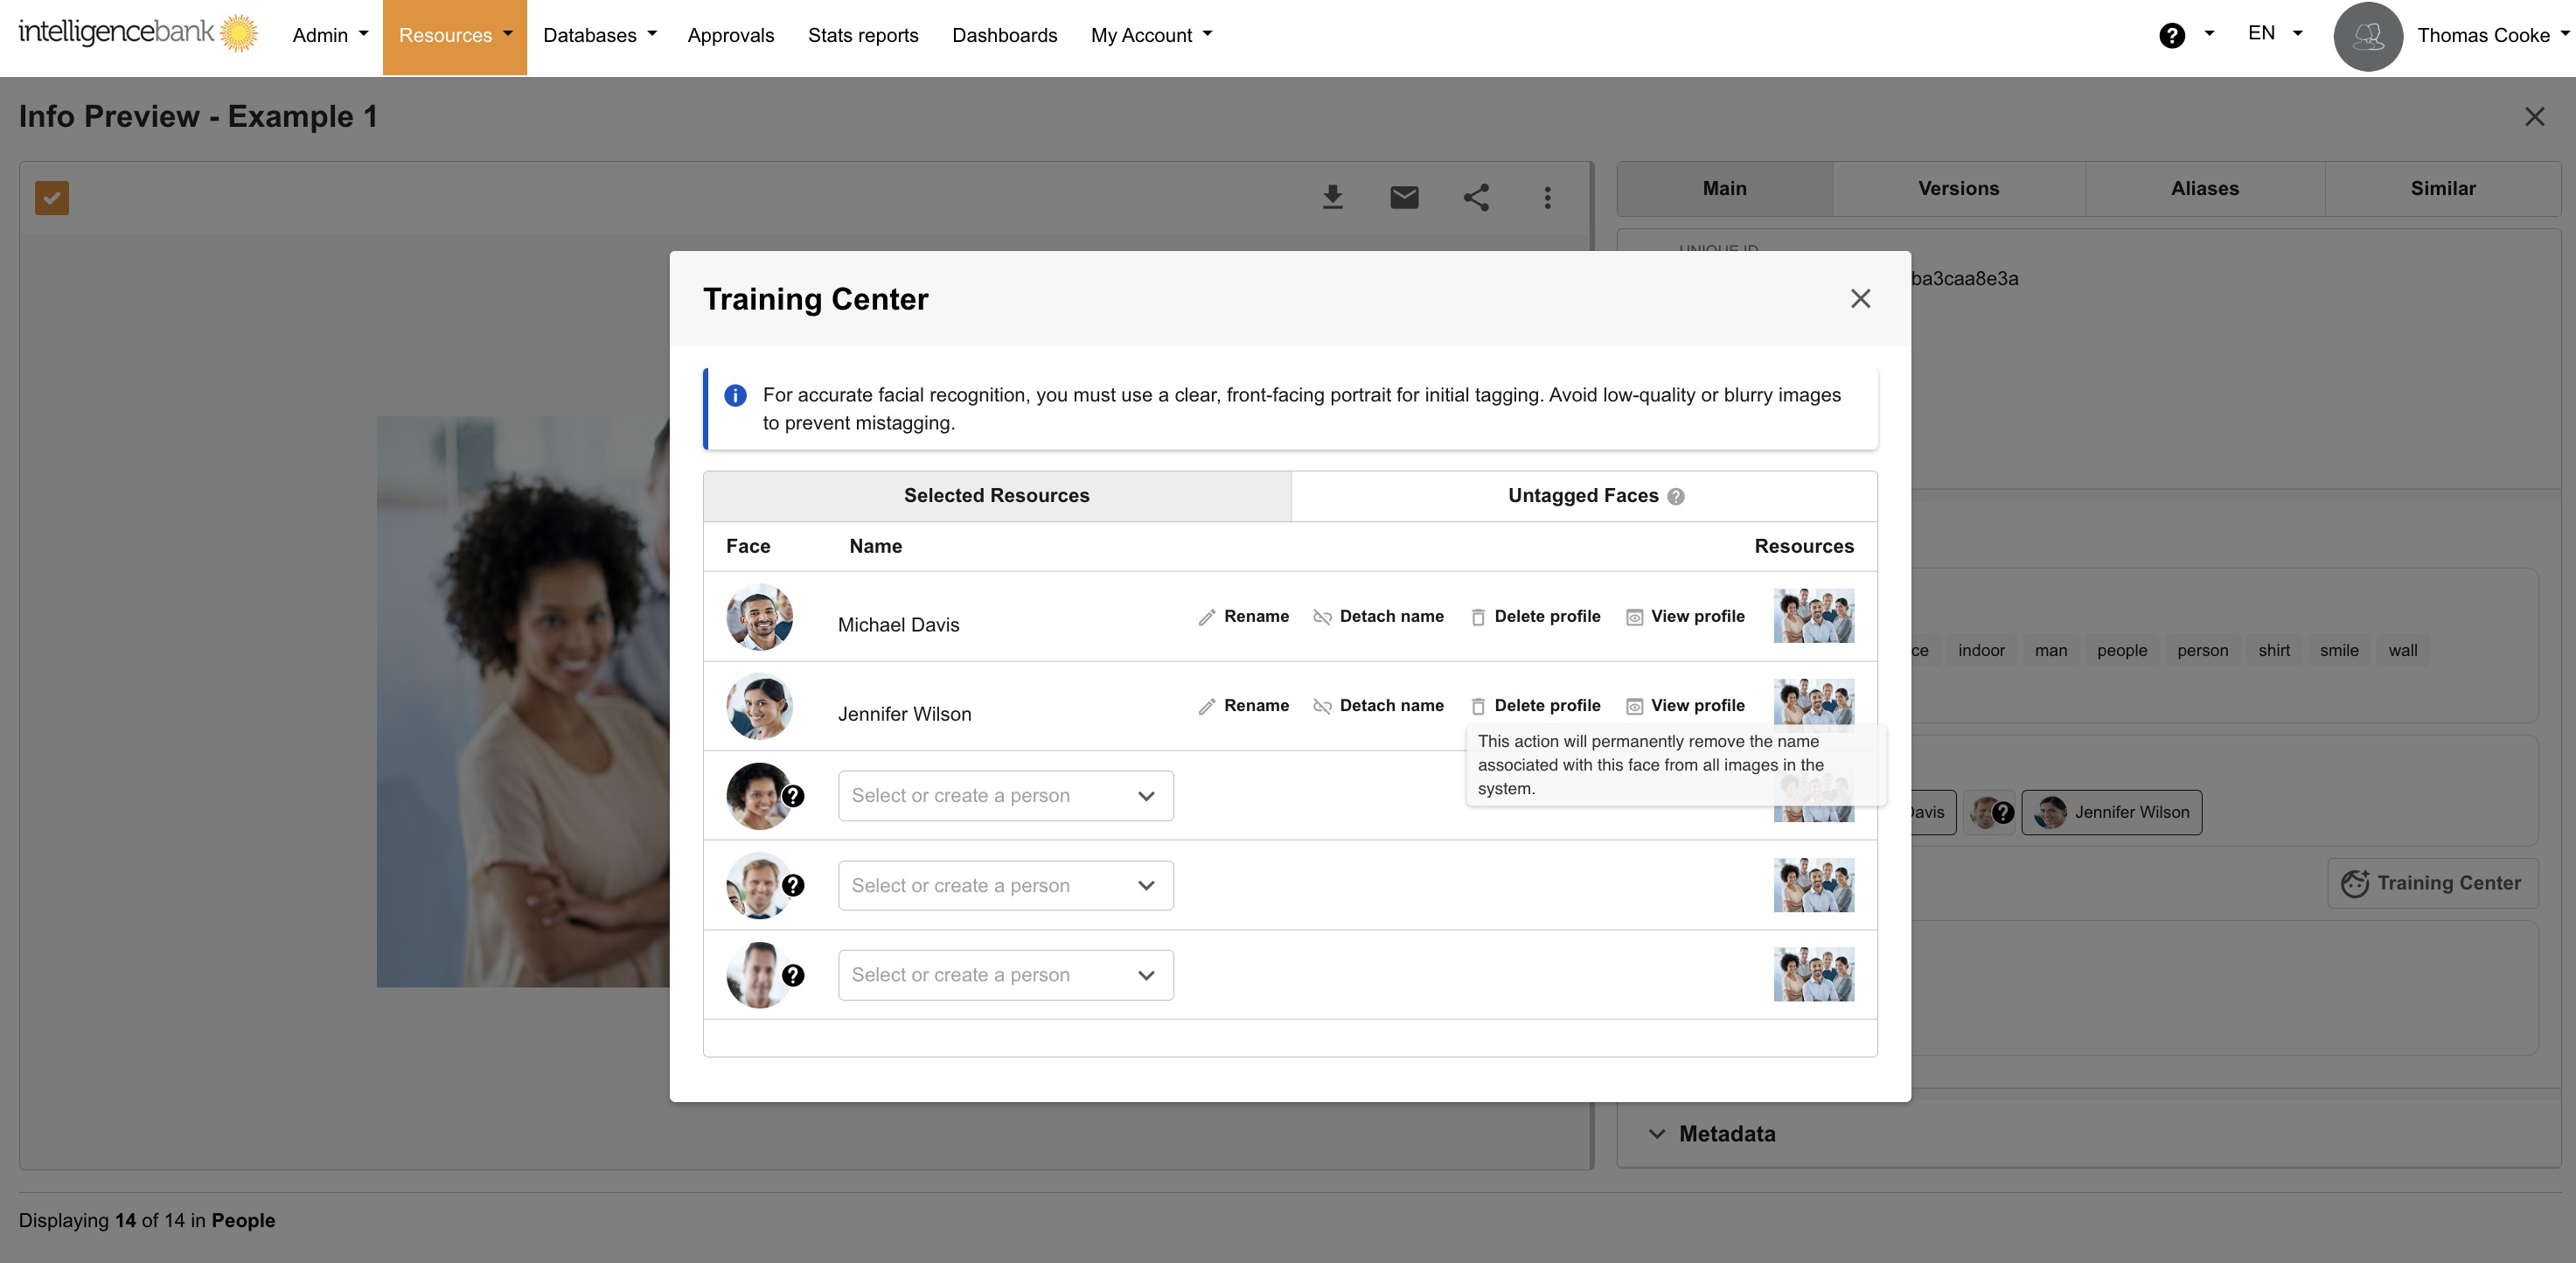
Delete will remove the name from that face across every image and video in the platform. You can then rename later if required.
View Profile
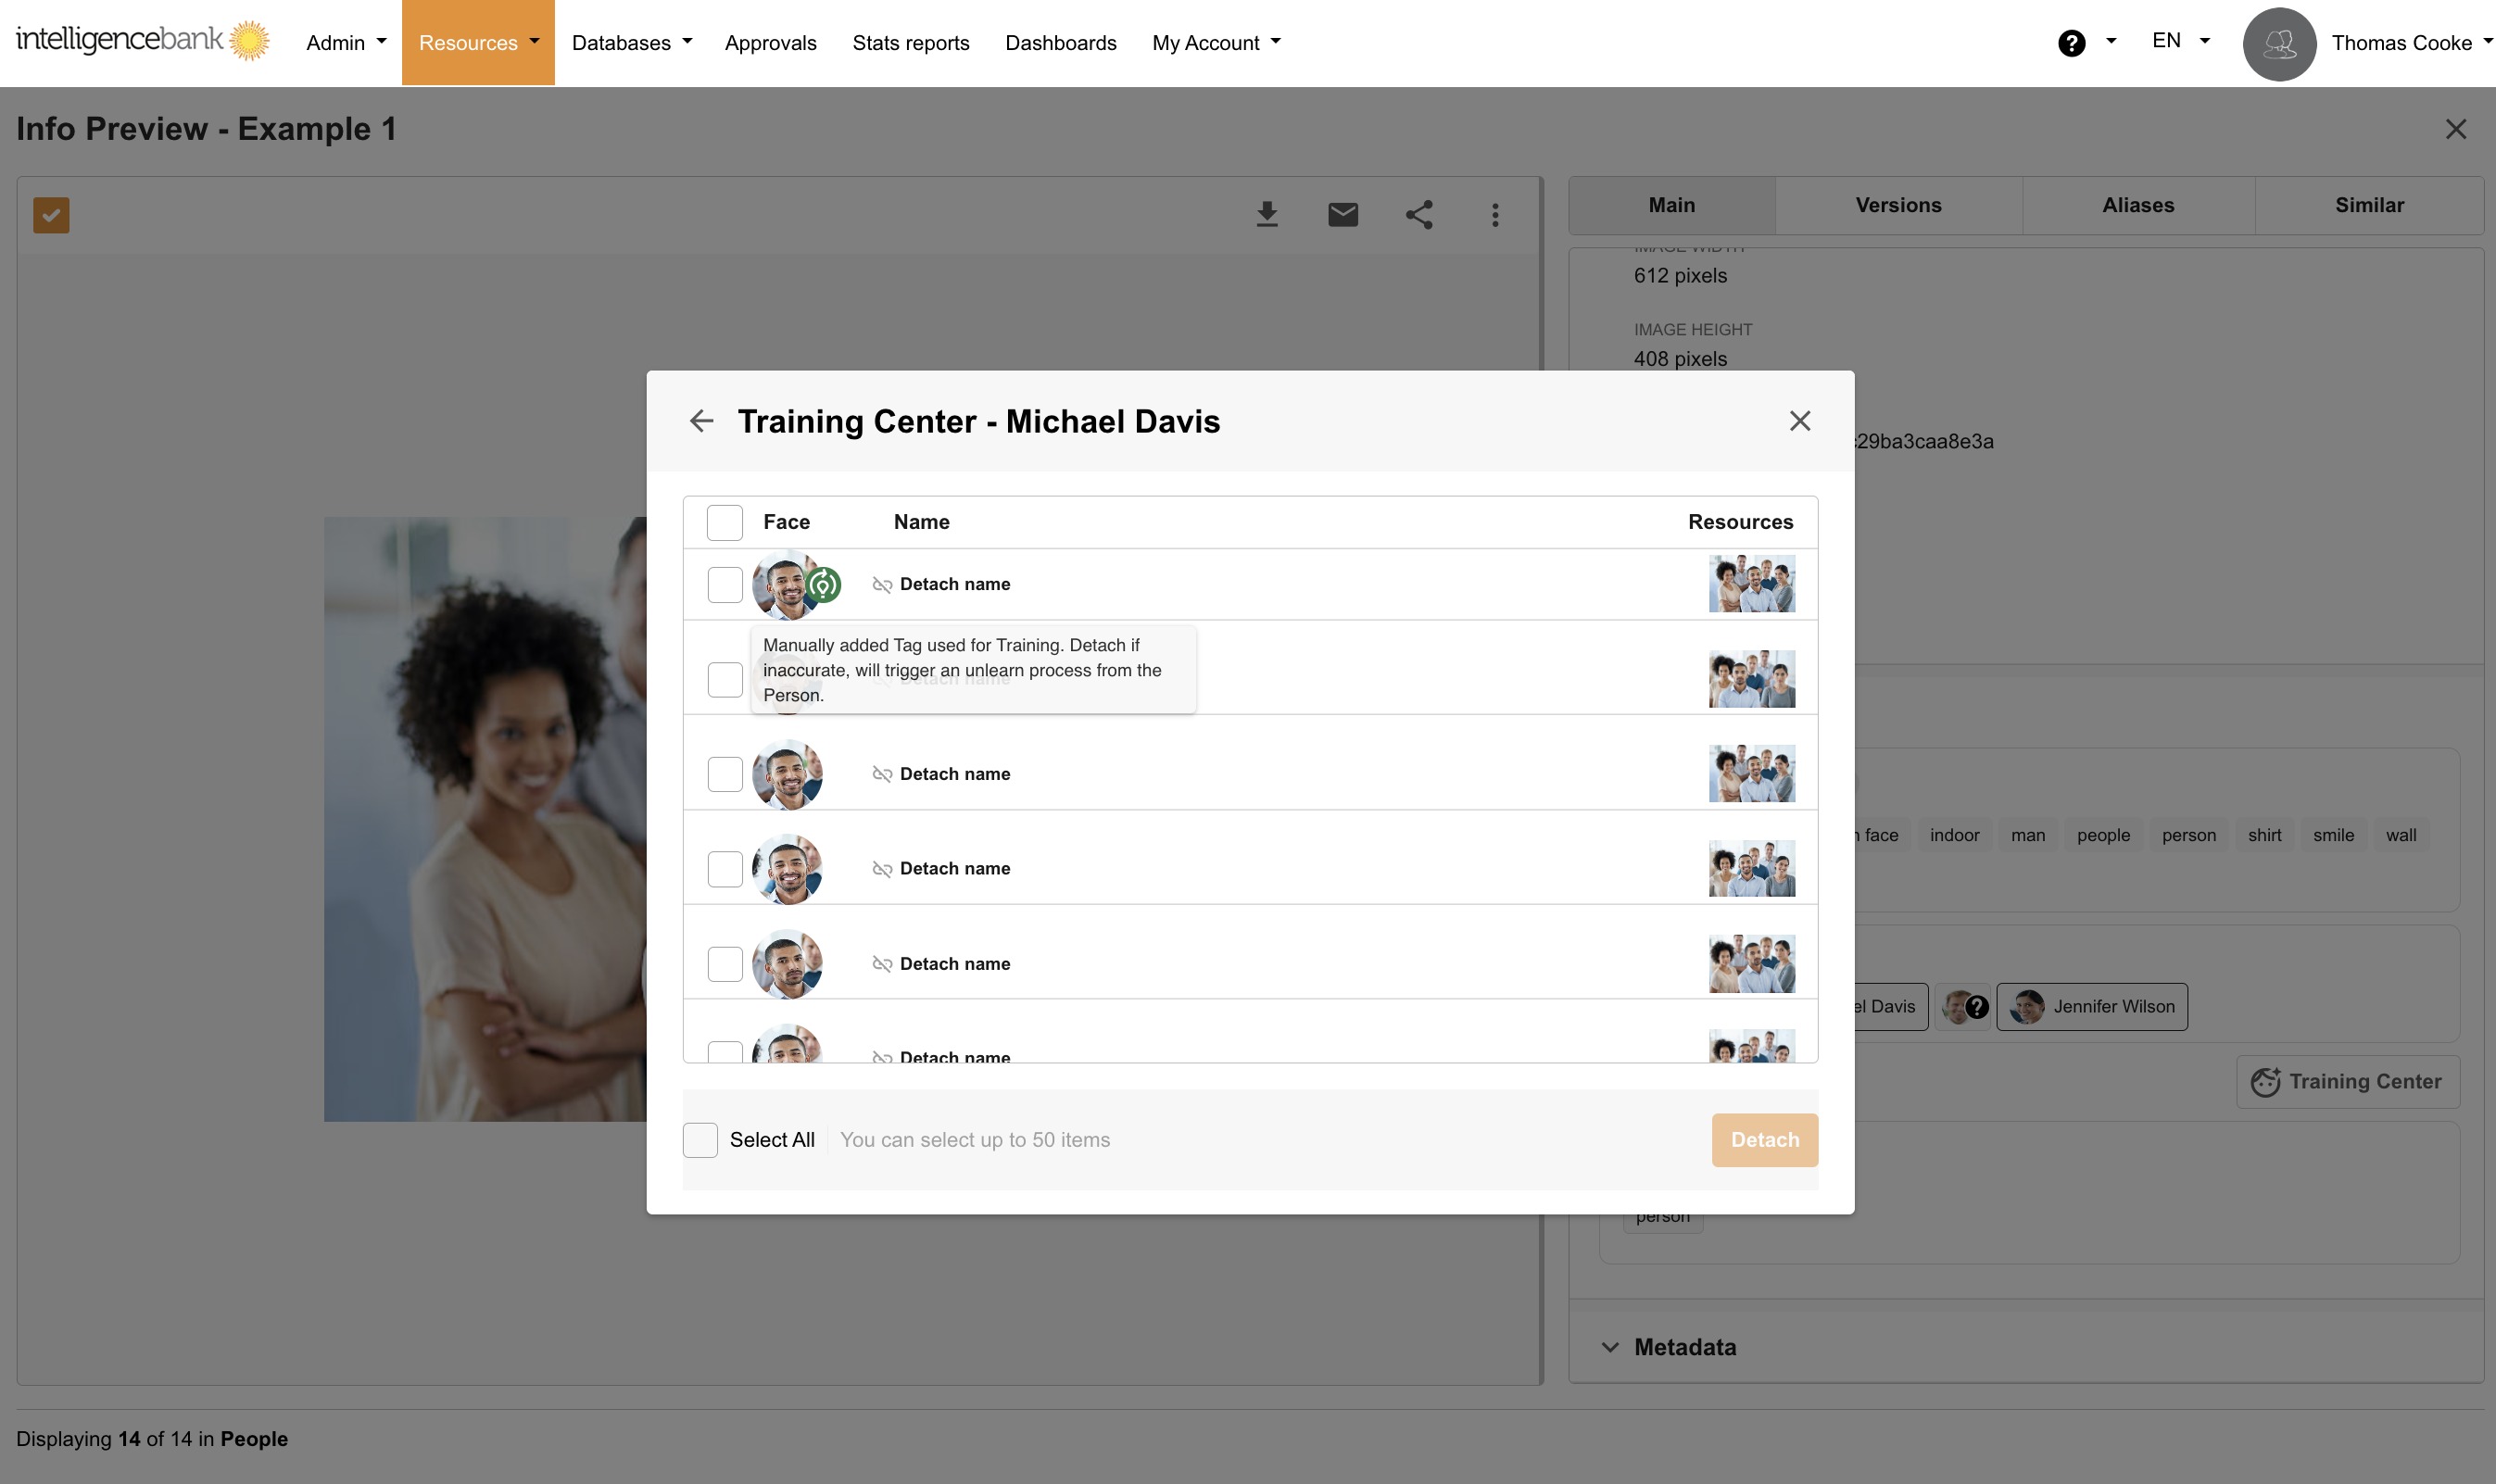
Clicking on View Profile will display all assets, both images and videos with that name tagged in them. From here you can detach any that are not that person.
A green indicator displays next to assets that have been used in training.
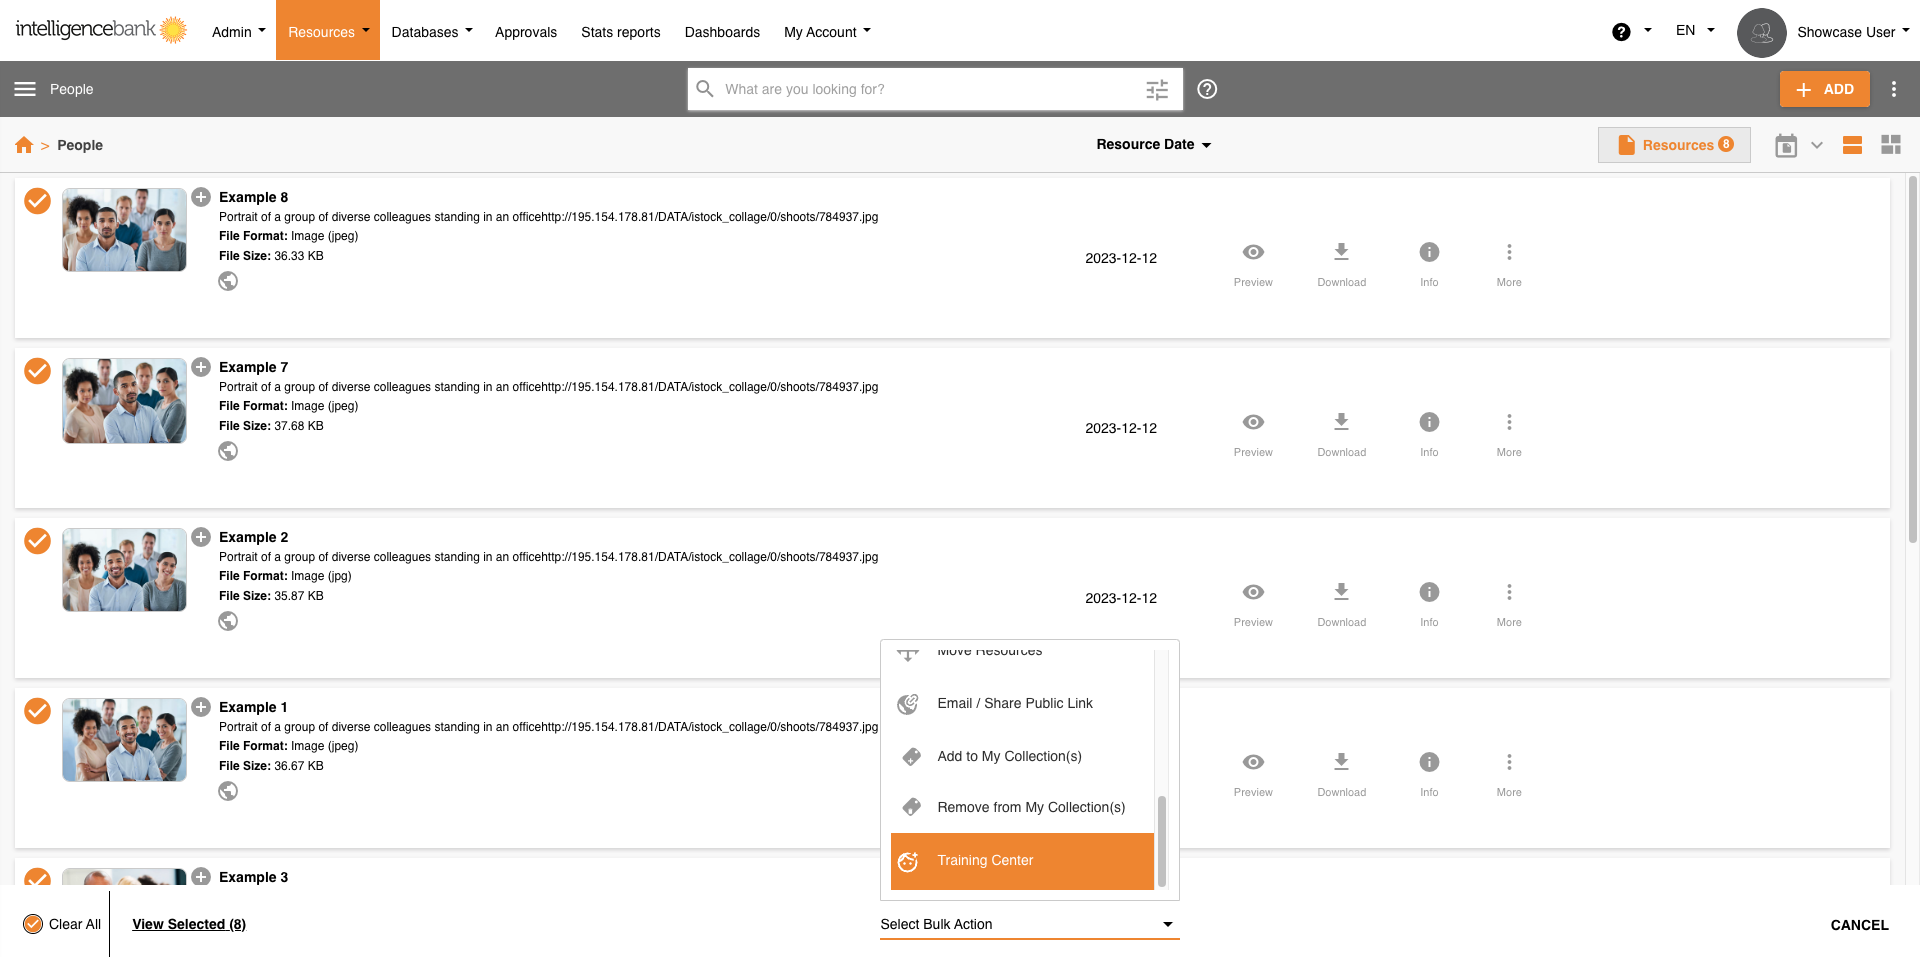
Bulk Training
You can select multiple assets — images or videos — and then use the Bulk Action - Training Centre option to bulk train unknown faces. This makes it more efficient to train multiple assets at a time.
Note, there is a current bulk action limit of up to 300 assets at a time.
Facial Recognition on Videos
Facial Recognition works the same way on videos as it does on images, with no extra steps for you to take. If Facial Recognition is enabled, every new video you upload is automatically scanned for faces as part of processing.
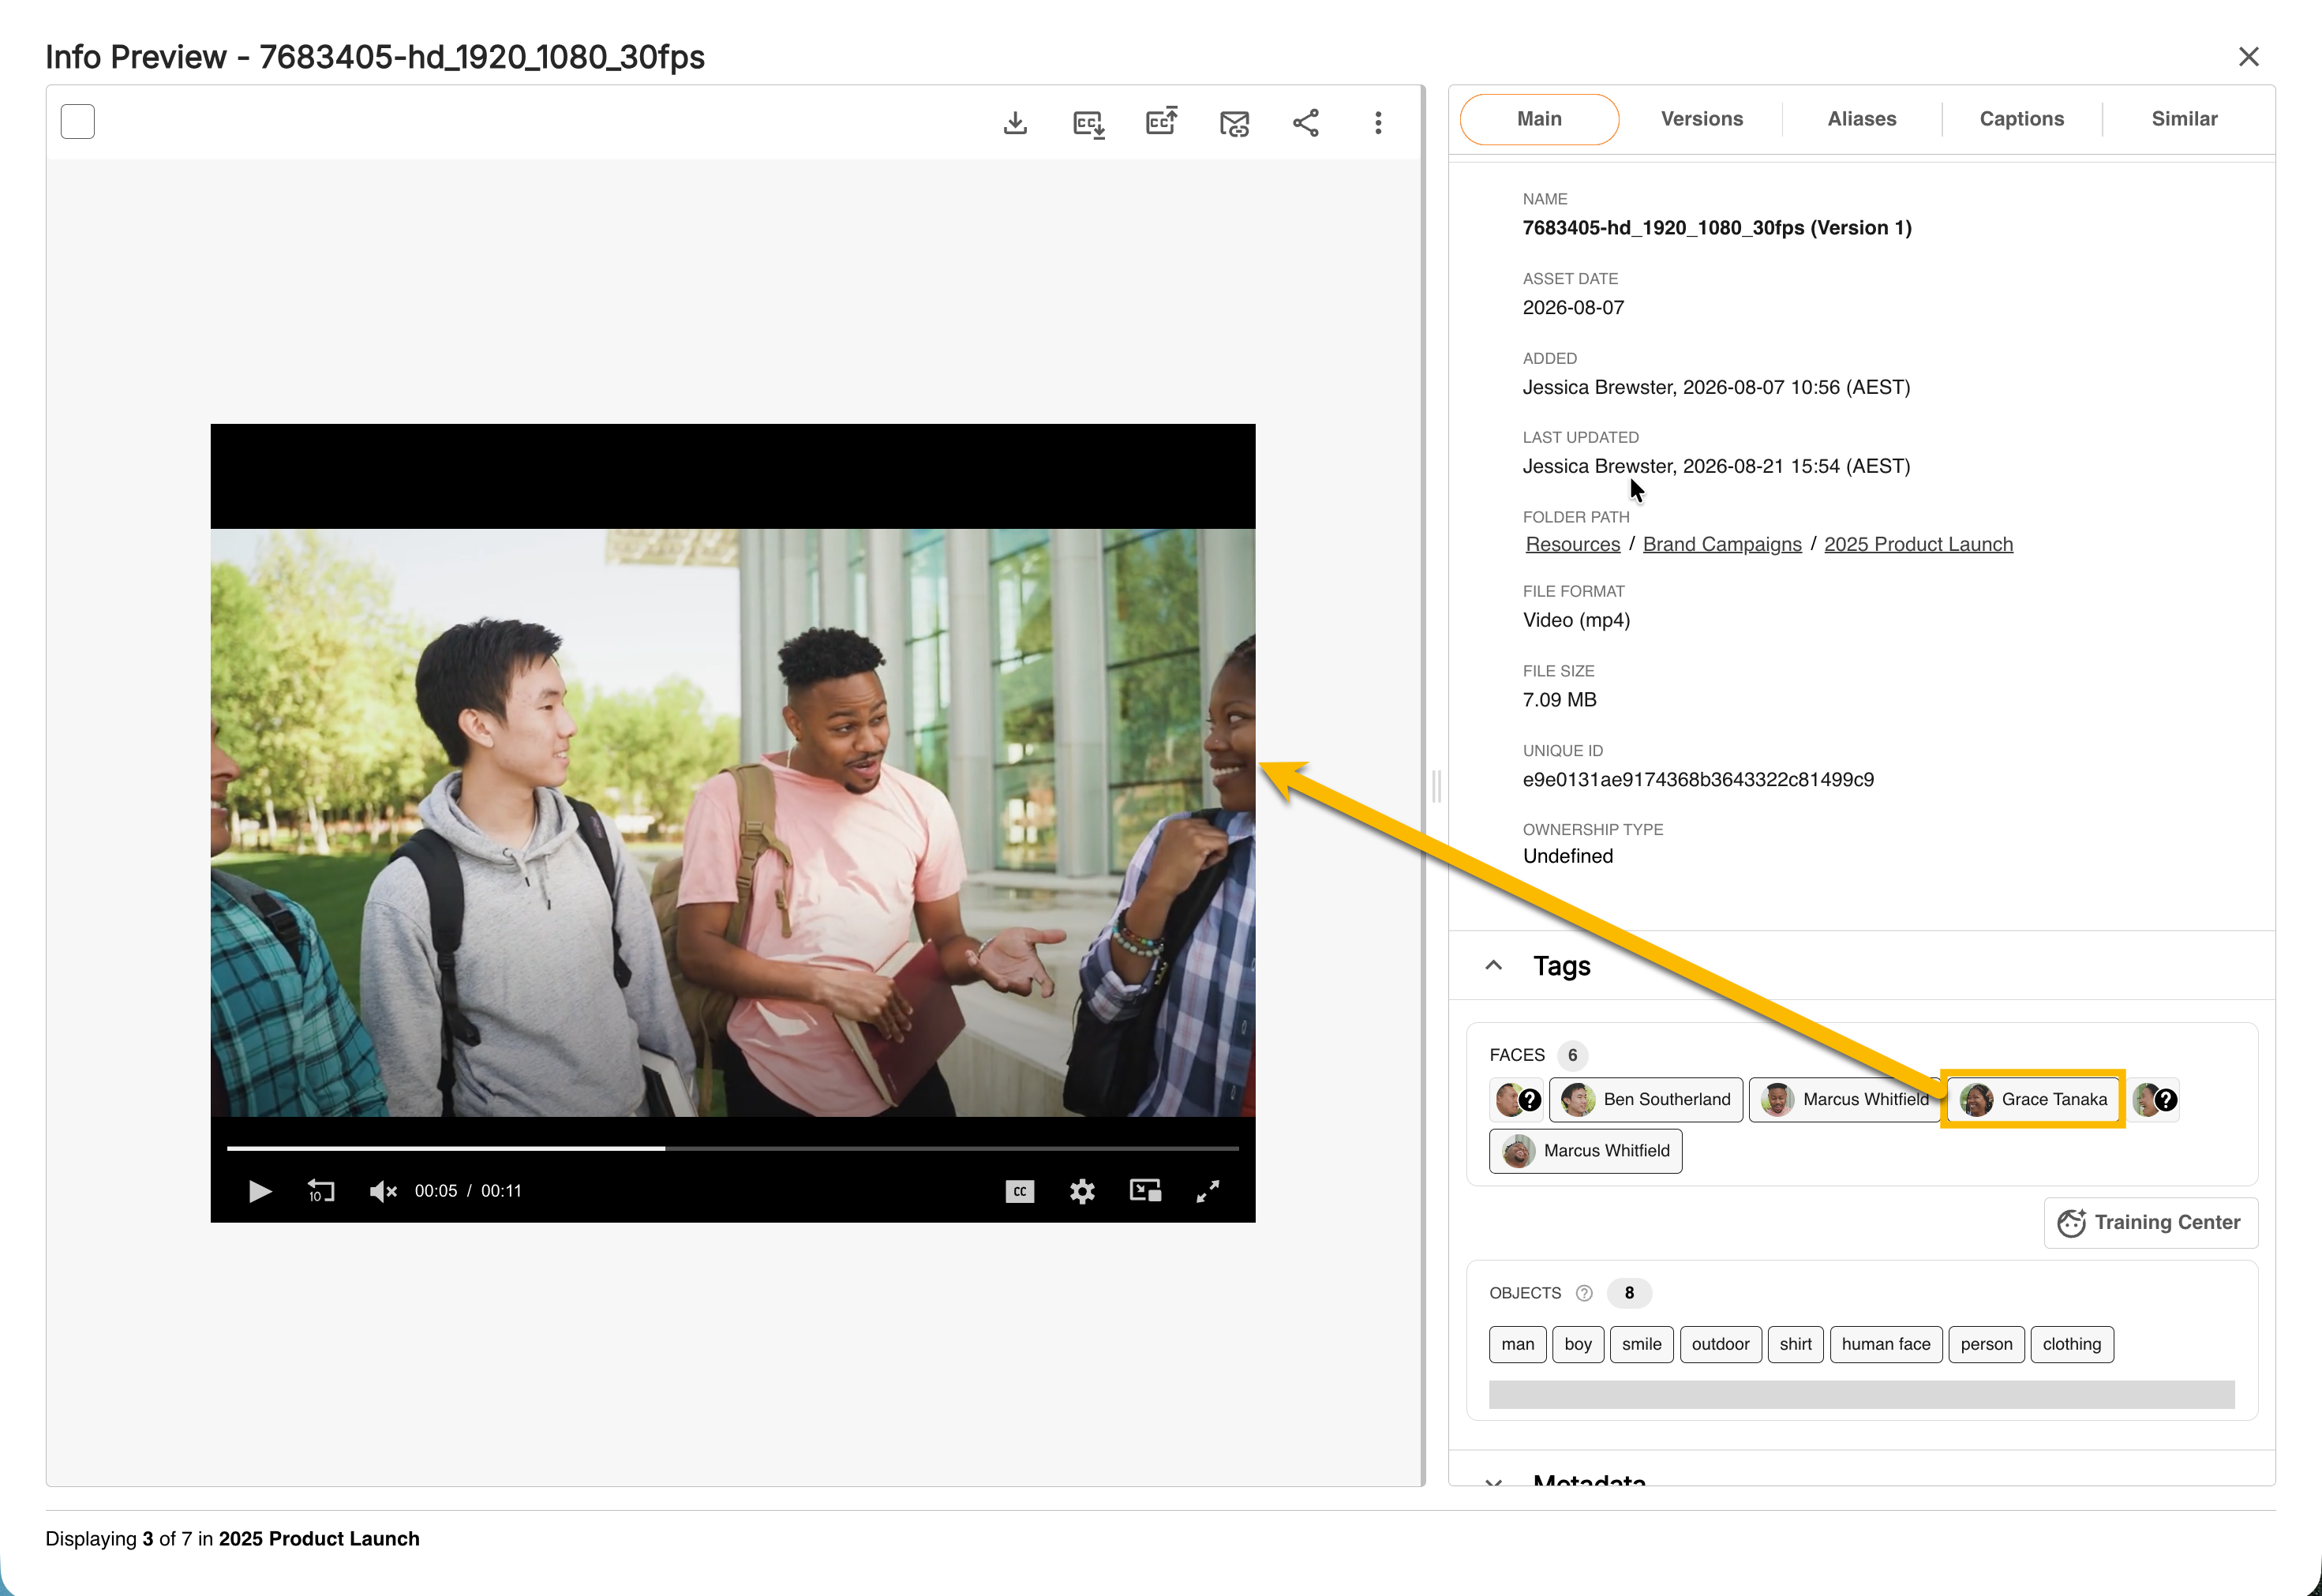
- If the video contains faces, a Faces section appears alongside the video once processing finishes, showing one chip per face detected - Known or Unknown, the same as images.
- If no faces are found in the video, no Faces section appears.
- Click any face chip and the video player jumps straight to the point where that person first appears - useful for finding someone in a long video without watching the whole thing.
- Recognition is shared across your whole library, not run separately for images and video: a person already named on an image is automatically recognized the next time they appear in a newly uploaded video, and naming someone on a video means they're recognized automatically in future images too.
- If one face on a video can't be processed, it won't affect the other faces detected on the same video, or the video's other AI-generated tags.
- Only videos uploaded after Facial Recognition are turned on are scanned automatically. Existing videos already in your library are not processed retroactively, but can be edited or updated to enable Facial Recognition using the Bulk Training Center action. Please contact your IntelligenceBank Customer Success representative if you'd like the existing videos backfilled.
Searching for Faces
Search and Filter Assets by Known Faces
Users can search and filter for assets by individuals’ names, making it easier for them to locate assets that feature particular people.
To search, simply input the name in the Search Bar. Images and videos with that name will be filtered as a result.
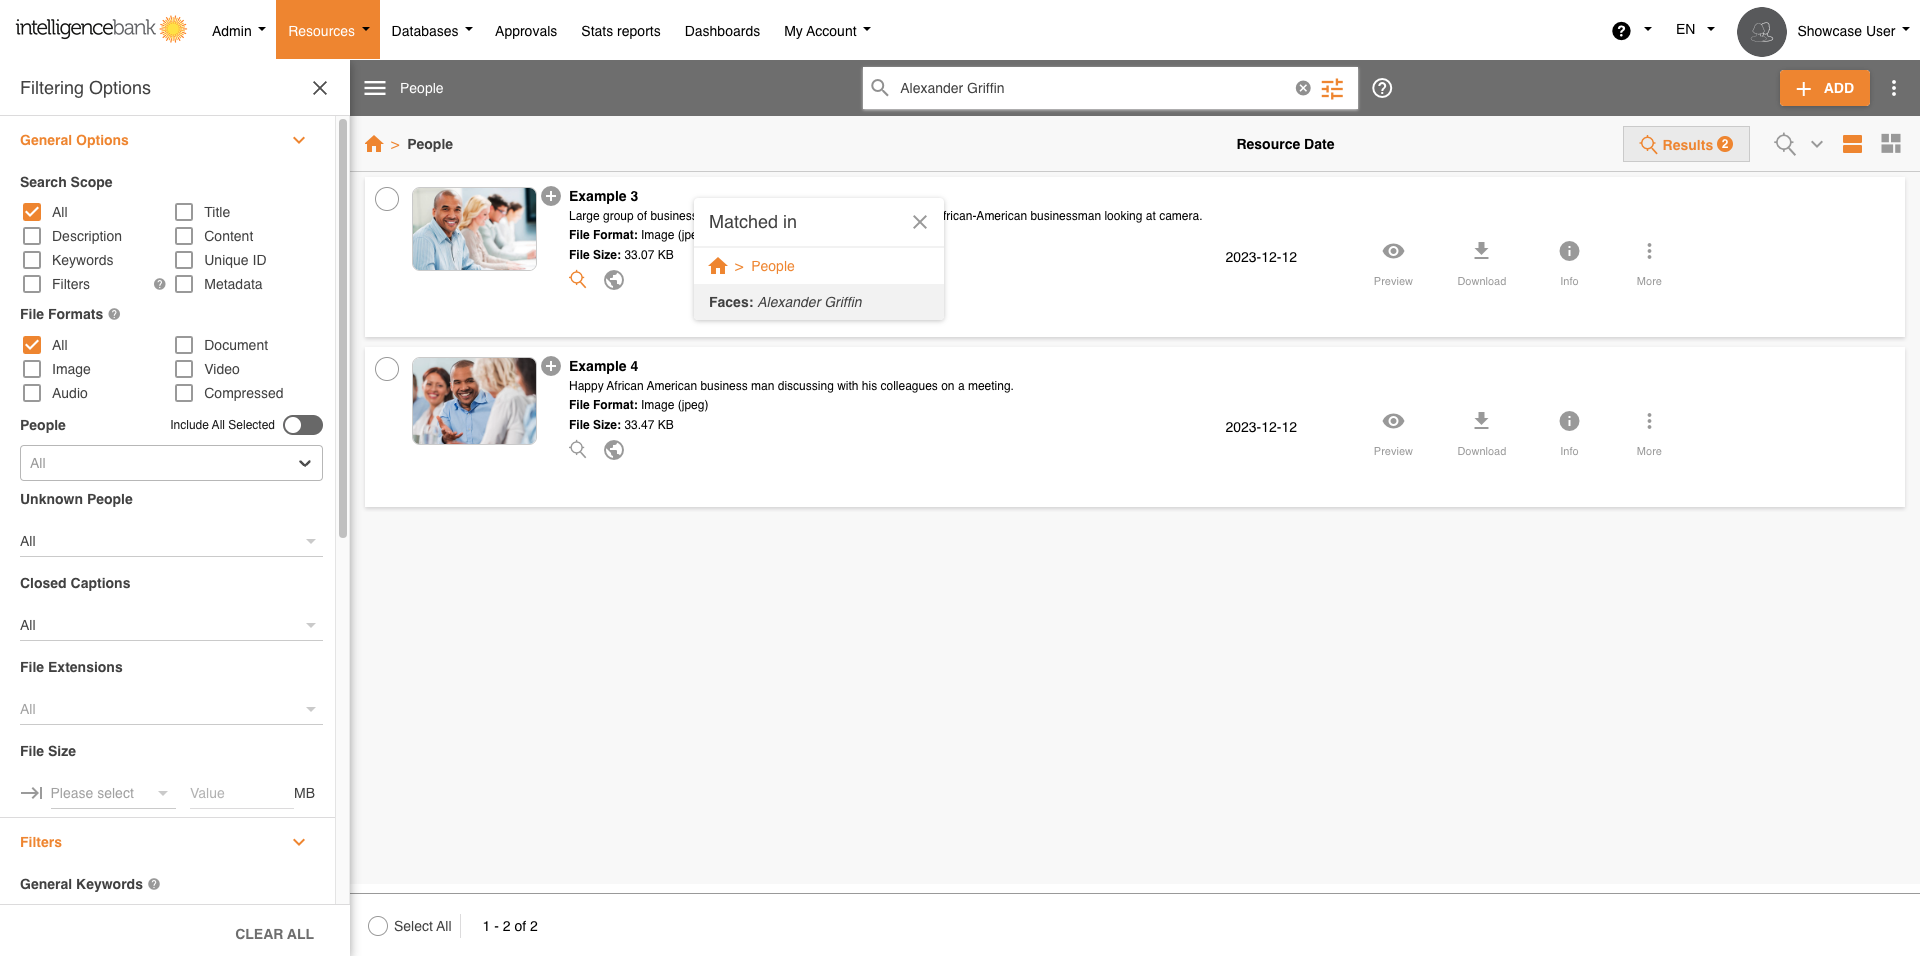
To filter assets by known faces:
- Access the Filters Panel
- Select Images from the File Formats.
- A People dropdown will appear. Select the name or names required from this dropdown and all matching images and videos will be filtered as a result.
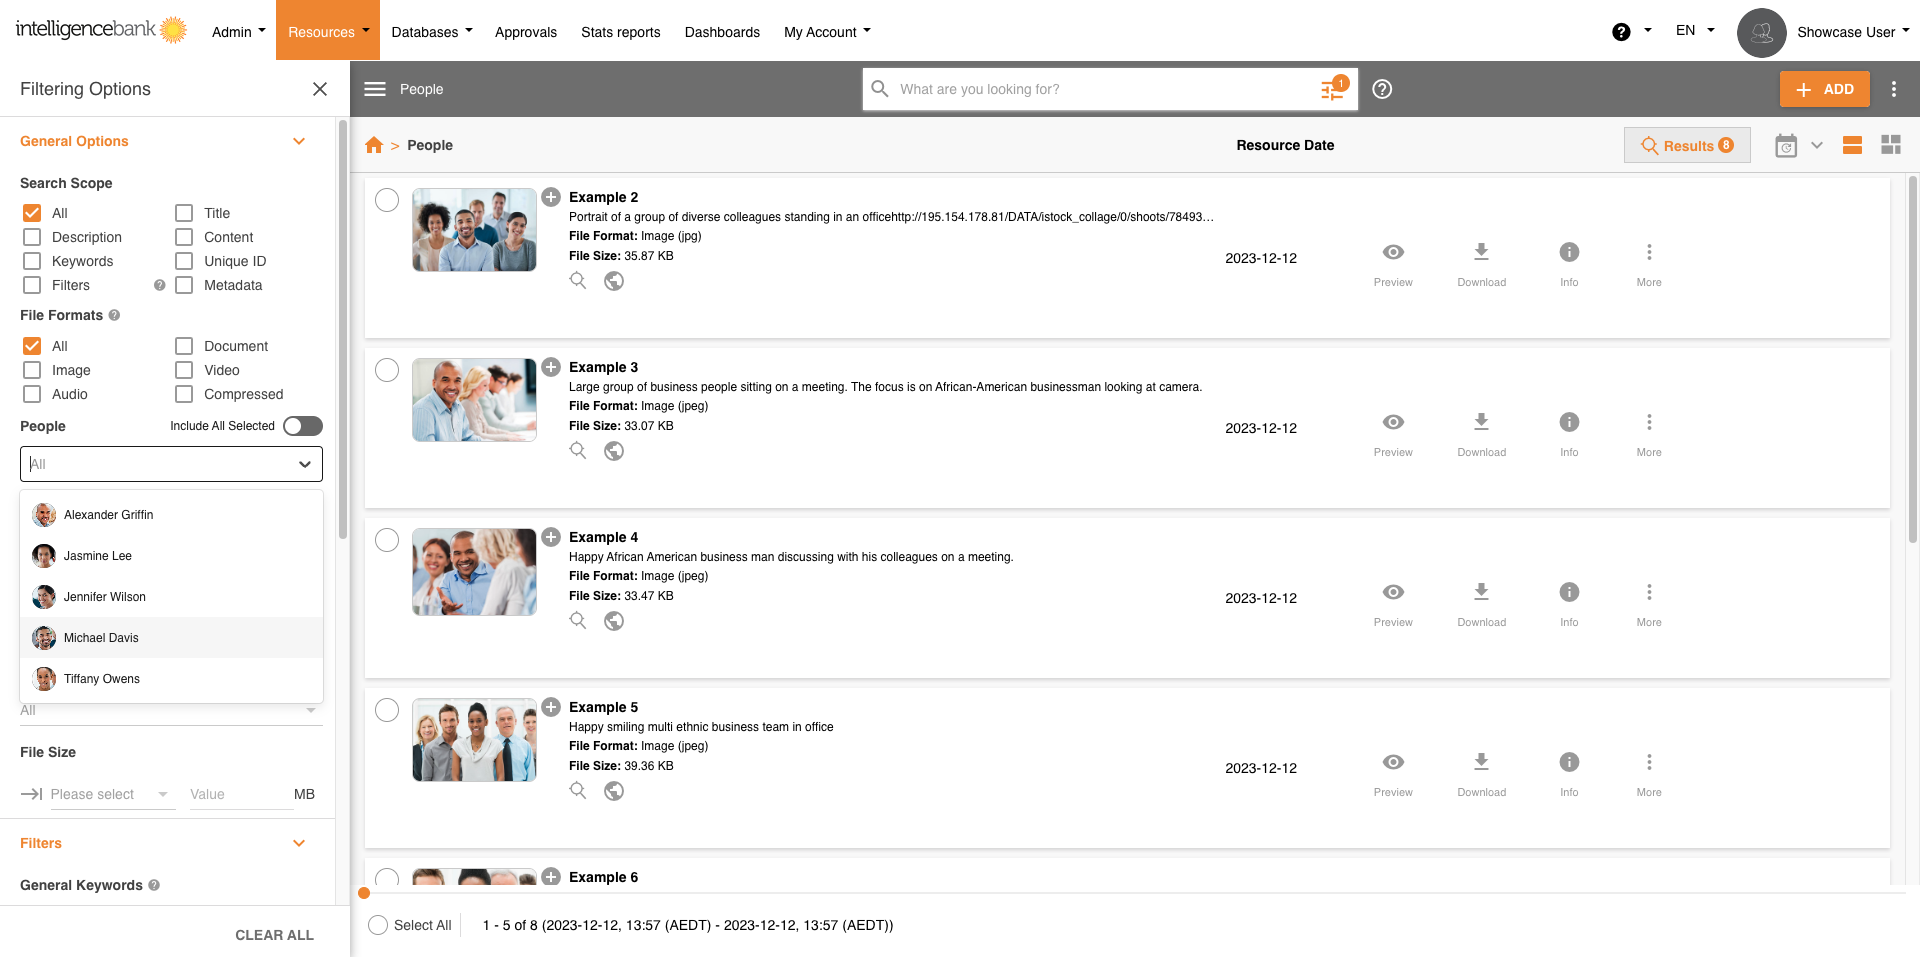
If you select multiple faces and toggle on Include All Selected, only those assets that have each of the selected faces will be filtered as a result.
Filter Assets by Unknown Faces
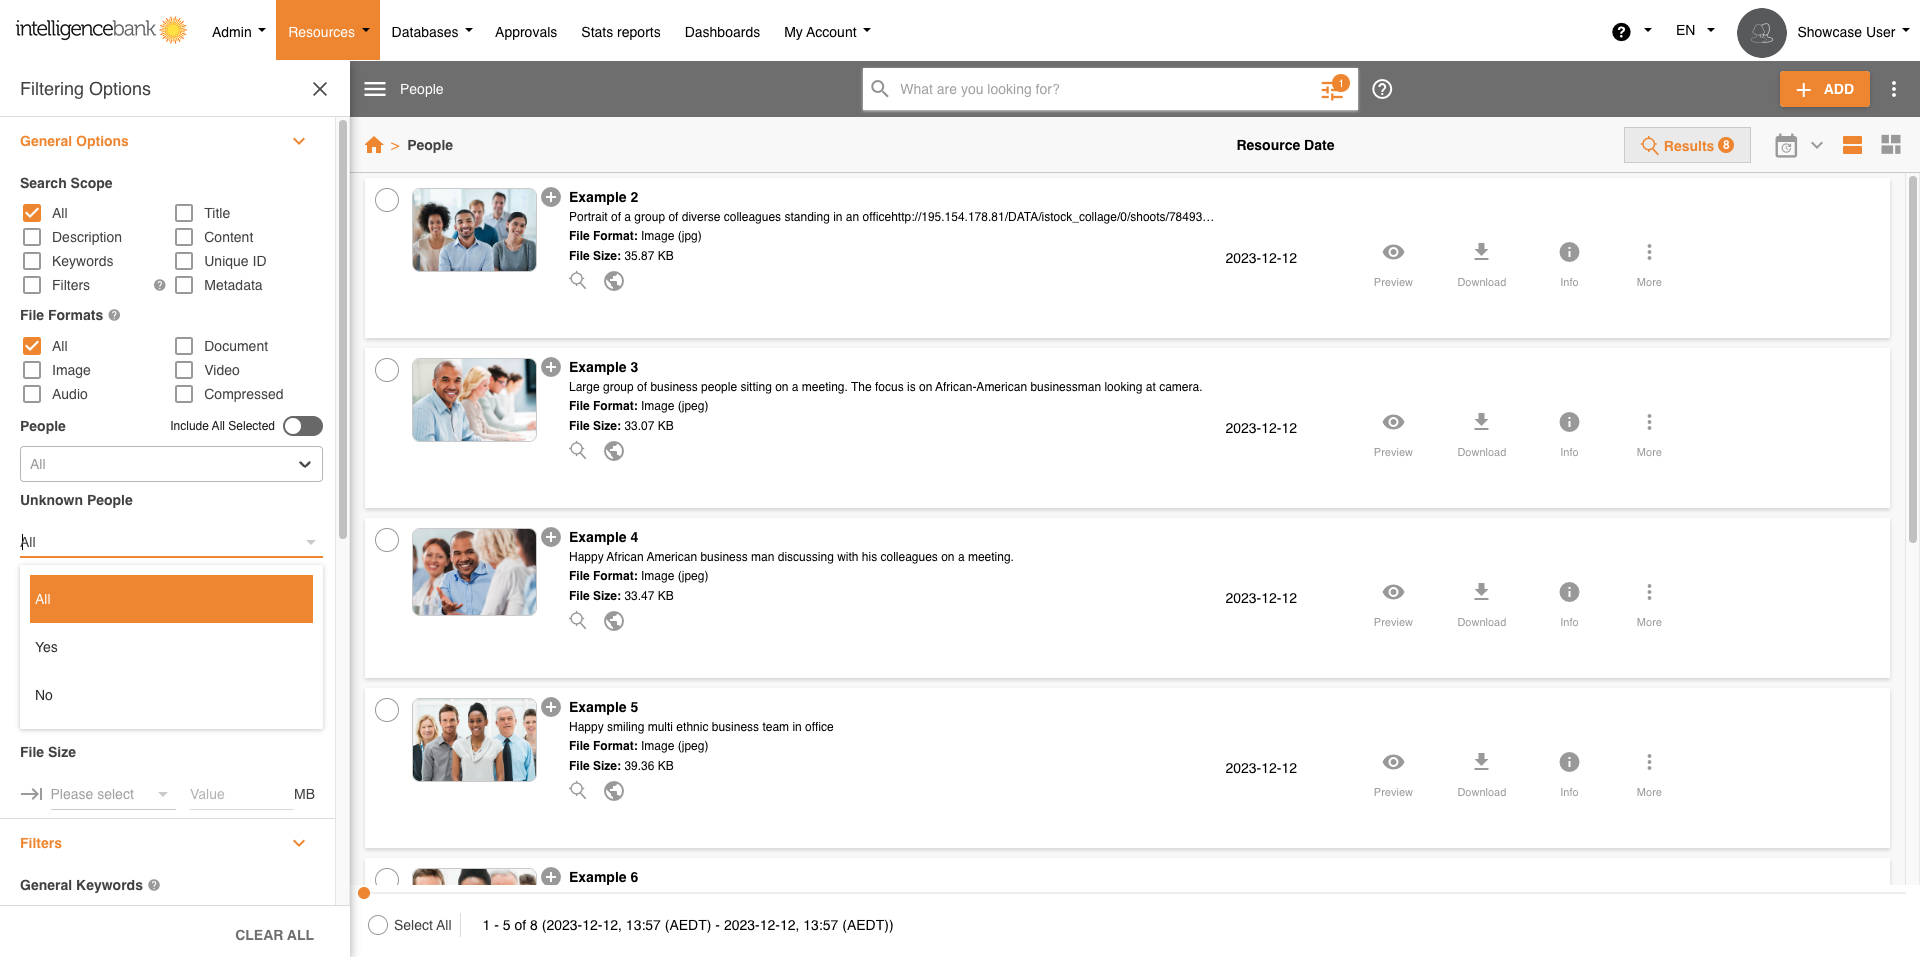
Users can also filter by Unknown Faces. Select Yes under the Unknown People dropdown to view all assets — images and video — with unknown faces. You can then use the Bulk Training Action to tag them.
Limitations
Image and Video Quality:
Facial recognition algorithms can detect faces even at small sizes, such as 36x36 pixels. However, for optimal performance, it's recommended to use images and video with a face resolution of at least 200x200 pixels. Maintaining sufficient image/video quality ensures accurate facial analysis — the same guidance applies to the individual frames a video is scanned from.
Face Orientation:
Facial recognition works best when faces are oriented towards the camera within a certain range. Microsoft recommends faces be oriented within 35 degrees for both pitch and yaw (head tilt and rotation), while roll (head tilt to the side) typically doesn't affect detection.
Eye Distance:
To ensure accurate facial recognition, there should be at least 100 pixels between the eyes in the image or video frame.
Occlusions:
Faces may be partially or entirely occluded for various reasons, such as:
- Religion: Headwear that covers or partially obscures faces.
- Personal Protective Equipment (PPE): PPE such as face protective masks that cover or partially obscure faces.
- Weather: Garments like scarves wrapped across the face.
- Injury: Eye patches or large bandages.
- Glasses: Very opaque glasses and pinhole glasses (other glasses and lenses should be fine).
- Personal Style: Bangs over eyebrows, baseball caps, large facial tattoos, etc.
These occlusions can hinder accurate facial recognition.
Changes in Appearance:
Significant changes in appearance, such as the removal of a full beard or the passage of many years between initial images/video and later ones, can lead to recognition errors.
Age Considerations:
Facial recognition systems are generally less accurate for children, especially those 13 years and younger. We recommend using Facial Recognition for individuals over 18.
Large Video Files:
The File Size Upload limit is optimised to 10GB with a maximum length of 4 hours. Please speak with your account manager about increasing the file size, noting that the playback maximum is 10GB.
Was this article helpful?
That’s Great!
Thank you for your feedback
Sorry! We couldn't be helpful
Thank you for your feedback
Feedback sent
We appreciate your effort and will try to fix the article