Admin users have the ability to create presets with custom names and specific download requirements for quick usage. This allows users to quickly apply and select presets for download that will be applied to the original image. They can also be used within the Share / Embed functionality.
For example: You can set up a preset that meets the required specifications for 3rd party sites, such as Facebook profile pictures, LinkedIn Headers, or simply create these presets for your own internal specifications.
This article contains a full overview of the options available when creating & managing presets.
Manage Presets
The Manage Presets area is available for access via either the single image download overlay or Share / Embed.
In either instance, go to a single image file and select the corresponding action, ie either Download or Share / Embed.
Single Download
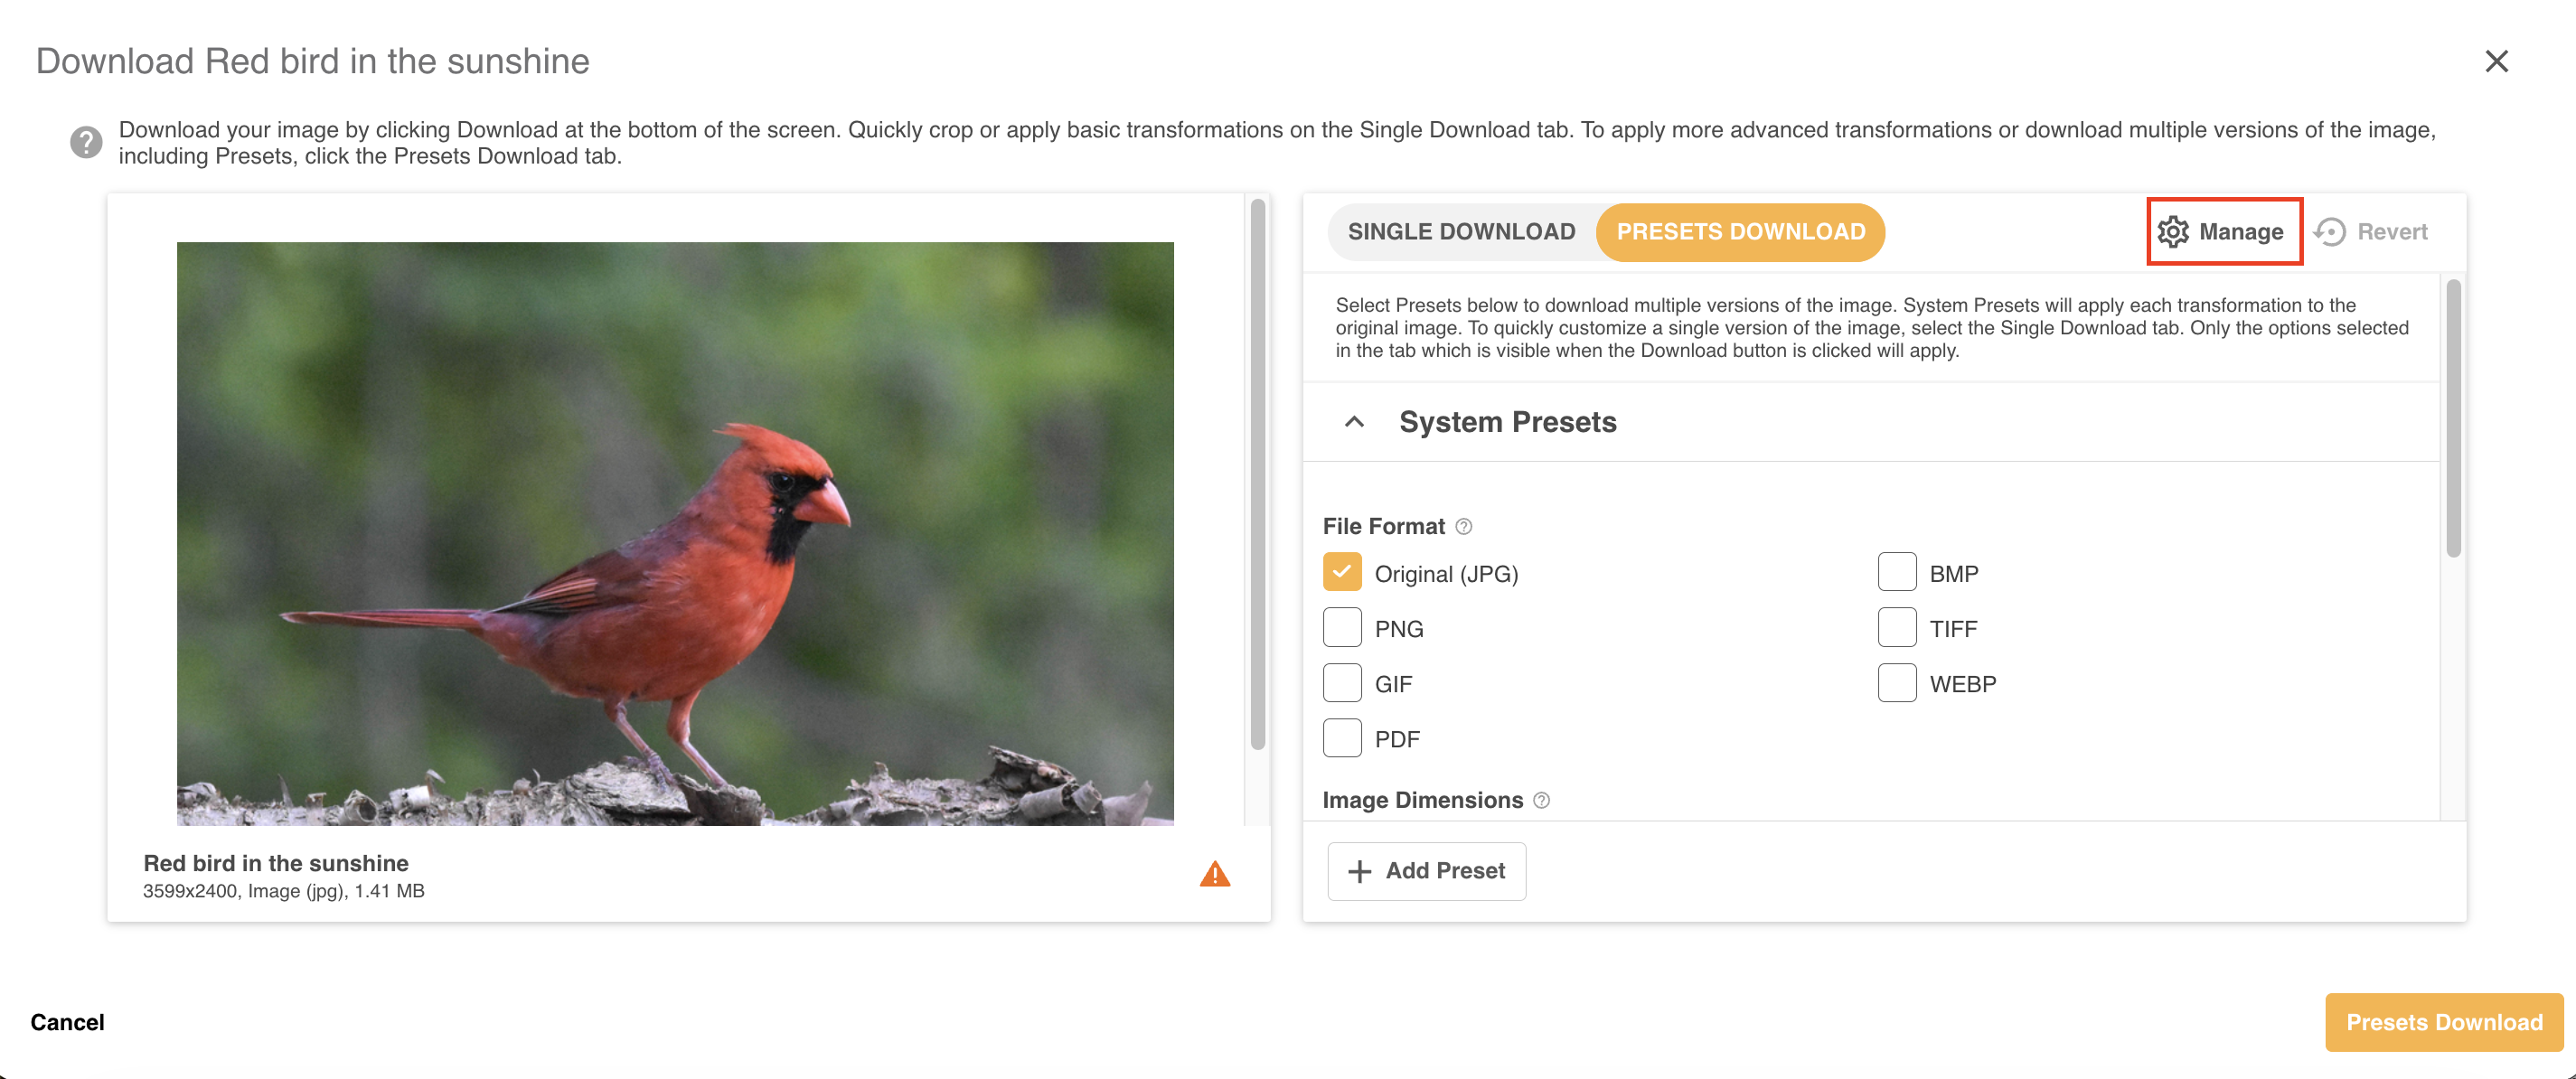
If you wish to access Manage Presets from single download, when the single download overlay loads, click the Presets Download tab and the Manage option highlighted below. If you can't see the Manage option, it means you do not have permission to manage presets.
Share / Embed
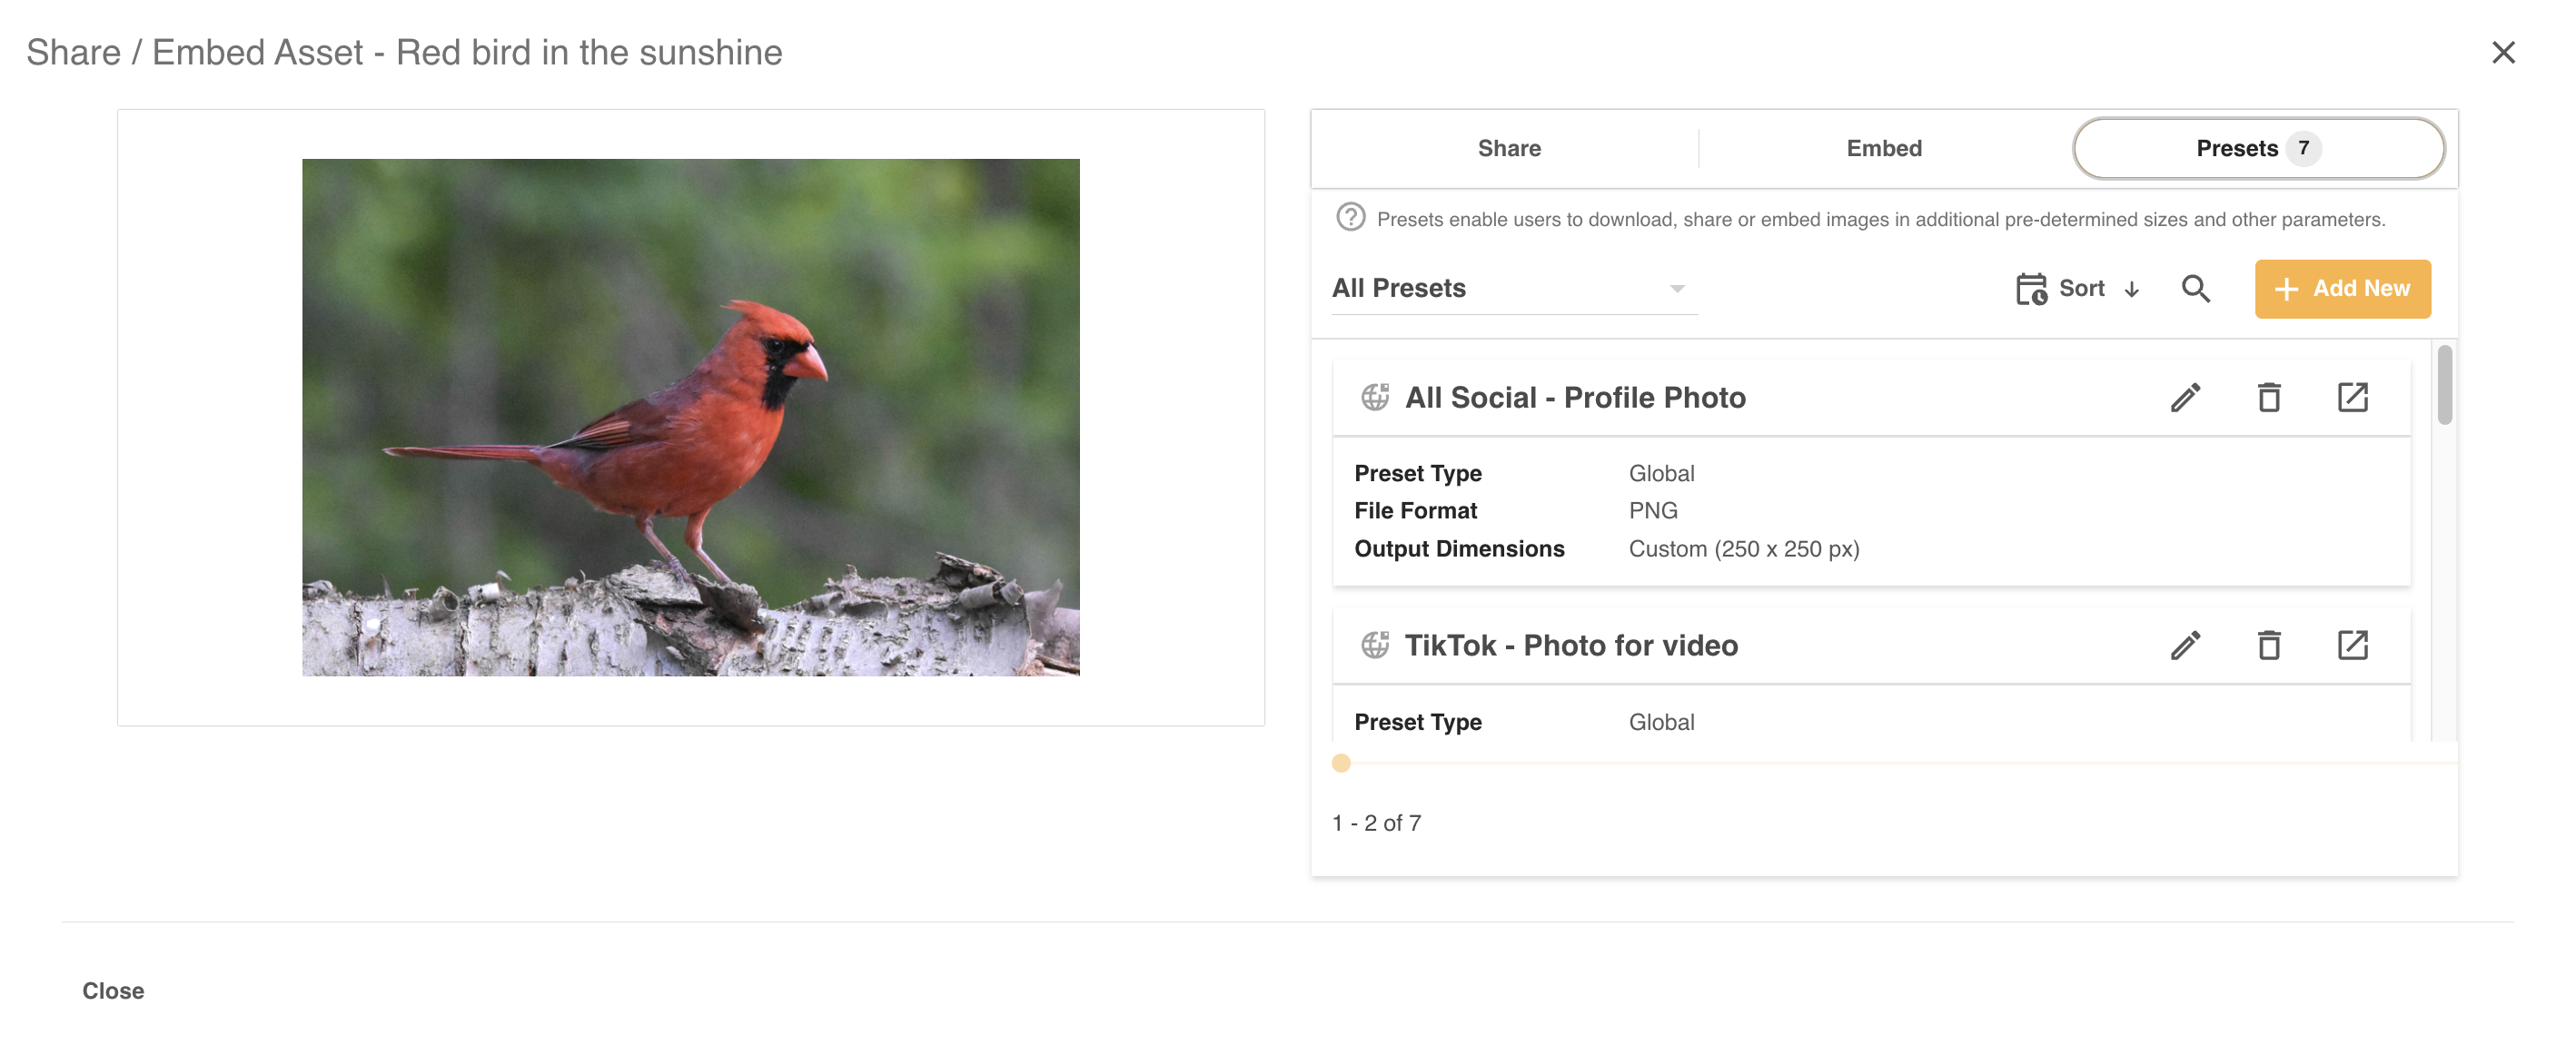
To access Manage Presets from Share / Embed, go to the Share / Embed overlay and click the Presets tab. From here, you will be able to edit or add new presets, providing you have permission to do so.
Add a New Preset
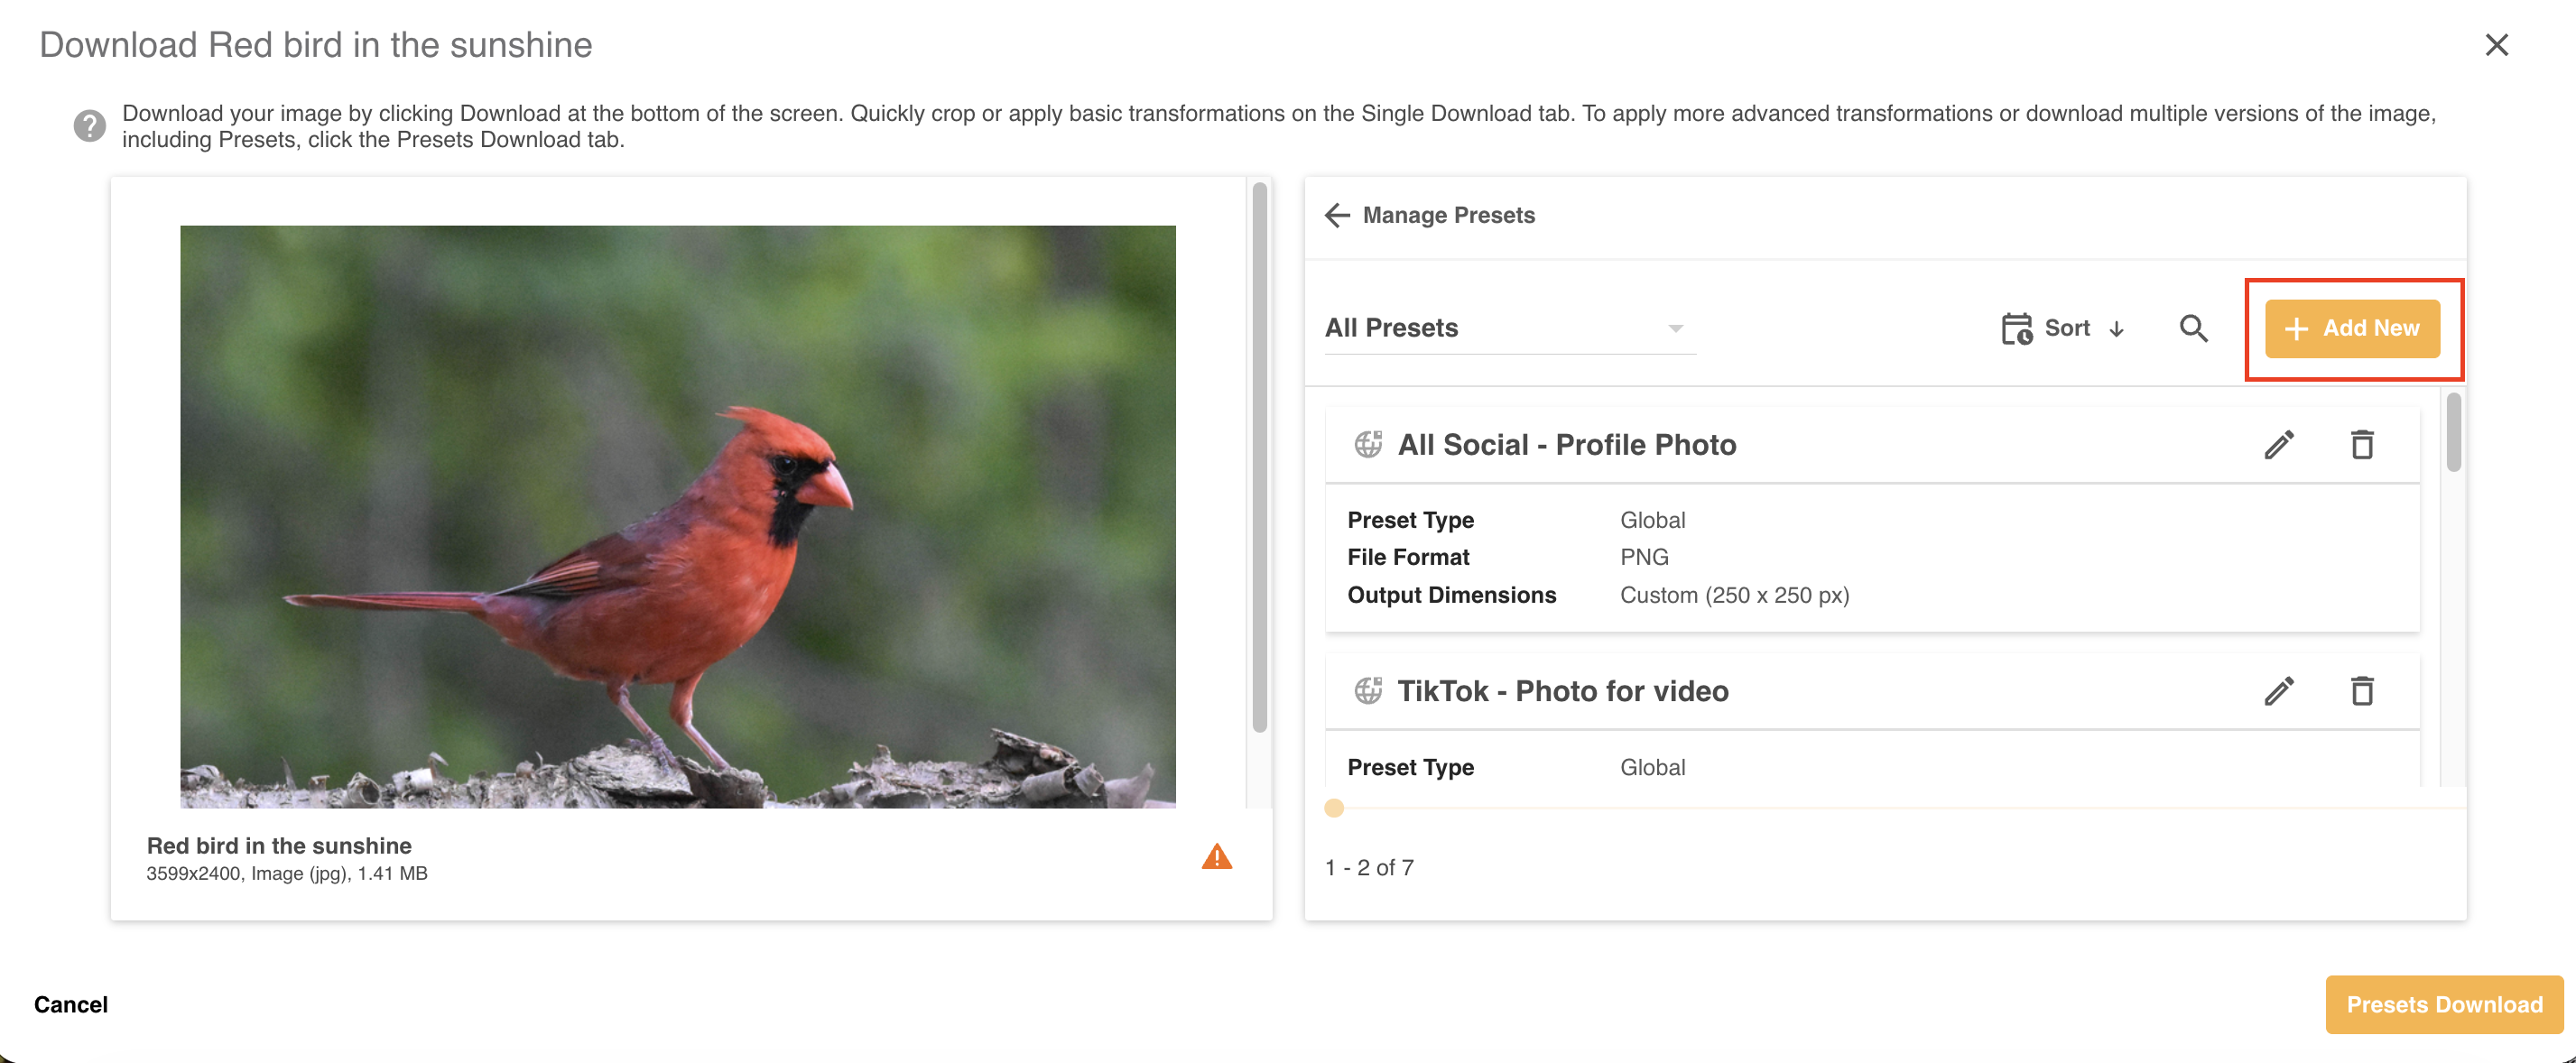
Once the Manage Presets page is opened, you will be able to add a preset via the + Add New button highlighted below:
The page you are on will determine the options available here, though in all cases you will be able to create Global, Single, and Ad Hoc Presets.
Single Presets
Once added, these are only applicable for the individual image you are viewing. For example, if you clicked Single Download and opened Manage Presets / Add Preset, a single preset would only ever apply to the selected image you wish to download. Users will be able to use this preset when downloading or publicly sharing that image.
Single Presets have specific transformation options available that allow you to preview the changes being made, along with other features such as applying Aspect Ratio. You can read all about those here.
Global Presets
These are available for all assets when the user is downloading or publicly sharing an image. As they can apply to multiple images at once, Admin users can set default rules for how the images behave in specific scenarios, e.g. default area position. You can read about the Global Preset options here.
Ad Hoc Presets
Ad Hoc presets are one-off presets that only apply to that single action, ie downloading one image. The options available for Ad Hoc Presets are dependent on where you're performing the action, ie in Bulk Download or Single Download.
Loading an existing Preset
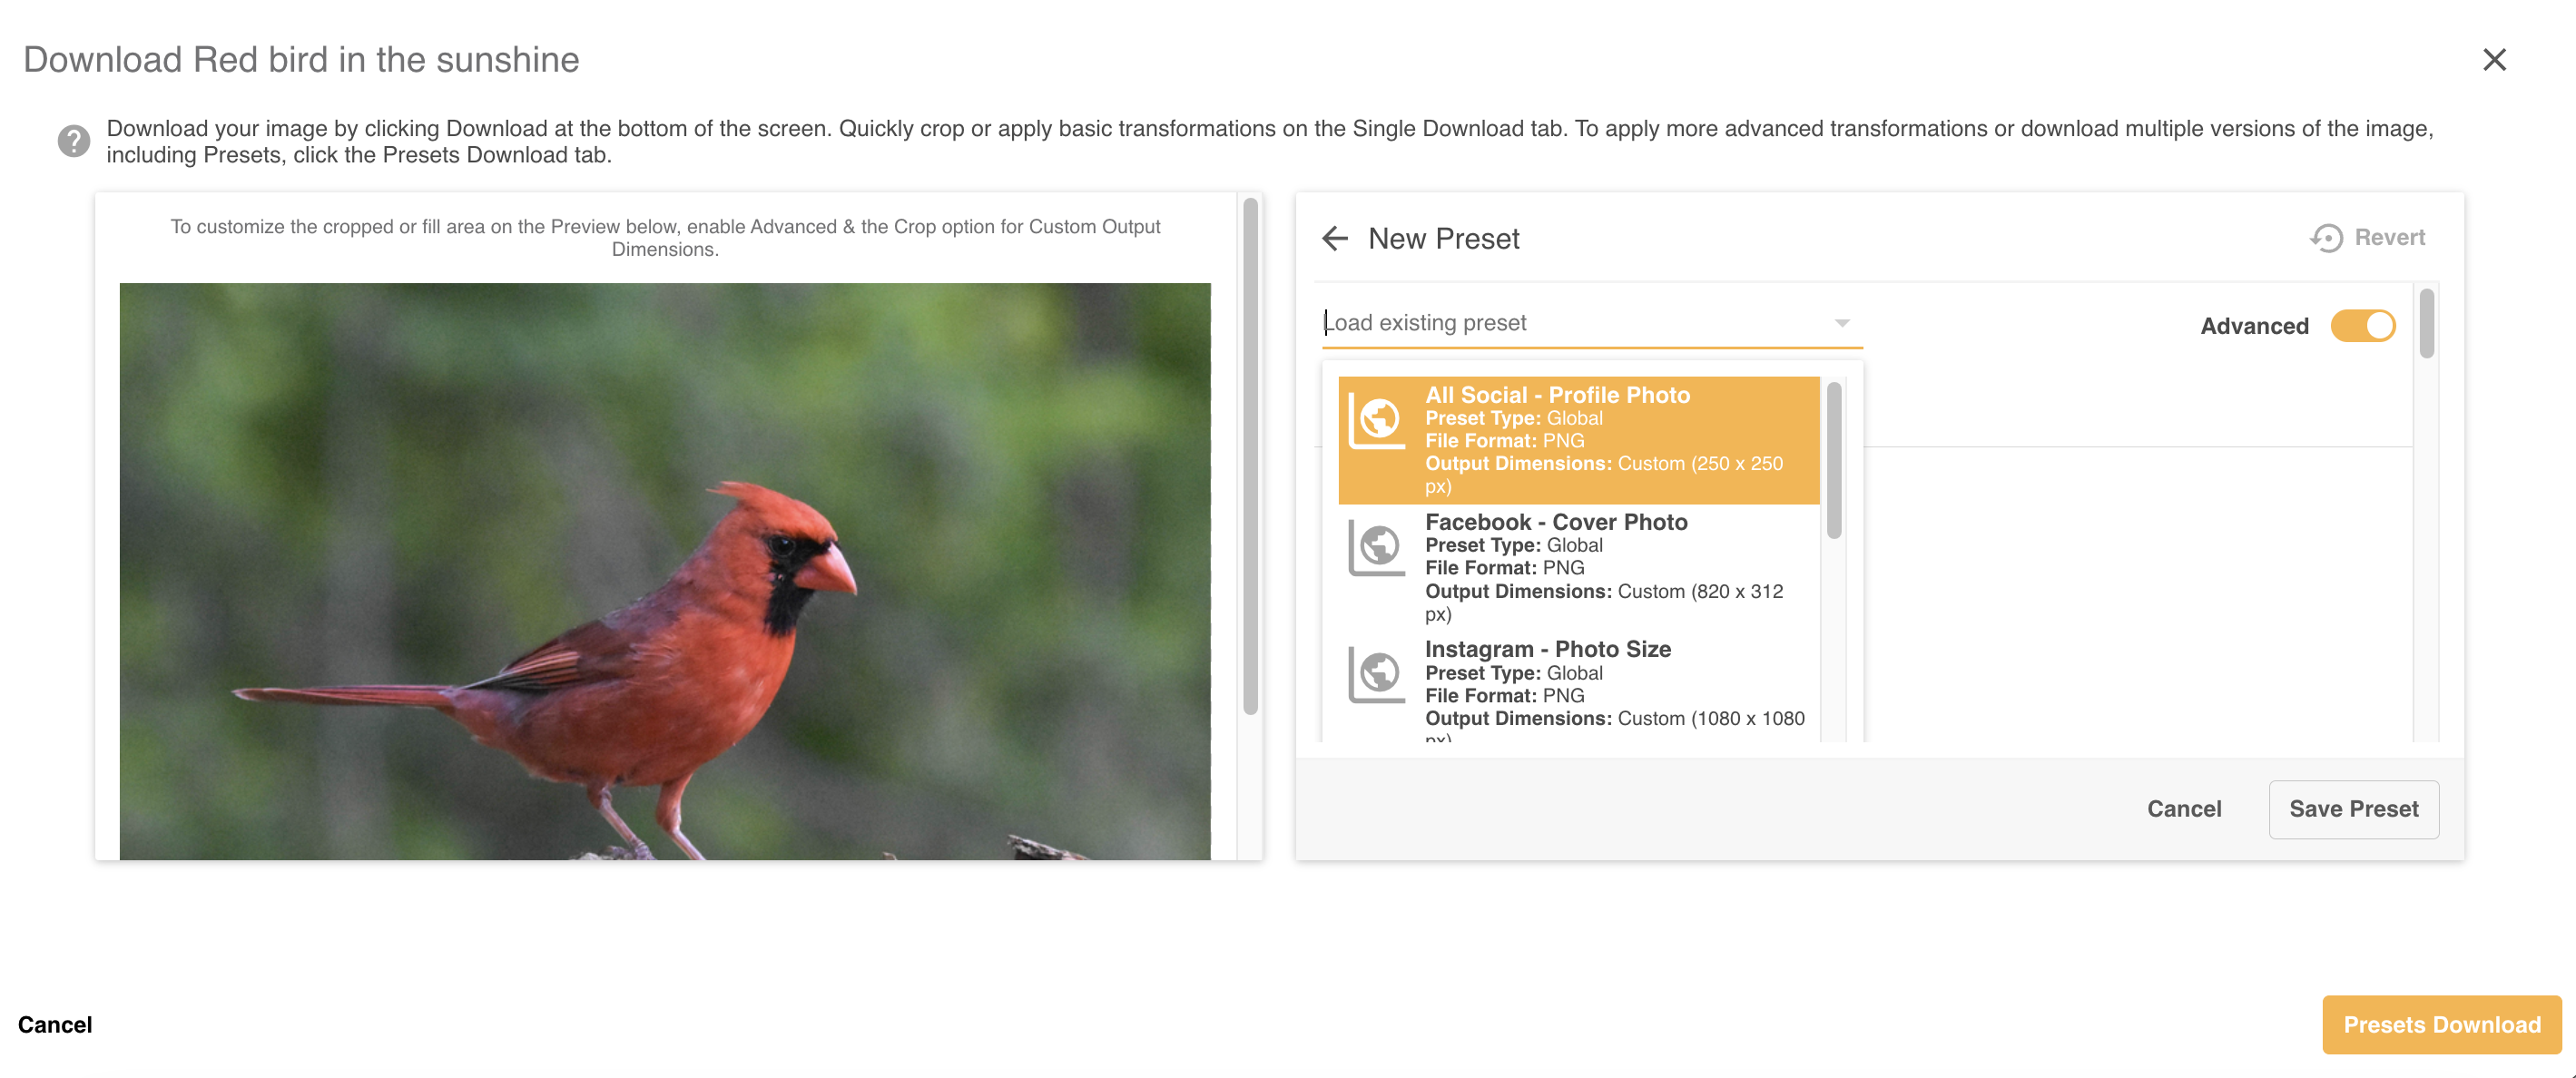
Regardless of the preset type, you will be able to load an existing preset. This will always appear at the top of the preset creation form and will load the settings for the selected preset.
Editing an Existing Preset
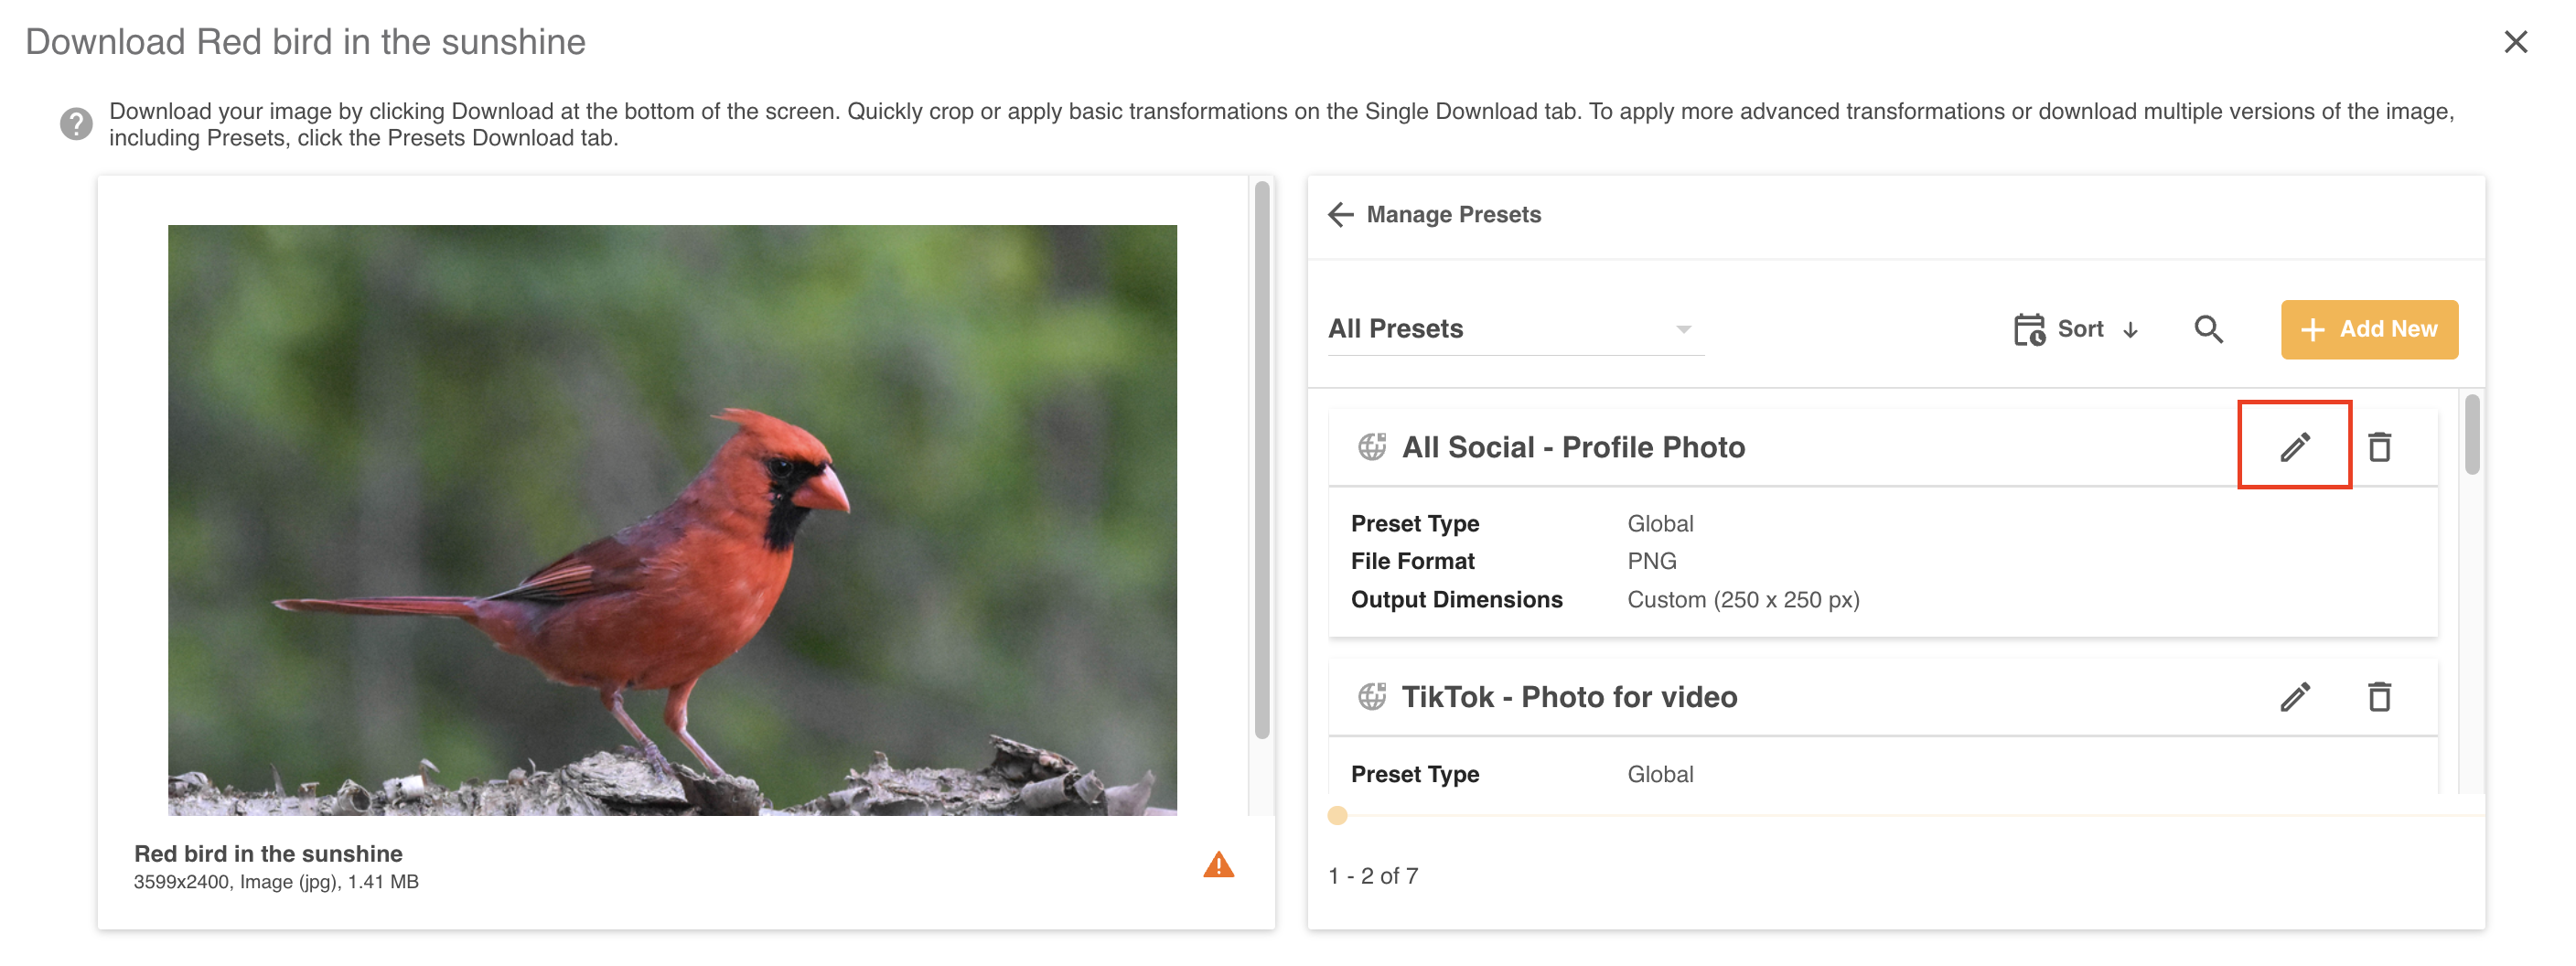
To edit an existing preset, open the Presets List / Manage Presets page. Navigate to the asset you wish to edit and click the pen icon.
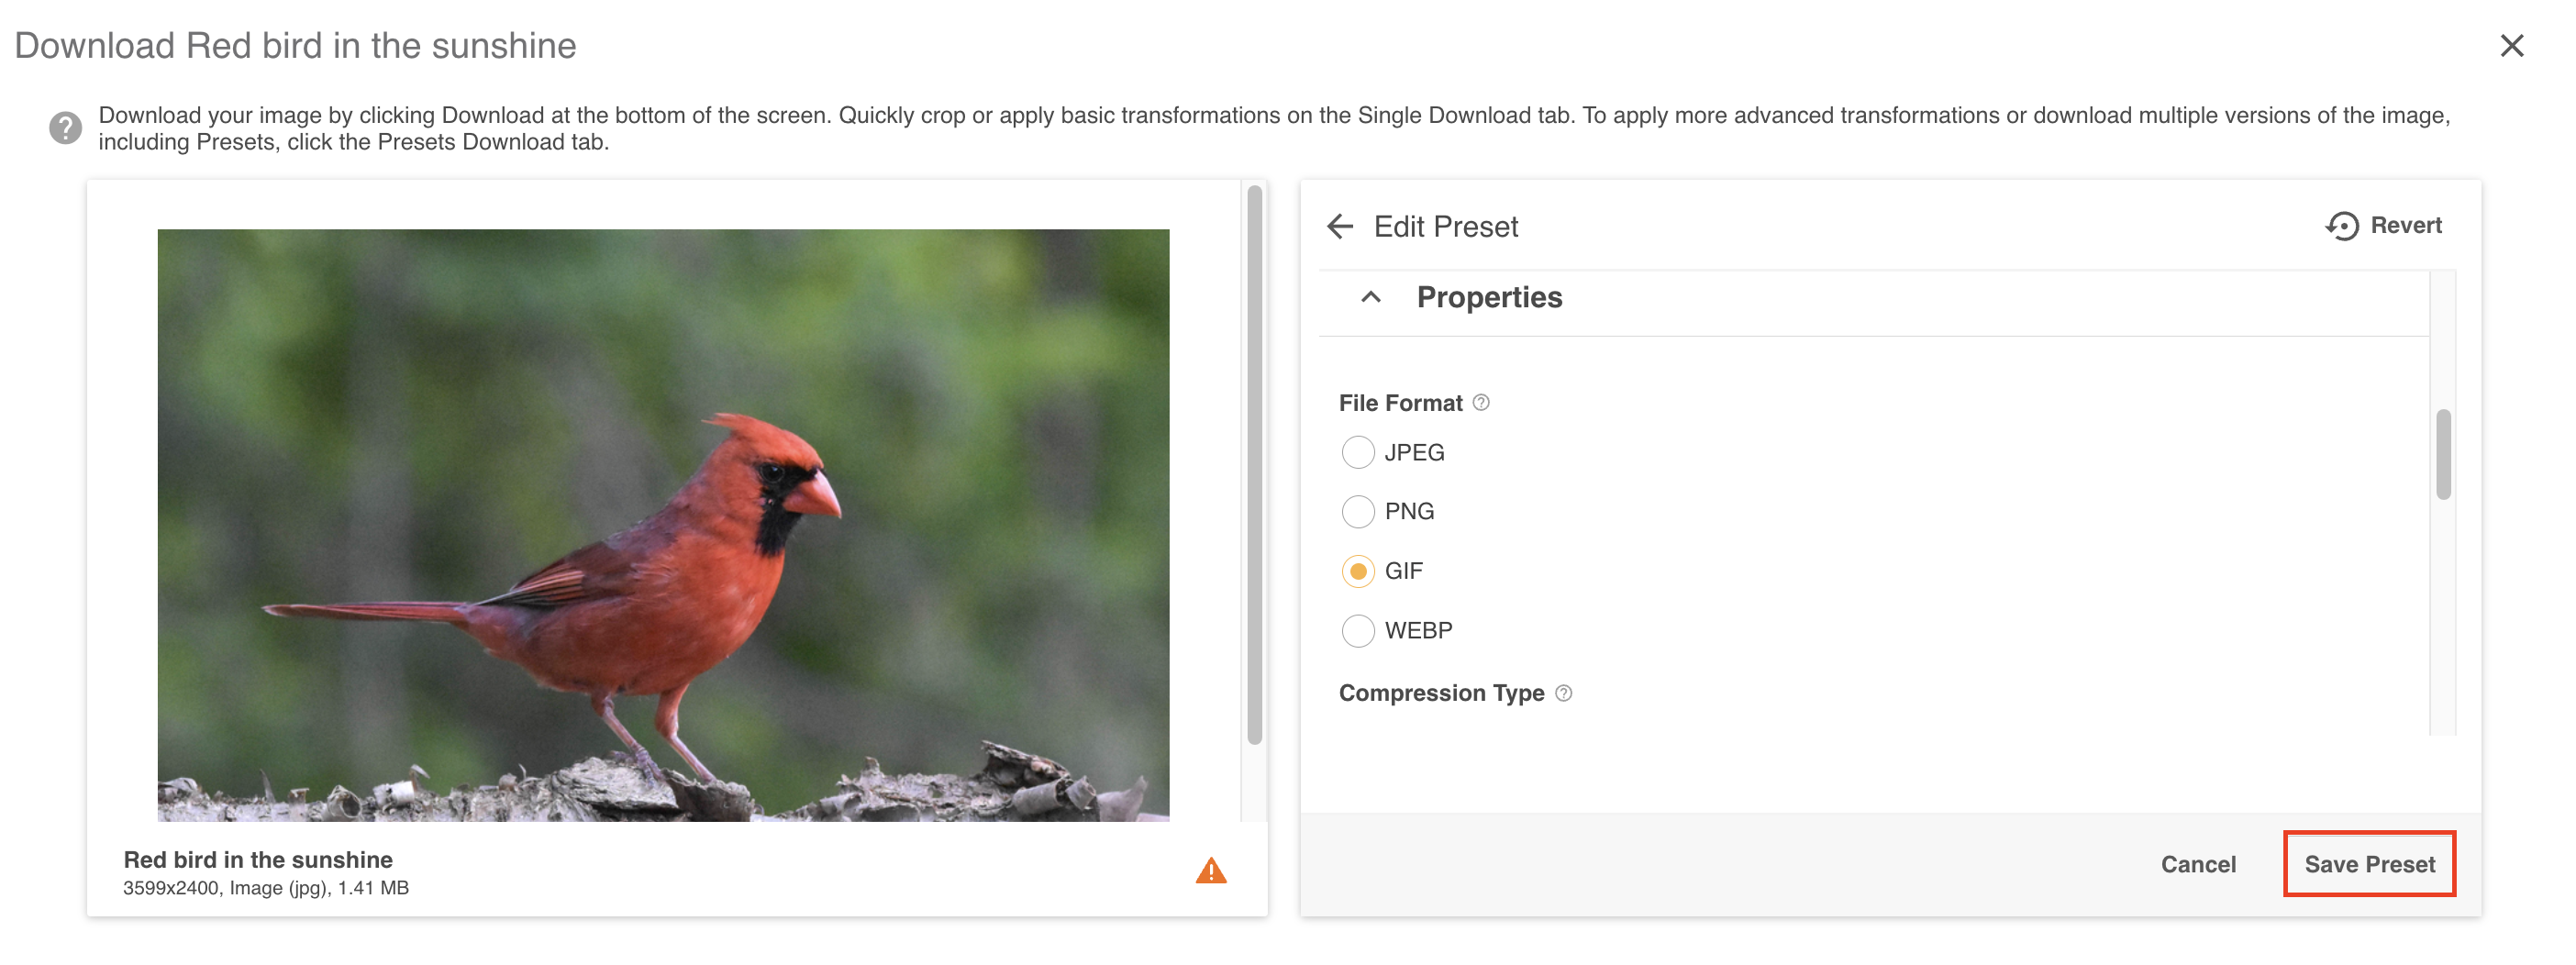
You will then be able to update and save your changes by clicking Save Preset.
Was this article helpful?
That’s Great!
Thank you for your feedback
Sorry! We couldn't be helpful
Thank you for your feedback
Feedback sent
We appreciate your effort and will try to fix the article