When Bulk Downloading images, you can apply transformations, which allow you to download presets or other formats as well as (or instead) of the original file.
This feature is particularly helpful and makes it more efficient to apply multiple presets for multiple images at a time.
This article covers the options available when applying transformations to images during the Bulk Download process.
To find out more about Bulk Download in general, reference the article here.
Table of Contents
Accessing Bulk Download Transformations
To access this feature:
| 1Bulk select and download | Bulk select images and click Download in the Bulk Actions menu.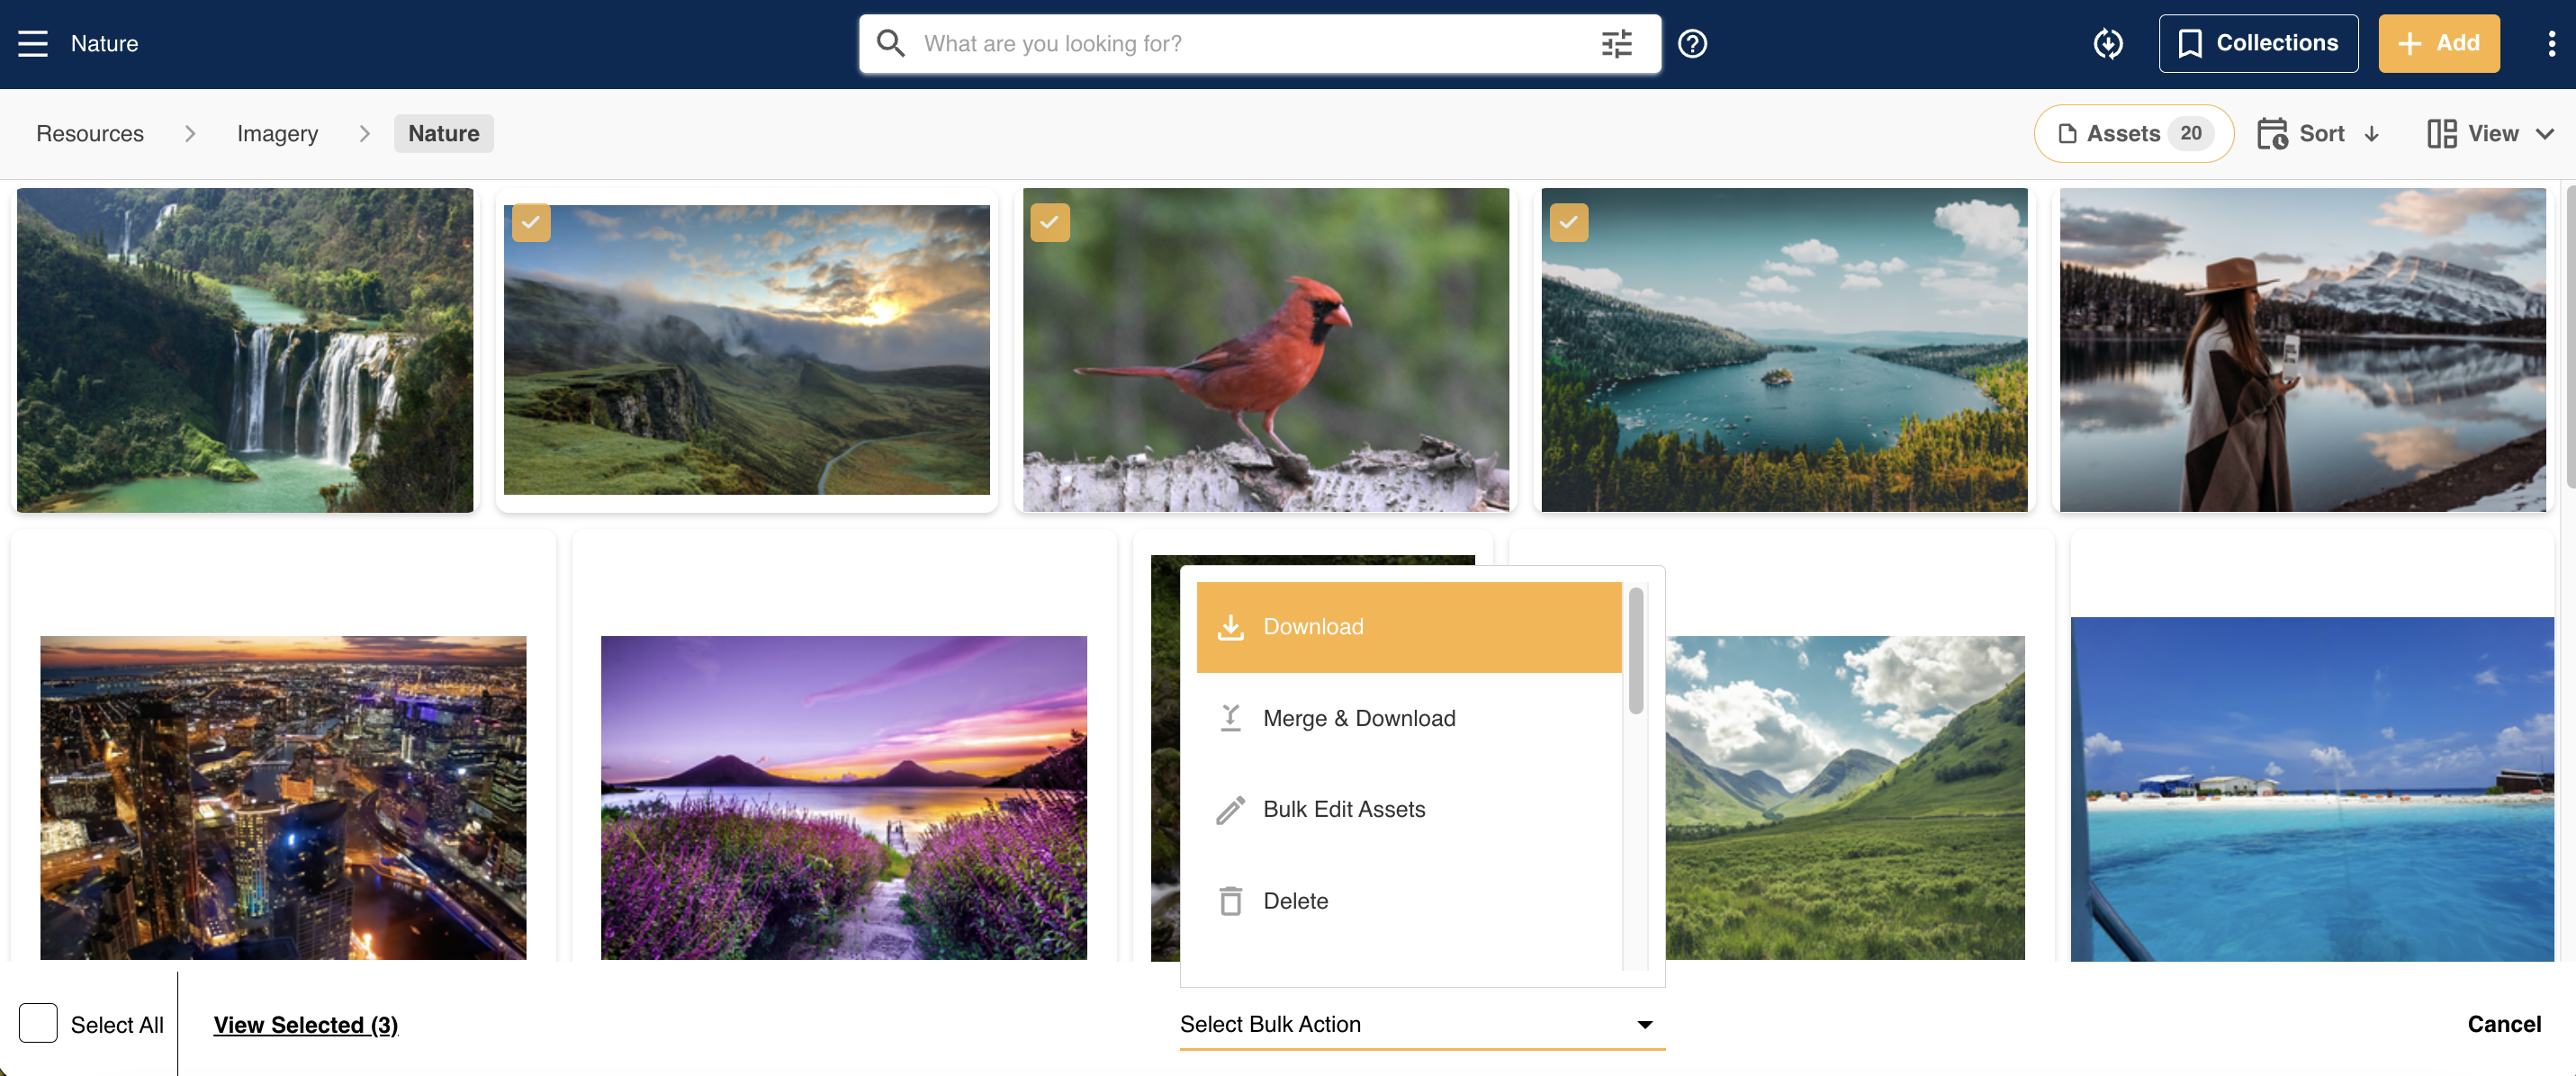 |
| 2Open Transformation Options | If supported images are included in your download request, you'll see a Transformation Options button in the bottom right corner. Click this button to open the Bulk Transformations page.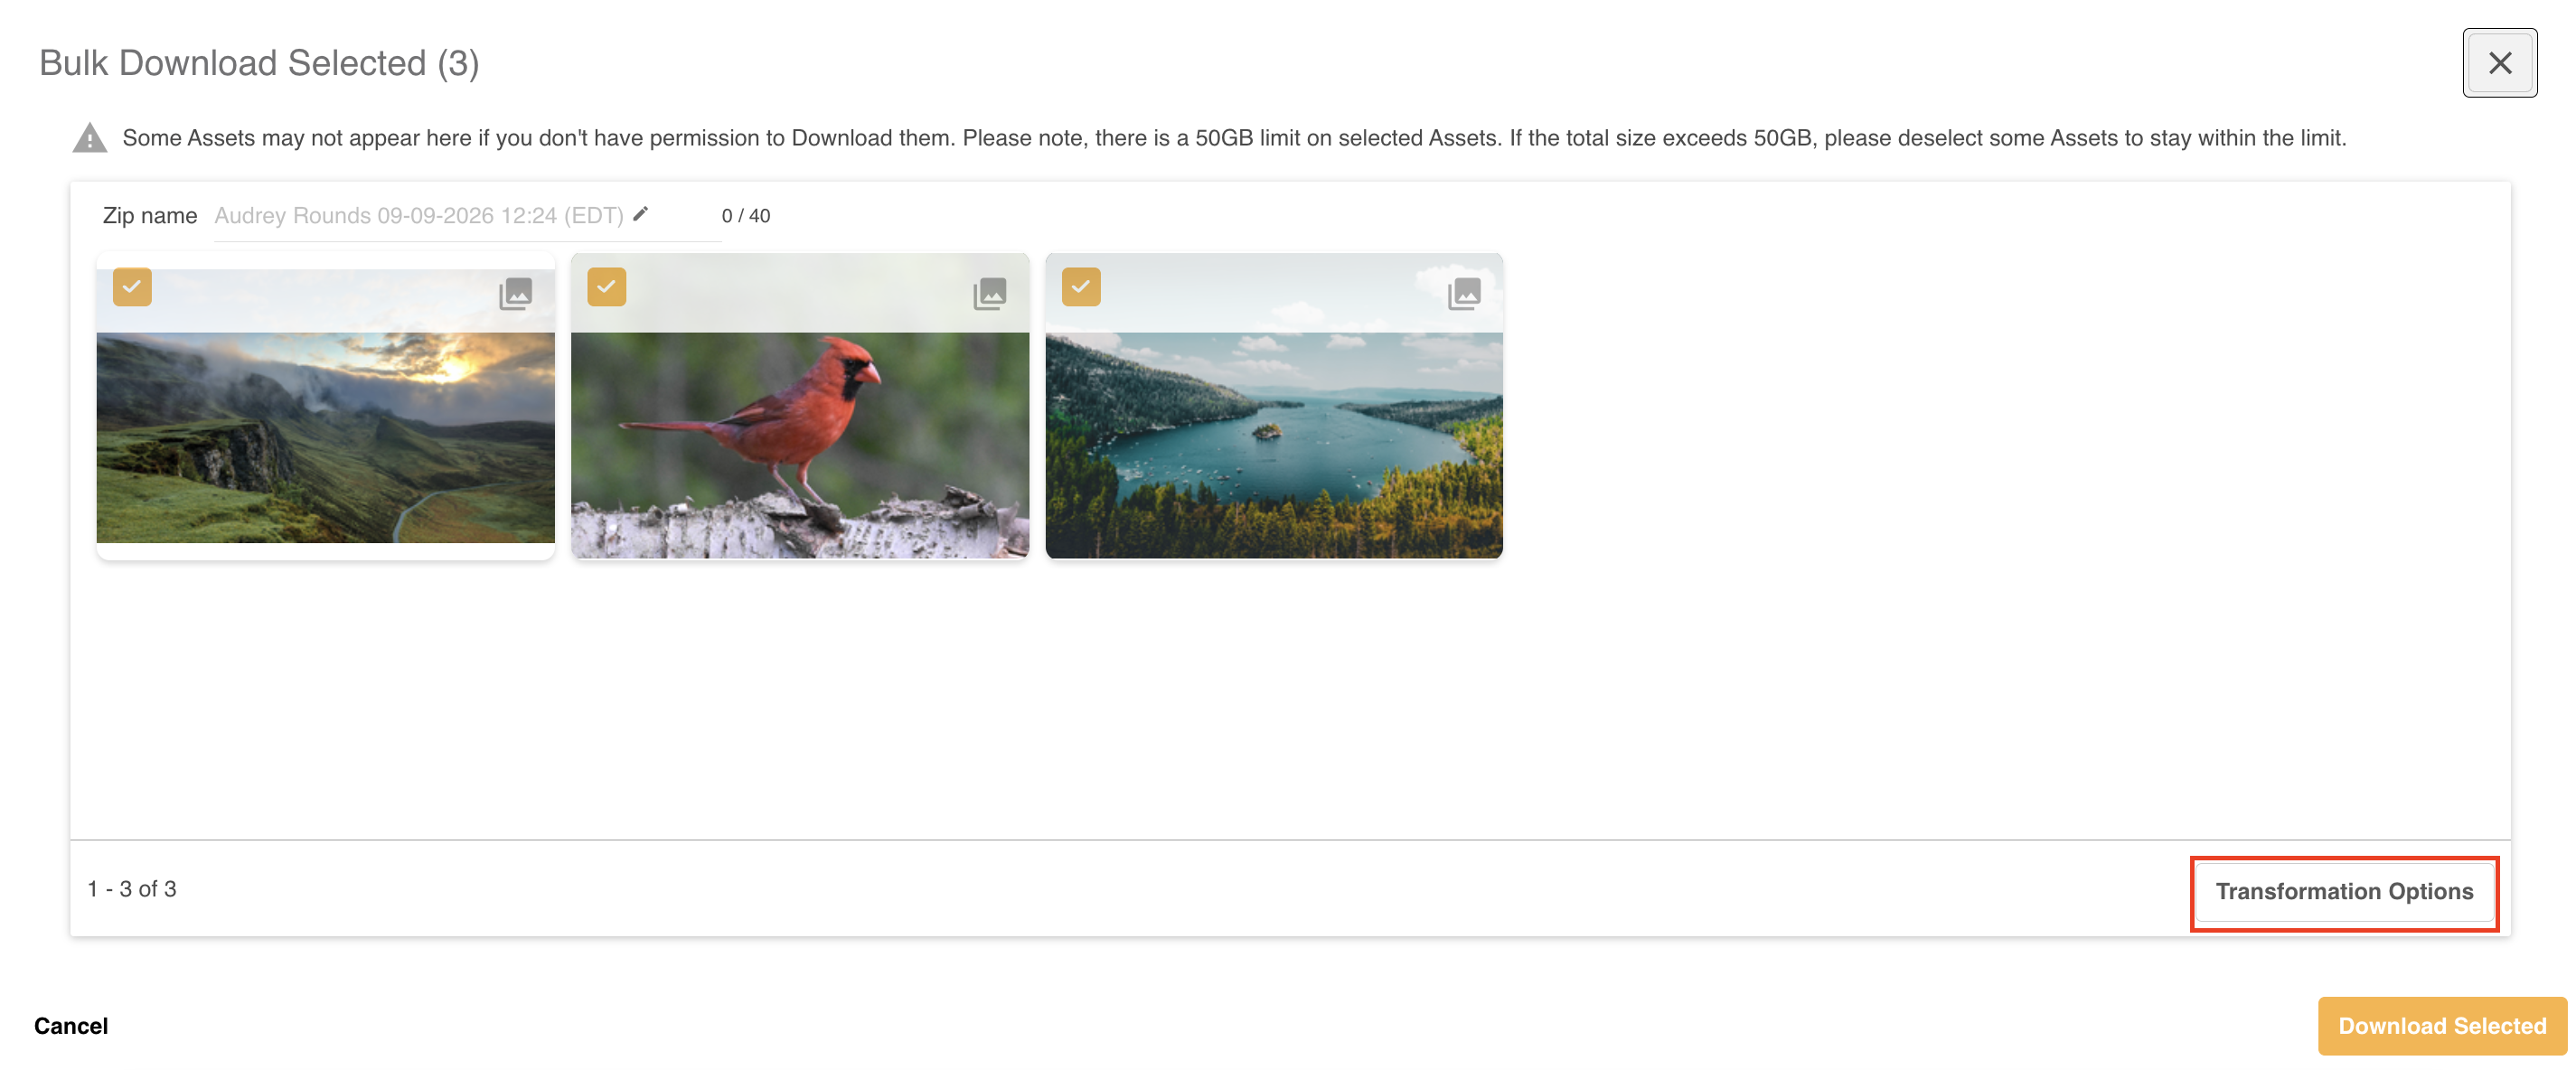 |
Bulk Download Transformations are available to anyone with Access permission for higher. Preview users may also be able to leverage this feature, if there is a download approval process in place and approval to download has been provided.
Transformation Page
Once you select Transformation Options, a page will load with all images that can be transformed on the left hand side. The Transformation Options will load on the right.
The actual view of the images, ie either Mosaic or List, will depend on which layout was selected when you clicked the Bulk Download action. If Card was the layout, the images will display in List within the bulk download transformation page.
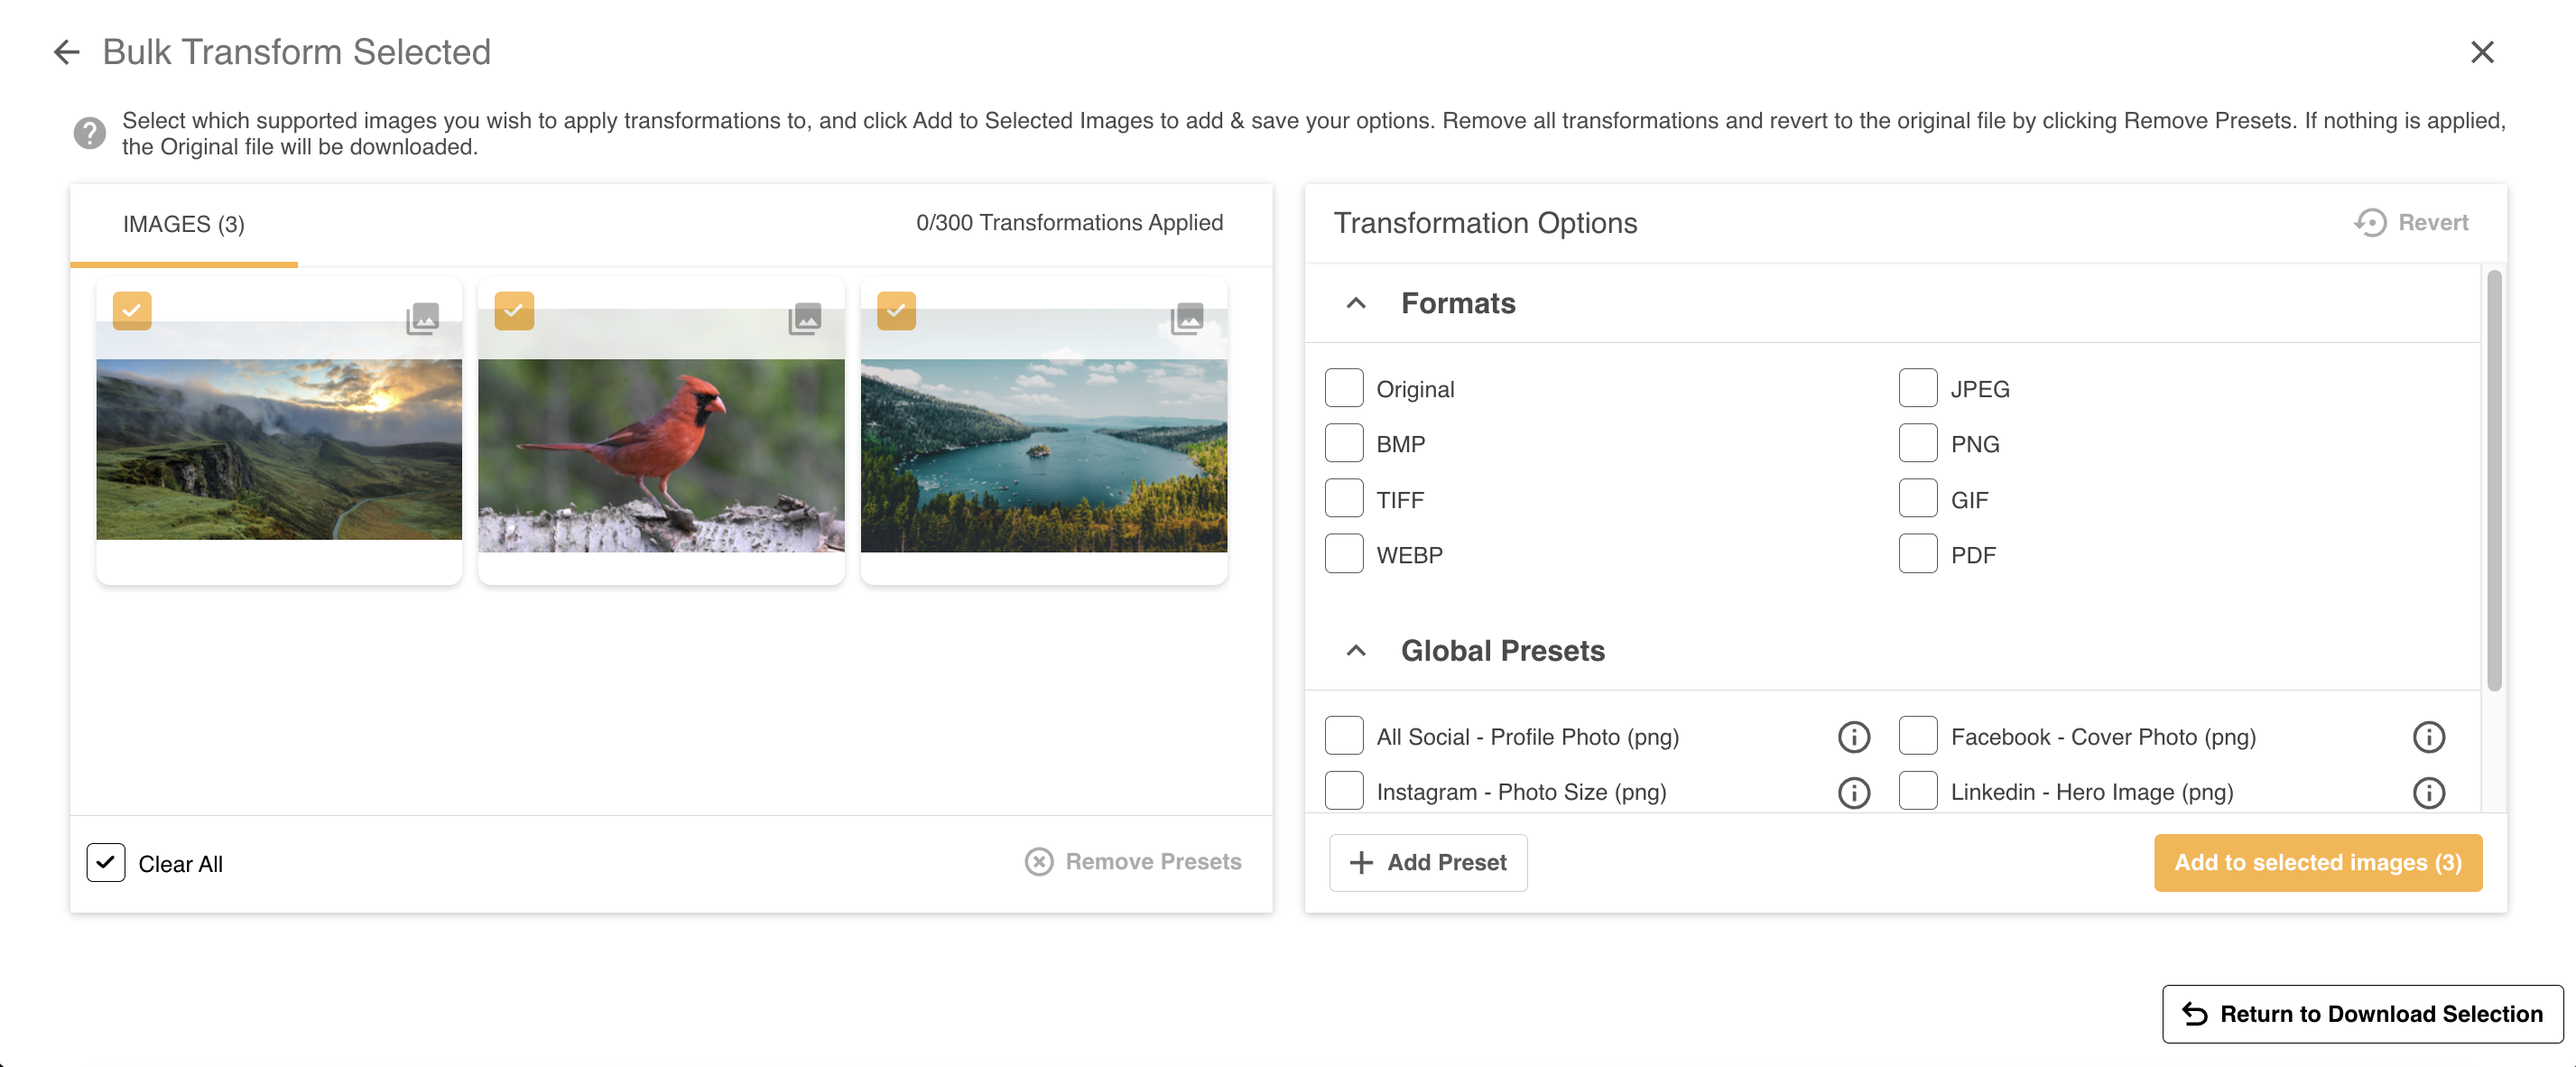
If you needs to return to the Download Selection page, click either the back arrow or Back to Download Selection.
Transformation Options
On the right side of the page are the Transformation Options.
You can select file formats and presets and apply them to the images selected on the left. Transformations that are successfully applied will provide you with images in those Preset / Format requirements once downloaded.
The Transformation options available are included below.
File Formats
The File Formats supported include:
- Original
- JPEG
- PNG
- GIF
- BMP
- TIFF
- WEBP
Global Presets
Presets allow you to transform and create a common set of parameters that can be applied to an image. Global Presets are usually created for common transformations that need to be regularly applied to images.
Global Presets are available to be selected and applied in a Bulk Download. If Global Presets exist, all users with at least Access permission to Transformation Presets will be able to apply them when downloading images. Note that this section is scrollable and you may need to scroll down to view all your options.
Users with the appropriate permission (Main Admins, Asset/Resource Admins, and users with Admin permission on Transformation Presets) will also be able to add Global Presets from the Bulk Transform page using the + Add Preset button.
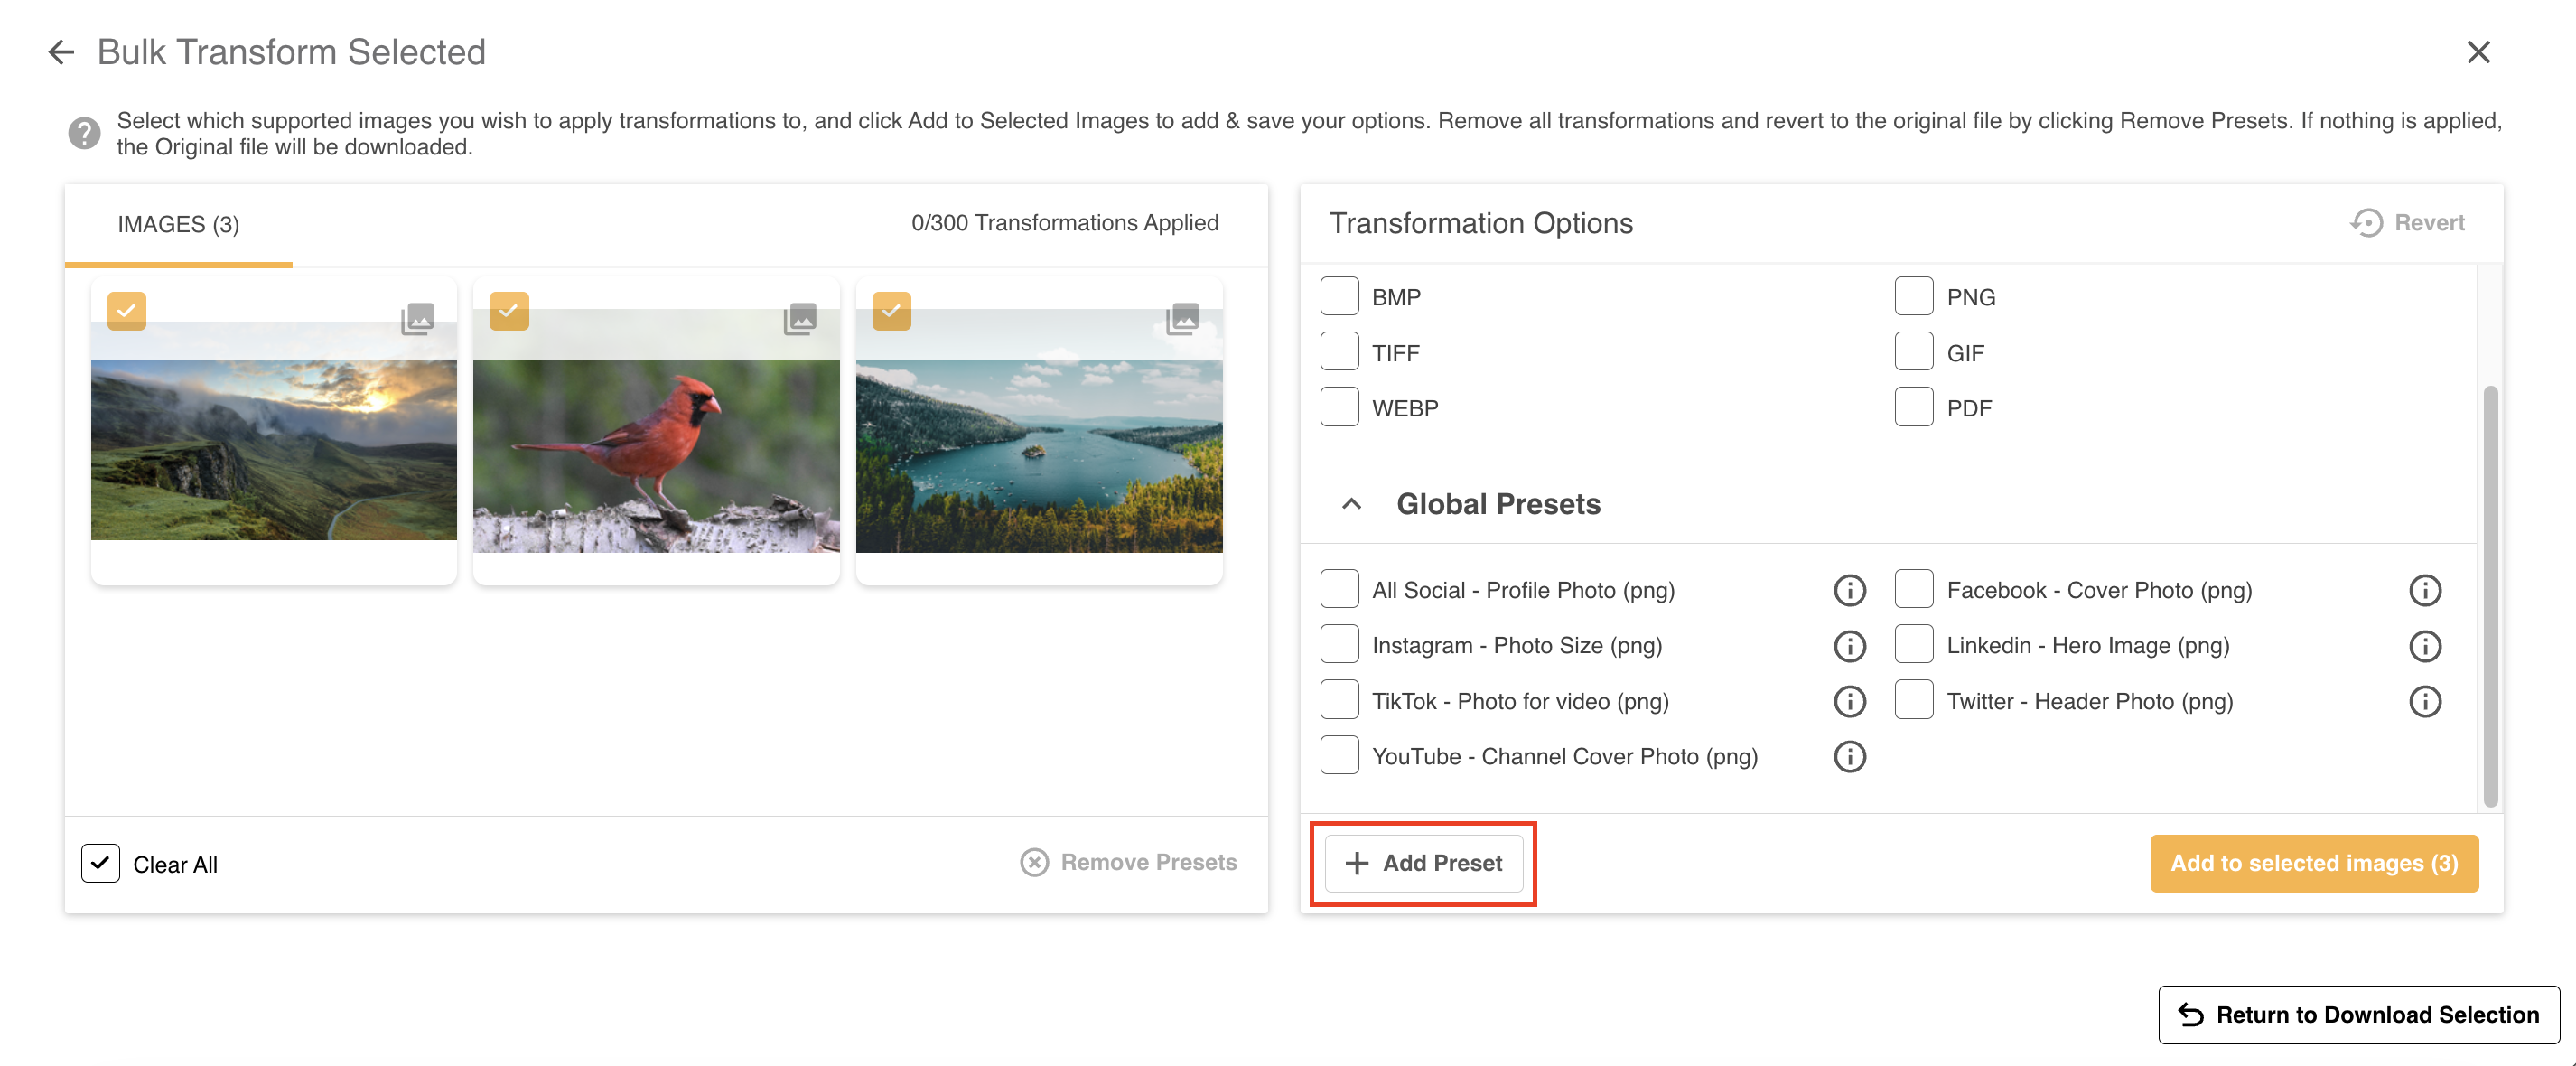
The process for Adding a Global Preset is the same in the Bulk Transformation page as it is in other areas. You can read more about Adding a Global Preset here.
Ad Hoc Presets
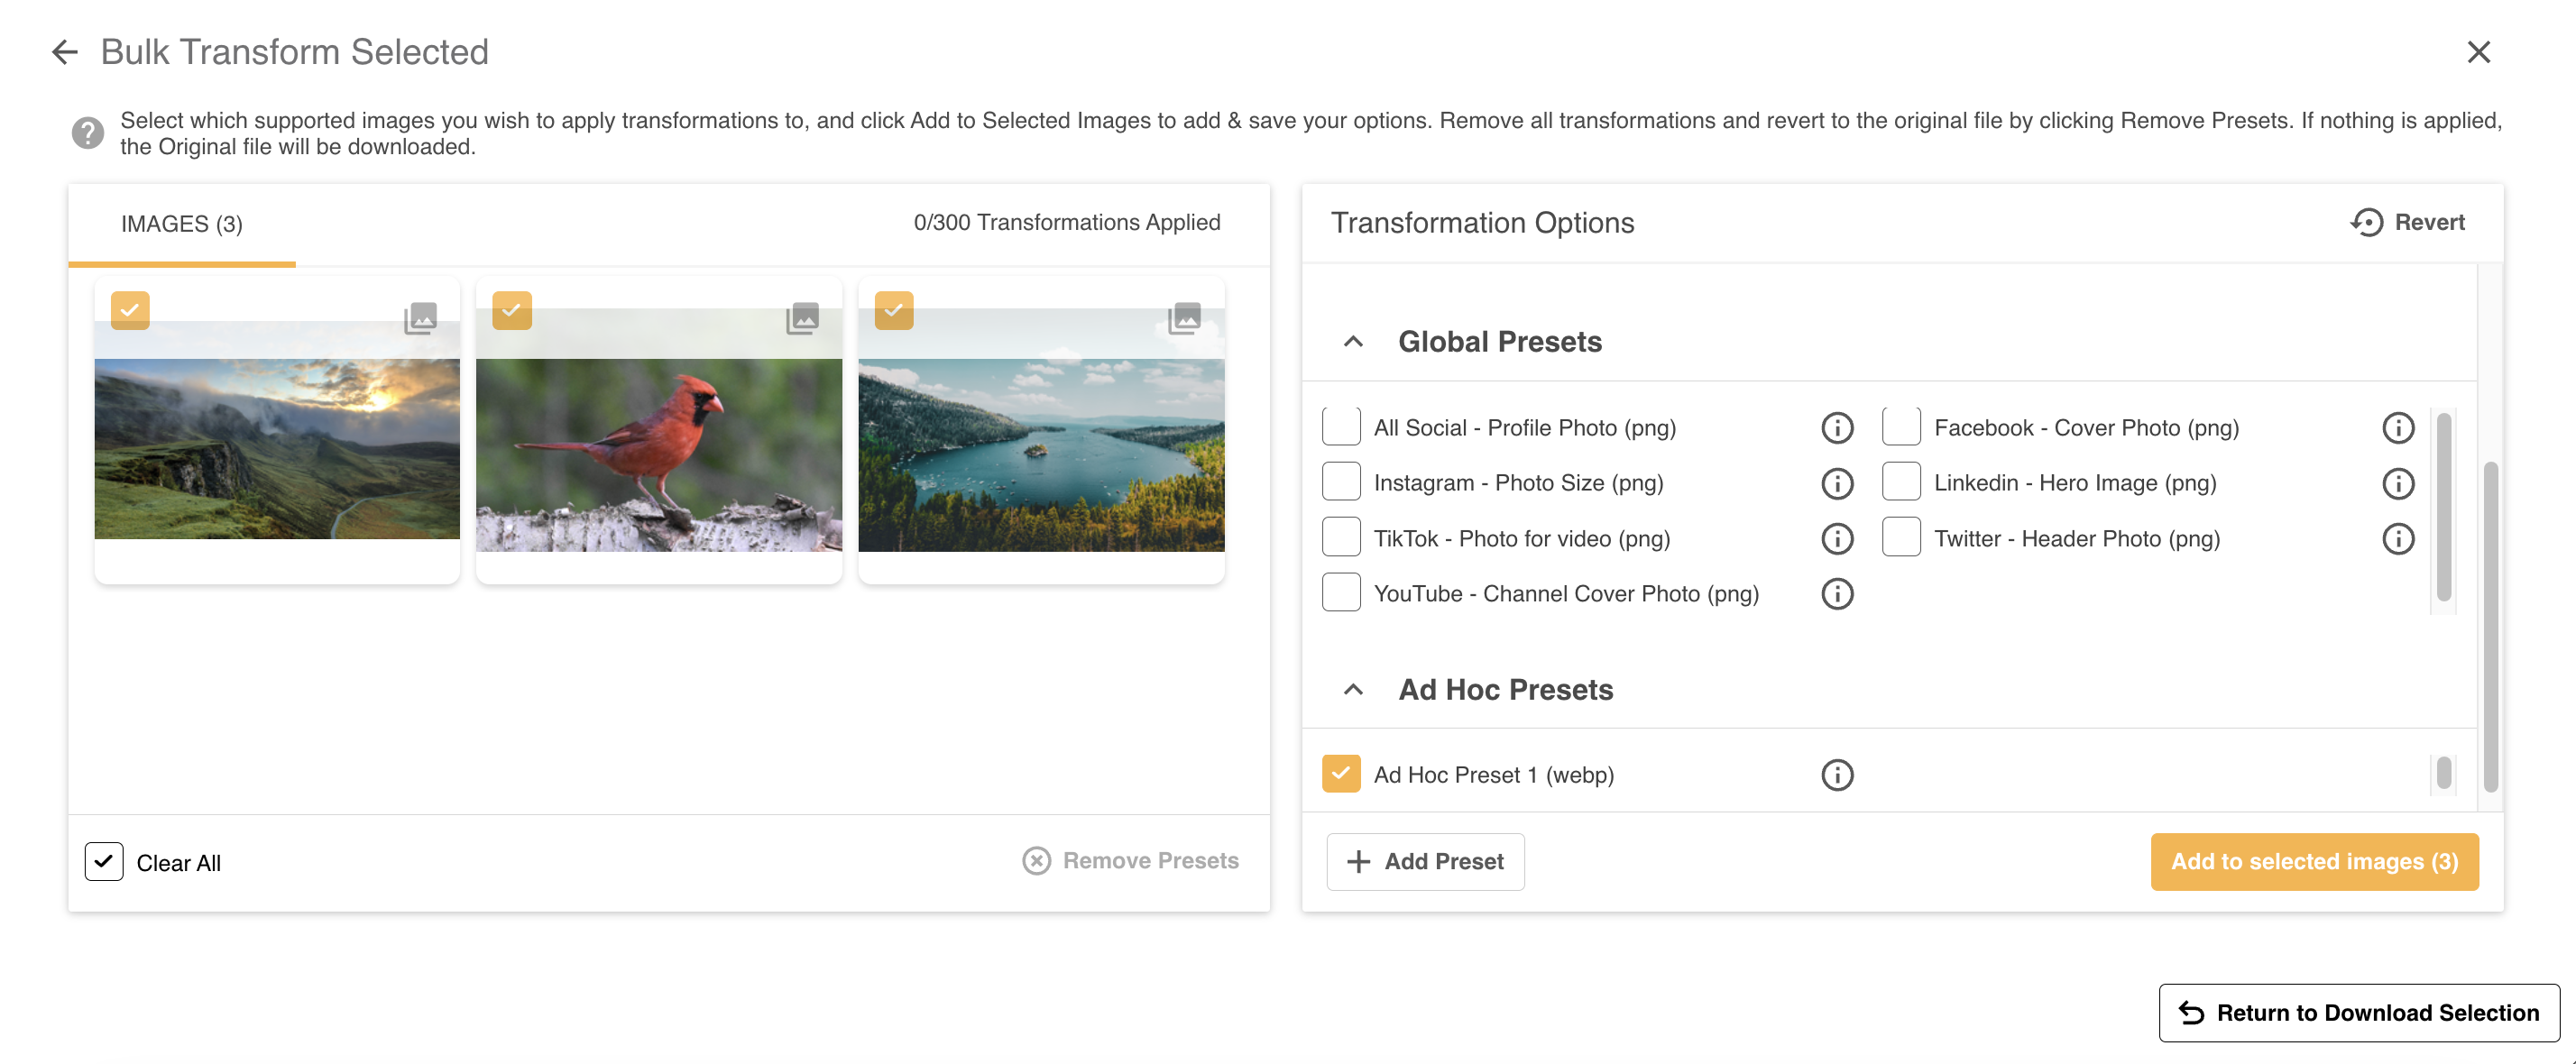
Ad Hoc Presets allow you to add a one-off transformation that is only available for the current download. These can be created by all users who have Access permission on Ad Hoc Transformations.
To create an Ad-Hoc Preset, select the + Add Preset button and the Ad-Hoc Preset Type. Name the preset, fill out the preset parameters and select Save Preset.
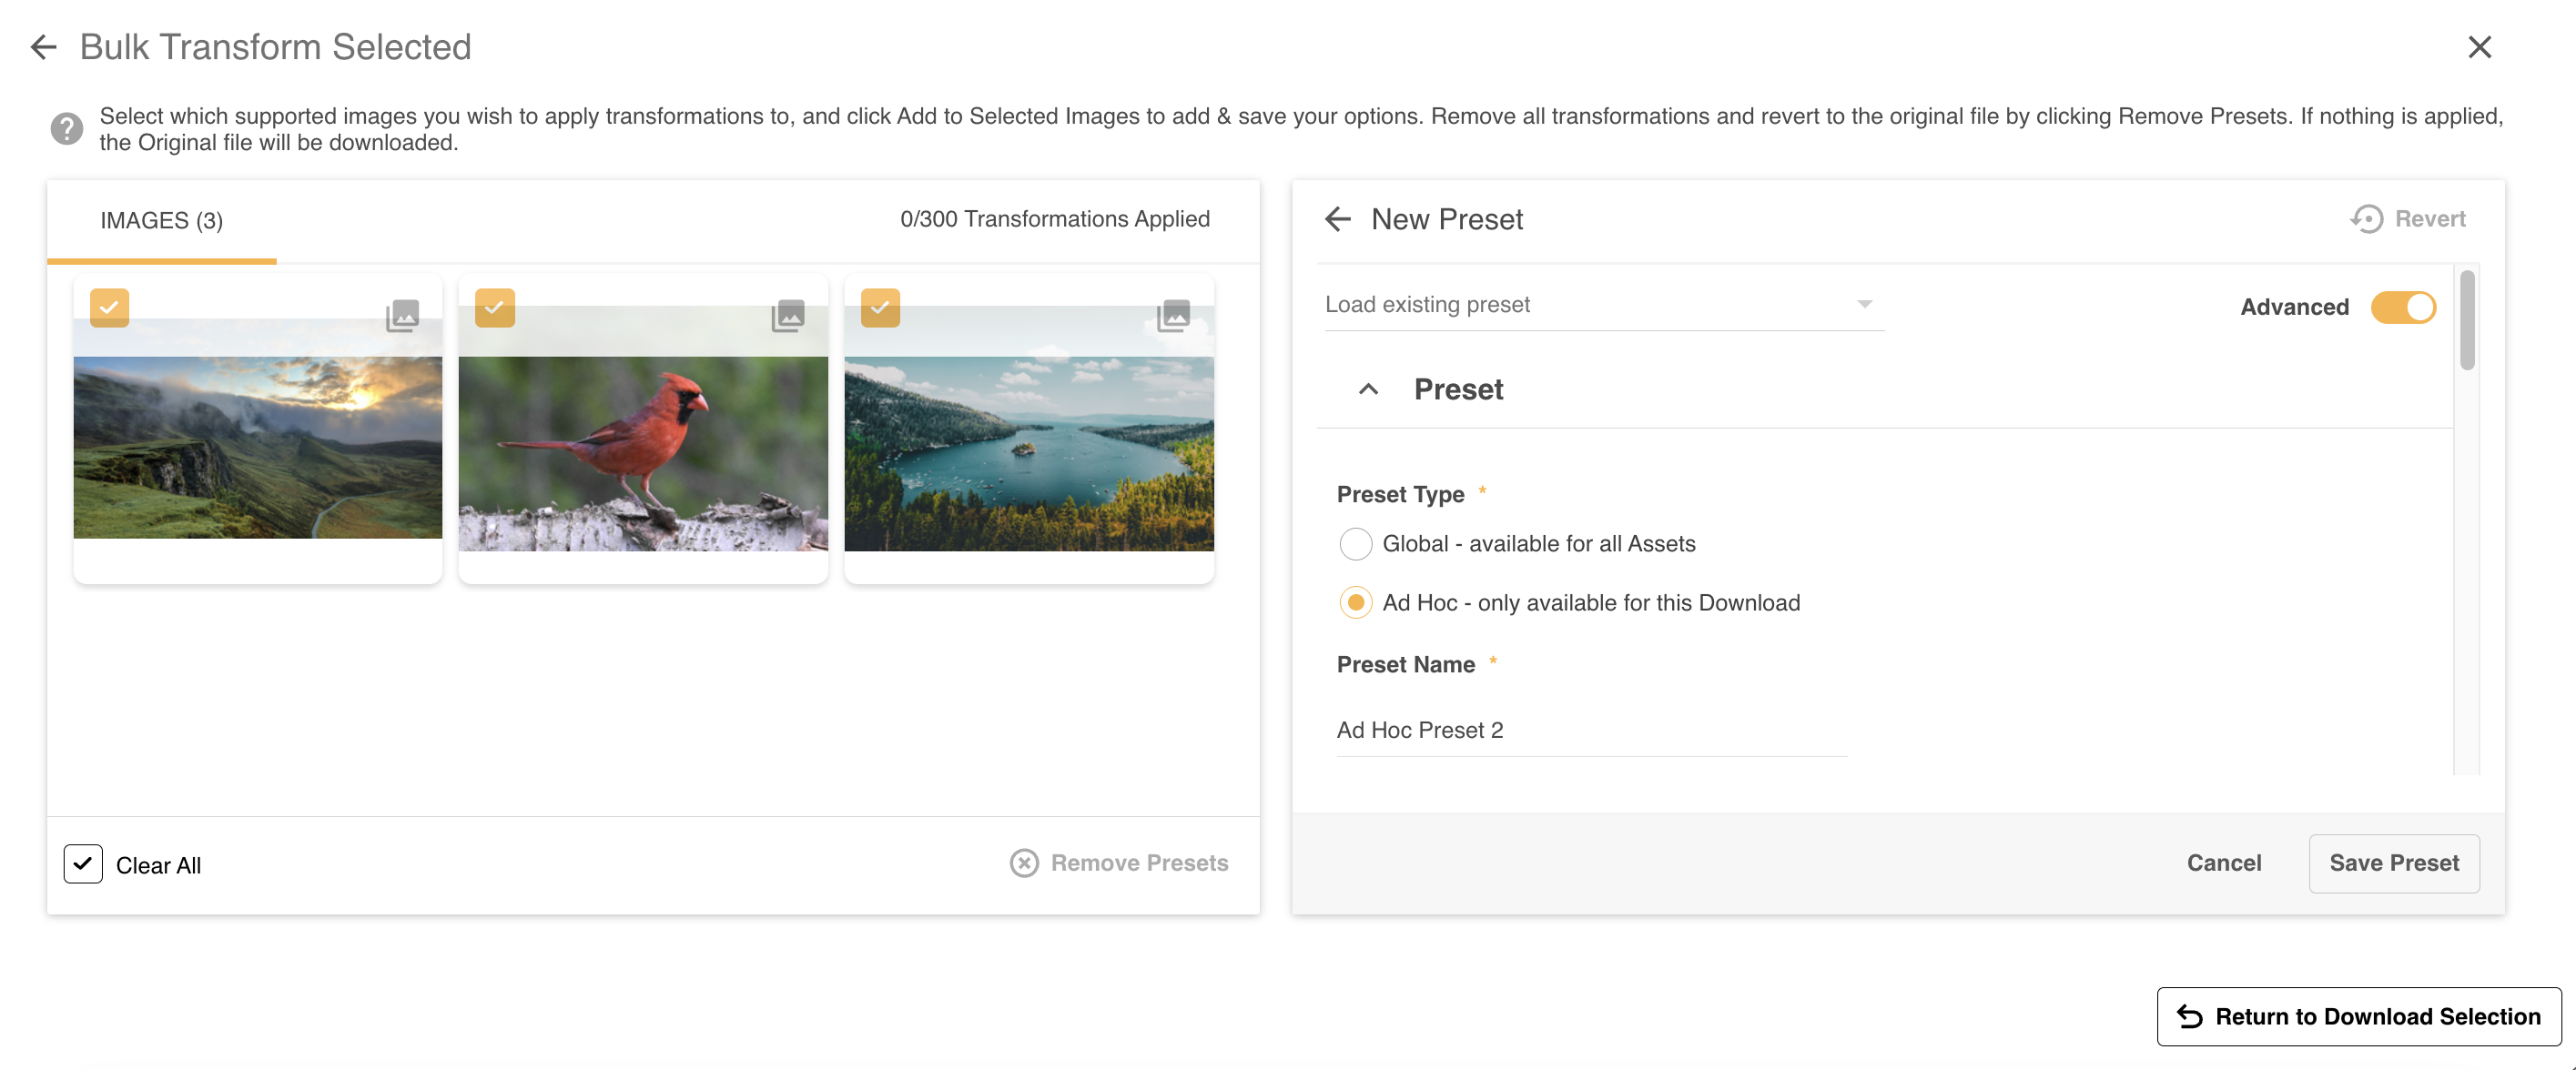
Once you've saved an Ad Hoc Preset, it will automatically be pre-selected on the Transformation Options page, allowing you to quickly apply it to the images. Like with other transformations, presets will only be accessible once the images have been downloaded.
Applying Transformations Options in Bulk
To apply transformations to the selected images:
| 1Select formats or presets | Select the formats or presets you require on the right hand side.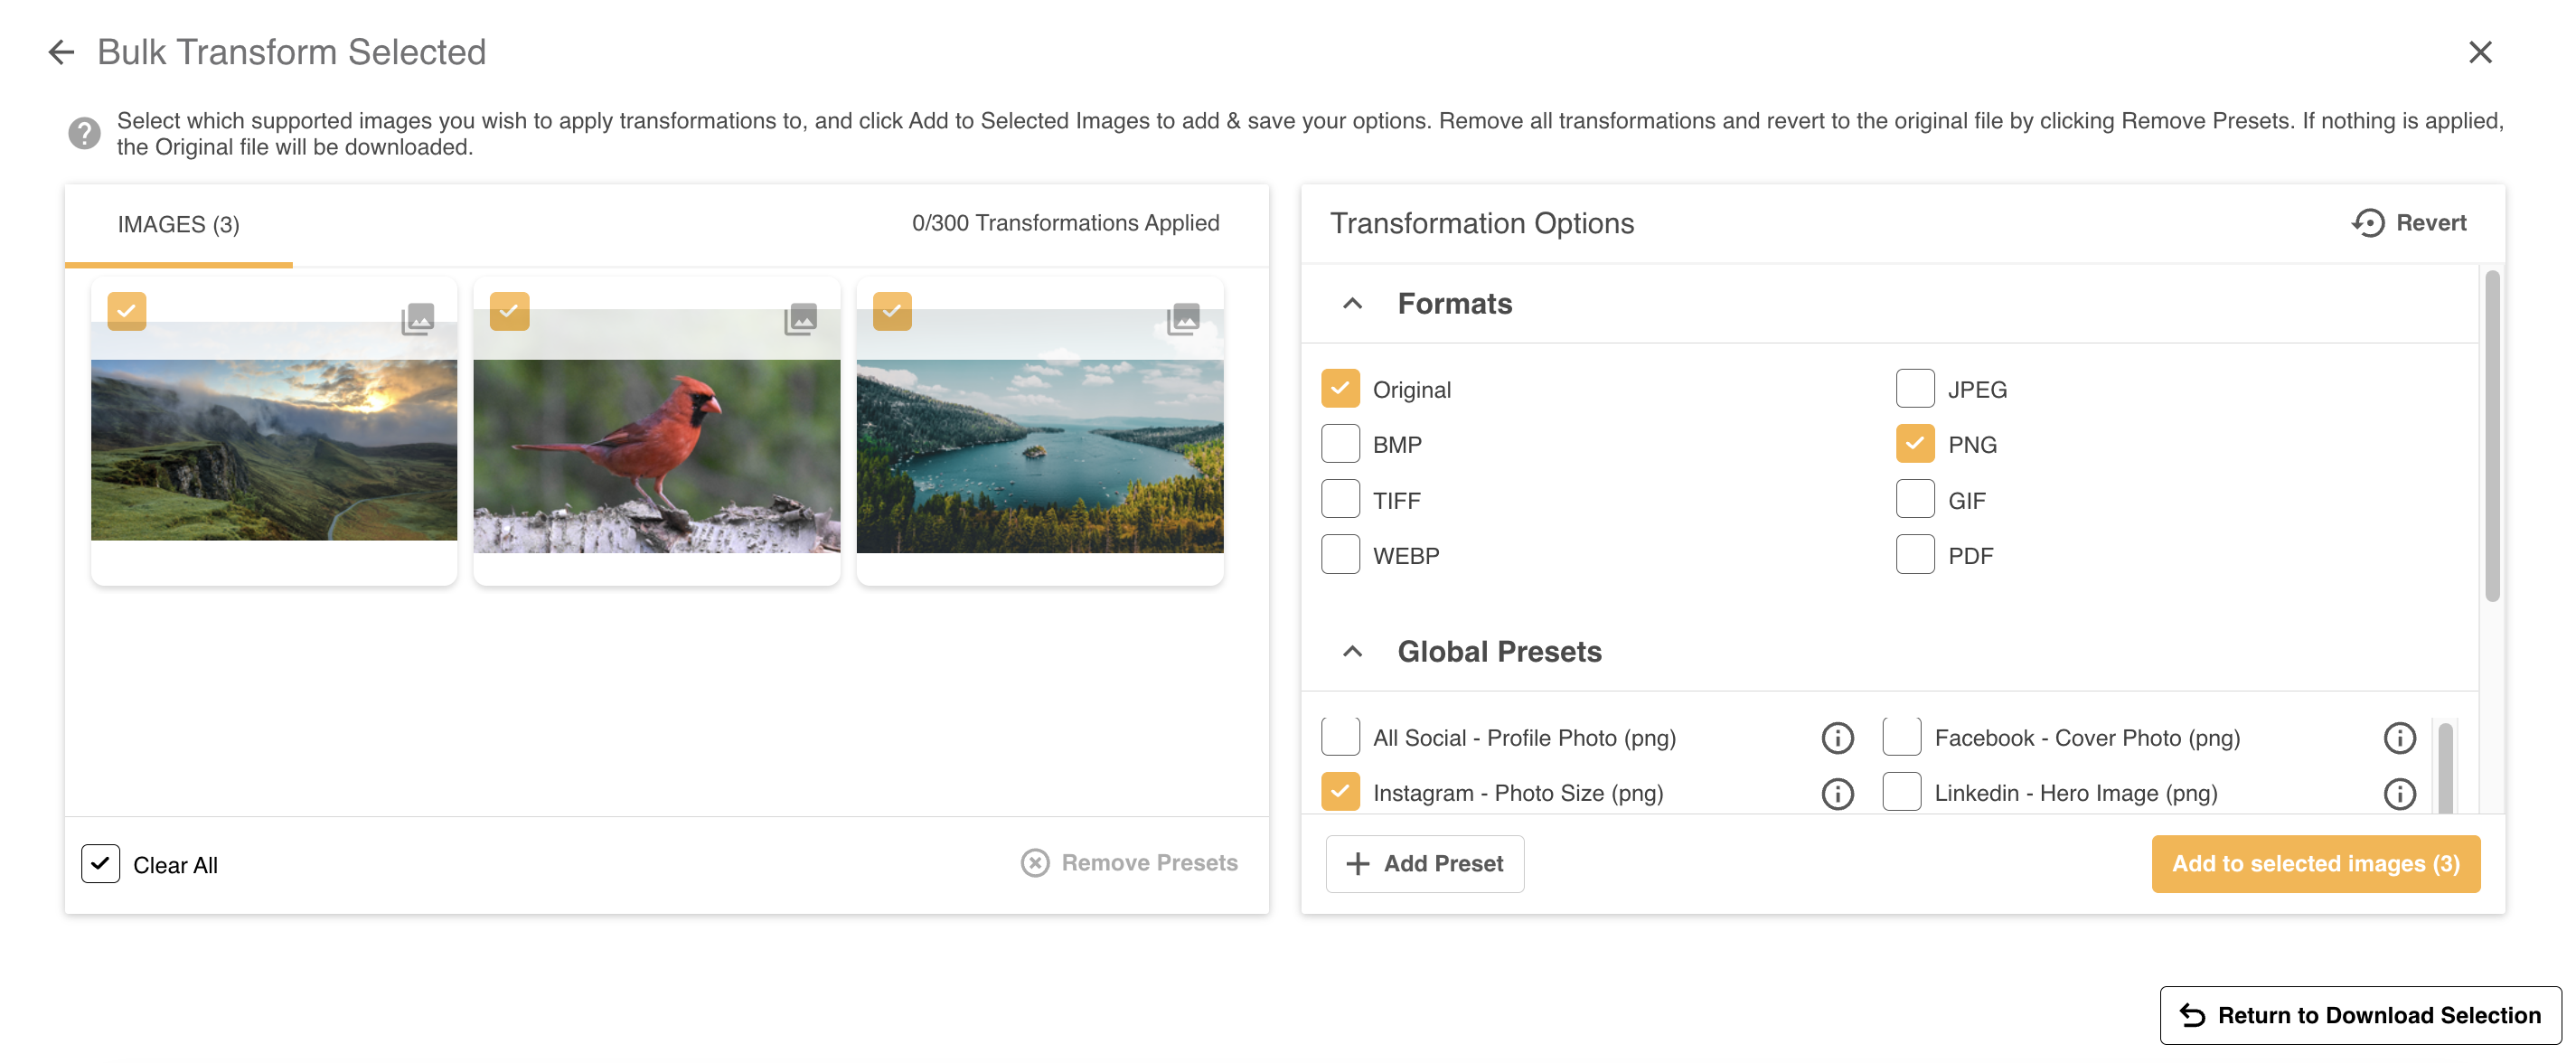 |
| 2Select images | Ensure the images you wish the transformations to be applied to have been selected on the left. The transformations will only be applied to selected images.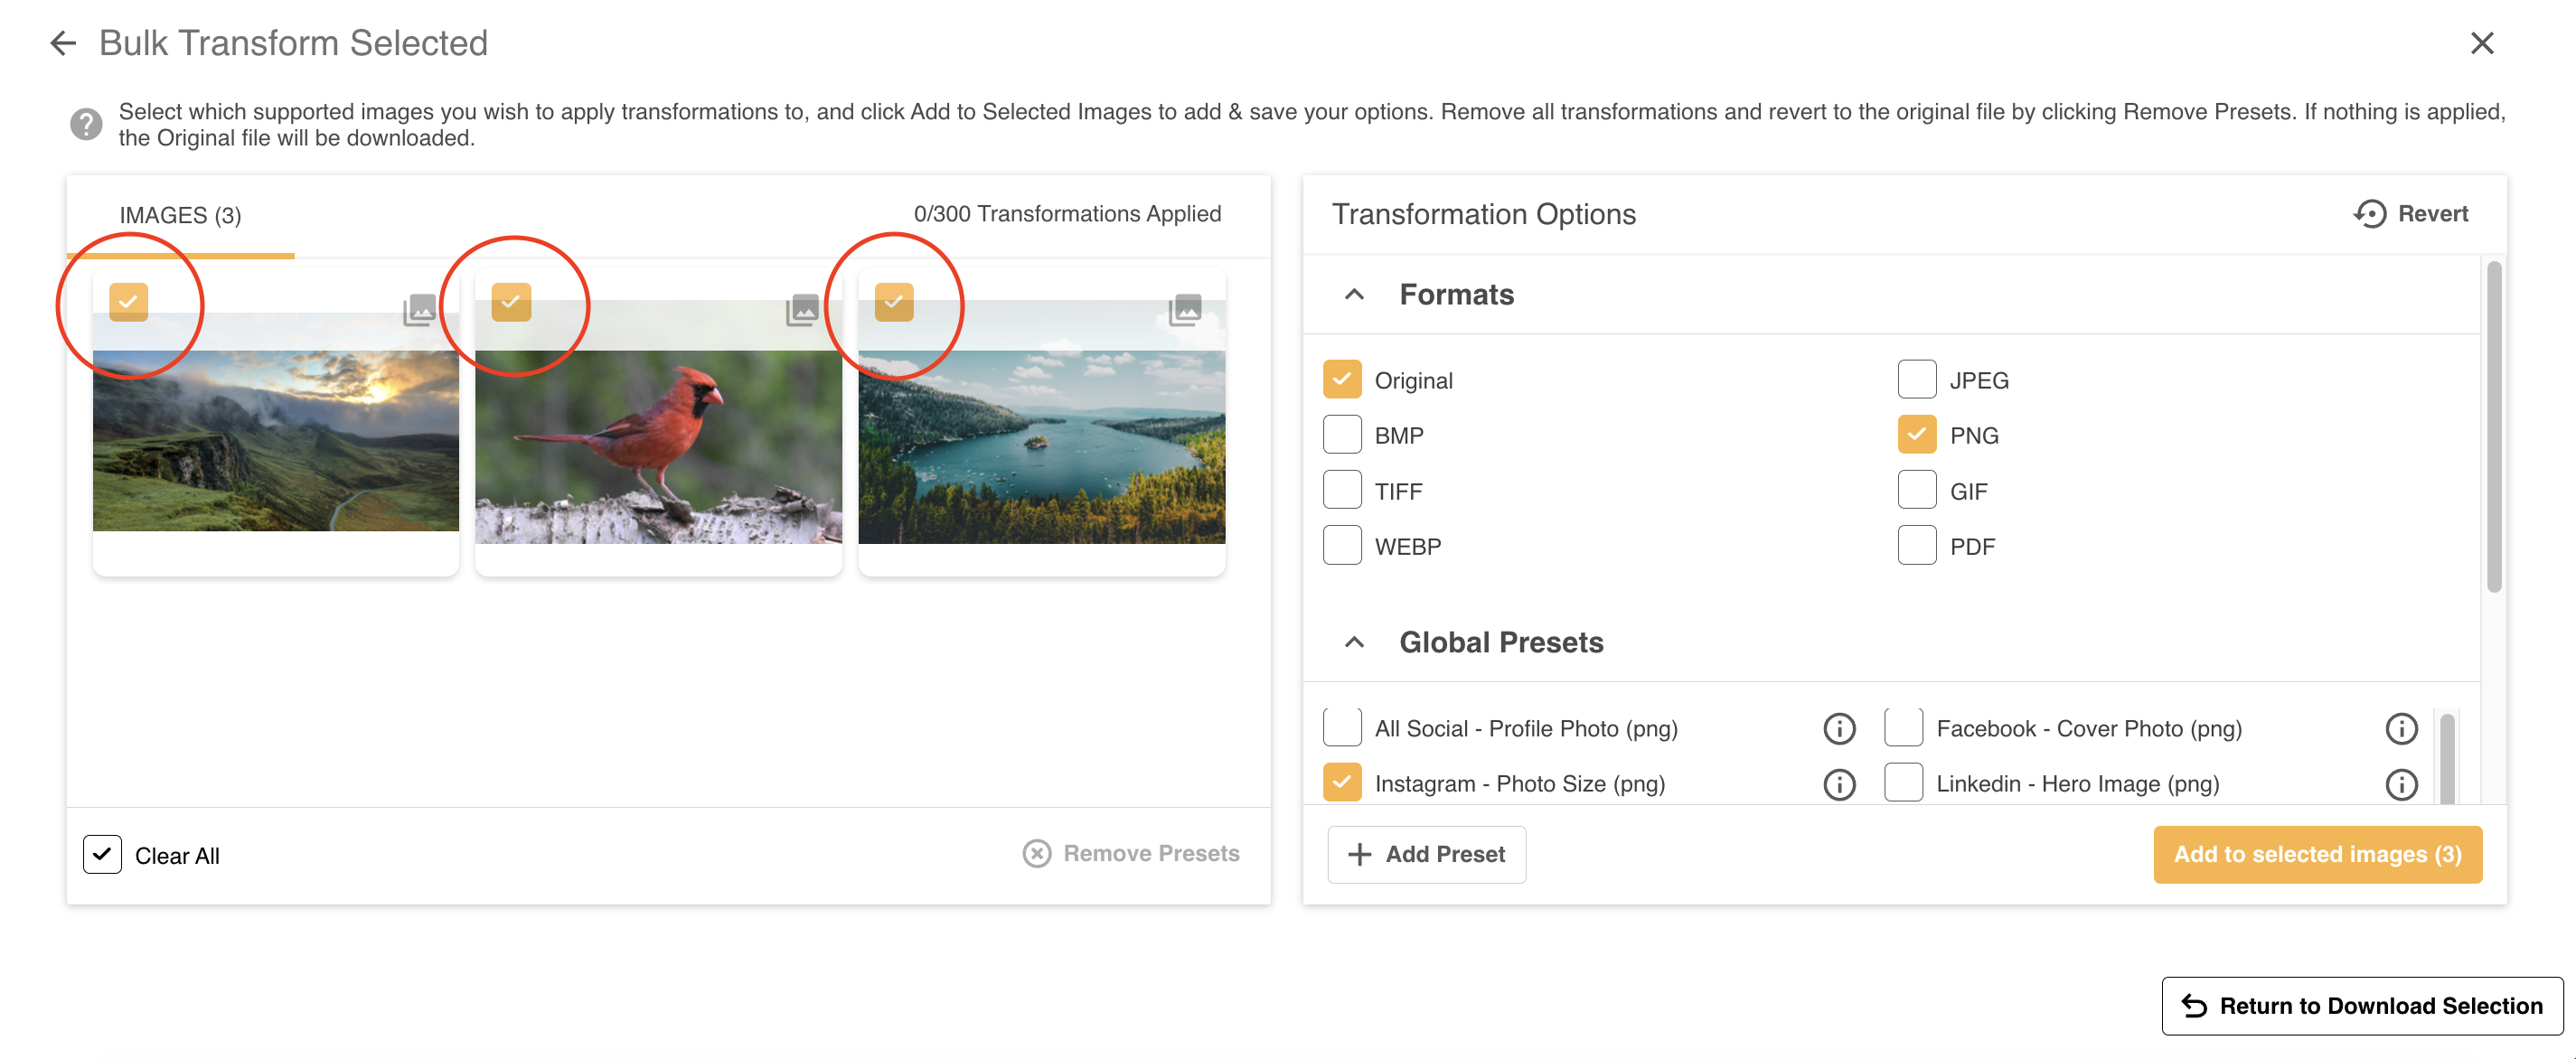 |
| 3Add to Selected | Once all of the selections have been made, click the Add to Selected button at the bottom of the Transformation Options panel. The selected transformations will automatically be applied to the selected images. The counts applicable to each image will be updated accordingly.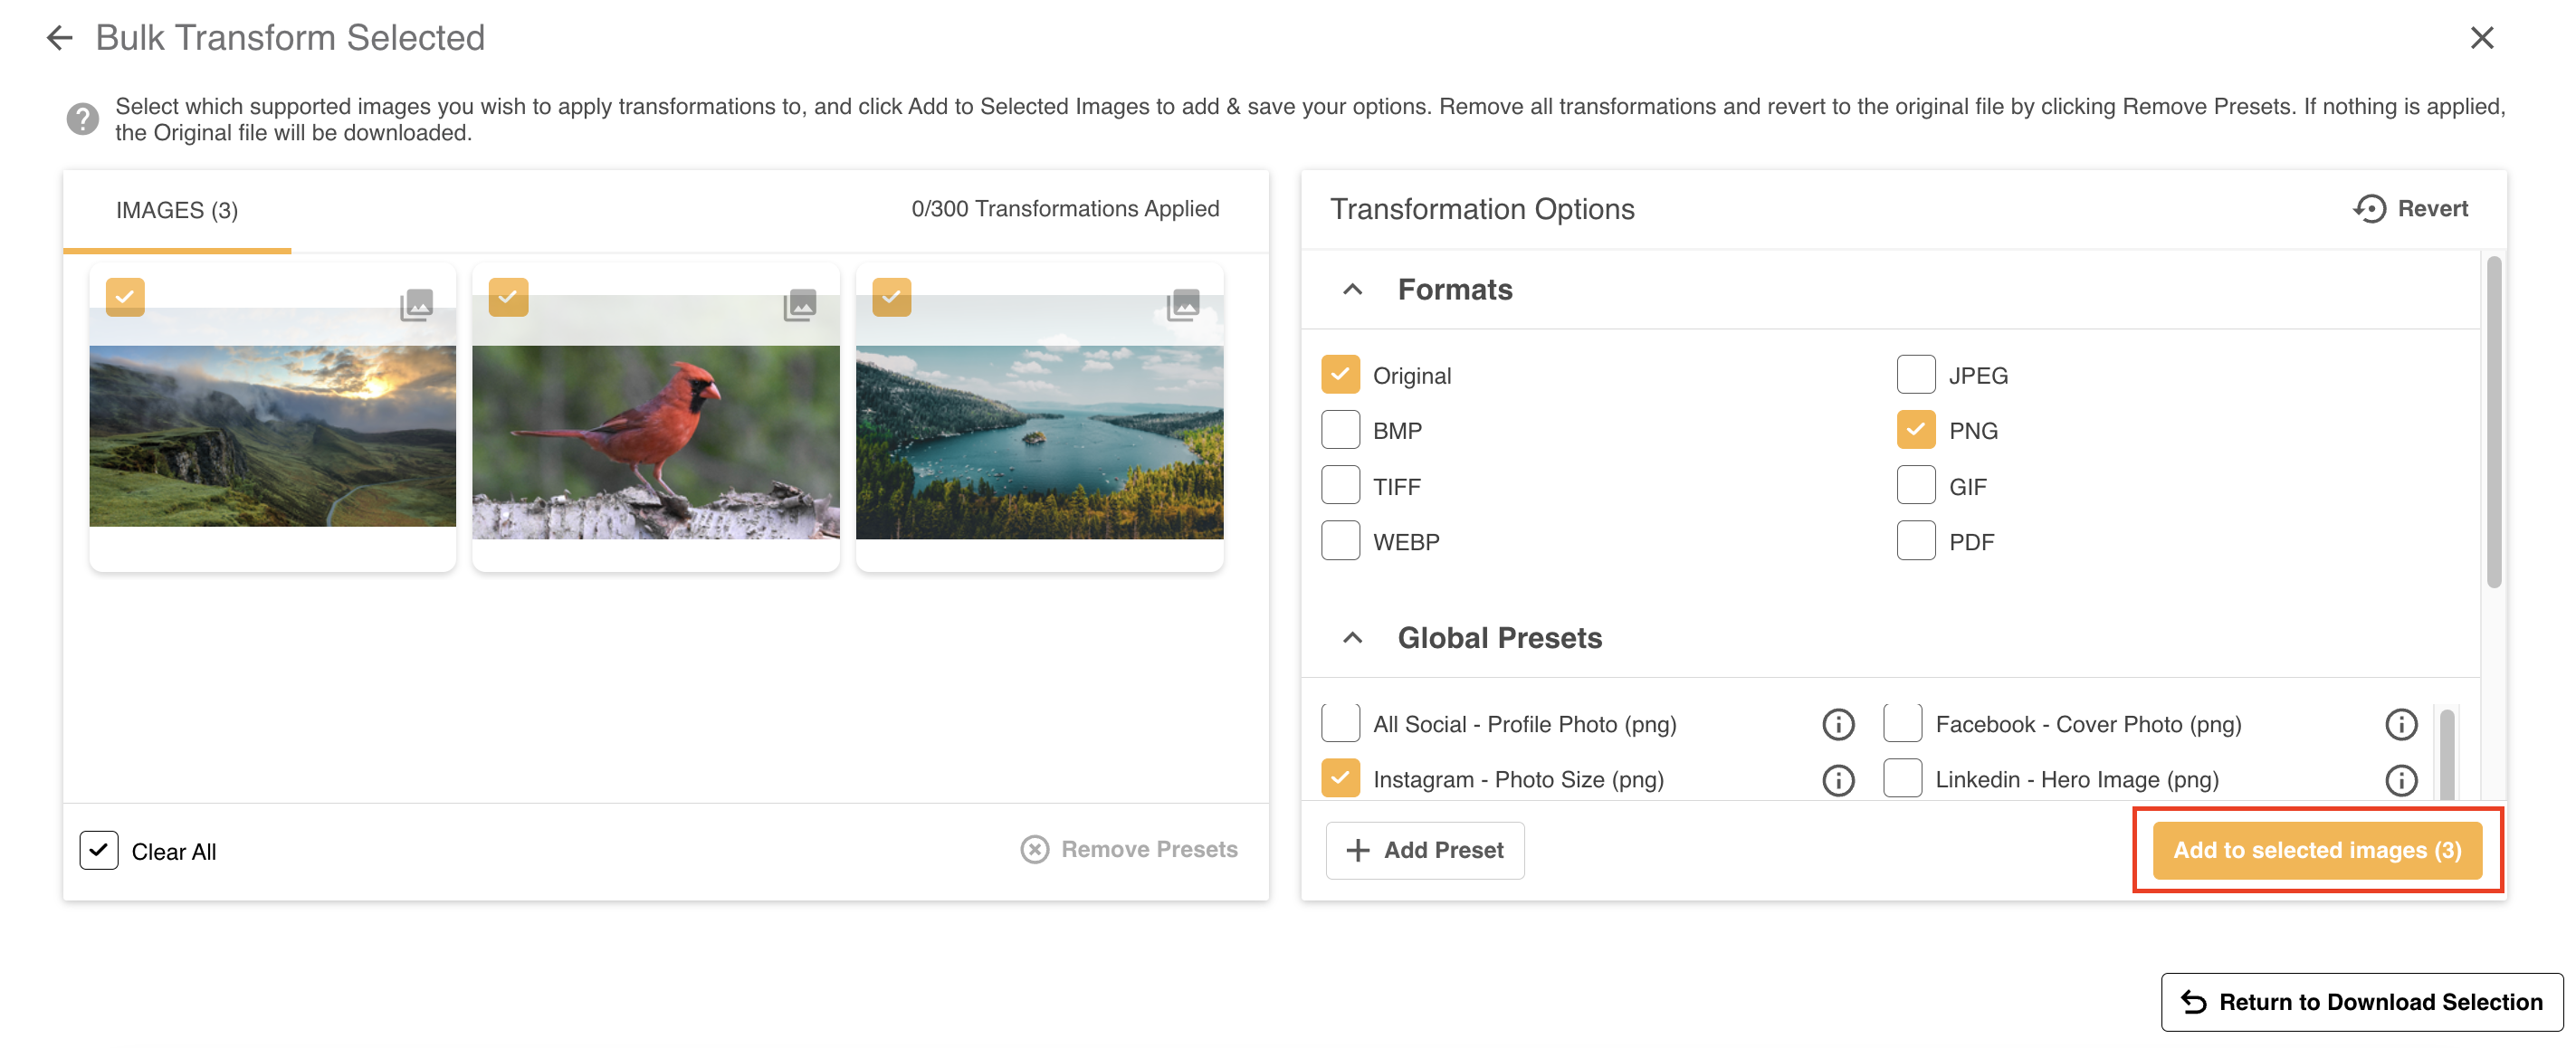 |
Removing Transformations
If you've added the wrong preset or format and need to remove all or some of your applied transformations, reference the below options.
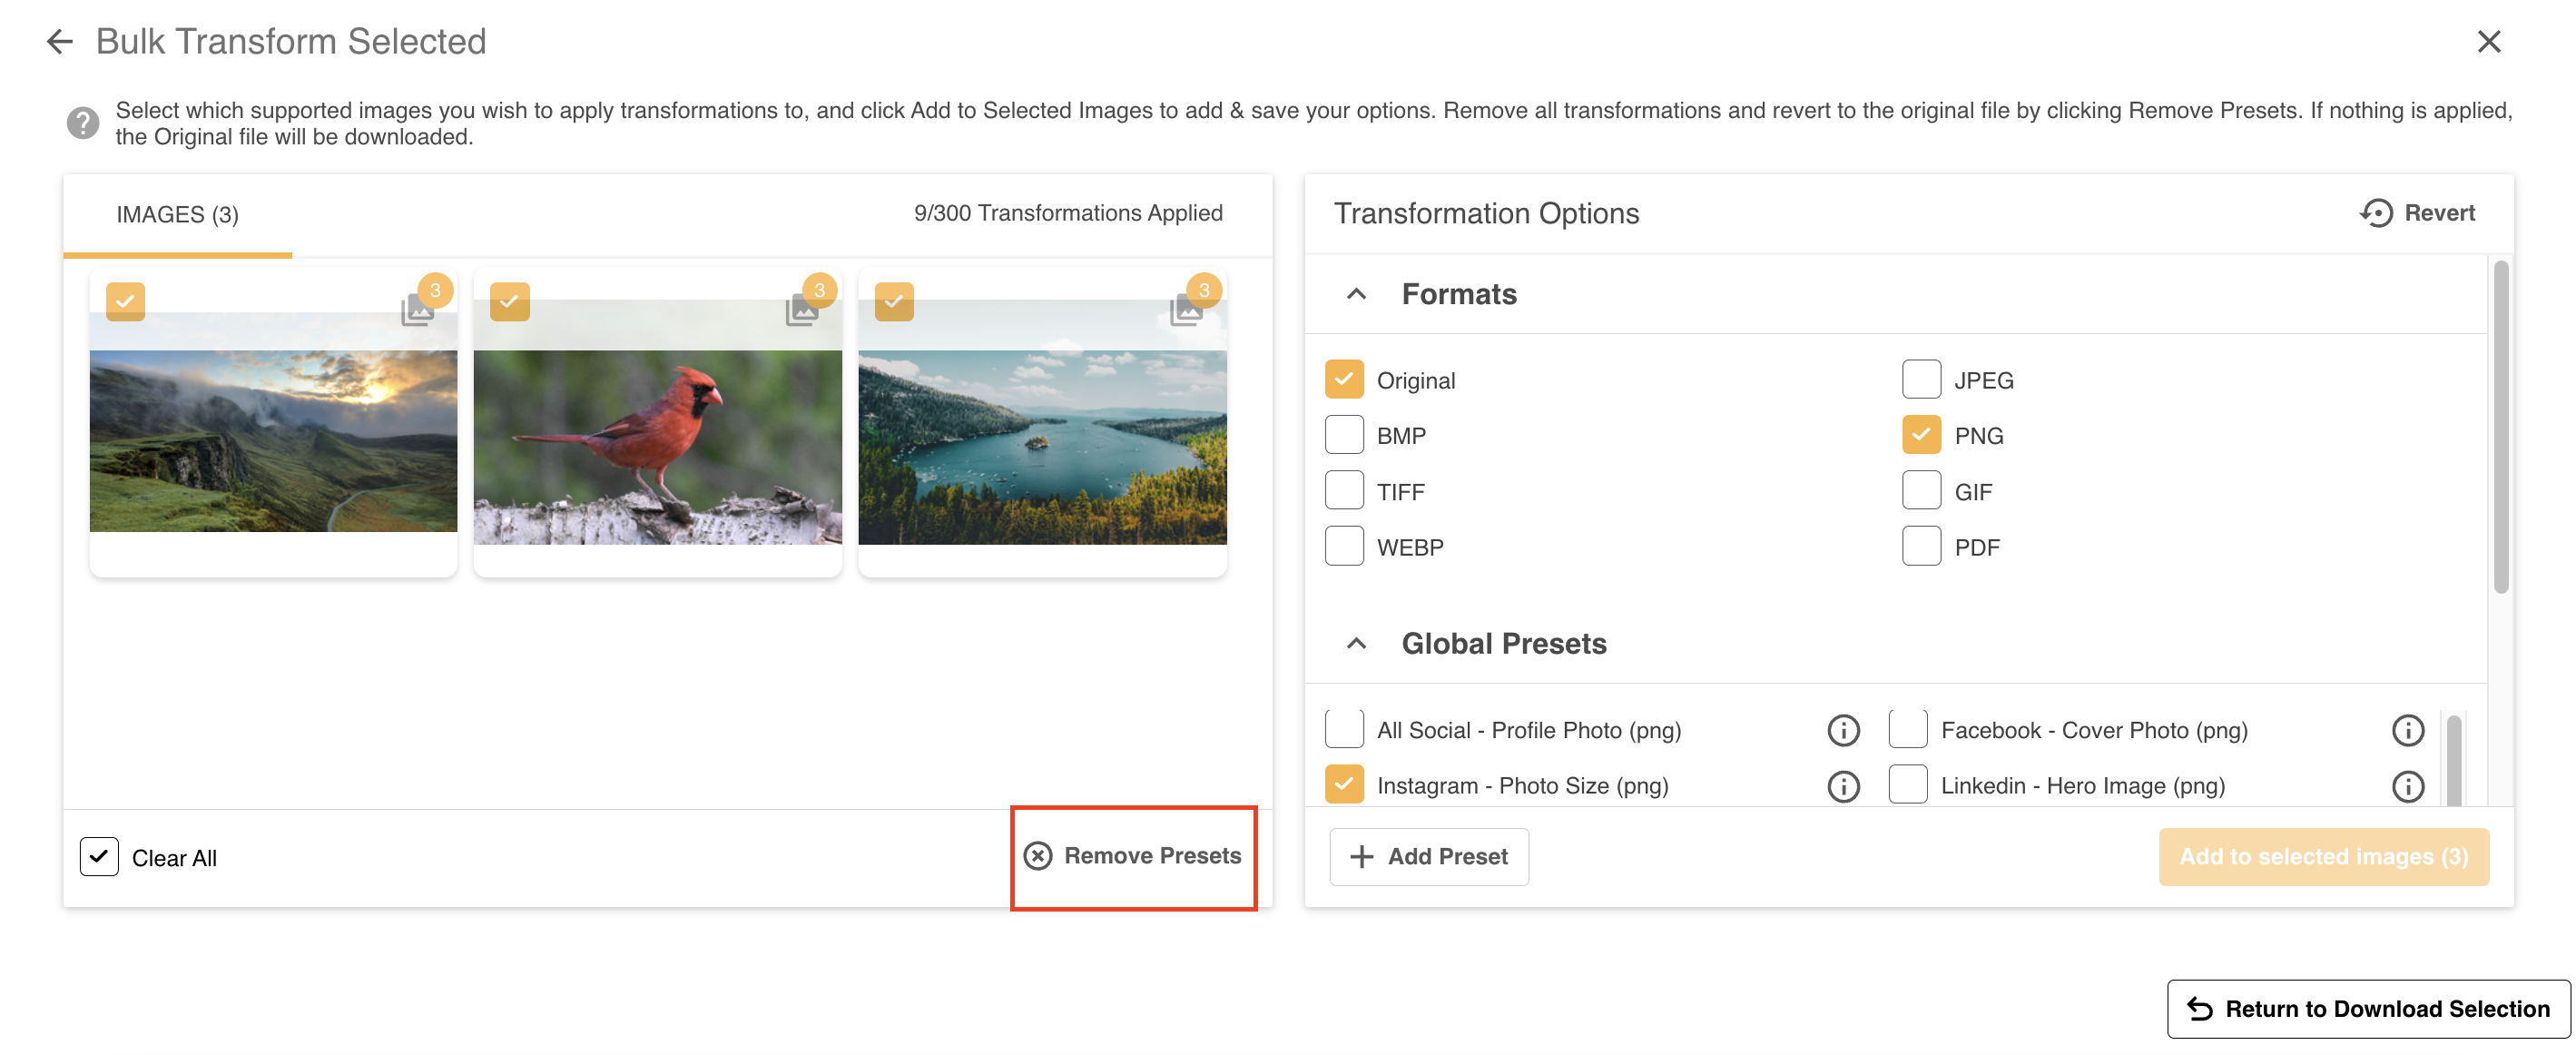
Remove all Selected Presets
Click Remove Presets at the bottom to remove all transformations, including formats, from selected Images. This action can be undone via the green success snackbar that will appear once the removal has been successful.
Transformations Options Popup
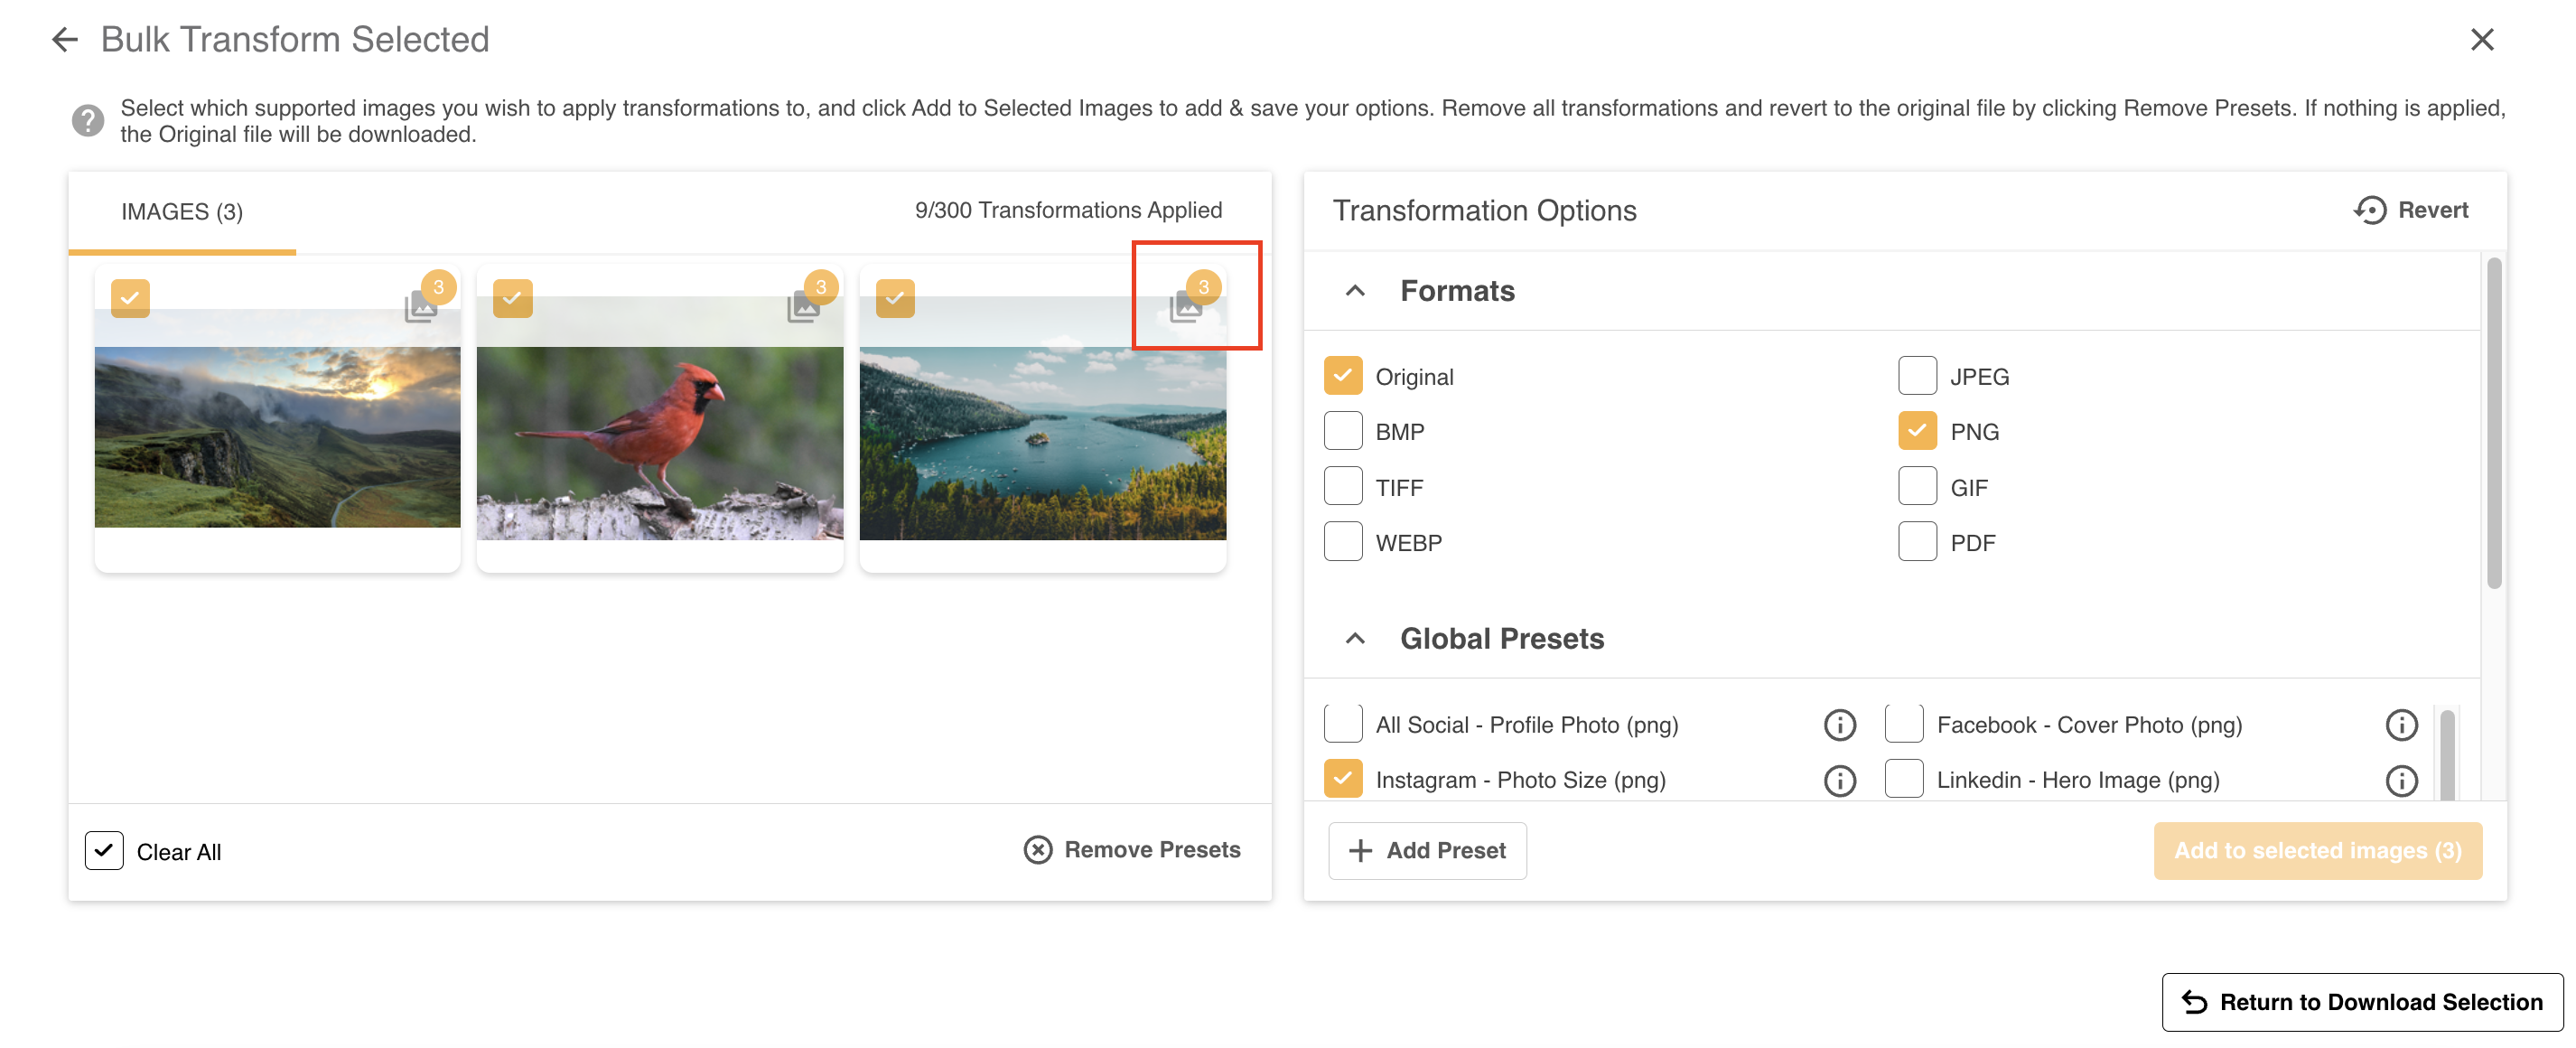
To remove transformations from a specific image, click on the transformation icon at the top right of any image. This will open the Transformations Options popup.
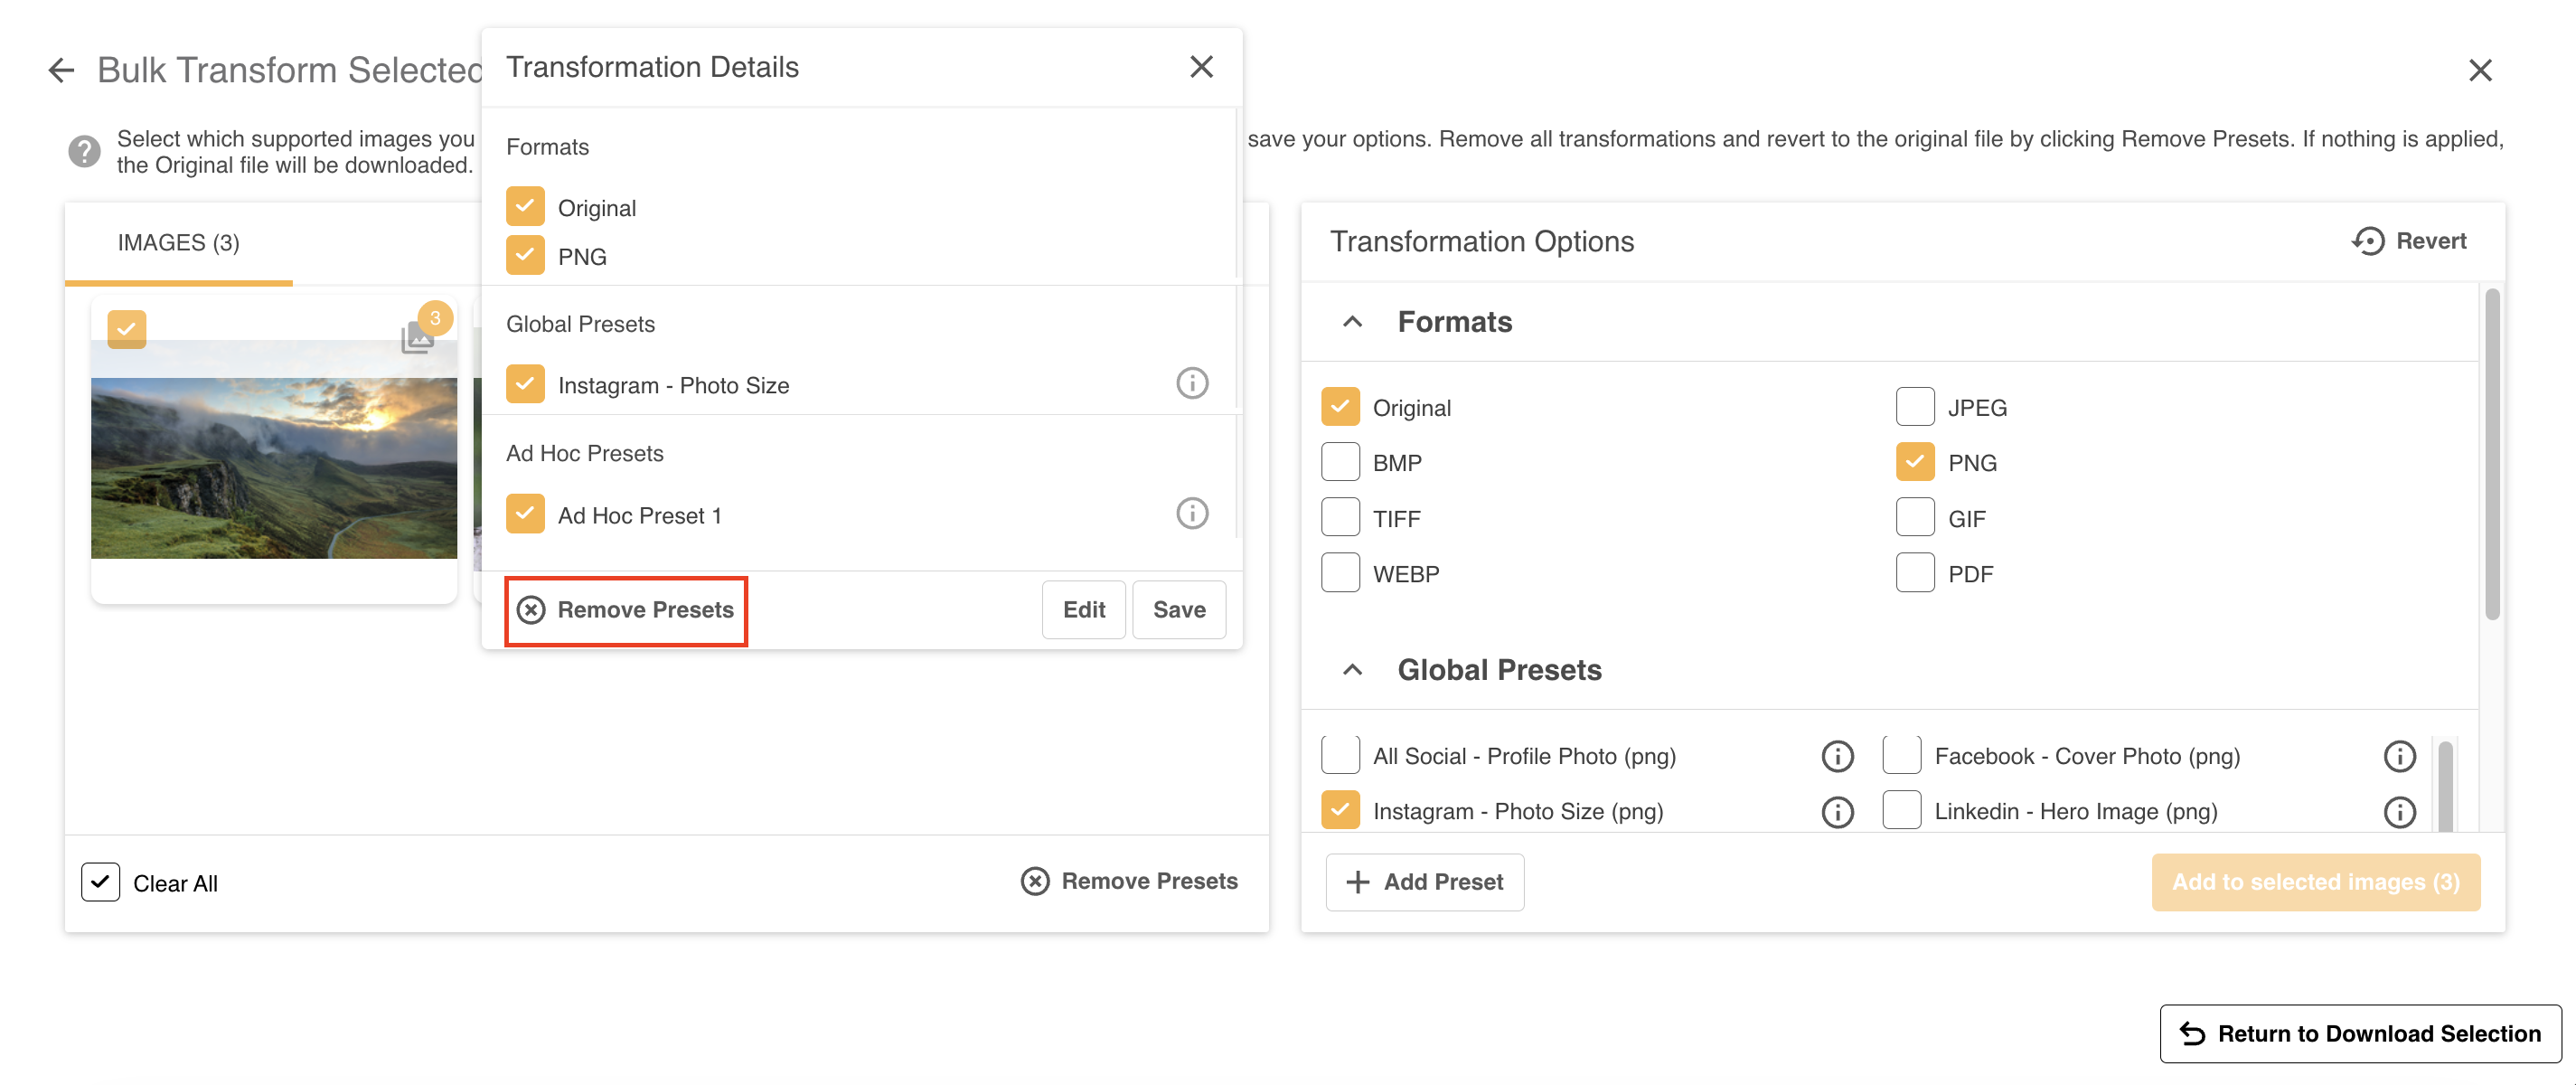
Within the popup, there is another Remove Presets button, which will remove all transformations for that particular image. Once you click the icon, click the Save button to save these changes.
Preset Detail Popup
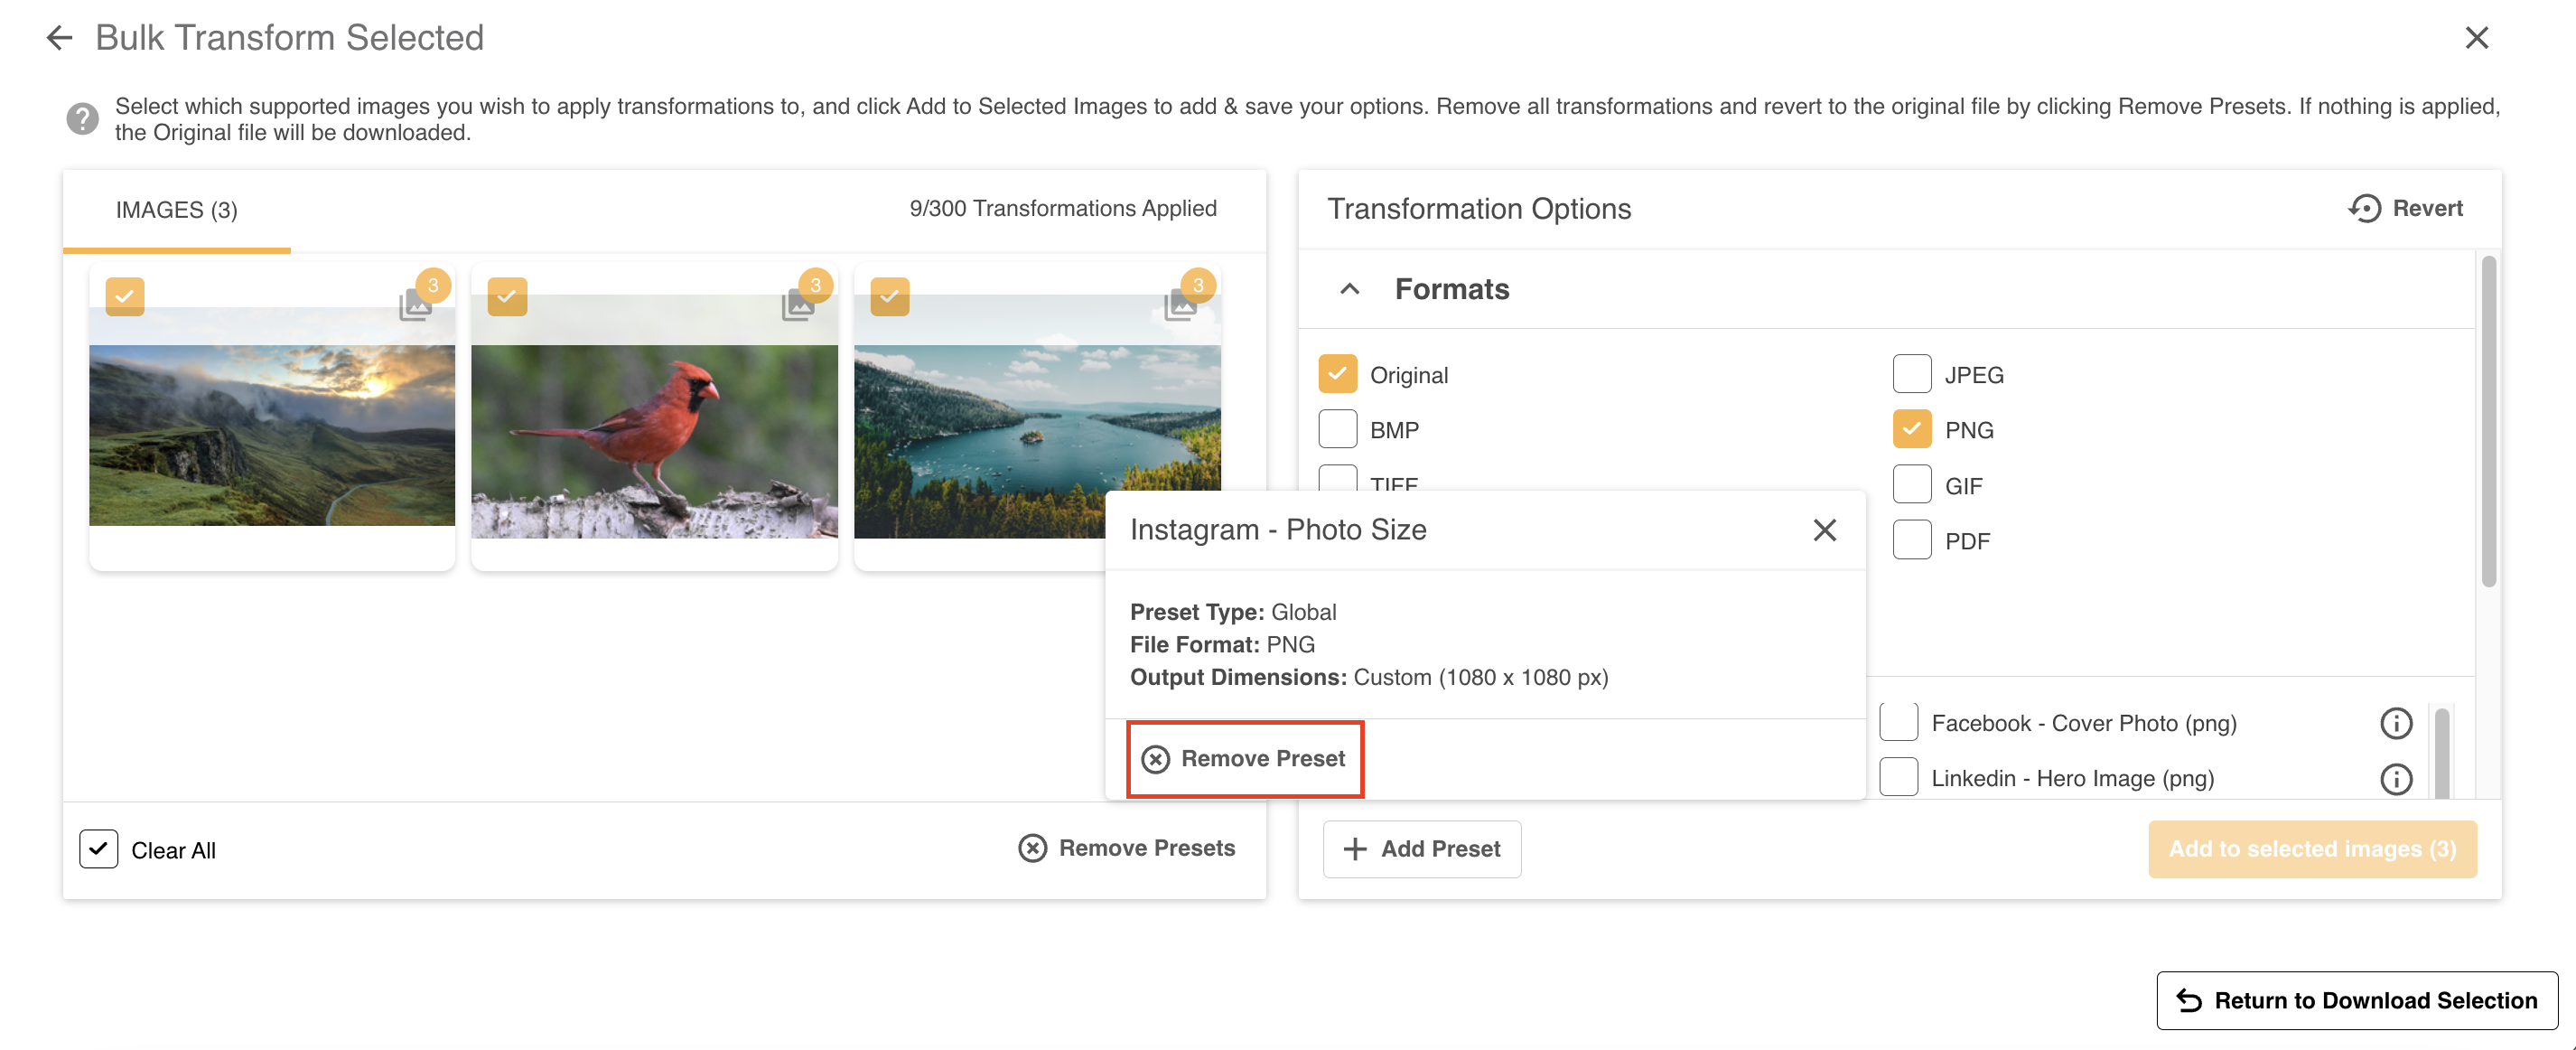
If you need to remove a particular preset transformation from the selected images, click the info icon next to the preset in the Transformation Options list. This will open a popup which contains information about each preset.
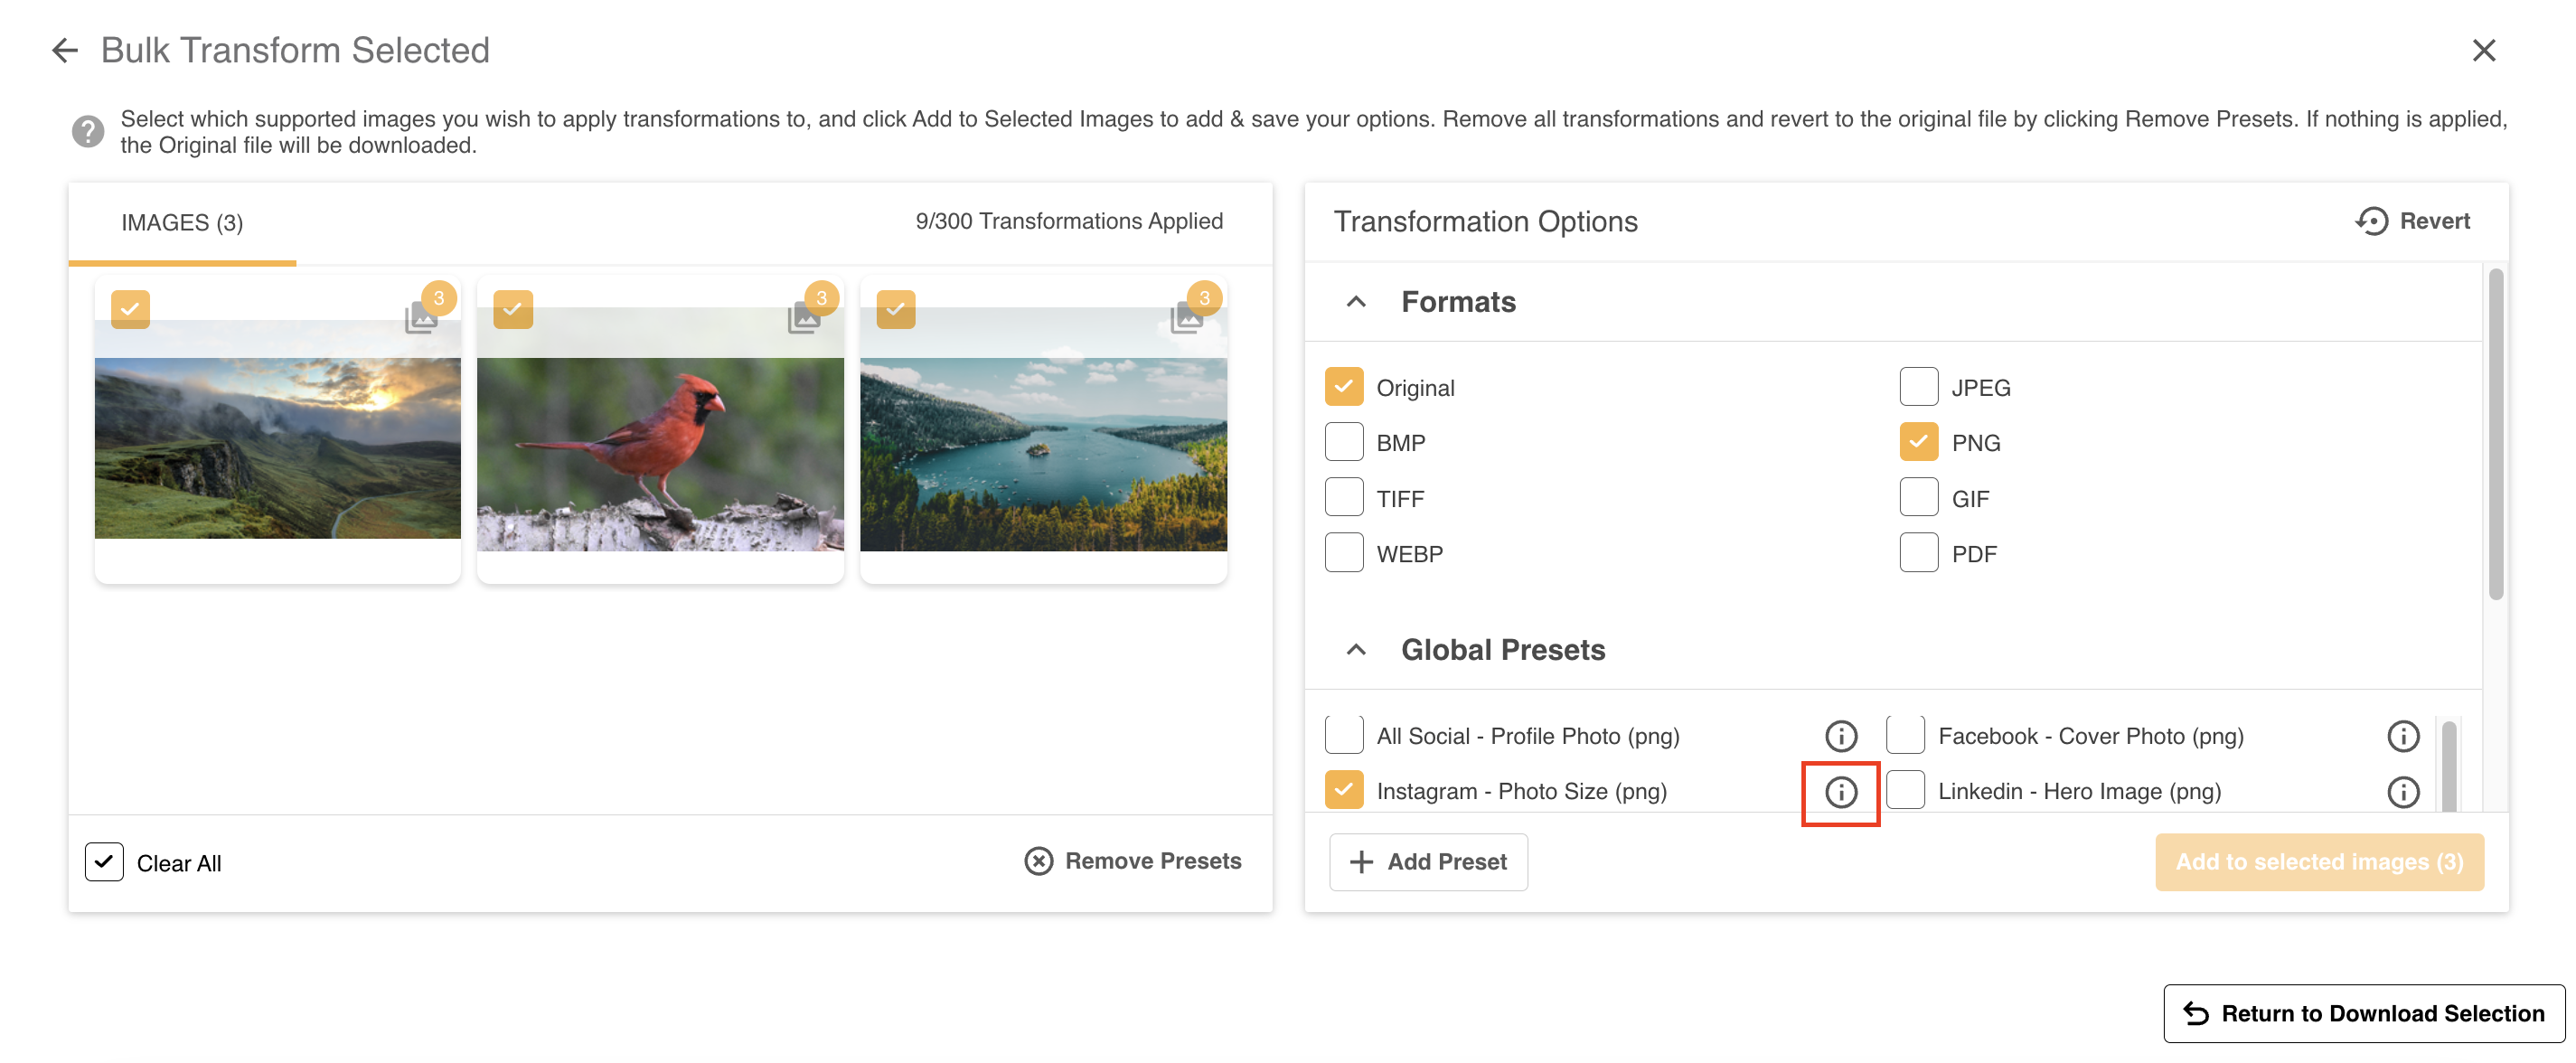
Within the popup, select Remove Preset to remove the chosen preset from all selected images. No other transformations applied to the selected images will be impacted.
Transforming Individual Images
You can also apply transformations directly to an individual image, if, for example, you just need one image transformed with a particular file format or preset.
To do so, follow the steps below:
| 1Open Transformation Details | Once any transformations have been applied to the image, click the count or icon to open the Transformation Details popup.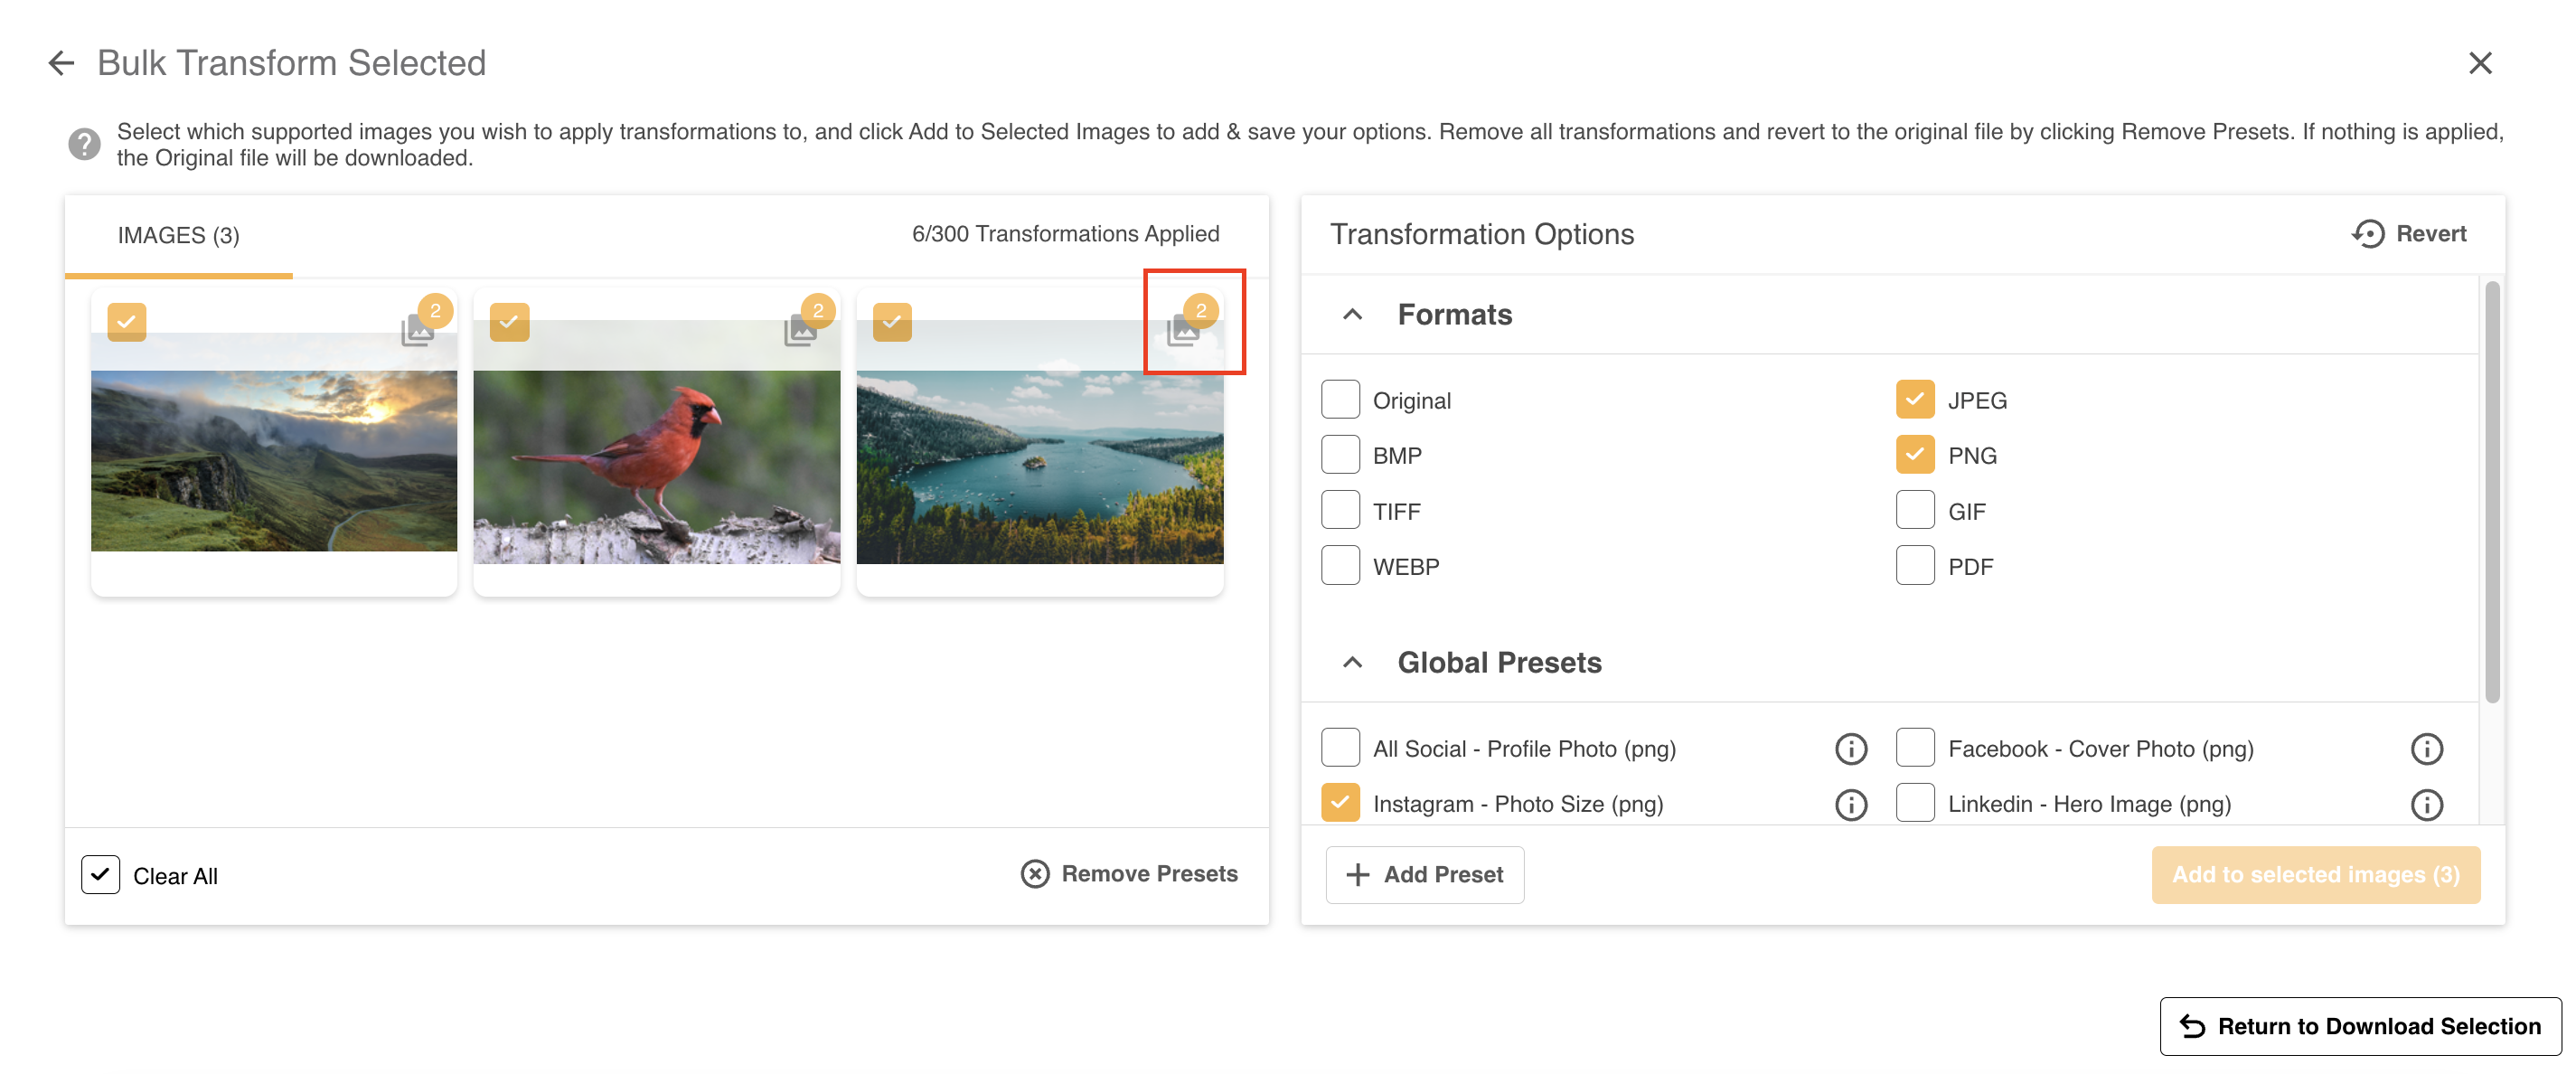 |
| 2Click Edit | Once the popup is open, it will display a list of all transformations that have been applied to the image already, including Formats, Global and Ad Hoc Presets. From here, you can access the Transform Image page by clicking the Edit button at the bottom of the popup.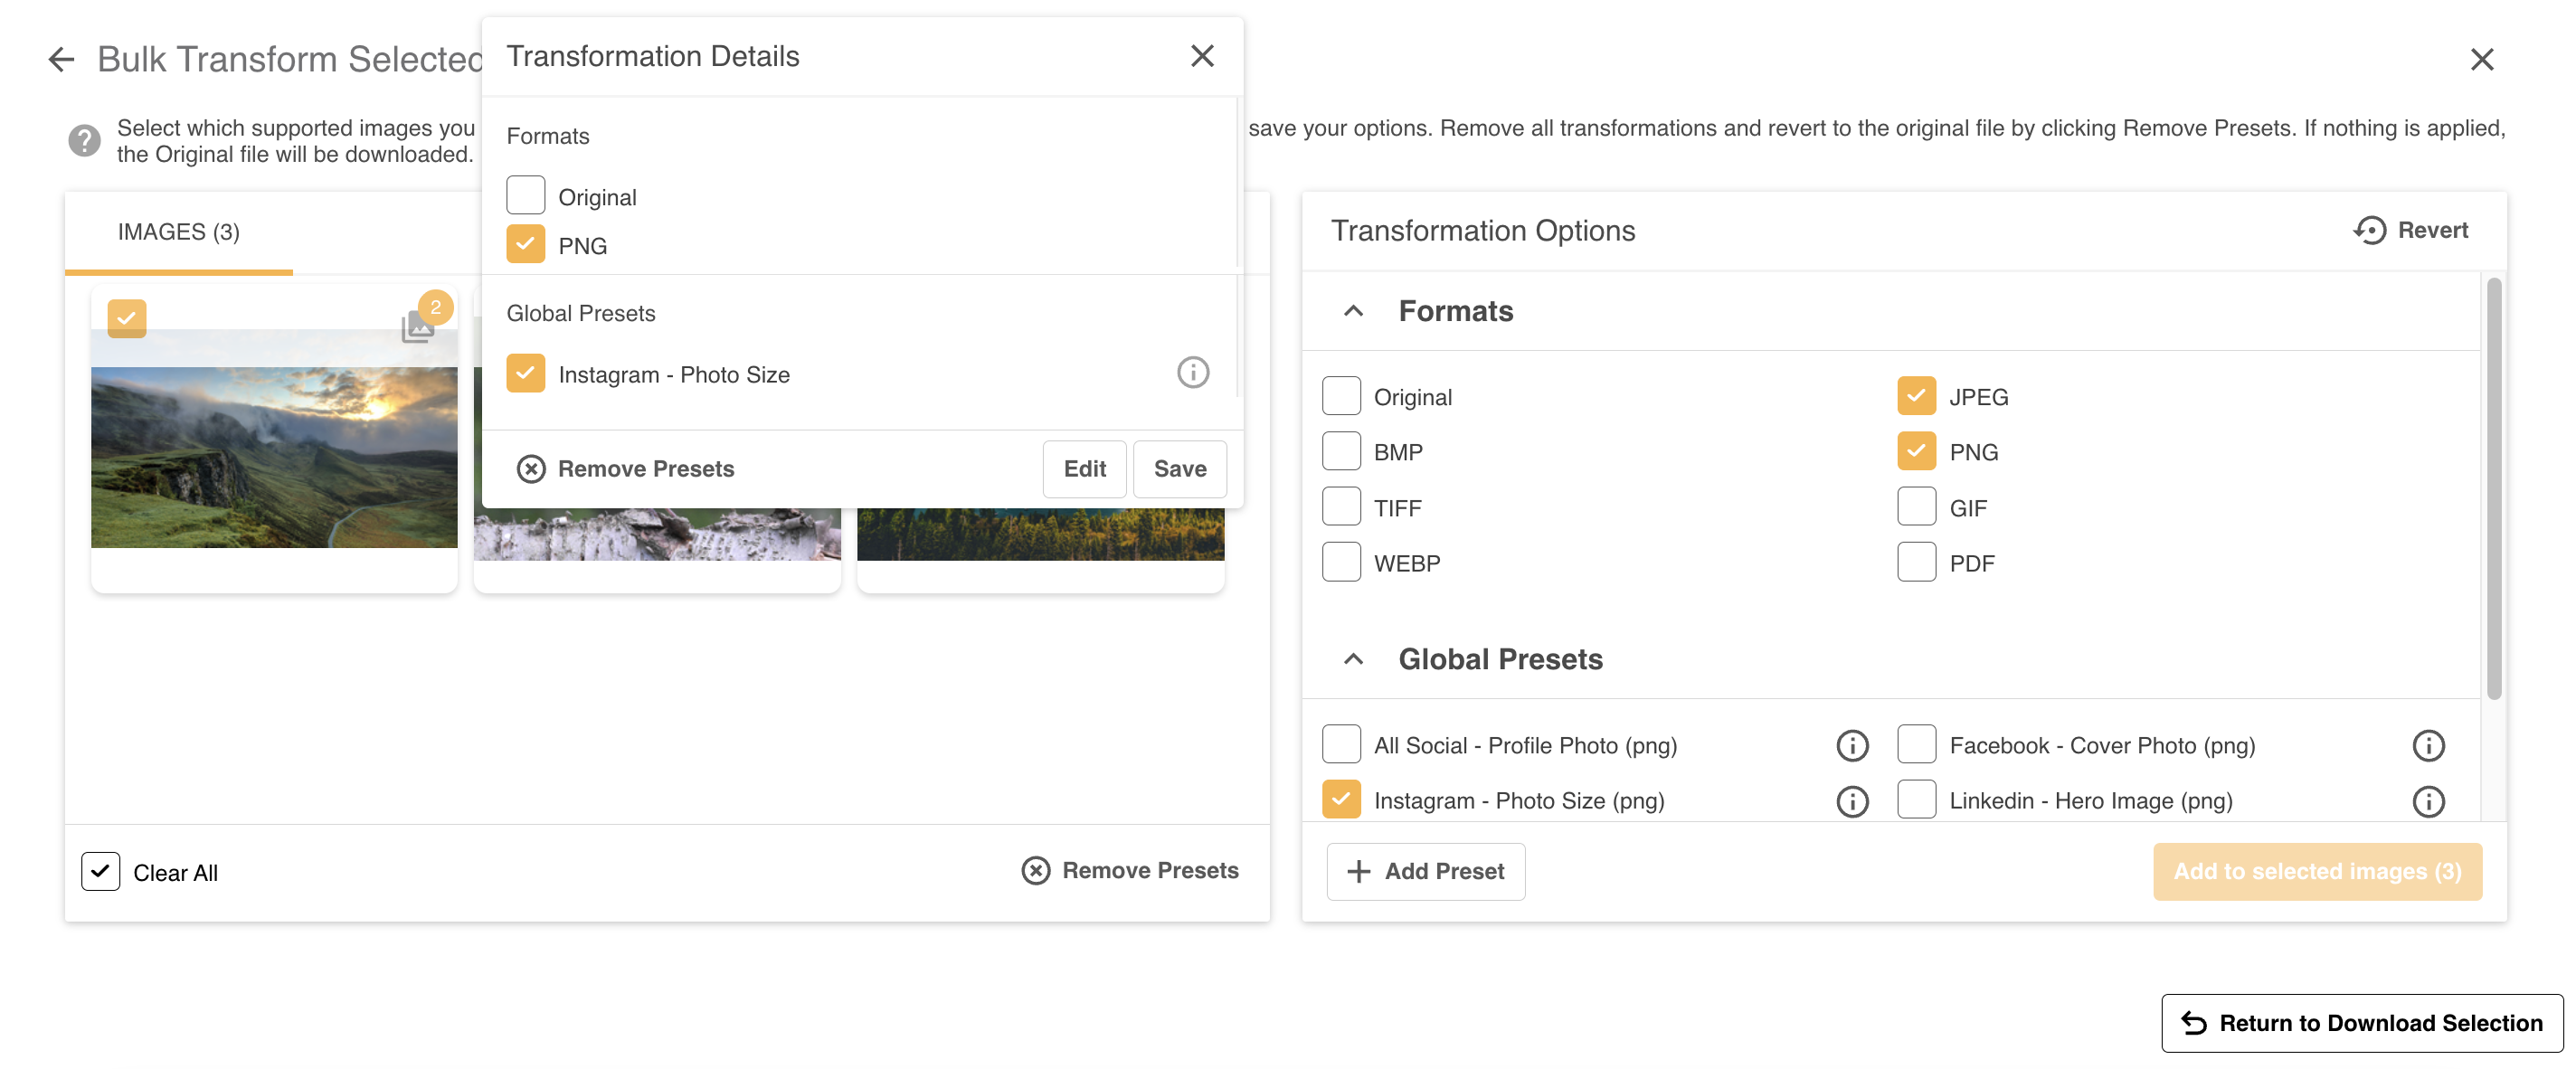 |
| 3Make selections | This will open a new overlay, with a larger preview of the image selected and the current transformations that have been applied. Make any additional file format or preset selections as needed for this image. Unlike on the Bulk page, all changes made to the Transformation Options panel will apply to just the featured image. 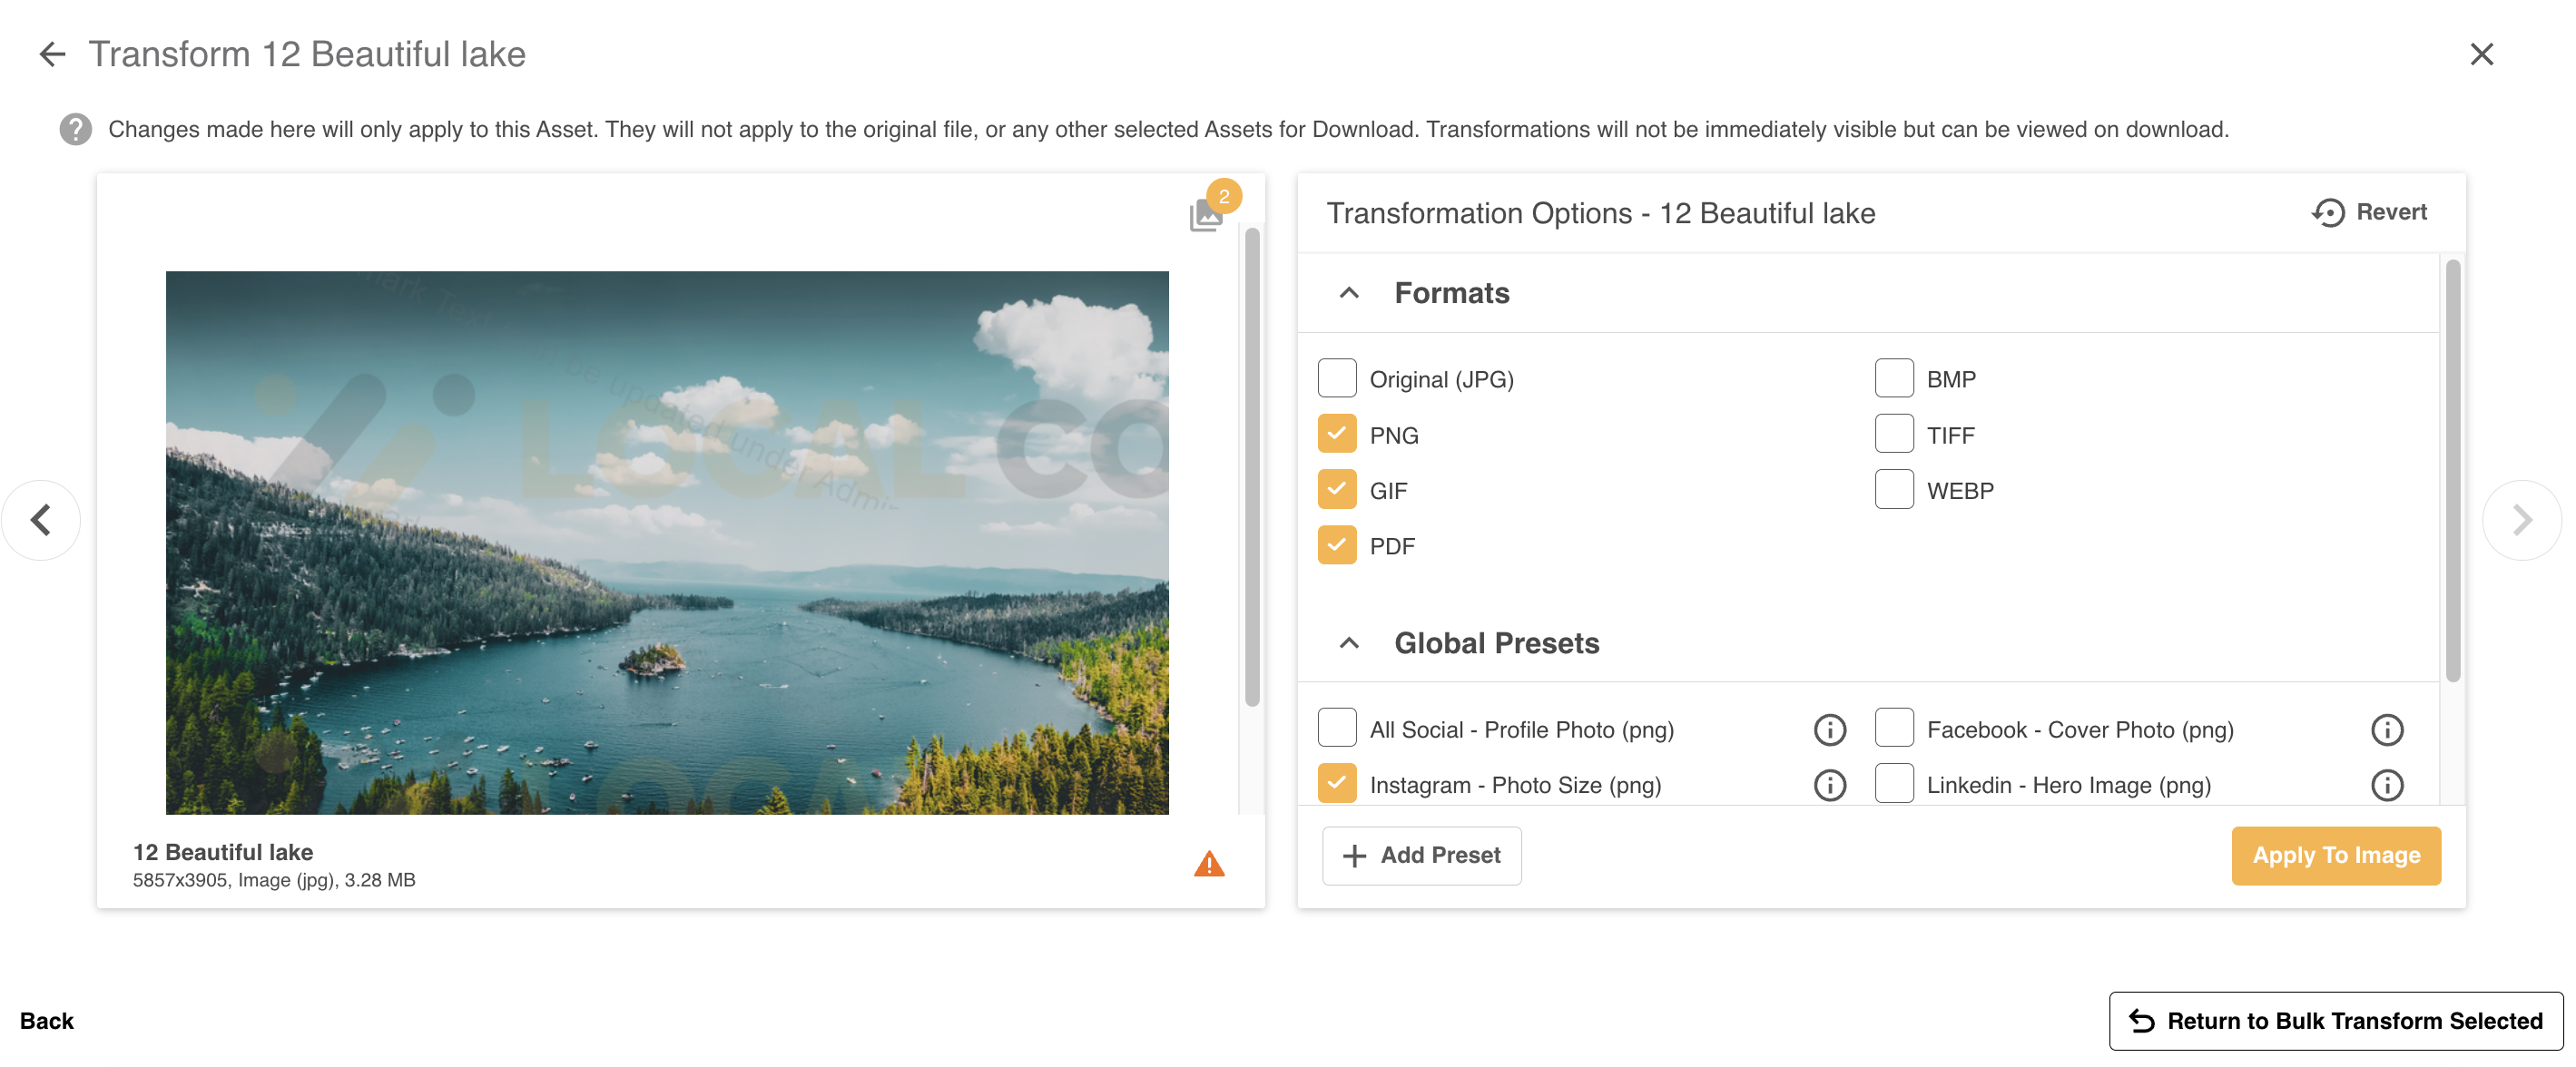 |
| 4Apply to Image | To save your changes, click the Apply to Image button near the bottom of the page. You can then select Return to Bulk Transform Selected to go back to the bulk transformations page. |
Downloading Transformations
Once you're ready to download the transformations, follow the below steps:
| 1Return to Download Selection | Click Return to Download Selection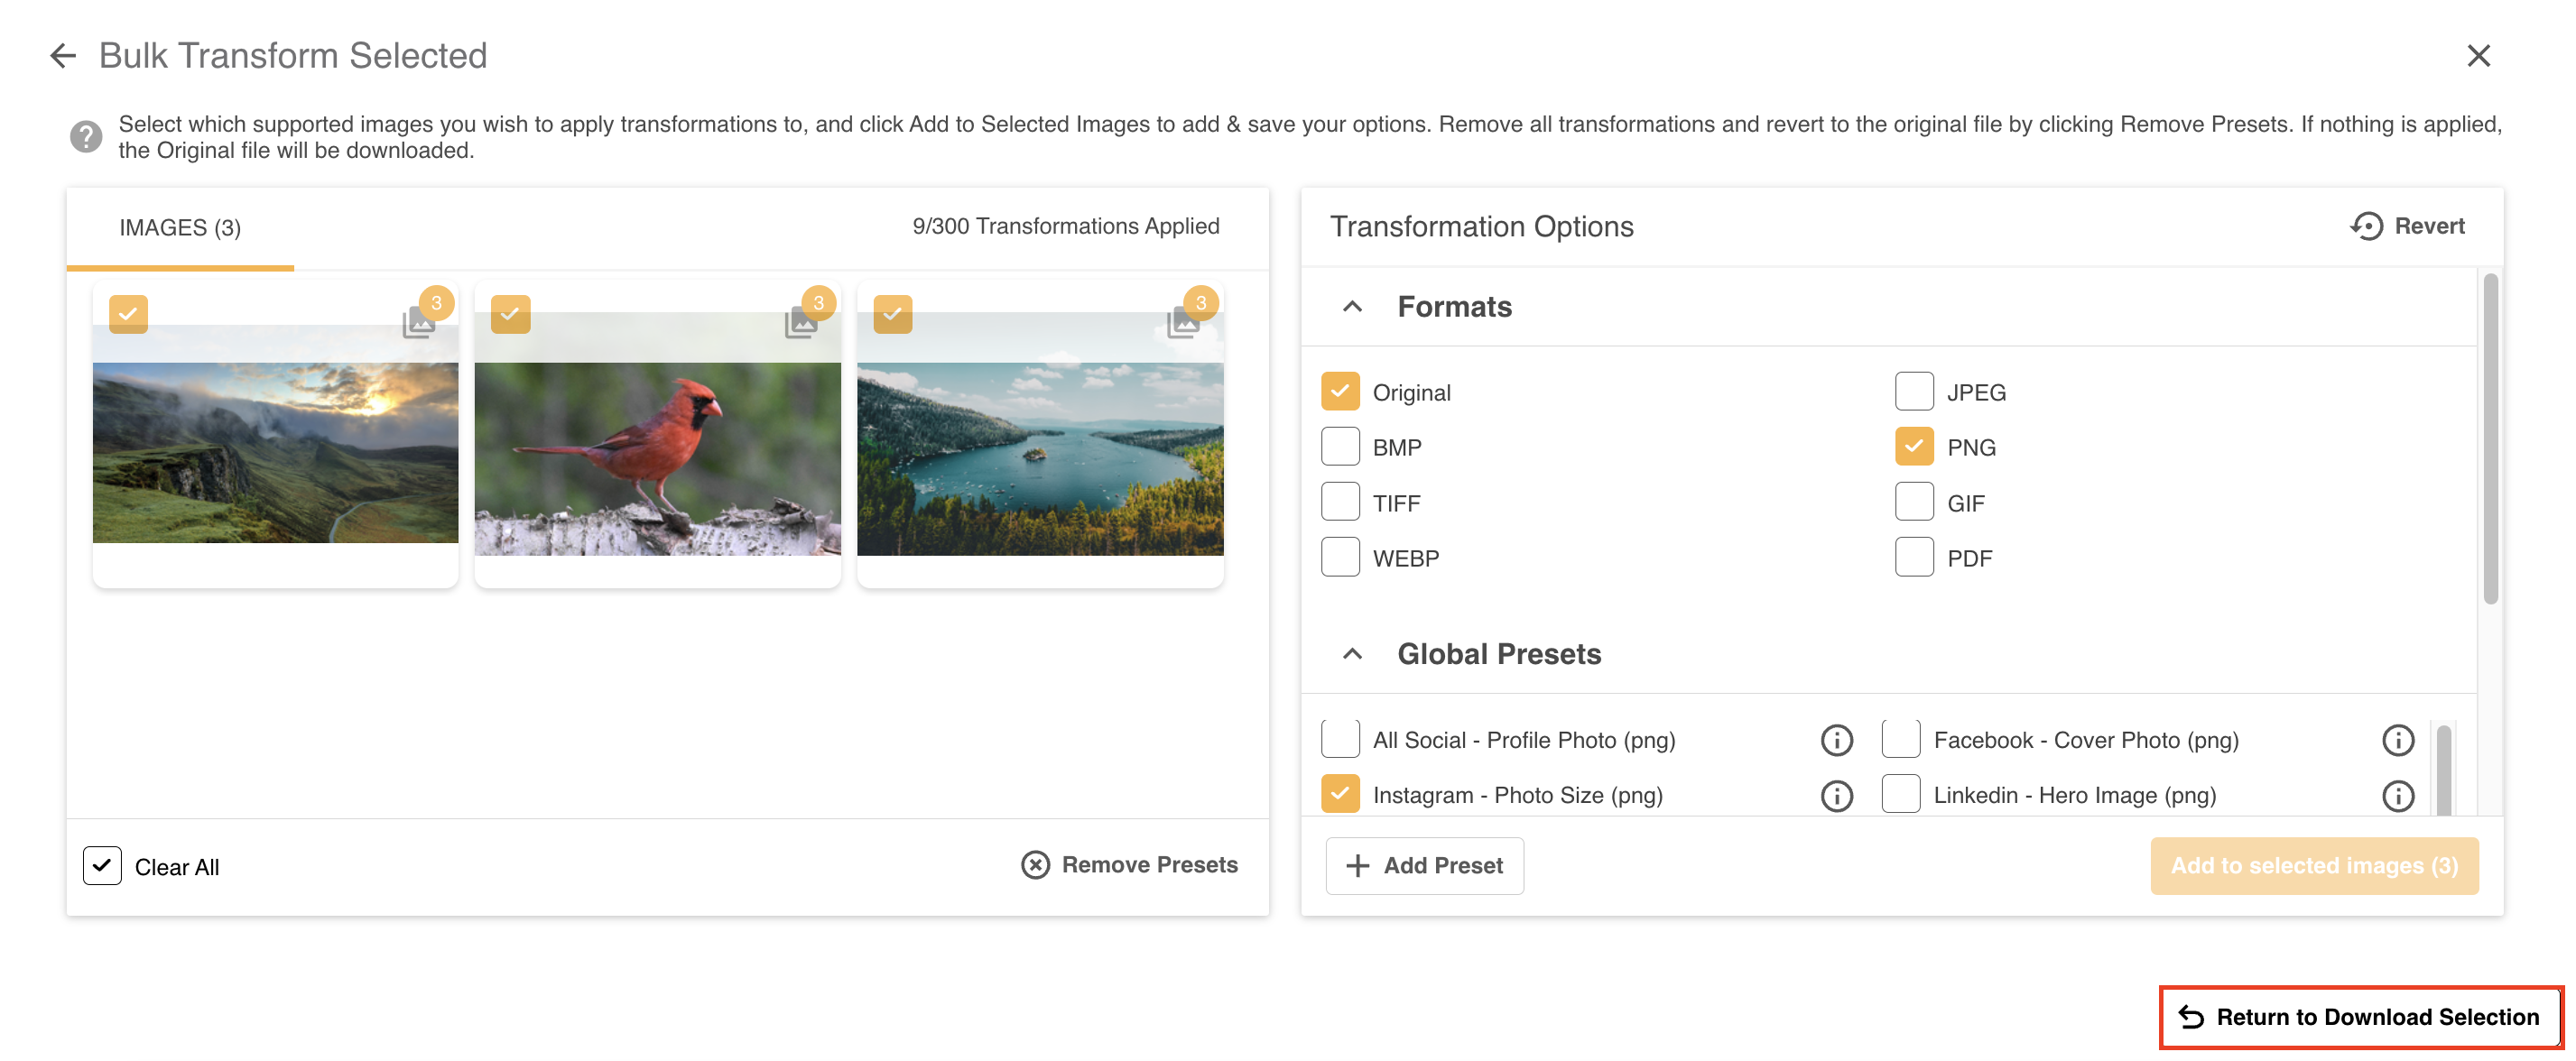 |
| 2Deselect if needed | You will see the count icon appearing for each image transformations have been applied to. If you wish, you can still deselect images from this page. If a file is not selected, it will not be downloaded. This includes the original file and any transformations which have been applied. |
| 3Download Selected | Click Download Selected to download the assets.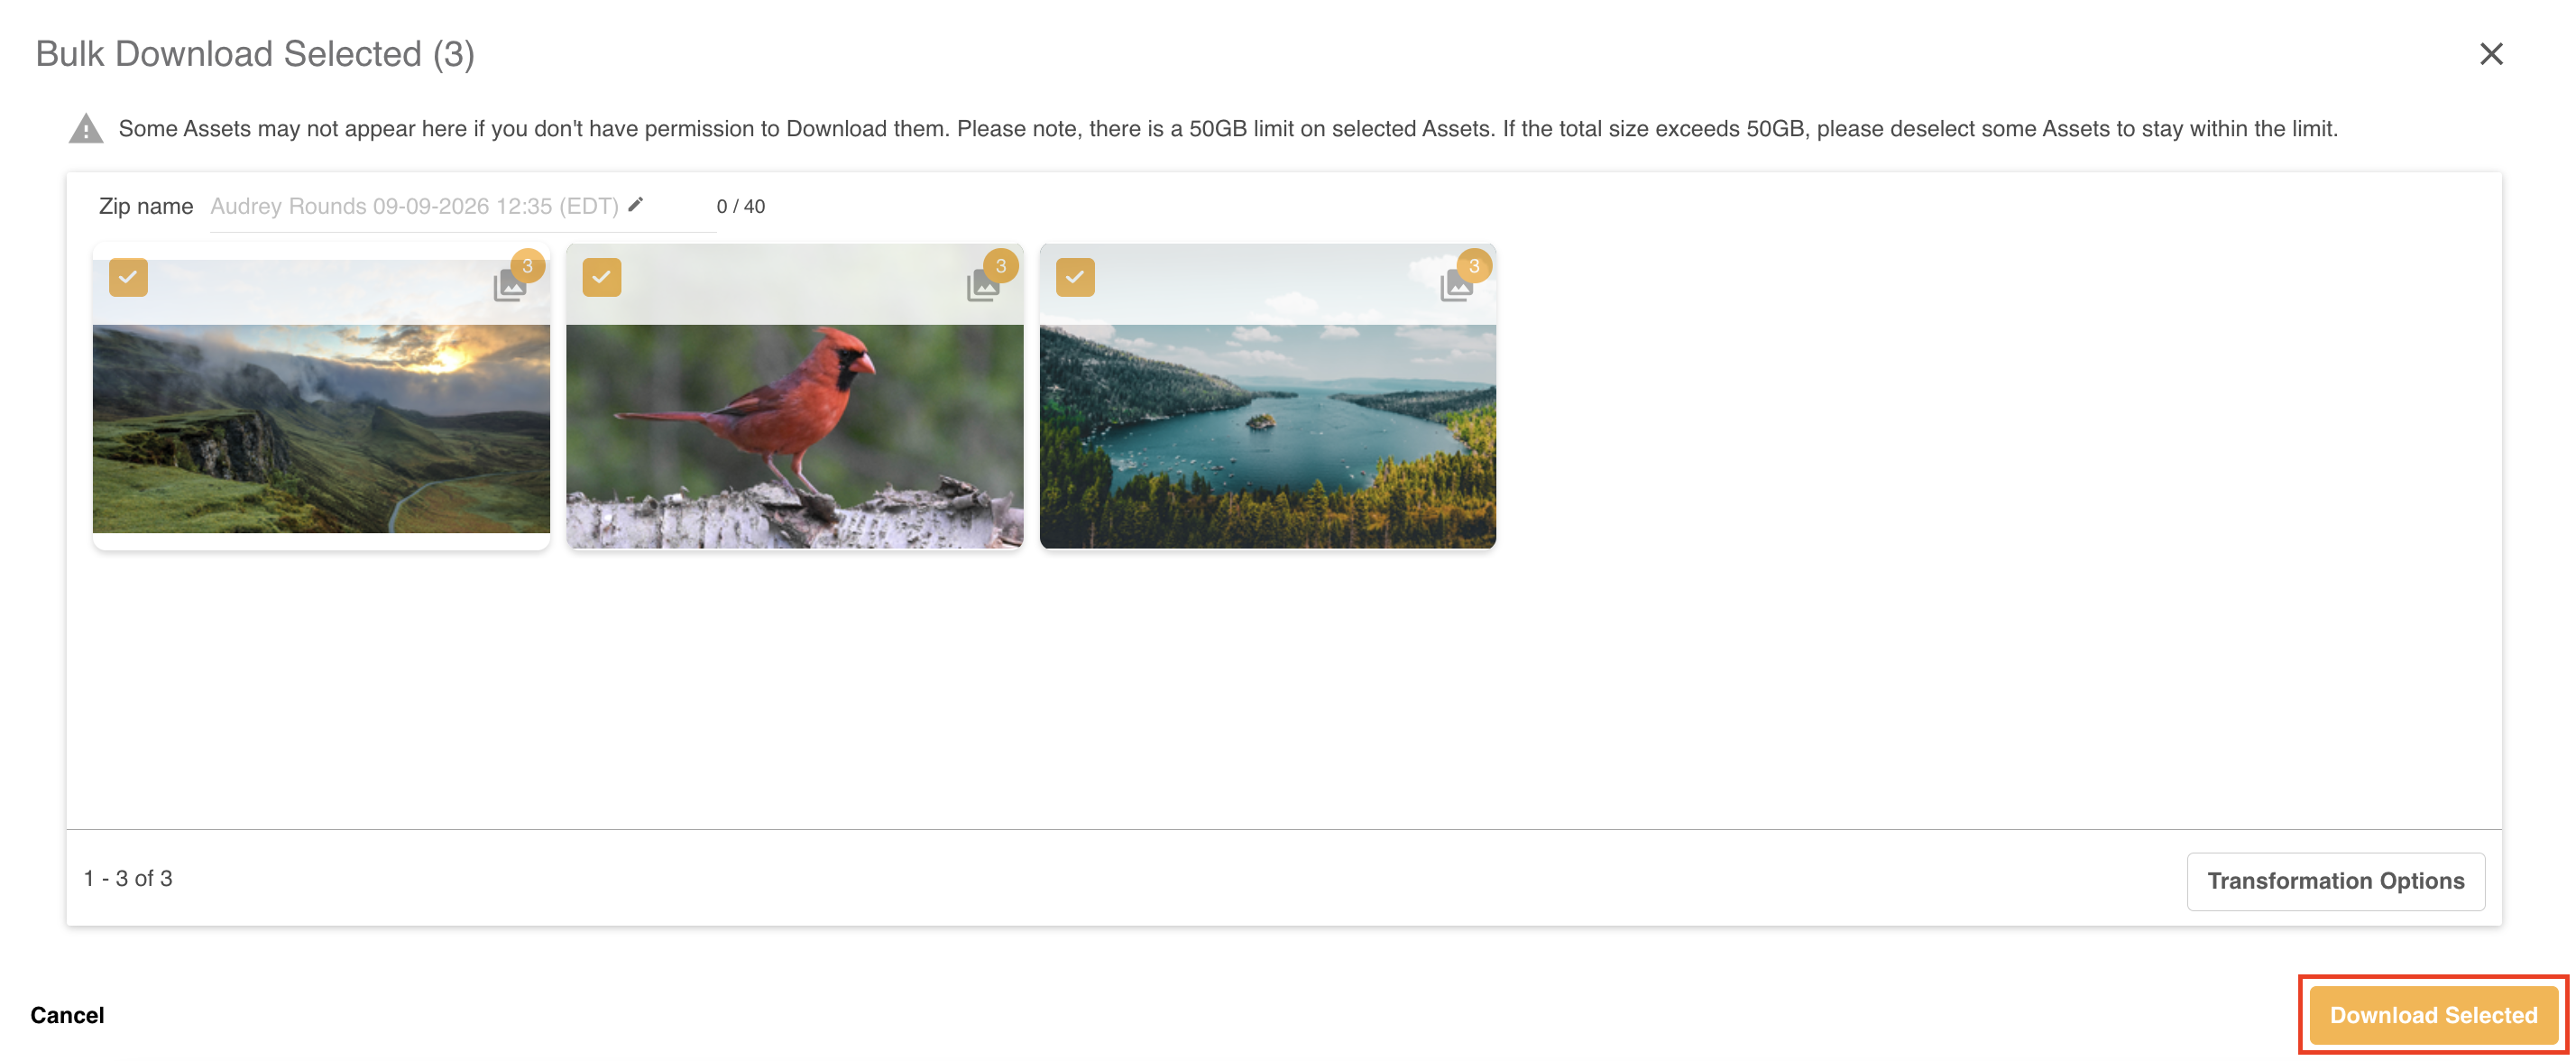 |
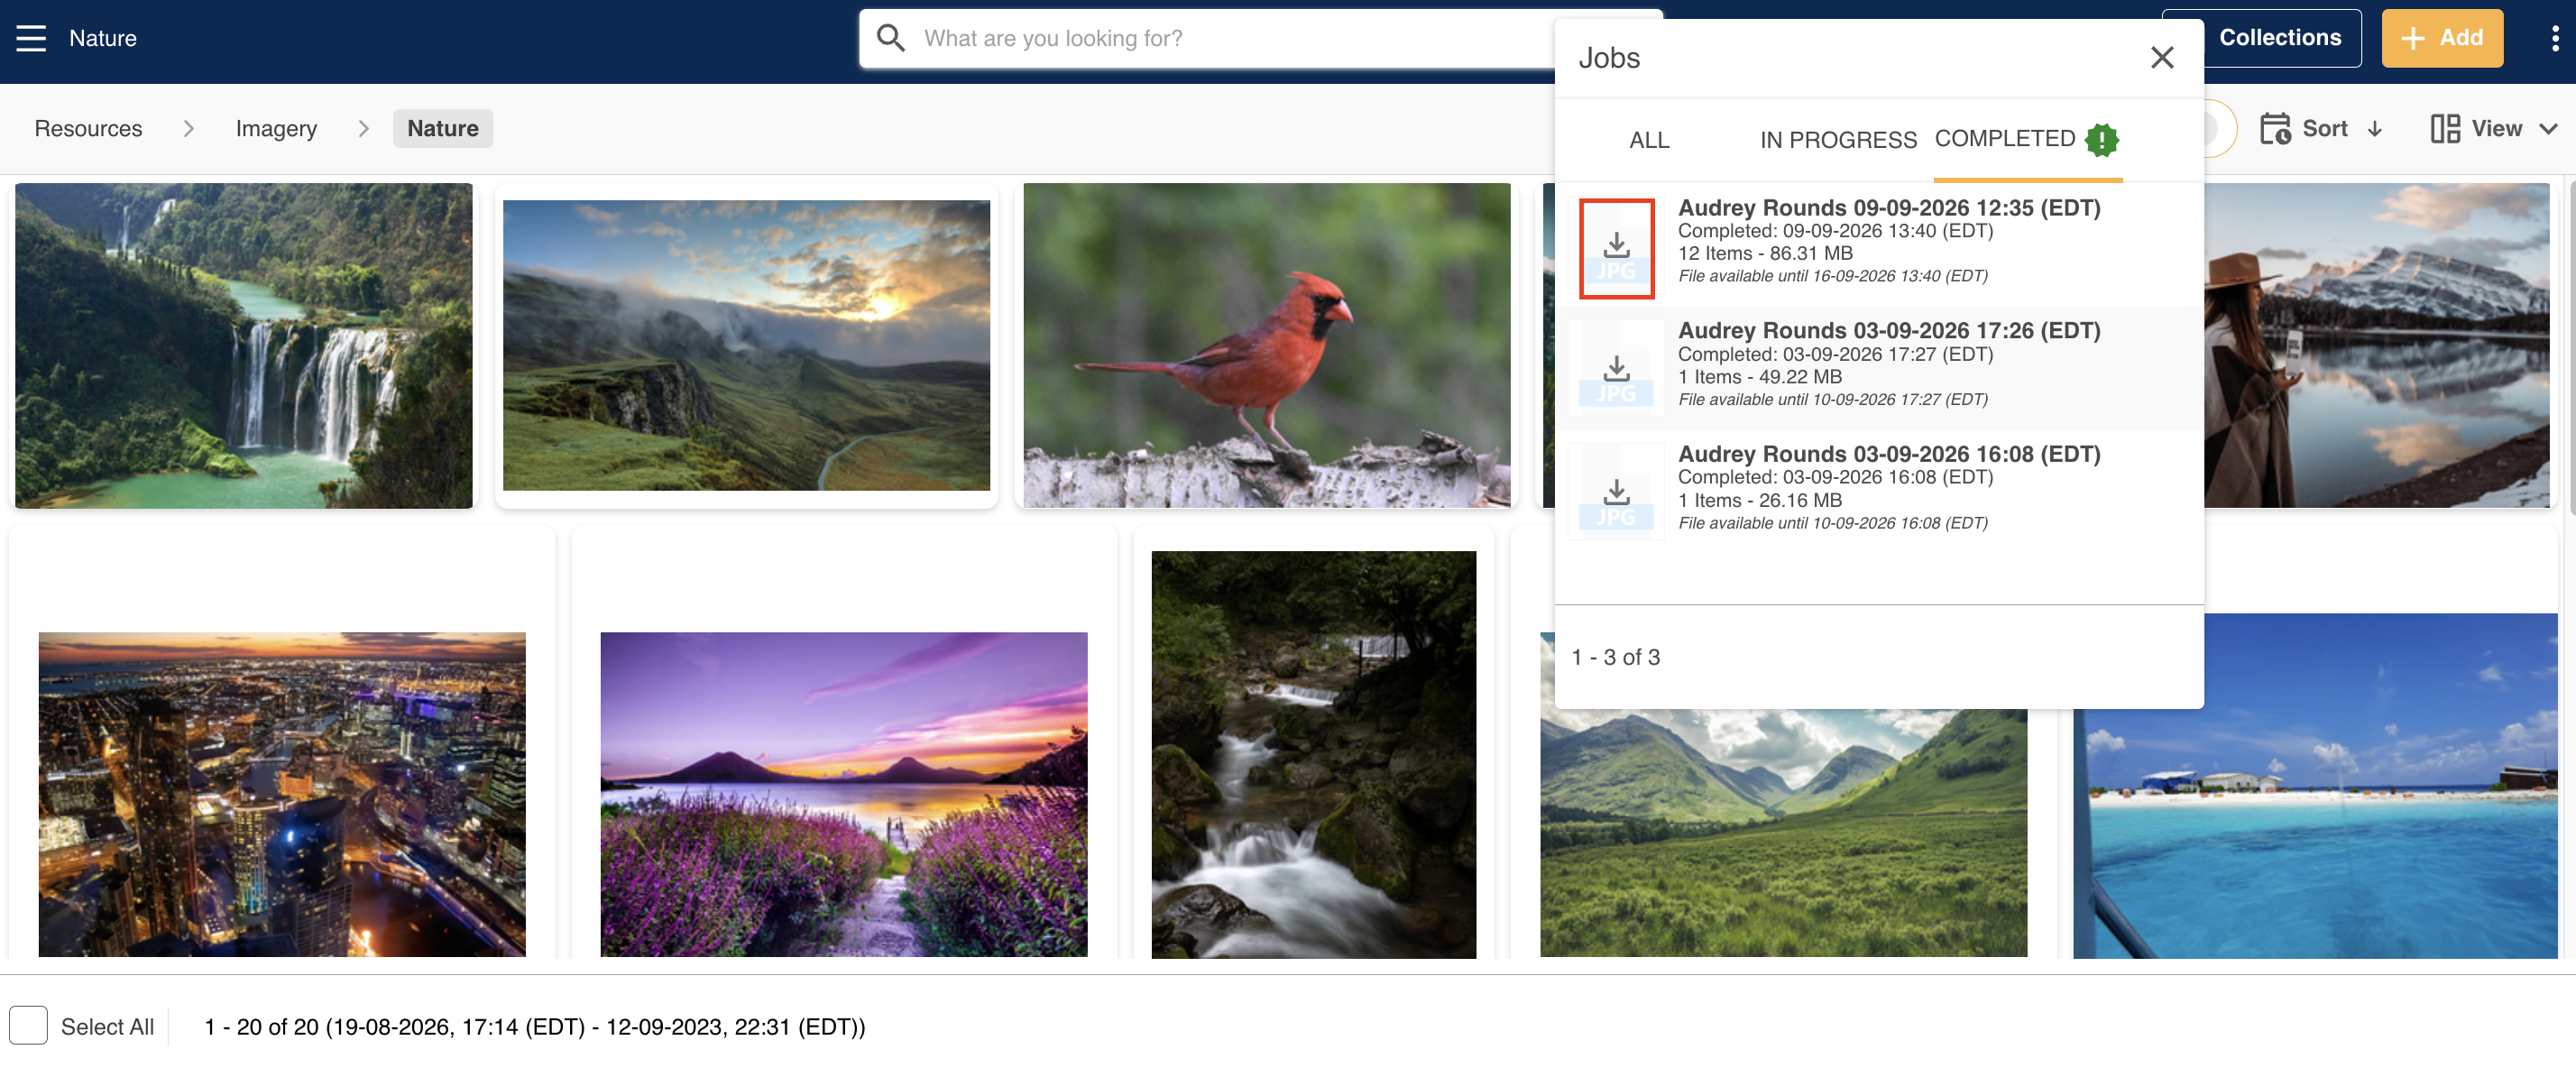
You will be able to view the progress of the transformations and download process in the Jobs List Popup.
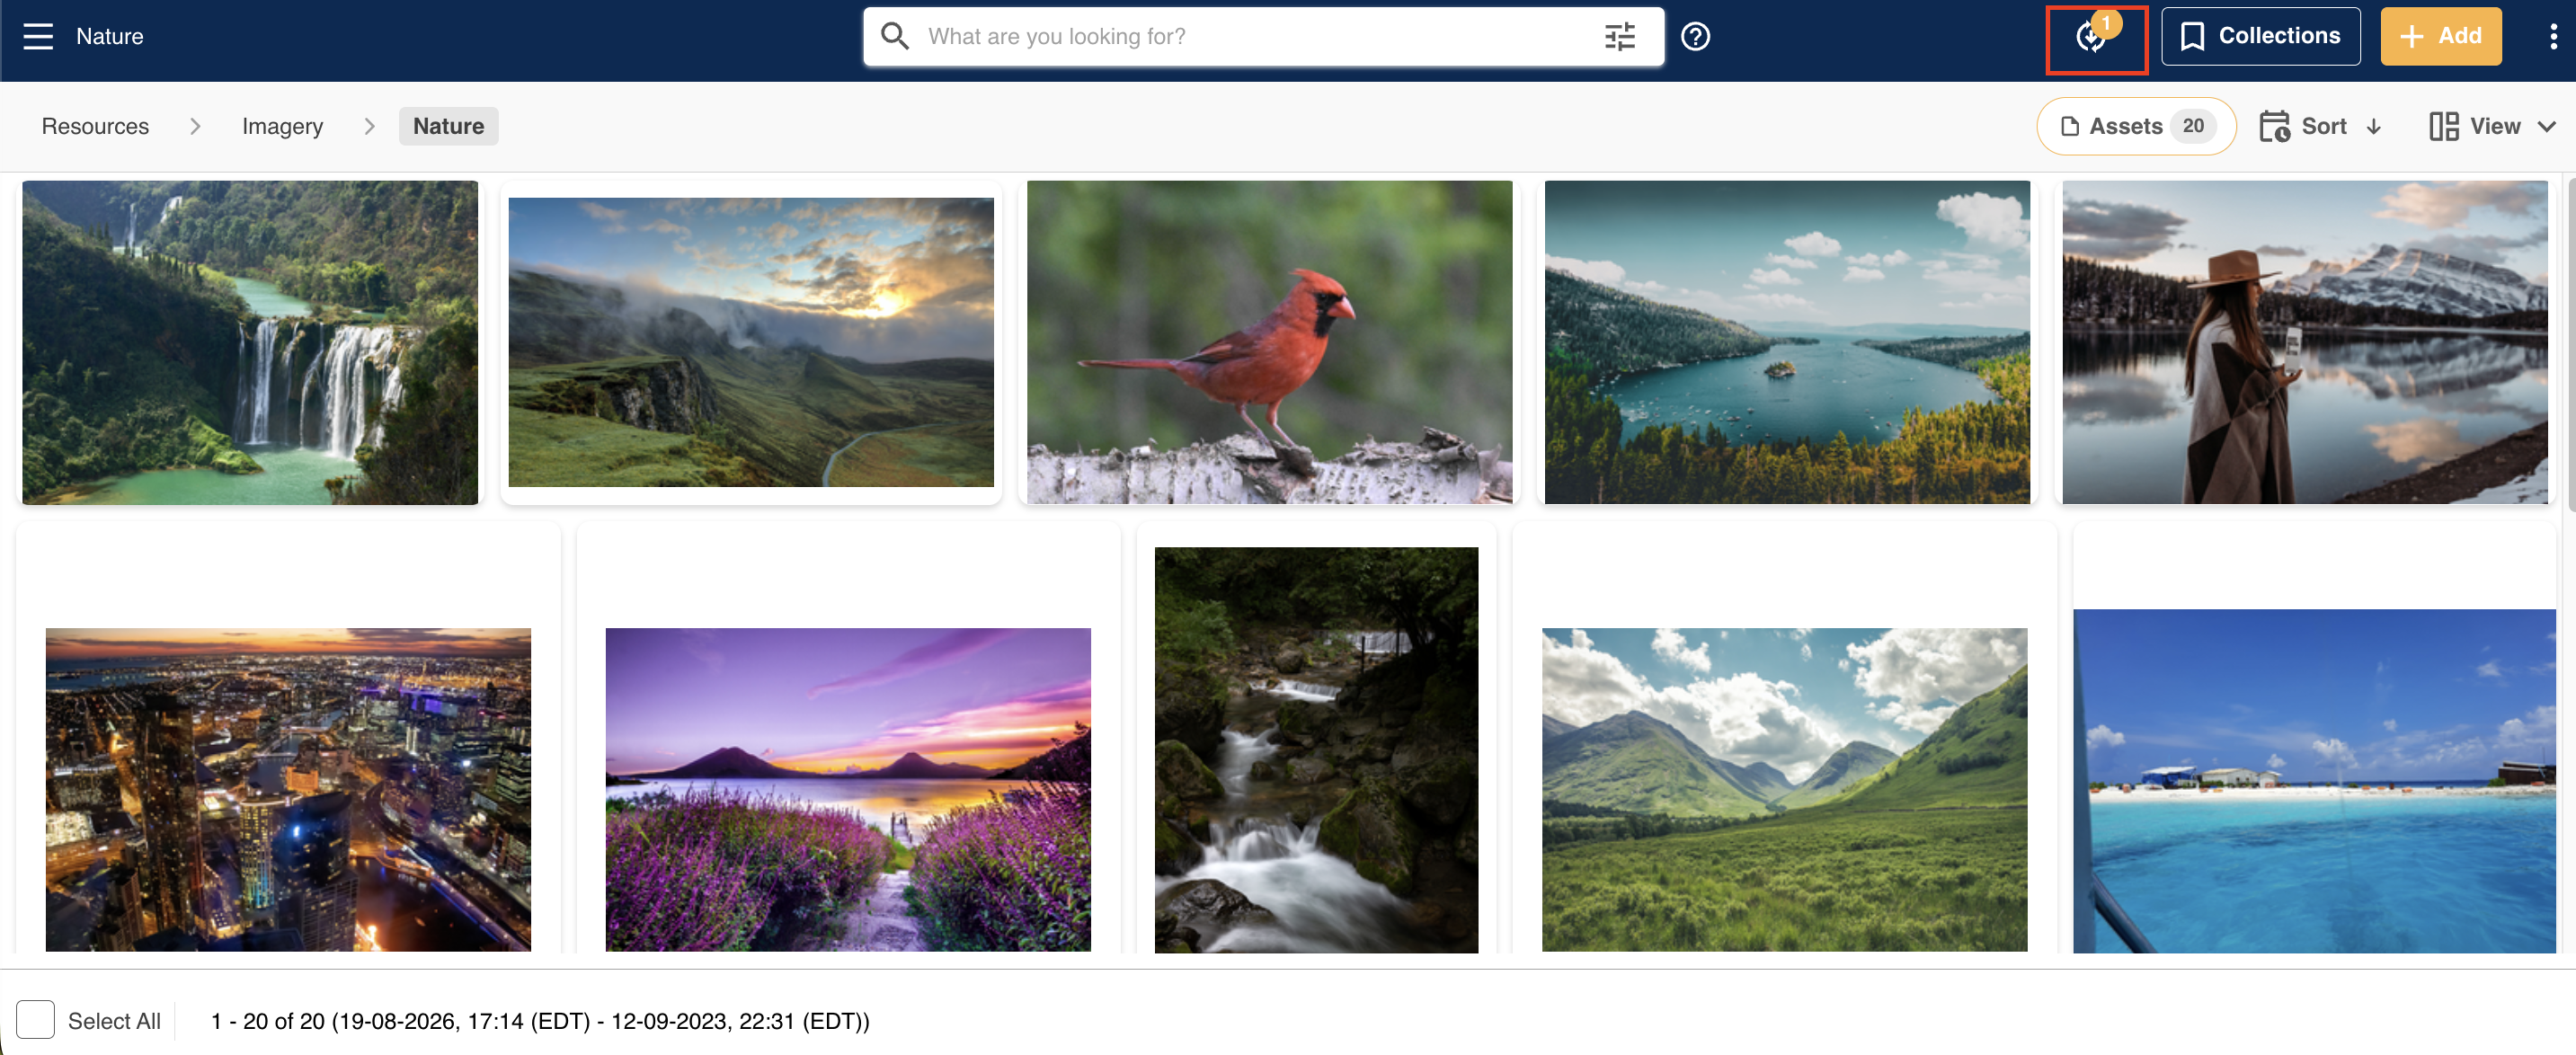
The zip file will automatically download according to your browser's behaviour. It's important to ensure that popups are not blocked on your browser as this might prevent the file from downloading.
If you wish to download the file again, you can do so by clicking the download action in the Jobs List Popup. Previous download jobs will be available in this list for up to a week after they were originally downloaded.
Transformation Limits
The transformation limit is 300 for each bulk download. This means that you can apply a total of 300 transformations total to all selected images. If there were 300 images, for example, you could apply one transformation to each.
The original file is not included in the transformation limit. Similarly, if you apply a file format which is the same as the original, this will also not apply.
If you've tried to apply transformations, but the number of transformations selected would exceed the 300 limit, none of the transformations will be applied. You will see an error snackbar with a count informing you of how many transformations you need to remove in order to apply the presets.
Was this article helpful?
That’s Great!
Thank you for your feedback
Sorry! We couldn't be helpful
Thank you for your feedback
Feedback sent
We appreciate your effort and will try to fix the article