Record File Approvals is an approval workflow type that applies to assets uploaded within record Multi-Upload fields, giving teams a central location to review, mark up, and approve deliverables without leaving the record.
As part of the approval, users can also mark up assets and add new revisions, ensuring you can track any requested changes and who approved or declined an asset.
Record File Approvals are exclusive to databases and can be enabled against any Multi-Upload field in a database form builder.
Table of Contents
Key Benefits
Record File Approvals offer an easier, more streamlined way to review and approve deliverables created off a creative brief, task, or other form of request. Users can easily monitor the request's progress, mark up assets, and respond to the approval request from within the record itself or in the Approvals List, ensuring all assets can be tracked and reported on against the record.
Record File Approvals is also helpful when sending documents scanned for automatic risk detection for final approval by Legal and/or Compliance teams. Approval can take place directly in the form these assets were originally uploaded to, saving time and effort by these teams.
Setting Up a Record File Approval Workflow
Create a New Record File Approval Workflow Template
| 1 | Admin users can access the Admin > Workflow area of their platform to create a Record File Approval Workflow Template. |
| 2 | Name the template and ensure Workflow Type is set to Approval and Tool is set to Record File. |
| 3 | Select the other workflow settings as required. For more detail on workflow settings, read this article. |
| 4 | Save the approval workflow template. |
Enable Workflows on Uploaded Files in your Database
| 1 | In Databases, add a new database and form, or edit the form template for an existing database. |
| 2 | Ensure your form has an Upload field and that the Upload File Type is set to Multiple Files Upload. |
| 3 | Select the Enable Workflows on Uploaded Files checkbox and click Configure. |
Select and Customize Workflow Options
If your platform only has one Record File Approval workflow template, you will be taken directly to customize its settings. If there are multiple workflow templates, you will be shown a list to choose from. Click the name of the desired workflow template and Select to continue.
On the customize options page, you can enable workflow options for this specific Multi-Upload field, such as the set reviewers and number of required approvals. You can also select to enable Conditional Reviewers for this workflow (see more on this below).

Conditional Reviewers
Conditional Reviewers is an option for all Record File Approvals and can be set for each Multi-Upload field. They allow you to set rules or conditions so that the reviewers on an approval request can change based on who the requester is, or based on data that has been input within the record.
Conditional Reviewers provide a more efficient and automated way to route approval requests to the right reviewers, ensuring the right people see the right requests. This cuts down on what otherwise might be manual assigning of reviewers by requesters, who may make mistakes and assign requests to the incorrect reviewers, resulting in more work to re-assign.
This feature is helpful in scenarios where the reviewer on an asset within the record might vary depending on a user's team, what type of asset it is (e.g. image, video, social post) or other information filled out in the form.
A hierarchy is set where the first rules are checked and if they do not match, the next conditional rule may apply. If no conditional rules apply, the default/fallback reviewers that appear in the Customize Options popup will instead be applied.
To add Conditional Reviewer rules:
| 1 | Click the toggle in the Customize Options page, then click Add Condition Set. |
| 2 | Name this condition set or retain the default name. |
| 3 | Add conditions that need to be met for the Conditional Reviewers to be applied. Conditions can draw from the requester's information (such as specific users, or what group or division they are a part of) or from fields within the database itself. Up to 10 condition rules can be added per Condition Set, using the And/Or option. |
| 4 | Reviewer Nomination Type can be left as Users or changed to Groups. You can select specific users or groups from the platform, or tie this to whoever is selected in a user lookup or group lookup field in the database (if configured). The requester's Leader can also be selected. For Staged Workflows, the option to add Requester's Choice is also available. This allows a more flexible first stage where users can ask peers to review assets before the workflow follows a more structured compliance process. Note that selecting this option alongside other reviewer configurations will allow users to remove any pre-configured reviewers for that stage. |
| 5 | Required Approvals can be set to All (all reviewers must approve) or One (when multiple reviewers exist, any one can approve on behalf of all). |
| 6 | Click Add Set to confirm this Condition Set. You can create up to 10 Condition Sets for each Record File Approval Workflow local application. |
Save Configurations or Changes
1. Once all options and conditions are set, click Confirm on the Customize Options page.
2. Click Save & Close at the bottom of the Multi-Upload field to save all settings against the upload field.
Requesting Approval
Once the above configuration is complete, new Record File Approval requests can be made on assets uploaded to the record. Uploaded assets must be either saved or submitted in the record for the Request Approval option to display. Once saved, the Request Approval icon will show against the asset within the upload field for any user who can View or Edit the record.
Request Approval - Single Asset
To request approval on an asset uploaded to a record:
| 1 | Click the Request Approval icon against an asset.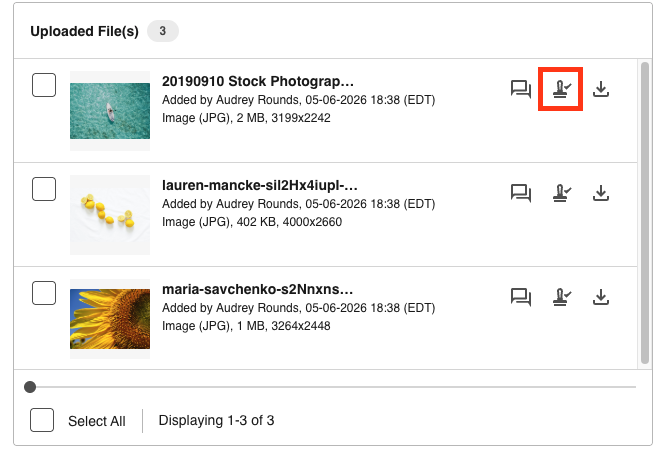 |
| 2 | The Request Approval pop-up will appear. The reviewers shown will be based on the reviewers set in the workflow's Customize Settings, or on the rules set for Conditional Reviewers.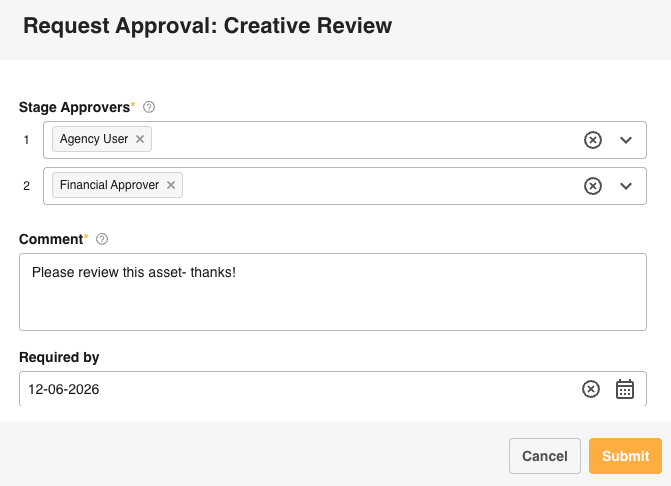 |
| 3 | A comment may be required. The Required By field will show if enabled in the workflow settings. Once all required fields are completed, select Submit to submit your approval request. |
Request Approval - Bulk Request
Approval may also be requested in bulk for multiple or all saved assets within the Multi-Upload field. A mix of both files and URLs can be selected within the bulk approval request.
| 1 | Select the assets you'd like to request approval on by clicking the square icon to the left of each asset. To select all, click the Select All icon at the bottom of the upload field.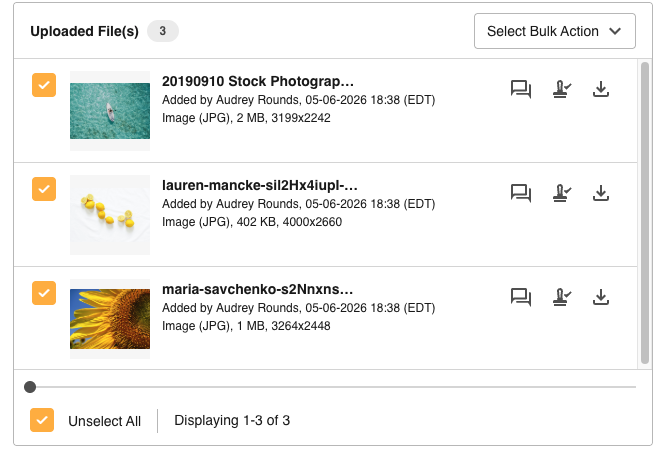 |
| 2 | In the Select Bulk Action dropdown, select Request Approval.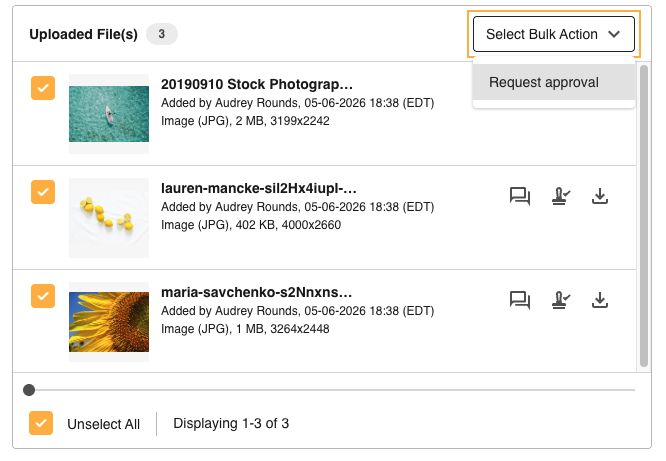 |
| 3 | The approval request form will open. Review or select the reviewers, add a comment, and set a Required By date as needed. Select Submit to submit your approval request. |
Reviewing and Collaborating on a Request
Reviewers (or Workflow Admins / Main Admins) can click the Review Request icon in the record's upload field to open the Review Request overlay. This can also be accessed from the Approvals List.

From here, users can add Markup Comments, add revisions, or respond to the approval request. Note that users need at least Edit permission on the record to be able to add revisions.
Additionally, users can view information about the file and approval request, specifically:
- Item Details - includes the asset name, record, database, upload field, and what page or stage the upload field is in.
- Request Details - shows a snapshot of details relating to the request, such as when it was requested and who by, and who the reviewers are.
- Request Status - displays the current status of the request as well as its progress or history, such as the response of previous reviewers.

Requesters and other users with permission to see all workflow requests can also monitor request progress via the same icon, though for them the action is called Request Details. Requesters can add revisions (if they have Edit permission on the record) and Markup Comments via this link.
Markup Comments and Annotations
Once an approval request is initiated, feedback and collaboration can occur via the Markup Comments functionality within the request. This includes the ability to @mention participants of the request and/or Admin users, ensuring you can get timely feedback.
You can read a detailed guide to our Markup Comments and Annotations feature here.
Adding Revisions
Users who are a request participant (Requester, Reviewer, or Admin users) with Edit permission to the record can add new revisions. The new/current revision will then be reflected back in the record's Multi-Upload field. Two revisions can be compared together, allowing users to easily compare differences between assets and confirm that the requested changes were made.
You can read more about adding and comparing revisions here.
Markup Alerts
Adding Comments, @mentions, and revisions may trigger Markup Alerts to relevant users based on platform and user settings. You can read a detailed guide on how to configure these alerts here.
When @mention Digest alerts are enabled, Record File Approval digest info will be included with Asset @mentions where both have been made tagging the same user within the Digest defined time period.
Important Considerations about URLs in Markup Comments and Revisions
Opening a URL in the Review Request will initially show the live URL (the same as if the web page is accessed directly). There are some restrictions for URLs that could impact their ability to be displayed and annotated:
- Only URLs that can be displayed in an iFrame can be viewed. This may be a setting that needs to be enabled when creating the link or webpage.
- The URL must be publicly accessible. If the link's content is behind a login, it cannot be viewed.
- The link should be a secure link - for example, using https rather than http.
- There are some known issues when Viewports are enabled on a website. If you encounter any issues, please contact your Customer Success Manager.
Also note that since the live site is being displayed, if the site is updated any annotations made will continue to display in their original location.
For URLs, once a new revision is saved, a snapshot (screenshot) of the previous revision will be generated as a PDF. This allows you to update the same URL while maintaining an accurate history of changes made to the link. Previous revisions will also display annotations and comments, allowing these to be resolved as required. Any previous revision can be downloaded as a PDF file, while the current revision has an option to access the URL directly in the browser.
Similar behaviour will occur when a request is completed - a snapshot of the web page at the time the request was completed will display instead of a live preview of its current state.
Responding to an Approval Request
Once an asset has been through any last revisions and updates, you can select to Approve or Decline the asset.
My Response (Approve / Decline)
The Review Request overlay contains the My Response section where reviewers can submit their response.
Note that you may not see the Decline option in the Response field if your approval workflow was configured not to display Decline. To learn more about this workflow setting, refer to this article.
Viewing an Asset's Approval Progress on a Record
Once a request is made, if you are a request participant, you'll be able to see a pending status displayed for that asset in the upload field list within the record. Any change to the asset's status will be updated here.
If you are a selected reviewer, you will also notice a small indicator in the record alerting you when the request is waiting on your response. Once you have responded, if others still need to respond to complete the request, the status will change from pending to pending others. Required By information and the stage a request is in will also appear when applicable.
Email Notifications
The act of requesting a Record File Approval, as well as subsequent reviewer responses or actions, will trigger a variety of email notifications to the request participants involved. Record File Approval Workflow emails can be configured to be disabled or customized at the Admin level (noting this will apply to all locally applied instances of that workflow).
User Notifications can either be set to All (where all the below emails can be triggered) or customized to include only some of them.
| Role | Notification Triggers |
|---|---|
| Requesters |
|
| Reviewers |
|
Notifications include links to the record, database, and asset. Recipients can also access their request in their Approvals List.
Notable Additional Features
Display Approval Status to All Record Users
If you want all users who can access a record to be able to see the approval status of files within it - even if they are not a participant in the workflow request - you can enable Display Approval Status To All Record Users in the form builder settings.
This will allow users who otherwise have no permission on these file approval requests to monitor the status, but they will not be able to see other workflow request information, nor will this extend to the requests visible to them in the Approvals List. Consider using this setting if, for example, Project Managers or Triagers need to track an asset's progress through approval, but do not need to be part of the approval request itself.
Restrict Download on Declined/Cancelled Files
To ensure users cannot download and potentially use assets that have been declined or had their request cancelled, select Restrict Download on Declined/Cancelled Files in the form builder. When enabled, all users (including Admins) will not be able to download declined or cancelled assets from either the asset list in the record or via download links in the Download PDF of the record.
Note that participants involved in the request will always be able to download assets via the Request Details location, in case the asset needs to be further workshopped and re-submitted. Additionally, if General Markup Comments is also enabled for the Multi-Upload field, download options remain present there.
Only Publish Approved Files to Folders
If workflows are enabled for a Multi-Upload field along with the Publish to Folder setting, a new option called Only Publish Approved Files will be available in the form builder. When this is enabled, an asset in this upload field must be approved before the option to publish it into the DAM will be available. You can read more about Publish to Folder here.
Hide Decline in Reviewer's Response
There may be instances where you do not want to offer reviewers the option to decline a request, as doing so may complete the approval request and it cannot be re-opened if changes are later needed. Hiding the Decline option prompts users to continue workshopping assets via rounds of feedback made in General Markup Comments or File Approval Markup Comments and Annotations.
In the approval workflow settings, set Hide Decline Response Option to Yes for a new or existing Record File Approval workflow. Should a file request look unlikely to meet approval criteria (for example, due to a change in the brief or project), these requests can still be cancelled.
Grouped Record File Requests
Requests can be configured for Grouped Approvals, which will group items requested at the same time into a Grouped Request. This allows requesters to more easily track overall progress, and allows reviewers to review grouped items together. Read more about Grouped Approvals here.
Need Help?
If you have any further questions about Record File Approvals, please contact your Customer Success Manager.
Was this article helpful?
That’s Great!
Thank you for your feedback
Sorry! We couldn't be helpful
Thank you for your feedback
Feedback sent
We appreciate your effort and will try to fix the article